Table of Contents >> Show >> Hide
- Why Popsicle Stick Candlesticks Work (and When They Don’t)
- Materials and Tools
- Design Basics: The “Heat Gap” Rule
- Step-by-Step: Classic Popsicle Stick Candlestick (Taper-Style Look)
- Three Designs That Look Boutique (But Still Start With Sticks)
- Finishing and Sealing: Make It Look Done (Not “In Progress Forever”)
- Safety Checklist (Because Fire Is Not a “Design Feature”)
- Styling Ideas: Where These Candlesticks Look Best
- Troubleshooting: Fixes for the Most Common “Oops” Moments
- FAQ
- Real-Life Crafting Experiences and Lessons Learned (500+ Words)
- Conclusion
Popsicle sticks have one job in life: hold frozen joy together long enough to drip down your hand. And yet, the second they retire from dessert duty,
they become the Swiss Army knife of craftingframes, coasters, mini pallets, and now… candlesticks. Because nothing says “I’m an adult” like taking
a pile of tiny wooden slats and turning them into moody, cozy lighting.
This guide walks you through how to make popsicle stick candlesticks that look surprisingly polished, plus how to keep them
practical (and safe) whether you use real candles or LED flameless candles. Expect step-by-step instructions,
design upgrades, finishing tips, and a troubleshooting section for when your “minimalist” candlestick starts leaning like it’s had a long week.
Why Popsicle Stick Candlesticks Work (and When They Don’t)
What makes them awesome
- Budget-friendly: Craft sticks are inexpensive and easy to find.
- Beginner-friendly: No saws, no fancy joinery, no existential woodworking crisis.
- Customizable: Paint, stain, decoupage, metallic accents, geometric shapesyou’re the boss.
- Lightweight: Great for tablescapes and seasonal décor without hauling around heavy holders.
What to be careful about
Popsicle sticks are wood. Wood is flammable. That doesn’t mean your project is doomedit means your design needs a plan.
The safest route is using flameless LED tea lights or LED taper candles. If you prefer real flames,
design your candlestick so the flame and hot wax stay well away from the wood, and only burn candles with common-sense precautions.
Materials and Tools
Think of this as your craft shopping list. You don’t need everything on day one, but each item earns its keep.
Materials
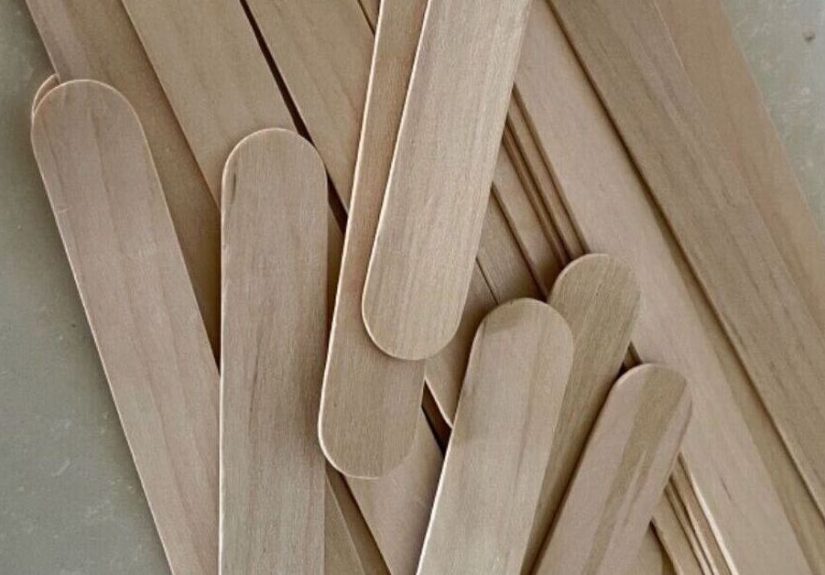
- Standard craft sticks (aka popsicle sticks): straight, smooth, unwarped
- Strong adhesive: wood glue for durability, hot glue for speed (or both)
- Cardboard or thin wood for a hidden base (optional, but helpful)
- Paint, stain, or acrylic craft paint (optional)
- Sealer/topcoat (optional): decoupage medium or clear acrylic sealer
- Felt pads or cork (to protect surfaces)
- For real candles: a metal or glass insert/cup sized for your candle (highly recommended)
- For safer glow: LED tea lights or LED taper candles
Tools
- Hot glue gun (if using hot glue)
- Scissors or craft knife (for trimming small pieces)
- Ruler or measuring tape
- Clamps or rubber bands (optional, for holding glued sections while drying)
- Sandpaper (fine grit) or sanding block
- Paintbrush or foam brush
Design Basics: The “Heat Gap” Rule
If you remember one thing, make it this: your flame should not be close enough to “toast” the wood.
Popsicle stick candlesticks can look luxe, but the design must keep heat, flame, and dripping wax under control.
- Best option: LED candles. Zero flame, zero smoke, maximum peace.
- Next-best option: Put the candle inside a glass votive or metal cup that sits inside your
popsicle-stick structure. The insert acts like a “heat shield” and drip catcher. - Smart positioning: Make your candlestick top platform wide, stable, and designed so wax lands in the insertnot on the wood.
Translation: you’re not building a “bonfire with vibes.” You’re building a holder that respects physics.
Step-by-Step: Classic Popsicle Stick Candlestick (Taper-Style Look)
This design mimics a traditional candlestick silhouette: a sturdy base, a vertical column, and a top platform where the candle sits.
You can size it for an LED taper (easy mode) or adapt it for a real candle using a proper insert.
Step 1: Make a sturdy base
- Lay 8–10 sticks side-by-side to form a rectangle. Glue two sticks across the back like “braces” to hold them together.
(Wood glue = stronger, hot glue = faster.) - Create a second identical rectangle and glue it on top to make the base thicker and heavier. This reduces tipping.
- Optional upgrade: glue a piece of thin cardboard or craft wood underneath to create a clean, flat bottom.
Step 2: Build the column (the “candlestick body”)
- Decide on height. For a tabletop candlestick, 6–10 inches is a sweet spot.
- Create a square “tube” by gluing sticks into four walls. The simplest method:
- Glue two sticks parallel to each other.
- Add two more sticks on the sides to form a square frame.
- Repeat stacking frames until you reach the height you want.
- Glue the column to the center of the base. Let it set fully before moving on.
Step 3: Add a top platform
- Build a small square platform the same way as the base, but slightly larger than your candle cup/insert.
- Glue the platform to the top of the column. Add extra bracing underneath with short stick pieces if needed.
Step 4: Choose your candle setup (important!)
Option A: LED taper candle (recommended)
- Add a small centered “guide ring” made from trimmed stick pieces or a small wooden circle so the LED taper sits straight.
- If the LED candle is narrow, wrap the candle base with a strip of felt or cardstock until it fits snugly.
Option B: Real taper candle (only with a proper insert/holder)
- Use a metal taper candle cup or holder insert sized for your candle. Secure it to the top platform.
- Make sure the flame will sit above the wood with clear space around it, and keep wax contained.
Option C: Tea light / votive candlestick look
- Place a glass votive holder on the top platform (or recess it slightly into the platform if your design allows).
- This creates the cozy glow while keeping the hottest parts away from the sticks.
Step 5: Clean up and stabilize
- Sand rough edges lightly so the finish looks intentional, not “camp-craft chic unless you mean it.”
- Add felt pads under the base to protect your table and prevent sliding.
- Do a gentle “wobble test” before adding any candle: press lightly from the side; it should not tip easily.
Three Designs That Look Boutique (But Still Start With Sticks)
1) The Minimalist Slat Candlestick
Instead of a square column, create a clean rectangle and glue vertical sticks around it like modern slats. Leave tiny gaps between slats for a
higher-end look. Paint it matte white, warm beige, or charcoal for instant “designer shelf” energy.
2) The Rustic “Crate” Votive Holder
Build a short, boxy holder and place a glass votive inside. Add a simple “X” detail on two sides using trimmed sticks.
Finish with a light stain or dry-brushed paint so it feels farmhouse without screaming “I own 37 mason jars.”
3) The Geometric Hex Column
Create a hexagon by trimming sticks into shorter lengths and gluing them into repeating angles. This takes a little patience, but it looks
surprisingly high-end. Use an LED candle or a glass insert on top.
Finishing and Sealing: Make It Look Done (Not “In Progress Forever”)
Finishing is where your candlestick stops looking like “a science project” and starts looking like décor.
The key is patience: thin layers, dry time, and a little sanding go a long way.
Option 1: Paint (fast and forgiving)
- Sand lightly first so paint goes on smoother.
- Use thin coats. Let each coat dry fully before the next.
- For a ceramic look, finish with a clear sealer once the paint is fully dry.
Option 2: Stain (warm, wood-forward)
- Use a light touchcraft sticks are thin and can blotch if overloaded.
- Wipe off excess quickly for a natural tone.
- Let it cure fully before adding any topcoat.
Option 3: Decoupage or “paper-wrapped” style
- Wrap sections with patterned paper, then seal using thin layers of decoupage medium.
- For a smoother finish, lightly sand between coats and seal at the end with a clear acrylic spray.
Important: Avoid finishes that remain tacky or soft near heat. And if you plan to use real candles,
prioritize designs that keep heat away from the wood (or use LED candles and enjoy your stress-free glow).
Safety Checklist (Because Fire Is Not a “Design Feature”)
- Safest choice: Use LED tea lights or LED tapers.
- If using real candles, use a glass or metal insert and keep the flame well above and away from wood.
- Keep candles on a stable, heat-resistant surface and away from anything that can burn.
- Trim wicks before burning so flames don’t get wild and sooty.
- Avoid drafts (windows, fans, vents) that can cause flicker, uneven burns, and wax splatter.
- Never leave a burning candle unattended. Ever. Not even “for one second.”
- Keep out of reach of kids and petsbecause cats consider gravity a hobby.
Styling Ideas: Where These Candlesticks Look Best
- Dining table: Make a set of three heights for a centerpiece that looks curated, not cluttered.
- Bathroom shelf: Use LED candles for spa vibes without “steam + flame” drama.
- Seasonal décor: Paint them for holidays, or wrap with themed paper and seal.
- Gift idea: Pair with a set of LED tapers and a note: “Glow responsibly.”
Troubleshooting: Fixes for the Most Common “Oops” Moments
My candlestick leans
- Check your base thickness. Add another layer of sticks.
- Reinforce the column corners with short diagonal braces.
- Let glue fully cure before handlingrushing is how leaning begins.
Hot glue strings everywhere
- Let glue cool, then peel strings off gently.
- Use a low-temp glue gun for delicate areas if possible.
- Hide tiny messes with paint, trim, or a decorative band.
Paint looks streaky
- Sand lightly, then repaint with thinner coats.
- Use a foam brush for smoother coverage.
- Finish with a clear sealer to even out sheen.
Wax dripped onto the wood
- Let wax cool completely.
- Gently lift it off with a plastic card; avoid gouging.
- Consider switching to an insert or LED candle for future burns.
FAQ
Can I use real candles directly on popsicle stick candlesticks?
It’s strongly better to use a metal or glass insert or, safest of all, LED candles.
If you insist on real candles, design for a generous heat gap and follow safe candle practices every time.
What glue is best?
For long-lasting strength, wood glue is excellent (with dry/cure time). Hot glue is great for quick assembly and tacking pieces in place.
Many crafters use both: hot glue to hold instantly, wood glue to strengthen the joint.
How do I make them look less “kid craft”?
The secret sauce is symmetry + sanding + a confident finish. Clean edges, consistent spacing,
and a matte paint or stained look instantly raises the vibe.
Real-Life Crafting Experiences and Lessons Learned (500+ Words)
If you’ve ever tried building something tall out of small, flat pieces of wood, you already know the emotional arc: excitement, confidence,
mild arrogance, and thensomewhere around the third layergravity starts negotiating. Popsicle stick candlesticks are no different. They’re a
surprisingly good “mini workshop” project because they teach the same lessons as bigger DIY builds, just without the power tools and the dramatic
trip to the hardware store for the one thing you forgot.
One of the most common experiences people have is realizing that “straight” is not automatic. Craft sticks look uniform, but tiny warps add up fast.
A column that starts out square can slowly drift, like it’s trying to moonwalk off your table. The fix is simple and very relatable:
slow down and check alignment every few layers. A ruler becomes your best friend, and suddenly you’re the kind of person who says things like,
“Let’s verify the corners before we commit.” Congratulationsyou’re now emotionally prepared for furniture assembly.
Glue choices also shape the experience. Hot glue feels like a superhero at first: instant grip, fast progress, pure momentum. Then you touch the glue
one time (one time!) and learn a valuable life lesson about patience and heat. On the other hand, wood glue is the quiet professional: it doesn’t rush,
it doesn’t show off, and it rewards you the next day when everything feels solid. The “best of both worlds” approachtacking with hot glue and
reinforcing with wood glueoften turns into the most satisfying workflow. You get the speed of assembly without the heartbreak of a joint popping
loose the moment you pick it up to admire it.
Finishing is where people usually have their biggest “aha” moment. Before paint or stain, the candlestick can look like a prototype. After paint,
it suddenly looks like décor. Matte paint tends to forgive small imperfections and makes the structure feel intentional. Metallic accentslike a
thin gold band near the topcan make a simple shape feel upscale. And if you try a decoupage pattern, you’ll learn the universal decoupage truth:
thin coats win. Thick coats lead to bubbles, wrinkles, or that sticky surface that makes you want to keep apologizing to guests: “No, it’s not wet,
it’s just… artisanal.”
The most memorable experiences usually involve candle decisions. Many crafters start with the romance of a real flame and end with a deep appreciation
for LED candles. LED tapers have gotten so good that, from a few feet away, most people just see “cozy glow” and don’t ask further questions.
And you’ll discover something oddly freeing about being able to decorate without worrying about drafts, dripping wax, or that moment when you leave
the room and your brain whispers, “Did I blow it out?” LED candles let the project be about style and atmospherenot stress.
Finally, there’s the pride factor. Popsicle stick candlesticks are one of those projects where friends will say, “Wait… you made that?”
The trick is that the materials look humble, so the transformation feels dramatic. It’s like taking sweatpants and calling them “loungewear,”
but in a wholesome, craft-room way. And once you’ve made one, you’ll probably make a secondbecause symmetry on a table is powerful, and also because
you now have leftover sticks that are whispering, “We could be taller.”
Conclusion
Popsicle stick candlesticks are proof that you don’t need expensive materials to create warm, styled décoryou just need a solid plan,
a steady hand with the glue, and the wisdom to choose LED candles when you want the cozy look without the fire-side responsibilities.
Start simple, perfect your base and alignment, and then level up with finishes and variations that match your home.
Your next centerpiece might cost less than your coffeeand look like you bought it on purpose.