Table of Contents >> Show >> Hide
- What Makes SSB “Special” (and Why AM Receivers Struggle)
- Choose Your Architecture: Three Ways to Hear SSB
- The Blocks That Matter (No Matter Which Path You Pick)
- A Practical Build Plan: Start Simple, Then Level Up
- Example Builds (Concrete, Repeatable, and Actually Popular)
- Testing and Alignment: How to Debug Without Losing Your Mind
- Troubleshooting: The Greatest Hits of DIY SSB Headaches
- Upgrades That Make a Homebrew Receiver Feel “Pro”
- Conclusion: Your First SSB Receiver Is a Beginning, Not a Finish Line
- Builder Experiences (500+ Words of Real-World “What It’s Like”)
Single Sideband (SSB) is the “no carrier, no training wheels” version of voice radio. It’s efficient, punchy,
anduntil you build the right kind of receiveroccasionally sounds like a flock of robotic ducks arguing over a parking spot.
The good news: rolling your own SSB receiver is one of the most satisfying ham radio / shortwave projects you can do.
The better news: you don’t need a NASA badge to do itjust a plan, a soldering iron, and the willingness to debug one
mysterious hum that will absolutely try to move into your audio chain rent-free.
This guide walks you through the architectures that actually work, the blocks that matter (mixer, BFO, filters, audio),
and a practical build path with specific, real-world examples. We’ll keep it rigorous, but funbecause if you’re hand-winding
toroids at midnight, you deserve at least one laugh.
What Makes SSB “Special” (and Why AM Receivers Struggle)
An AM broadcast station hands your receiver a convenient carrierbasically a built-in reference toneso even simple detectors
can recover audio. SSB does the opposite: it intentionally suppresses the carrier and sends only one sideband. Efficient? Yes.
Friendly to simple envelope detectors? Not even a little.
To demodulate SSB, your receiver must reinsert a near-carrier signal at the right frequency and phase. That reinsertion
typically comes from a Beat Frequency Oscillator (BFO) feeding a product detector (a mixer used as a detector).
If the BFO is off by a few hundred Hz, voices sound like cartoons. If it’s off by more, you’ve invented a new genre of electronic whale song.
The practical takeaway
- SSB reception demands a stable local oscillator/BFO (frequency drift = instant misery).
- Selectivity matters: without filtering, you’ll “hear” too much at once and understand none of it.
- Audio filtering is not optionalit’s the difference between “I hear something” and “I can copy the call sign.”
Choose Your Architecture: Three Ways to Hear SSB
There are many receiver designs, but for DIY SSB the field narrows quickly to three practical families.
Pick based on your goals: simplicity, performance, or “I want to learn the whole buffet.”
1) Direct Conversion (DC): The “Fastest Path to SSB Audio”
A direct conversion receiver mixes RF straight down to audio in one step. Your local oscillator (VFO) tunes to (or near) the received signal frequency,
and the mixer output produces the audio difference frequencies. Add a good audio low-pass / band-pass filter, and SSB becomes intelligible.
Why builders love it: few parts, easy to get working, perfect for a first homebrew SSB receiver or a single-band QRP companion.
Why builders curse it: strong-signal overload can happen, LO radiation can cause “mystery” self-reception, and audio can be plagued by hum
if layout and grounding are sloppy.
2) Superheterodyne (Superhet): The “Classic” for Selectivity
A superhet converts RF to a fixed intermediate frequency (IF), filters it with a narrow bandpass (often a crystal ladder filter),
amplifies it, then uses a product detector + BFO to recover audio. This gives you sharp selectivity and better handling of crowded bands.
Why builders love it: great adjacent-channel rejection, scalable performance, easier to add AGC and RF gain control.
Why builders sweat: more stages, more alignment, more opportunities to put the wrong capacitor in the wrong place and spend an hour
politely negotiating with an oscilloscope.
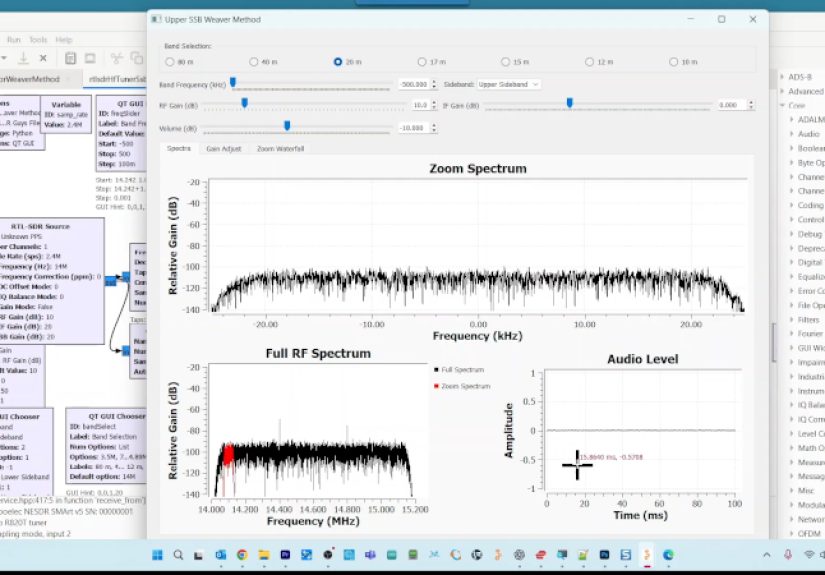
3) Phasing / Weaver Method: The “Analog Brain Teaser”
Phasing-type receivers use quadrature mixing and careful phase relationships to separate sidebands. The Weaver method is a clever variant that
shifts filtering to audio/baseband ranges where filters can be easier. These are excellent learning projects and can be very effective, but
they demand good quadrature generation and thoughtful filtering.
A quick decision guide
| Goal | Best Pick | Why |
|---|---|---|
| First working SSB receiver | Direct Conversion | Low part count, quick success, easy debugging |
| Better selectivity & crowded bands | Superhet + crystal filter | Narrow IF filtering gives “real radio” feel |
| Learn advanced demodulation | Phasing / Weaver | Quadrature + filtering teaches serious RF concepts |
The Blocks That Matter (No Matter Which Path You Pick)
Front end: band-limiting and sanity
Your antenna delivers everything it can pick upbroadcast AM, shortwave, noise, lightning pops, and the neighbor’s switching power supply
that sounds suspiciously like a sci-fi doorbell. A simple preselector (band-pass filter) or low-pass filter helps the mixer see what it needs,
not what it shouldn’t.
Mixer / product detector: where RF becomes audio
In DC receivers, the mixer is the detector. In superhets, the product detector mixes IF with a BFO. You’ll see a few popular choices:
- Diode ring (double-balanced) mixers: excellent isolation and strong-signal behavior, but need adequate LO drive and good transformers/baluns.
- Active mixers (Gilbert-cell style ICs): easy to use, lower LO drive, fewer transformers; dynamic range varies by part and design.
- FET switching mixers: can be very linear and robust when done right.
Local oscillator and BFO: stability is king
SSB makes frequency drift painfully obvious. If your oscillator wanders, the recovered audio pitch wanders, and human speech becomes an
interpretive dance. Use a stable tuning capacitor, short leads, decent power supply decoupling, and mechanical rigidity.
For DC receivers, your VFO effectively plays the “BFO role” as you tune through SSB signals. For superhets, a dedicated BFO near the IF is typical.
Filtering: you can’t copy what you can’t separate
A good SSB experience depends on selectivity. In a superhet, that usually means a crystal ladder filter around a common IF (often in the
single-digit MHz range), targeting a voice bandwidth around 2.1–2.8 kHz depending on taste and application. In a DC receiver, you lean on
audio filtering to tame wideband noise and reduce “overcrowded” audio.
Audio chain: where magic becomes understandable
Don’t underestimate the audio stage. A modest audio power amp plus an active audio filter can dramatically improve intelligibility.
Many DIY builds use compact audio amps that can drive headphones or a small speaker; add an audio low-pass around 2.4–3 kHz and suddenly
your receiver stops hissing like an offended cat.
A Practical Build Plan: Start Simple, Then Level Up
If you’re new to DIY SSB receivers, the best strategy is to build in layers so each layer can be tested on its own.
Here’s a path that works well and keeps you out of “rebuild everything because nothing works” territory.
Step 1: Pick a band and a target
Choose one HF band where SSB activity is plentiful (40 meters is a favorite because you can hear a lot with a simple antenna).
Define what “success” means: copy a net, monitor a few stations, or build a general-coverage shortwave SSB receiver.
Step 2: Build the audio chain first
This sounds backward, but it’s a morale hack: build the audio amp + headphone output and confirm it’s quiet and stable.
Then you can inject a signal (even from a phone or audio generator) and confirm gain, filtering, and noise floor.
- Use star grounding or a clear ground bus.
- Decouple the power rail near every IC and transistor stage.
- Keep high-gain audio traces short, and don’t route them next to oscillator wiring.
Step 3: Add the mixer/product detector
For a direct conversion receiver, connect the antenna input through a simple band-pass or low-pass network into the mixer.
Provide your local oscillator injection, and monitor the audio output. You’ll usually hear noise changes as you tuneeven before you copy signals.
Step 4: Build the VFO (and make it behave)
A good VFO is more mechanical than mystical. Solid mounting, short leads, shielding where appropriate, and stable components matter.
If you want an easier route, consider a frequency synthesizer module or a simple PLL/VFO solutionjust be mindful of phase noise and spurs.
Step 5: Add RF front-end improvements
If strong local stations overload your receiver, add a preselector, attenuator, or a simple RF gain control. Many “my receiver is deaf” reports
are actually “my receiver is overloaded and confused.”
Example Builds (Concrete, Repeatable, and Actually Popular)
Example A: Single-band direct conversion SSB receiver
This is the “I want to hear SSB this weekend” design pattern:
- Input filter: simple band-pass for your chosen band (or low-pass if you’re staying below a cutoff).
- Mixer: diode ring or active mixer IC used as a product detector.
- VFO: tunable LO covering the band segment you want to listen to.
- Audio filter + amp: band-limit to speech range; drive headphones.
Expect to add at least one “quality of life” upgrade: an RF attenuator, an audio notch, or a tighter front-end filter.
That’s normal. Radios evolve. So do sandwiches.
Example B: Superhet with crystal IF filter (more selectivity)
The superhet pattern adds complexity but pays you back in selectivity:
- RF mixer: converts the band to a fixed IF.
- IF crystal ladder filter: provides the SSB passband selectivity.
- IF amp: enough gain to overcome losses and drive the product detector.
- Product detector + BFO: converts IF to audio cleanly.
- Audio filter + amp: final shaping and listening comfort.
If you’ve ever used a commercial HF rig and loved how it “locks onto” a crowded signal, this is why: the IF filtering does the heavy lifting.
Example C: Hybrid “analog front end + digital audio DSP”
A modern twist is to do analog mixing down to audio, then feed a microcontroller or small DSP board for filtering, AGC, noise reduction,
and passband shaping. You still “roll your own receiver,” but you let software do what software does best: consistent filtering and smart audio.
Testing and Alignment: How to Debug Without Losing Your Mind
Receiver debugging is mostly about proving each block works in isolation before blaming the universe.
Here are practical tests that save time:
Quick tests that catch 80% of problems
- Audio chain sanity: touch the audio input (through a small capacitor if needed) and confirm you get a loud buzz.
- LO presence: use a frequency counter, a nearby SDR, or a second receiver to confirm your VFO is oscillating where you think it is.
- Noise response: connect/disconnect the antenna; you should hear a noticeable change in noise level if the front end is alive.
- Signal injection: a tiny RF signal generator or calibrated attenuator helps confirm mixer and filter response.
Common alignment moves
- Peak band-pass filter response gently (don’t “over-peak” into instability).
- Set the BFO offset so SSB speech sounds natural, not nasal or underwater.
- Trim audio filter cutoff for your preference: tighter for noise, wider for comfort.
Troubleshooting: The Greatest Hits of DIY SSB Headaches
“All I hear is hum.”
Start with grounding and power decoupling. Keep audio wiring away from the oscillator. Use a clean supply (or add a regulator and extra filtering).
Headphones can reveal issues a speaker hides. Also check that your enclosure isn’t acting like a tiny antenna for every switching supply in the neighborhood.
“SSB sounds like Donald Duck.”
Your BFO/LO is offset incorrectly. Tune slowly through the signal until speech becomes natural, then adjust your BFO reference (superhet) or
dial calibration (DC). This is normal. Every SSB receiver has a “sweet spot.”
“I can hear stations, but they’re buried in hiss.”
Add audio filtering, improve front-end band-limiting, and consider a higher dynamic range mixer if overload is suspected.
Sometimes the fix is as simple as reducing RF gain or adding an attenuator so the mixer stops saturating.
“It works… until I touch the knob.”
Mechanical stability matters. Use a better tuning capacitor, shorter leads, and rigid mounting.
If your oscillator frequency changes when you look at it sternly, your layout is negotiating with stray capacitanceand stray capacitance always wins.
Upgrades That Make a Homebrew Receiver Feel “Pro”
- Audio band-pass / notch: improves intelligibility and reduces fatigue during long listening sessions.
- Better front end: add a preselector or a switched band-pass filter bank if you want multi-band coverage.
- Shielding and compartmentalization: separate oscillator, mixer, and audio physically (even cardboard partitions help during prototyping).
- Calibrated dial or digital readout: you’ll tune faster and with less guesswork.
- AGC (advanced): especially useful in superhets; makes strong signals comfortable without constant knob-twisting.
Conclusion: Your First SSB Receiver Is a Beginning, Not a Finish Line
Rolling your own SSB receiver is equal parts RF engineering and detective work. The win isn’t just hearing SSBit’s understanding why a product detector
matters, why oscillators must behave, and how filtering turns chaos into copyable audio. Start with a direct conversion receiver if you want quick results,
graduate to a superhet if you crave selectivity, and explore phasing/Weaver methods if you like your learning curve served “extra spicy.”
Build in blocks, test as you go, and treat every weird symptom as a clue. In the end, when you copy real SSB conversations on a receiver you built with
your own hands, you’ll have earned the right to smile like someone who just hand-crafted a time machine that runs on solder and stubbornness.
Builder Experiences (500+ Words of Real-World “What It’s Like”)
Ask a room full of homebrew radio builders about their first SSB receiver and you’ll hear a familiar story arc: excitement, confusion,
one dramatic troubleshooting montage, and then a moment of triumph that feels wildly disproportionate to the amount of hardware involved.
That last part is the point. A working SSB receiver is proof that you didn’t just assemble componentsyou made a system cooperate.
One of the most common early experiences is the “noise milestone.” You finish the audio chain, connect the mixer output, power up, and… nothing.
Or rather, nothing you recognize. Then you clip on the antenna and the noise floor changes. It’s subtle, but it’s the first sign of life.
Builders often describe that tiny shift like hearing a heartbeat on a stethoscope. It’s not a conversation yet, but it means RF is getting in and
being turned into something your ears can detect.
The next experience tends to be “SSB doesn’t sound like SSB.” New builders are frequently surprised that tuning SSB is not like tuning FM or AM.
You don’t just land on a frequency and lock in. You sweep slowly, and the audio morphs. At one spot voices are too high; at another they’re too low;
somewhere in the middle they suddenly sound human. When that happens for the first time, it’s a lightbulb moment: the receiver isn’t broken,
it’s telling you exactly how sensitive SSB is to oscillator offset.
Then comes the classic bench villain: hum. The hum is rarely “mystical”it’s usually grounding, power supply ripple, or a layout issue that couples
oscillator energy into the audio path. But emotionally? It feels mystical. Builders often go through a little ritual:
move wires with a chopstick, reroute the audio lead away from the VFO, add decoupling capacitors closer to the pins, and suddenly the hum gets quieter.
That moment teaches a lesson that textbooks struggle to deliver: physical layout is circuit design.
Another common experience is encountering “too much signal.” The receiver hears everythingseveral stations at once, broadcast breakthrough,
intermodulation productsand it’s tempting to assume the receiver is insensitive or “not selective enough.” Often, the opposite is true:
the front end is letting in strong signals and the mixer is being pushed into non-linear behavior. The fix can be surprisingly simple:
a bit of attenuation, a tighter band-pass filter, or a more robust mixer. Builders learn that high sensitivity isn’t always the goalcontrolled sensitivity is.
Once you’ve got intelligible SSB, you’ll likely notice how quickly preferences develop. Some people like a “communications” sound: narrower audio bandwidth,
reduced hiss, and punchy speech. Others prefer a wider passband that sounds more natural but brings more noise. Many builders end up adding an audio filter
switch: a narrow setting for weak signals and a wider one for comfortable listening. This is the point where a homebrew receiver stops being a project
and starts becoming your radio.
Finally, there’s the experience that keeps people building: incremental upgrades. You add a better dial readout. You improve the front-end filter bank.
You shield the VFO compartment. Each change yields a noticeable improvement, and you can hear it immediately in the headphones.
That feedback loopbuild, test, hear improvementturns “electronics” into a craft. And when you eventually listen to SSB on a receiver
you designed, tuned, and tamed, the satisfaction is the purest kind: the kind you can’t buy pre-assembled.