Table of Contents >> Show >> Hide
- Why a Thrift Hutch or China Cabinet Is DIY Gold
- Step 1: Choose the Right Thrift Hutch
- Step 2: Prep Work – The Secret to a Long-Lasting Makeover
- Step 3: Choosing the Best Paint for Your Hutch Makeover
- Step 4: Painting Your Thrift Hutch Like a Pro
- Step 5: Hardware, Glass, and the Details That Make It Look High-End
- Step 6: Styling Your “New” Cabinet Hometalk Style
- Common Mistakes to Avoid in a Thrift Hutch Makeover
- Creative Variations on the Classic Hutch Makeover
- 500-Word Experience Section: Lessons from Real-Life Thrift Hutch Makeovers
- Conclusion: Your Hometalk-Worthy Hutch Is Only a Weekend Away
If you’ve ever walked past a dusty old hutch or china cabinet at a thrift store and thought,
“You are one can of paint away from being gorgeous,” this article is for you. A thrifted hutch
is one of the best budget-friendly furniture flips you can do: tons of storage, a huge visual
impact, and endless possibilities for color and style. Inspired by the creative, real-life
makeovers you see on Hometalk and other DIY communities, we’ll walk through exactly how to
transform a dated cabinet into a fresh centerpiece for your dining room, kitchen, or living
space.
Whether your style is farmhouse, modern, cottagecore, or “I just want it to look less orange,”
this step-by-step guide will help you plan your project, prep like a pro, choose the right
paint, and finish with stylish hardware and décor. Grab your thrift-store treasure and let’s
turn that hutch into a showstopper.
Why a Thrift Hutch or China Cabinet Is DIY Gold
Hutches and china cabinets tend to be:
- Affordable: People often get rid of them when they downsize or change styles.
- Well-built: Older solid-wood pieces can outlast many modern flat-pack options.
- Full of character: Glass doors, molding, and shelves give you lots of design options.
- High-impact: One makeover can completely change the mood of a room.
Hometalk-style makeovers often start with a thrifted piece that looks sad and dated, but ends up
magazine-worthy once the orange stain, heavy hardware, and dark glass are swapped for soft
paint colors, fresh hardware, and styled shelves. A little elbow grease really goes a long way.
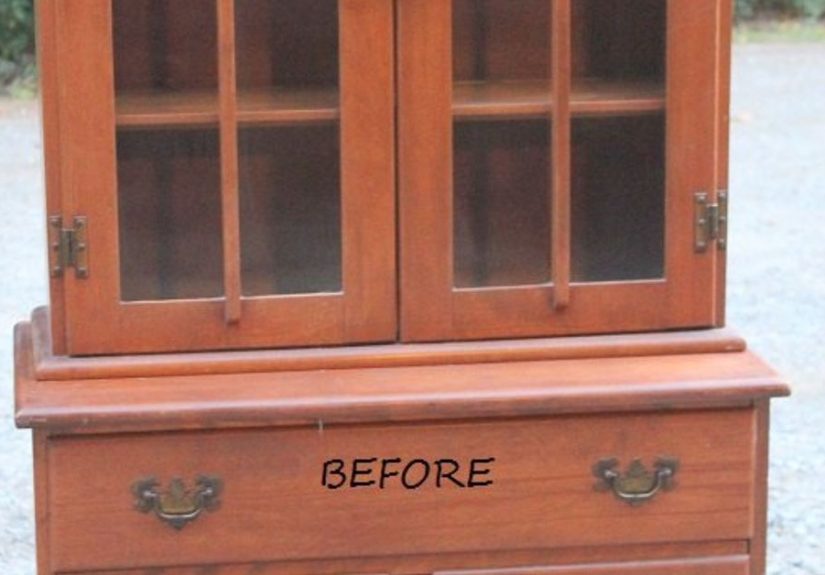
Step 1: Choose the Right Thrift Hutch
Look for Good Bones (Not Perfect Finish)
When you’re hunting at thrift stores, Facebook Marketplace, or estate sales, ignore scratches
and outdated stain. Focus instead on:
- Solid structure: The cabinet shouldn’t wobble, sag, or feel like it’ll implode when you open a door.
- Working doors and drawers: Sticky is okay (you can fix that), broken or missing is more work.
- Minimal water damage: A few stains are fine, but warped or crumbling wood is a red flag.
- Style potential: Ask yourself, “Can I imagine this in a different color with new hardware?”
Don’t panic if the finish is glossy or dark. With good prep and the right paint, even the
shiniest cherry hutch can become a soft white farmhouse piece or a bold, moody showpiece.
Measure Twice, Thrift Once
Before you fall in love with a $40 hutch, measure:
- The wall where it will sit (width and height).
- Ceiling height, especially if the hutch has a tall crown.
- Doorways and stairwells you’ll need to move it through.
Old china cabinets are notorious for being just a tiny bit wider than your doorway. Many come in
two pieces (base and top), which makes things easierjust make sure you can safely separate and
move them.
Step 2: Prep Work – The Secret to a Long-Lasting Makeover
Here’s the unglamorous truth: the success of your makeover depends less on your paint color
and more on how well you prep. Instagram never shows the “scrubbing with degreaser” stage, but
it’s what keeps your paint from peeling later.
Disassemble Like a Pro
- Remove all doors, shelves, and drawers.
- Unscrew hardware (handles, knobs, hinges) and store it in labeled bags.
- Take out glass panels if they’re removable, or tape them off if not.
Labeling hinges and doors with painter’s tape saves major headaches later, especially on older
hutches where hardware only wants to go back in its original spot.
Clean and Degrease Thoroughly
Years of furniture polish, kitchen grease, and dust can make paint peel. Clean the entire
surface with a degreaser or TSP alternative, paying extra attention to handles, corners, and
the lower part of the cabinet where hands and pets tend to land.
Use:
- A soft scrub brush for carved details and grooves.
- A microfiber cloth or sponge for flat surfaces.
- A clean, damp cloth afterward to remove any cleaner residue.
To Sand or Not to Sand?
There are two main routes for a hutch makeover, and both can work:
- Light scuff-sanding: Use medium-to-fine sandpaper (around 150–220 grit) to dull the shine and
give paint something to grip. You’re not stripping to bare woodjust scratching the surface,
then vacuuming and wiping away dust. - Deglosser / liquid sandpaper: For hutches with lots of curves, grooves, and trim, using a
deglosser saves time. Apply it according to the label, let it work, then wipe off the residue
before painting.
If your piece is very old, red-toned (like cherry or mahogany), or has water spots, consider a
stain-blocking primer to prevent “bleed-through” where tannins show as pink or yellow spots
under light paint.
Step 3: Choosing the Best Paint for Your Hutch Makeover
Chalk Paint vs. Mineral Paint vs. Regular Latex
For a thrift hutch makeover, the three most popular paint options are:
- Chalk paint: Water-based, easy to use, and designed to stick well with minimal prep. It dries to a
matte, slightly chalky finish that’s perfect for farmhouse, vintage, and shabby-chic looks.
It usually needs a topcoat (wax or clear sealer) to protect from chipping and stains. - Mineral or furniture paint: Many DIYers love these for hutches because they’re durable, self-leveling,
and often don’t require a separate topcoat. They give a smooth, professional look with fewer
brush marks. - High-quality latex/acrylic paint: Great if you’re matching trim or wall colors. Choose a satin or
semi-gloss finish designed for trim, doors, or cabinets and use a bonding primer if the
original finish is very slick.
Color Ideas for a Thrift Hutch Glow-Up
Not sure what color to choose? Try:
- Crisp white or soft cream: Classic, bright, and perfect for displaying colorful dishes.
- Moody navy, charcoal, or black: Dramatic and modern; makes glass and brass hardware pop.
- Muted green or blue: Ideal for cottage and farmhouse vibes.
- Two-tone: Paint the exterior one color and stain or paint the interior a contrasting shade.
If your room is small, lighter colors can make the cabinet feel less bulky. In a large dining
room or open-concept space, a deep color can anchor the room and act like a built-in feature.
Step 4: Painting Your Thrift Hutch Like a Pro
Prime (If Needed), Then Paint in Thin Coats
If you’re painting over a super glossy finish, dark stain, or potential bleed-through wood,
start with a bonding or stain-blocking primer. Let it dry fully according to the directions.
Then move on to paint:
- Use a good quality brush for corners and trim.
- Use a foam or microfiber roller for large flat areas.
- Apply thin coatstwo to three coats usually beat one thick goopy coat.
- Lightly sand between coats if you feel rough spots or nibs.
Don’t panic in the ugly middle stage. The first coat often looks streaky and patchy. By the
second or third coat, everything evens out and starts to look like the Pinterest inspo photo
you showed your friends.
Painting the Interior and Back Panel
The inside of your hutch is prime real estate for style:
- Paint the interior a lighter color than the exterior to highlight your dishes.
- Use peel-and-stick wallpaper at the back for pattern and personality.
- Stain the shelves and paint the body for a warm, mixed-material look.
If you display mostly white dishes, a colored or patterned back gives contrast. If your dish
collection is colorful, a white or neutral back keeps things calm and curated.
Step 5: Hardware, Glass, and the Details That Make It Look High-End
Update the Hardware
Small changes make a huge difference. Consider:
- Swapping dated brass pulls for simple black or brushed nickel knobs.
- Using cup pulls on fake “drawer” fronts for a custom-built look.
- Spray-painting existing hinges and pulls in oil-rubbed bronze if they’re solid but outdated in color.
Always test hardware layout before drilling new holes. If you’re covering old hardware
placement, fill holes with wood filler, sand smooth, and then paint.
Refreshing or Replacing Glass
Glass-front cabinets can go from “grandma’s china cabinet” to “modern display case” with a few
tweaks:
- Remove wood mullions for a clean, open look (if they’re decorative and not structural).
- Replace wavy or seeded glass only if it doesn’t fit your stylesome people love that vintage character.
- Add frosted film or fluted glass film if you want to hide everyday clutter but keep light flowing through.
Don’t Forget the Inside Hardware
Adjust shelves to better suit how you actually live. If you’re more “coffee mugs and plants”
than “fine china,” raise or lower shelves to accommodate baskets, pitchers, and décor instead
of assuming they have to stay where they were in 1987.
Step 6: Styling Your “New” Cabinet Hometalk Style
This is the fun partthe makeover montage moment.
- Start with empty, clean shelves. Don’t style around clutter.
- Mix heights and shapes: stack plates, lean cutting boards, add a tall vase or pitcher.
- Use odd numbers: group items in threes or fives for a natural look.
- Add greenery: faux plants, herbs in small pots, or trailing vines soften all the hard lines.
- Include texture: woven baskets, wood boards, rattan, and linen napkins add warmth.
Think of each shelf as a little vignette. If you’re stuck, step back, snap a phone photo, and
see what looks too heavy, too empty, or too symmetrical. Then adjust until it feels balanced
and intentional.
Common Mistakes to Avoid in a Thrift Hutch Makeover
- Skipping cleaning: Paint over grease and furniture polish = peeling later. Always degrease.
- Painting too thick: Thick coats lead to drips, ridges, and longer cure times. Thin coats are your friend.
- Ignoring cure time: Paint may feel dry to the touch in hours but can take weeks to fully cure. Be gentle with doors and heavy items at first.
- Keeping every original detail “just because”: Don’t be afraid to remove fussy trim, dated scallops, or overly busy hardware if they don’t suit your style.
- Overloading shelves: If you can’t see the back panel anymore, it’s probably too full. Give your favorite pieces some breathing room.
Creative Variations on the Classic Hutch Makeover
Your thrift hutch doesn’t have to stay a china cabinet forever. Some fun spin-off ideas:
- Coffee bar: Remove doors, add hooks for mugs, and dedicate shelves to coffee gear and syrups.
- Bar cabinet: Use the top for glassware and bottles, and store linens and tools in the base.
- Pantry storage: Fill the shelves with labeled jars, baskets, and bulk goods.
- Craft or office station: Hide supplies in the base, display pretty storage boxes and books above.
- Split the top and base: Use the base as a credenza and the top as a wall-mounted cabinet or bookshelf.
The beauty of a thrift hutch is that you’re not locked into its original purpose. A little
imaginationand Hometalk-worthy creativitycan turn it into exactly what your home needs.
500-Word Experience Section: Lessons from Real-Life Thrift Hutch Makeovers
If you talk to people who’ve actually tackled a thrift hutch makeover, you’ll hear a mix of
“I’d totally do it again” and “I underestimated how many shelves this thing has.” Their
experiences are gold if you’re planning your first flip.
One of the most common themes is underestimating prep time. From the outside, a china cabinet
looks like one big piece. In reality, it’s doors, drawers, shelves, glass, trim, and sometimes
separate top and bottom sections. DIYers often say they planned to start painting immediately,
only to spend an entire afternoon just cleaning, removing hardware, and taping off glass. The
takeaway: schedule a full “prep day” and let your future self be pleasantly surprised if you
finish early.
Another recurring lesson is the importance of testing your color in real light. A color that looks
soft gray in the paint store can lean blue, green, or even lavender in your dining room.
People who love their finished hutches almost always mention doing test patches firstboth on
the outside and inside of the cabinet. They move around the room, check the color in morning
light, evening light, and with lamps on, and only then commit. Those who skip this step are
more likely to repaint later (and yes, repainting a full hutch is arm day at the gym).
Many DIYers also talk about the emotional moment of the first brushstroke. It’s a little scary to
cover solid wood with paint, especially if you grew up hearing that painting wood furniture is
a “sin.” The reality from their experience: if the piece is already damaged, outdated, or
living a sad life in a thrift store, painting it is more like a rescue. Once the first coat is
on and they see the transformation starting, that nervous feeling usually switches to
excitement.
Hardware decisions bring their own mini drama. People often spend more time choosing knobs than
choosing paint. Some try to reuse original hardware by spray-painting it; others splurge on new
handles to give a budget hutch a custom look. Those who reuse hardware typically mention being
glad they saved money, especially if they loved the original shapes. Those who upgrade to new
pulls and knobs say that’s what made the piece feel genuinely “high-end.” Either way, the
lesson is to factor hardware into your budget and plan, not treat it as an afterthought.
A surprising amount of feedback centers on styling the inside. People who rush this part often feel
like their cabinet still looks cluttered and heavy, even though the paint job is great. Those
who love their final result say they took time to edit: they donated extra dishes, grouped
similar items together, and introduced a mix of textureslike wood boards, ceramics, glass, and
greenery. Over time, many find that their hutch evolves with the seasons: holiday dishes, fall
mugs, summer glassware, and so on. The cabinet becomes a living, changing display instead of a
dusty museum of stuff.
Finally, people consistently talk about the feeling of accomplishment. A thrift hutch makeover is not
a 20-minute projectbut that’s exactly why it’s so satisfying. You start with something most
people overlook, invest some time, creativity, and patience, and end up with a piece that could
easily pass for a custom built-in. Many DIYers say their finished hutch is the first thing
guests comment on when they walk into the room. It’s not just furniture; it’s a conversation
starter and a reminder that with a little effort, you can truly change the way your home feels.
So if you’re on the fence about that thrift store cabinet, think of all those success stories.
Yes, it’s a project. Yes, your dining room might look like a paint explosion for a weekend. But
once the last shelf is styled and the doors are back on, you’ll have a Hometalk-worthy makeover
that proves a good thrift hutch is never just “old furniture”it’s a DIY opportunity waiting to
happen.
Conclusion: Your Hometalk-Worthy Hutch Is Only a Weekend Away
A thrift hutch or china cabinet makeover is one of the most rewarding DIY projects you can
tackle. You get major visual impact, tons of storage, and a custom piece that reflects your
style, not a catalog page. With thoughtful prep, the right paint, updated hardware, and a bit
of styling, you can turn a dated cabinet into the star of your dining room, kitchen, or living
area. Next time you see a tired hutch at the thrift store, you won’t walk pastyou’ll see its
future.