Table of Contents >> Show >> Hide
- Why a spaghetti sauce jar is secretly perfect for brushes
- What you’ll need
- Step 1: Remove the label (and the sticky drama)
- Step 2: Evict the marinara smell
- Step 3: Make it stable and brush-friendly
- Step 4: Decorate your jar (6 easy styles)
- Step 5: Use it like a pro (brush care that actually matters)
- Common mistakes (and quick fixes)
- FAQ
- Mini upgrade ideas (because you’ll have more jars)
- of real-world “experience” tips (aka what usually happens in actual studios)
- Wrap-up
You know that moment when you finish a jar of spaghetti sauce and think, “I should recycle this,” and then you
immediately think, “I could also hoard it forever like a tiny glass trophy”? Congratulationsyou’re halfway to a
studio upgrade.
A spaghetti sauce jar is tall, sturdy, and usually wide enough to corral paint brushes without them doing that
slow-motion “topple into chaos” routine. With a little cleanup and a few simple upgrades, it becomes a
good-looking, brush-friendly holder that keeps your workspace tidy and your bristles happier.
Why a spaghetti sauce jar is secretly perfect for brushes
- Height matters: Long handles stand upright without knocking into each other like shopping carts.
- Stability: Sauce jars tend to have thicker glass than many drink bottles, so they’re less tippy.
- Easy to customize: Paint, wrap, label, decoupagethis jar is ready for its makeover montage.
- Budget-friendly: Costs approximately $0, assuming you already paid for the spaghetti (worth it).
What you’ll need
Pick the basics, then choose your “make it cute” options. This is a no-judgment craft zoneglam jar or plain jar,
both count.
Core supplies
- Empty glass spaghetti sauce jar (lid optional)
- Dish soap + warm water
- Microfiber cloth or paper towels
- Plastic scraper (old gift card works great)
Helpful extras (choose your fighter)
- Baking soda
- Cooking oil or coconut oil
- White vinegar
- Rubbing alcohol
- Hair dryer
- Craft paint (acrylic/chalk), spray paint, or glass paint
- Twine/jute, ribbon, washi tape, or adhesive vinyl
- Clear sealer (optional, for durability)
- Non-slip pads (felt/silicone dots) or a cork coaster
- Sand/pebbles/coins (optional, for weight)
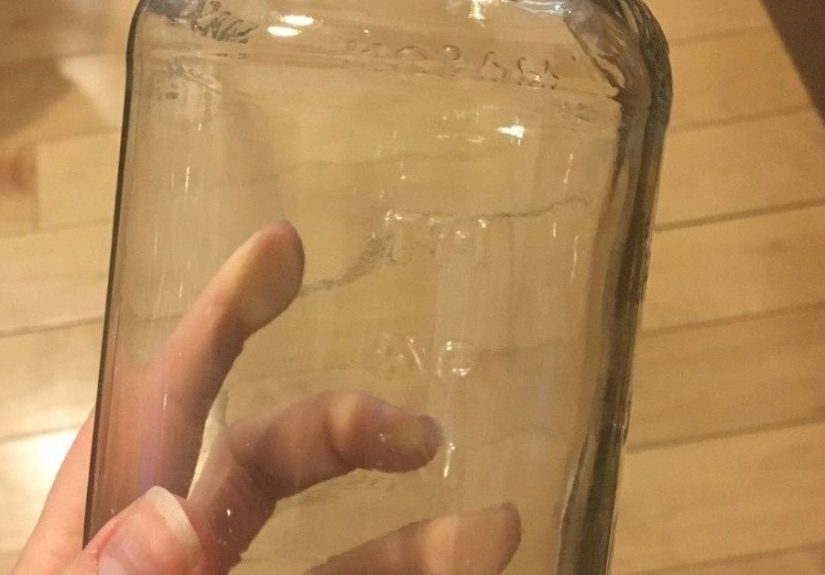
Step 1: Remove the label (and the sticky drama)
Labels come off in two phases: the paper part (usually easy) and the glue part (usually… emotionally complicated).
Start gentle, then escalate like a responsible adult.
Method A: The warm soak + scrape (best first try)
- Fill a bowl or sink with warm water + a generous squirt of dish soap.
- Soak the jar 15–30 minutes.
- Peel the label. Use a plastic scraper for stubborn bits.
- Rinse and dry to see what adhesive is still hanging on.
Method B: Oil + baking soda paste (for clingy glue)
Mix a spoonful of baking soda with enough oil to make a spreadable paste (think “frosting,” not “soup”). Smear it
over the sticky area, wait 15–30 minutes, then rub off with a cloth. Wash with soap afterward so your jar doesn’t
feel like a greased baking sheet.
Method C: Vinegar compress (for residue that laughs at you)
- Soak a cloth or paper towel in white vinegar.
- Press it on the sticky area for a few minutes.
- Wipe and repeat as needed, then wash the jar.
Method D: Gentle heat (fast, satisfying)
Warm the label with a hair dryer for 30–60 seconds, then peel. If adhesive remains, follow with the oil paste or
vinegar method. (Pro tip: “Hot glass” can be sneakyhandle with care.)
Method E: Rubbing alcohol (finishing move)
Dab rubbing alcohol onto a cloth and rub the residue until it lifts. Then wash the jar with soap and water.
Jar-saving rule: Skip metal blades. Glass scratches aren’t cute, and nobody wants a craft project that
ends with a Band-Aid subplot.
Step 2: Evict the marinara smell
The glass usually lets go of odor quickly. The lid, however, can cling to that “Italian restaurant at 2 a.m.”
vibe like it pays rent. Here’s how to de-stink both.
For the jar (glass)
- Baking soda soak: Add a tablespoon of baking soda, fill with warm water, let sit 1–2 hours (or overnight), then wash.
- Vinegar rinse: Rinse with a little vinegar, then wash normally. (Don’t mix vinegar + baking soda in a closed jar unless you enjoy science experiments.)
- Air it out: Let it dry completely with the jar open.
For the lid (the usual troublemaker)
- Sun treatment: Set the lid outside in direct sunlight for a few hours, underside up.
- Separate storage: Store lids off jars so trapped odors can’t regroup.
If the lid refuses to behave, give it a new job (like holding screws) and leave your brush holder blissfully lid-free.
Step 3: Make it stable and brush-friendly
A good brush holder prevents two things: (1) tipping, and (2) bristles getting bent or mashed like they lost a fight
with a backpack zipper.
Option 1: Add weight (for top-heavy brush collections)
- Add 1–2 inches of clean sand, pebbles, or coins to the bottom.
- If you want it extra tidy, cover the weight with a circle of felt or cardstock.
This is especially helpful if you use long-handled wash brushes or keep a lot of tools in one jar.
Option 2: Add a “no-slip” base
- Stick felt or silicone dots underneath.
- Set the jar on a cork coaster or small tray.
Option 3: Create simple dividers (so brushes don’t clump)
If you want your brushes separated by size (or by “clean” vs “probably still has paint in it”), drop in a DIY divider:
- Chopsticks method: Bundle a few chopsticks with a rubber band and place them inside as a loose grid.
- Foam circle method: Cut a circle of craft foam to fit the jar opening, then cut slits for brush handles.
Step 4: Decorate your jar (6 easy styles)
Decoration is optionalbut it’s also the most fun you can have with a jar that used to hold sauce. Pick one style or
combine them if your creative energy is doing cartwheels.
Style 1: Minimalist “studio clean” (paint + label)
- Wipe the jar with rubbing alcohol so paint sticks better.
- Paint the outside (acrylic or chalk paint). Two thin coats beat one gloopy coat.
- Add a simple label: “WATERCOLOR,” “ACRYLIC,” “DETAIL BRUSHES,” etc.
Style 2: Twine wrap (rustic, cozy, hides imperfections)
- Start at the bottom and glue twine in a spiral upward.
- Keep lines tight so it looks intentional, not “I wrestled a rope and lost.”
- Finish with a knot, a tag, or a little ribbon.
Style 3: Decoupage (patterned and artsy)
- Choose paper: napkins, scrapbooking paper, or tissue paper.
- Brush on decoupage glue, smooth the paper, then seal over it.
- Let cure fully before handling a lot.
Style 4: Spray paint + stencil (fast and bold)
- Work outdoors or in a well-ventilated area.
- Use light coats; rotate the jar for even coverage.
- Add stenciled icons (tiny brush silhouette, paint splatter, your initials).
Style 5: “Frosted glass” look (soft and modern)
Use frosted glass spray or a translucent paint on the outside. It looks high-end and hides leftover adhesive ghosts
you didn’t fully defeat.
Style 6: Washi tape bands (no drying time, instant charm)
Wrap tape around the jar in neat bands. Seal with a thin coat of clear sealer if you want it to last.
Step 5: Use it like a pro (brush care that actually matters)
A jar holder is only truly helpful if it supports good brush habits. The big idea: don’t store brushes wet,
and don’t let water creep into the ferrule (that metal part that clamps the bristles).
After painting: the “keep your brushes alive” routine
- Wipe excess paint first: Less paint down the drain, less work for you later.
- Clean gently: Use the right cleaner for your paint (soap + water for many acrylics/watercolors; appropriate solvent for oils).
- Avoid soaking above the ferrule: Prolonged water/solvent exposure can loosen glue and swell wooden handles.
- Reshape bristles: Use your fingers to restore the tip/edge while damp.
- Dry flat first: Let brushes air-dry completely on a towel or rack.
- Store upright once fully dry: Then your jar brush holder is the perfect “home base.”
Short break tip (mid-project)
If you’re stepping away briefly, you can wrap brushes/rollers to slow drying. Keep it short-termthis is a pause button,
not a long-term storage plan.
Cleanup without the guilt spiral
If you’re using acrylics, consider letting paint solids settle and disposing of sludge responsibly instead of rinsing
everything straight down the drain. A little planning keeps your studio (and plumbing) happier.
Common mistakes (and quick fixes)
Mistake: The jar tips when you grab one brush
Fix: Add weight (sand/pebbles), use non-slip pads, or move the jar onto a heavier tray.
Mistake: Bristles look bent or “fluffy”
Fix: Don’t cram too many brushes in one jar. Add a simple divider, and reserve one jar for detail brushes only.
Mistake: Paint scratches off the glass
Fix: Clean the glass thoroughly before painting and consider sealing the outside.
If you want maximum durability, keep decoration to wraps/labels instead of paint.
Mistake: The jar still smells like sauce
Fix: Let it air out longer. For lids, sunlight is surprisingly effective.
Worst case: ditch the lid and enjoy an odor-free, open-top holder.
FAQ
Can I use the jar for water while painting, too?
You can, but it’s best to dedicate jars: one for “paint water” and one for “brush storage.” That keeps your clean brushes
from getting accidental pigment baths.
Should brushes be stored bristles up or down?
Let brushes dry flat first. Once fully dry, storing them upright with bristles up in your jar holder is a common, practical approach.
Avoid storing brushes resting on their bristles (that’s the fast track to weird shapes).
Do I need to seal the inside of the jar?
Usually noyour brushes will touch the inside lightly. If you add sand/pebbles, keep them clean and dry, or cover them
with felt to prevent scratching sounds that make your teeth itch.
Mini upgrade ideas (because you’ll have more jars)
- Label by medium: Acrylic, watercolor, gouache, oil, varnish brushes, etc.
- Color-code: One color per project or per skill level (beginner brushes get the “practice jar”).
- Tool jar: Palette knives, sculpting tools, pens, scissorsanything that currently lives in a messy pile.
of real-world “experience” tips (aka what usually happens in actual studios)
If you’ve ever tried organizing art tools, you already know the truth: the “perfect setup” lasts about one enthusiastic
painting session. The goal isn’t perfectionit’s making it easier to reset your space without turning cleanup into a
whole second hobby.
The first lesson most people learn is that label removal is a personality test. Sometimes the label slides off like it
was barely committed to the relationship. Other times, it tears into confetti and leaves behind a glue layer that
feels personally offended by your existence. When that happens, the oil-and-baking-soda paste is the peace treaty.
It’s not dramatic, it’s not expensive, and it works while you do something elselike scrolling for “quick art hacks”
you will absolutely try once and then forget.
The second lesson: sauce smell is usually a lid problem. The glass itself tends to wash clean quickly, but lids can
hang onto odors like they’re saving them for a reunion tour. A lot of artists quietly stop using lids altogether for
brush storage because an open jar is faster, easier, and doesn’t trap smells. If you love lids (no judgment), the
“set it in sunlight” trick is one of those oddly effective, low-effort wins that feels like cheating.
The third lesson is about stability. A jar looks stableuntil you grab a single brush and somehow trigger a domino
effect that sends your entire tool collection into a slow-motion spill. That’s when adding weight becomes your
favorite “why didn’t I do this sooner?” upgrade. Even an inch of pebbles can turn a wobbly jar into something that
stays put when you’re working quickly. Pair that with a non-slip base and suddenly your brush holder feels like a
serious piece of studio equipment, not a former pasta container with a glow-up.
Another common studio moment: you realize that not all brushes should live together. Big wash brushes and tiny liner
brushes in the same jar is basically a crowd at a concerteveryone’s bumping into everyone else, and somebody’s
getting bent. Splitting by size (or by “delicate” versus “workhorse”) keeps bristles in better shape and makes it
easier to grab what you need without rummaging. If you want to feel extra organized, label jars by medium: one for
acrylics, one for watercolor, one for “mystery brushes I swear I will clean properly next time.”
Finally, the most practical “experience” tip: your jar holder is a reward for cleaning brushes, not a substitute for
it. Brushes stored wet tend to warp, splay, or develop crusty surprises. The smooth habit is simple: clean, reshape,
dry flat, then stand them up in the jar once they’re fully dry. When your setup makes the good habit easier, the jar
becomes more than storageit becomes part of your creative rhythm. And that’s the real win: less mess, less stress,
more painting.
Wrap-up
Turning a spaghetti sauce jar into a paint brush holder is the kind of DIY that pays you back every time you sit down
to make something. It’s inexpensive, customizable, and weirdly motivatingbecause a tidy brush station makes you feel
like the kind of person who definitely has their life together (even if your paint palette says otherwise).