Table of Contents >> Show >> Hide
- What Is Pavlova?
- Why Pavlova Works (A Tiny Bit of Dessert Science)
- Classic Pavlova Recipe (Crisp Shell, Marshmallow Center)
- Best Practices (So Your Pavlova Doesn’t Get Weird)
- Troubleshooting: Common Pavlova Problems (And Fixes)
- Topping Ideas That Make Pavlova Feel Brand New
- Make-Ahead and Storage Tips
- Experiences From Real Kitchens: What Making Pavlova Feels Like (And Why People Get Hooked)
- Conclusion
Pavlova is the dessert equivalent of showing up to the party wearing sweatpants… and still somehow looking iconic.
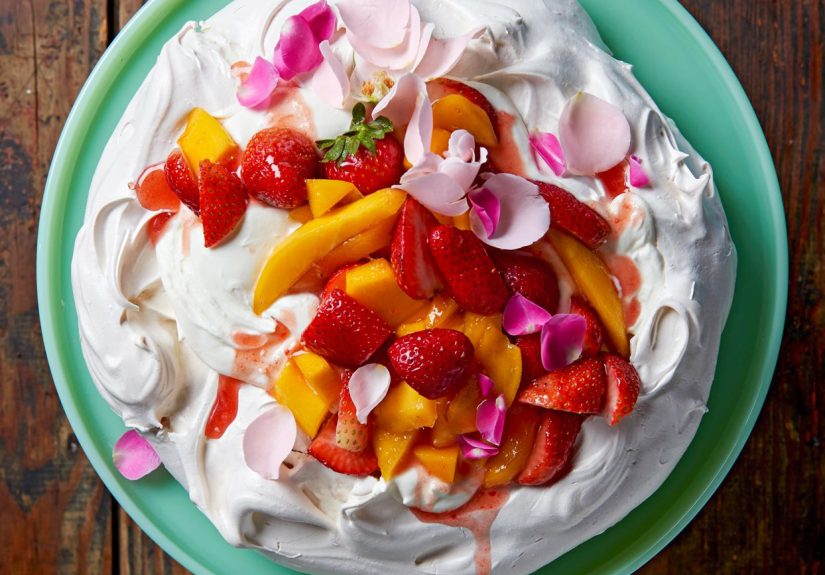
It’s light, dramatic, and unapologetically sweet: a big (or mini) meringue “cake” with a crisp shell, a soft
marshmallow-ish center, and a crown of whipped cream and fruit.
If you’ve ever wanted to serve something that looks like it took pastry-chef levels of effortbut actually starts
with egg whites and a mixerpavlova is your new best friend. Let’s break down what it is, why it works, and how to
make a pavlova that’s crisp on the outside, pillowy in the middle, and gone in ten minutes.
What Is Pavlova?
Pavlova is a meringue-based dessert made by whipping egg whites and sugar into a glossy foam,
baking it low and slow, and topping it with whipped cream and fruit. The signature texture is the whole point:
crackly, crisp outside + soft, chewy, marshmallow-like inside. In other words,
it’s a dessert that can’t decide whether it wants to be crunchy or fluffyso it does both and wins.
Pavlova vs. meringue: what’s the difference?
Classic meringues are usually crisp all the way through (think little cookies that shatter). Pavlova meringue is
baked in a way that keeps the center softer. Many pavlova recipes also include small additions like
cornstarch and an acid (vinegar, lemon juice, or cream of tartar) to help with
structure and texture.
Where did pavlova come from?
Pavlova is famously associated with Australia and New Zealand, and both countries claim it. What most sources do
agree on: it was named for Anna Pavlova, the Russian ballerina who toured the region in the 1920s.
The dessert’s airy look is often compared to a tutudelicious, edible ballet-core.
Why Pavlova Works (A Tiny Bit of Dessert Science)
Making pavlova is mostly about doing a few small things correctly so the chemistry can do its job. Here’s what’s
happening behind the scenesno lab coat required.
1) Egg whites create the structure
When you whip egg whites, you trap air and build a foam. That foam becomes the “cake.” Any fat (like yolk residue
or a greasy bowl) interferes with that foam, which is why pavlova recipes are so dramatic about using a clean, dry
bowl and careful separation.
2) Sugar makes it glossy and stable
Sugar doesn’t just sweetenit stabilizes the whipped whites, helps create that crisp shell, and contributes to the
chewy interior. The big trick: add sugar slowly so it dissolves. If sugar stays gritty, you’re more
likely to get weeping (sticky syrup beads) or a rough texture.
Many bakers also like using superfine sugar (or pulsing regular sugar briefly in a blender) because it dissolves
faster. If you want a “rule of thumb,” some modern recipes aim for roughly twice the weight of sugar to egg
whites for a strong, crisp shell that can hold toppings.
3) Acid helps the foam hold on to its dreams
A small amount of acidlike vinegar, lemon juice, or cream of tartarhelps stabilize the egg-white foam. Think of it
as giving the meringue a supportive pep talk so it doesn’t collapse the second you look away.
4) Cornstarch helps with the marshmallow center and moisture
Cornstarch is often used in pavlova to help manage moisture and encourage that tender interior. Too much can taste
chalky, so most recipes keep it to a small amount. The goal is a center that’s soft and chewy, not “dessert drywall.”
5) Low temperature + slow cooling = fewer cracks
Pavlova is usually baked at a relatively low oven temperature, then cooled graduallyoften in the turned-off oven.
That gentle cool-down helps reduce dramatic cracking and keeps the shell from shocking itself into chaos.
Classic Pavlova Recipe (Crisp Shell, Marshmallow Center)
This is a classic “one big pav” approach (about 8–9 inches). You can also make mini pavlovas using the same mixture
and a shorter bake time.
Ingredients (Pavlova Base)
- 4 large egg whites, room temperature
- 1 cup granulated sugar (superfine if you have it)
- 1 teaspoon cornstarch
- 1 teaspoon white vinegar (or 1/2 teaspoon cream of tartar)
- 1 teaspoon vanilla extract
- Pinch of salt (optional, but helpful)
Ingredients (Topping)
- 1 to 1 1/2 cups heavy cream (whipped to soft or medium peaks)
- 1–2 tablespoons powdered sugar (optional, to sweeten the cream)
- 1 teaspoon vanilla (optional)
- 2–3 cups fresh fruit (berries, kiwi, mango, passion fruit, peaches, etc.)
Step-by-Step: How to Make Pavlova
- Preheat and prep. Heat oven to 250°F. Line a baking sheet with parchment paper.
If you want a tidy shape, trace an 8–9 inch circle on the parchment, then flip it pencil-side down. - Whip the egg whites. In a clean, dry bowl, beat egg whites (and salt, if using) until foamy, then
continue until you reach soft peaks. - Add sugar slowly. With the mixer running, add sugar a little at a time. Keep beating until the
mixture is thick, glossy, and holds stiff peaks. Rub a little between your fingers; it should
feel mostly smooth, not gritty. - Add cornstarch, vinegar, and vanilla. Sprinkle in cornstarch, then add vinegar and vanilla.
Mix brieflyjust until incorporated. Don’t beat it for five more minutes like it owes you money. - Shape the pavlova. Spoon the meringue onto the parchment within the circle. Make the edges a bit
higher than the center so you get a shallow “nest” for toppings. - Bake low and slow. Bake for about 60–75 minutes (time varies by oven and size).
The pavlova should look dry on the outside and feel set. - Cool gradually. Turn off the oven and let the pavlova cool inside with the door closed (or cracked
slightly if your oven runs hot). This slow cool helps reduce cracking. - Top and serve. Right before serving, whip the cream, pile it onto the pavlova, and add fruit.
Slice and enjoy the crunch-meets-cloud magic.
Best Practices (So Your Pavlova Doesn’t Get Weird)
Use the “clean bowl” rule like it’s a law of nature
Any grease can prevent egg whites from whipping properly. Wash and dry your bowl and whisk, and make sure there’s no
yolk in the whites. If you’re nervous, separate each egg white into a small bowl first, then transfer itso one rogue
yolk doesn’t ruin the whole batch.
Don’t rush the sugar
Pavlova rewards patience. Adding sugar gradually helps it dissolve, creating a smoother meringue and reducing the
chance of weeping. If you’re in a hurry, use superfine sugaror blitz regular sugar briefly.
Humidity is pavlova’s nemesis
On humid days, pavlova can absorb moisture and turn sticky. You can still make it, but aim to store the baked shell
airtight and assemble close to serving time. If you live somewhere humid, consider mini pavlovas: they’re faster to
bake and easier to serve immediately.
Expect a few cracks (and call it “rustic elegance”)
Small cracks are common and not a failurethey’re a feature. Once you add whipped cream and fruit, nobody will care.
If you want fewer cracks, cool the pavlova slowly in the oven and avoid high baking temperatures.
Troubleshooting: Common Pavlova Problems (And Fixes)
Problem: It’s weeping (sticky beads or syrup)
Causes can include undissolved sugar, overbaking, or humidity. Next time, add sugar more slowly, bake low, and cool
gradually. Also, assemble close to serving.
Problem: The center is too gooey
Some gooeyness is normal (that’s the marshmallow center), but if it’s raw-looking, it may need a slightly longer
bake. Make sure the outside feels dry and set before cooling.
Problem: It’s browned or tastes caramelized
Your oven may be running hot. Lower the temperature and consider using an oven thermometer. Pavlova should dry out,
not tan like it’s on vacation.
Problem: It collapsed
This can happen if the foam wasn’t stable (fat contamination, sugar added too early or too fast, or under-whipped
whites). It can also happen from opening the oven door repeatedly. Think of the oven as a movie theater: once the
show starts, stop walking in and out.
Topping Ideas That Make Pavlova Feel Brand New
The base is sweet, so toppings that bring acidity, bitterness, or creaminess are perfect. Here are crowd-pleasers:
Classic fruit + cream
- Berry pavlova: strawberries, blueberries, raspberries
- Tropical pavlova: mango + passion fruit (a sweet-tart knockout)
- Kiwi + strawberry: tangy, bright, and very “summer potluck”
Level-up options
- Lemon curd + berries: tangy curd balances the sweetness beautifully
- Chocolate ganache + cherries: dessert drama, in the best way
- Salted whipped cream + fruit: a little salt makes everything taste more vivid
- Coffee or cocoa-kissed pavlova: add a small amount of cocoa or espresso powder for a grown-up vibe
Mini pavlovas (a.k.a. everyone gets their own cloud)
Pipe or spoon small nests onto parchment and bake until set and crisp. Minis are great for parties because they’re
portioned, cute, and less prone to cracking disasters during slicing.
Make-Ahead and Storage Tips
Can you make pavlova ahead of time?
Yesmake the meringue shell ahead, cool it fully, then store it in an airtight container at room temperature. The
key is keeping moisture away. Do not refrigerate the plain shell; fridges are humid and pavlova
turns sticky fast.
When should you add toppings?
Add whipped cream and fruit close to serving time. Once topped, the moisture from cream and fruit will slowly soften
the crisp shell (which tastes great, but changes the texture).
Experiences From Real Kitchens: What Making Pavlova Feels Like (And Why People Get Hooked)
If you ask home bakers what surprised them most about their first pavlova, you’ll hear the same theme: it looks
fancy, but it behaves like a very opinionated pet. Treat it well, don’t startle it, and it will reward you with
affection. Ignore its needs, and it might “express itself” through cracks, stickiness, or a dramatic slump.
The first moment of pavlova-making joy usually happens when the egg whites transform. At the start, it’s just a
bowl of suspicious liquid. Then the mixer whirs, the foam grows, and suddenly you’ve got glossy peaks that look like
edible cloud sculpture. People describe this stage like watching a magic trick you can eat later. It’s also when
you realize pavlova is a texture project as much as a dessert: you’re building a structure out of air.
Then comes the “sugar patience” lesson. Nearly everyone tries to rush it once. You start sprinkling sugar in, get
impatient, dump in a little too much, and the meringue looks okay… until it bakes and “weeps” later like it just
watched a sad movie. After that, most bakers become pavlova philosophers: add the sugar slowly, let it dissolve,
trust the process, and maybe apply those principles to the rest of life.
There’s also a universal pavlova experience: the temptation to open the oven door. You will want to check on it.
You will want to rotate the pan. You will want to see if it’s “doing something.” Pavlova responds to this the way a
cat responds to being picked up mid-nap. Experienced bakers learn to keep the oven closed, let the low heat do its
quiet work, and rely on time instead of constant supervision.
The cooling phase is where pavlova earns its reputation for dramaor for being surprisingly forgiving. Many people
remember the first time they turned off the oven and left the pavlova inside, feeling like they were gently putting
a baby bird to bed. And then, when they finally opened the oven hours later, they either found a gorgeous crisp
shell… or a crackled masterpiece that still tasted amazing. That’s the funny part: pavlova can crack and still be a
showstopper, because whipped cream and fruit are basically a delicious disguise kit.
Serving pavlova tends to create a specific kind of happiness at gatherings. Someone sees it on the table and thinks,
“Wow, you made that?” Then you slice through the crisp shell and the knife reveals the soft interior, and
suddenly everyone understands why it’s beloved. The sound alonethe gentle cracklefeels like proof that you nailed
the texture. And because it’s naturally gluten-free (as long as your cornstarch is), pavlova often becomes the
“everyone can have dessert” hero at mixed-diet events.
Over time, pavlova becomes a seasonal ritual for many people. Summer pavlovas lean into berries and stone fruit.
Winter versions may feature citrus curd, pomegranate, or even chocolate and cherries. Some cooks keep it simple:
whipped cream and whatever fruit is ripest. Others treat pavlova like a blank canvas for flavorscoffee, cocoa,
spices, salted cream, or tangy cultured dairy like crème fraîche. Either way, the experience repeats: you start with
humble egg whites, and you end with a dessert that looks like celebration.
And perhaps the best pavlova experience of all is the confidence boost. Once you’ve made one, the fear disappears.
You learn that the “rules” (clean bowl, slow sugar, low oven, cool gently) are more like guardrails than a prison.
After that, you’re free to playwith toppings, shapes, mini pavlovas, and flavorswhile still getting that signature
crisp-and-marshmallow texture that makes pavlova unmistakably itself.
Conclusion
Pavlova is a meringue dessert that looks like a special occasion and tastes like a victory lap: crisp shell, soft
center, whipped cream, and fruit in a perfect sweet-tart balance. If you remember just a few keysclean equipment,
slow sugar, a little acid, low-and-slow baking, and gentle coolingyou’ll be able to make pavlova confidently and
customize it endlessly.
Make it once, and you’ll start seeing pavlova everywhere: as a summer centerpiece, a holiday showstopper, or the
easiest way to make fruit feel like it’s wearing formal attire.