Table of Contents >> Show >> Hide
- What Is Plywood Underlayment?
- When You Should Use Plywood Underlayment
- When You Should Not Use Plywood Underlayment
- How to Choose the Right Plywood Underlayment
- How to Install Plywood Underlayment the Right Way
- Best Rooms for Plywood Underlayment
- Common Mistakes to Avoid
- Real-World Experiences With Plywood Underlayment
- Conclusion
If subfloors had a dating profile, they would all claim to be “solid, level, and low-maintenance.” In real life, many of them are more like “a little squeaky, kind of bumpy, and definitely hiding some drama under the old vinyl.” That is exactly where plywood underlayment comes in. It is the unsung layer that helps certain finished floors look smoother, last longer, and avoid those little ridges and dents that can make a brand-new floor look oddly tired on day one.
Still, plywood underlayment is not a universal miracle board. It is not the right answer for every room, every floor type, or every subfloor problem. Use it in the right situation, and it can turn a sketchy surface into a reliable foundation. Use it in the wrong place, and you may create height issues, moisture problems, or a flooring warranty headache you did not ask for.
This guide explains when plywood underlayment makes sense, when it does not, how thick it should be, and how to install it without turning your floor into a future complaint department. Whether you are laying sheet vinyl in a laundry room, refreshing a kitchen floor, or trying to figure out why your subfloor resembles a potato chip, here is what you need to know.
What Is Plywood Underlayment?
Plywood underlayment is a thin, smooth panel installed on top of a structural subfloor and below the finished floor covering. Its job is not to hold up the house. The subfloor already does that. Its job is to create a cleaner, flatter, more dent-resistant surface for the flooring you actually see and walk on.
That distinction matters. A subfloor is the structural base, usually plywood or OSB attached to joists. Underlayment is the refining layer. Think of the subfloor as the cake and the underlayment as the frosting smoother. The cake can be solid, but if the surface is lumpy, the top still looks rough.
Plywood underlayment is most often used when the finished flooring is thin enough to show imperfections underneath. That includes sheet vinyl, some glue-down resilient flooring, and certain other finish materials that do not forgive seams, fastener bumps, grain patterns, or uneven transitions. When the finished flooring is more forgiving, a separate plywood underlayment may be optional or unnecessary.
When You Should Use Plywood Underlayment
1. When Installing Sheet Vinyl or Other Thin Resilient Flooring
This is the classic use case. Sheet vinyl and some glue-down resilient floors can telegraph every flaw beneath them. A seam in the subfloor, a knot, a grain pattern, or a slightly sunken patch can show through later like your floor is tattling on your prep work.
If you want a smooth finished surface, underlayment-grade plywood helps eliminate that problem. In many residential projects, 1/4-inch underlayment-grade plywood is a common choice because it adds a smooth layer without raising the floor too dramatically. It is especially useful under sheet vinyl in kitchens, bathrooms, mudrooms, and laundry areas where you want the floor to look crisp rather than wavy.
2. When the Existing Wood Subfloor Is Structurally Fine but Surface-Rough
Sometimes the subfloor is strong enough but cosmetically terrible. Maybe it has minor surface damage, patched areas, shallow dips, old adhesive residue, or seams that are just rough enough to cause trouble. In that case, plywood underlayment can be a better fix than trying to patch every square inch and hoping for the best.
This is common in older homes where the floor framing is serviceable, but the top surface has been through several decades of carpet staples, peel-and-stick tile experiments, mystery glue, and one suspiciously committed remodeling phase from 1997.
3. When Covering Strip, Plank, or Board Subfloors
Older homes often have narrow strip wood or plank subfloors that move a little more and do not present the same smooth plane as modern sheet goods. If you are installing a resilient floor over that kind of base, plywood underlayment can bridge gaps, reduce movement effects at the surface, and create a more uniform layer for the finish floor.
In some cases, thicker panels may be needed over plank or board-type subfloors, especially when the top layer is not smooth or when the flooring manufacturer calls for more buildup. This is one of those moments when reading the flooring instructions is not optional busywork. It is the difference between a finished floor and a future regret.
4. When You Need a Smoother Surface Without Rebuilding the Entire Floor
If the subfloor is basically sound and dry, plywood underlayment can be the practical middle ground between “do nothing” and “tear the whole room to the bones.” It gives you a reset surface without a full structural rebuild. That can save time, reduce mess, and keep the project focused on the finish flooring rather than accidental home archaeology.
When You Should Not Use Plywood Underlayment
1. Under Tile, Where Cement Board or a Tile-Specific Underlayment Is Better
Tile is a different animal. Ceramic and porcelain tile need a suitable tile underlayment system, often cement backer board or another tile-approved substrate, not just a thin plywood underlayment panel. Tile installations depend on stiffness, bond performance, and the right materials stack. Plywood alone is usually not the hero in that movie.
2. Under Floating Floors That Already Require Foam or Have Attached Padding
Many laminate and luxury vinyl plank products are designed as floating floors. Some require foam underlayment. Others already include an attached pad. In those cases, plywood underlayment is often unnecessary unless you are correcting a wood subfloor surface issue first. Adding extra layers under products with attached padding can even violate installation instructions or create too much softness underfoot.
Translation: more layers do not always equal better floors. Sometimes they equal bounce, movement, and a manufacturer saying, “That was not in the instructions.”
3. On Wet, Damp, or Moisture-Prone Subfloors
Plywood underlayment should go over a dry, stable subfloor. If you have moisture coming up through concrete, chronic dampness in a basement, or a crawl space with moisture issues, plywood is not your first move. Moisture problems should be fixed at the source before adding wood-based layers. Otherwise, you are basically making a nice sandwich and hiding a leak in the middle.
4. When the Floor Height Increase Will Cause Problems
Even a 1/4-inch panel changes floor height. That may not sound dramatic until your door will not close, your threshold sits awkwardly, your dishwasher starts living permanently under the counter, or your refrigerator clearance becomes a math problem. Always check transitions, appliance clearances, baseboards, and door jambs before committing.
How to Choose the Right Plywood Underlayment
Look for Underlayment Grade, Not Just Any Plywood
This is where many DIY projects go sideways. Not all plywood is created equal. Underlayment-grade plywood is made to provide a smooth face suitable for finish flooring. Random leftover construction plywood with voids, rough patches, or a face full of personality is not the same thing. If the flooring is thin, every surface flaw matters.
For resilient flooring, a smooth, sanded face is especially important. If the panel texture can show through the finished floor, it will. Thin flooring has a remarkable memory for imperfections.
Common Thicknesses
A 1/4-inch panel is a common choice for many resilient flooring projects over wood subfloors. Thicker panels may be appropriate over plank subfloors or when a flooring manufacturer specifically calls for more thickness. The right answer depends on the existing floor assembly and the finished floor you plan to install.
As a rule, choose the thinnest approved panel that solves the surface problem without creating unnecessary height issues. This is not the moment to freestyle with “heavier must be better.”
Check Manufacturer Instructions First
Every flooring manufacturer has its own approved substrates and prep requirements. Some glue-down products are picky. Some floating products are pickier. Always verify what the finished flooring requires before buying underlayment, because the flooring instructions outrank the opinions of your cousin, your neighbor, and that one guy in the aisle who sounds confident.
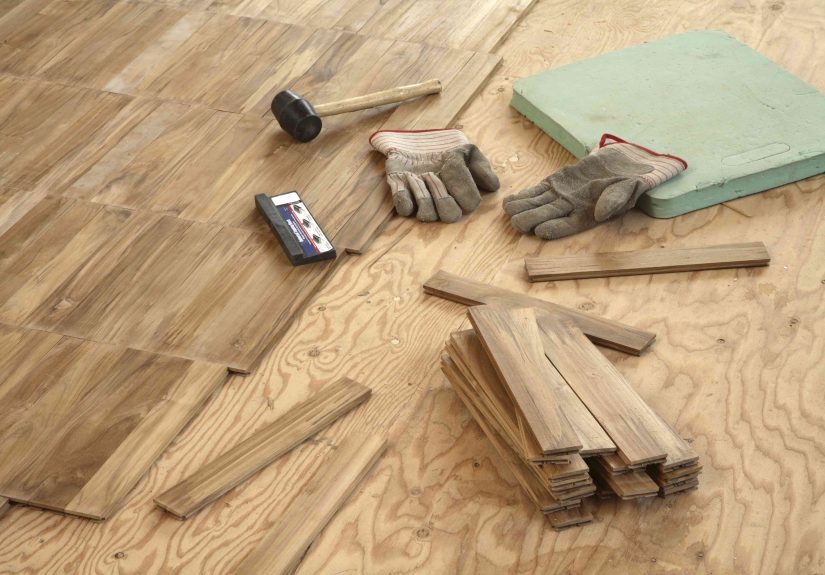
How to Install Plywood Underlayment the Right Way
1. Start With a Dry, Sound, Flat Subfloor
Before you install anything, fix squeaks, refasten loose areas, sand down high joints, and patch low spots as needed. Underlayment is not magic. It improves the surface, but it does not solve major structural movement or moisture issues. If the base is unstable, the finished floor will eventually let you know in the least polite way possible.
2. Acclimate the Panels
Let the underlayment panels adjust to room conditions before installation. Standing the sheets on edge with air circulation for a short period helps reduce surprises after installation. Wood products move with moisture and temperature, and floors are much happier when the panels settle in before they are fastened down.
3. Install Smooth Side Up
This one is simple but important. The smooth face should be up, because that is the surface your finished floor will sit on. If you place the rougher face up, you are defeating the whole point of using underlayment in the first place.
4. Stagger Joints and Offset Seams
Do not line up underlayment seams directly over subfloor seams. Offset them. Also offset panel ends from the subfloor panel ends. This helps reduce weak points and minimizes the chance of seam lines showing through resilient flooring later. Good layout is invisible when done right and very obvious when done wrong.
5. Orient the Face Grain Correctly
For maximum stiffness, install plywood underlayment with the face grain perpendicular to the floor joists. This helps the panel perform better under load and supports a more stable finished surface.
6. Leave Proper Gaps
Underlayment panels generally need a small expansion gap between sheets. A tight, jammed-together installation can lead to buckling as wood responds to moisture changes. Follow the panel manufacturer’s spacing requirement carefully. Tiny gap now, fewer headaches later.
7. Fasten Carefully
Use the recommended fasteners and keep them flush with the panel surface. Do not overdrive them. Fastener heads that are sunk too deep or standing too proud can telegraph through thin flooring or contribute to squeaks. Ring-shank or screw-shank nails are often preferred because they hold well and help reduce nail-pop problems over time.
8. Skip Random Construction Adhesive Unless Specifically Approved
It may seem logical to glue everything together for “extra strength,” but that can backfire. Some installation guidance warns against using construction adhesive between the subfloor and plywood underlayment because it can create irregular support, surface issues, or compatibility problems with resilient flooring above. In flooring prep, more glue is not always more wisdom.
Best Rooms for Plywood Underlayment
Plywood underlayment is especially useful in kitchens, laundry rooms, bathrooms, hallways, mudrooms, and utility spaces when you are installing sheet vinyl or another thin resilient floor over wood framing. These are rooms where surface smoothness matters, but full floor reconstruction usually feels excessive.
For example, imagine a small laundry room with an older wood subfloor that is solid but rough from previous flooring removal. Instead of trying to patch every staple scar and adhesive patch, a properly installed underlayment panel can create a cleaner slate for sheet vinyl. The result is usually better-looking, easier to install, and more durable over time.
Common Mistakes to Avoid
- Using ordinary sheathing plywood instead of underlayment-grade plywood.
- Installing over a damp or moving subfloor.
- Ignoring floor height changes at doors, thresholds, and appliances.
- Lining up underlayment seams with subfloor seams.
- Overdriving fasteners or leaving them proud.
- Assuming tile, laminate, vinyl plank, and sheet vinyl all want the same underlayment system.
- Adding plywood under products that already have an attached pad without checking instructions.
Real-World Experiences With Plywood Underlayment
One of the most common experiences homeowners describe is this: the old kitchen floor comes up, and the subfloor looks “mostly fine” from across the room. Then you kneel down and realize it is covered in staple holes, patched corners, shallow gouges, and a few seams that feel like speed bumps. In situations like that, plywood underlayment often becomes the difference between a floor that looks professionally finished and one that quietly broadcasts every old wound underneath. People are usually surprised by how much smoother the final vinyl looks after adding a clean underlayment layer, especially in daylight near windows where imperfections are easier to see.
Another common lesson comes from older homes with plank subfloors. Homeowners often assume that if the floor feels strong, it is ready for anything. Then sheet vinyl goes down and the subtle movement between boards, tiny gaps, or slight surface variation begins to show through. Installers who have dealt with old houses know this story well. The structure may be sound, but the surface is not refined enough for thin resilient flooring. Adding plywood underlayment over that wood base often makes the installation more predictable and the finished floor more attractive.
There is also the classic “I did not think 1/4 inch would matter” experience. It matters. It matters at the bathroom threshold, at the hall transition, under the dishwasher opening, and at the bottom of the door that suddenly shaves the new floor like it has a grudge. Many people only think about the floor covering itself and forget that underlayment changes elevation too. The smart move is to dry-plan the height before installation. Measure the finished stack-up, check appliance clearance, and look at door swings ahead of time. That five-minute check can save a full afternoon of muttering and trim work.
Fastening is another area where experience teaches humility. Some first-time installers hammer or nail too aggressively because they want everything “really secure.” Then the fastener heads sit too deep, or the panel gets slightly distorted, and those imperfections later show through the flooring surface. Others leave fasteners too proud, which creates tiny bumps under thin floors. The sweet spot is consistent, flush fastening. It is not glamorous, but it is one of the quiet details that makes the whole installation succeed.
Perhaps the biggest real-world takeaway is that plywood underlayment works best when it is treated as part of a system, not a shortcut. It is excellent for smoothing and refining a dry, stable wood subfloor under the right finished flooring. It is not a cure for moisture, major structural flex, or the wrong flooring choice. The people happiest with the result are usually the ones who slow down enough to prep the base, choose the right panel, follow spacing and fastening rules, and confirm the finished flooring manufacturer actually approves the assembly. Floors reward boring discipline. They punish guesswork with enthusiasm.
Conclusion
Plywood underlayment is one of those behind-the-scenes materials that can make a visible difference. Use it when you need a smoother, more uniform surface over a wood subfloor, especially under sheet vinyl and other thin resilient flooring. Skip it when the flooring system calls for something else, such as cement board for tile or foam underlayment for certain floating floors.
The best results come from matching the underlayment to the flooring, fixing subfloor issues first, planning for height changes, and installing the panels with care. In other words, plywood underlayment is not glamorous, but it is very good at making the glamorous part look better. And in flooring, that is a pretty great supporting role.