Table of Contents >> Show >> Hide
- Why Dehydrate Carrots?
- Before You Start: Quick Safety + Gear Checklist
- 10 Steps for Dehydrating Carrots
- Step 1: Pick Good Carrots (Seriously, It Matters)
- Step 2: Wash, Trim, and Peel Thoroughly
- Step 3: Cut Uniform Pieces
- Step 4: Blanch Carrots First
- Step 5: Shock in Ice Water, Then Drain Well
- Step 6: Arrange in a Single Layer
- Step 7: Set the Right Drying Temperature
- Step 8: Dry Until Tough-to-Brittle, Not Soft
- Step 9: Cool and Condition Before Long-Term Storage
- Step 10: Store Smart, Label Like a Pro
- How to Use Dehydrated Carrots
- Common Mistakes (and How to Avoid Them)
- FAQ: Dehydrating Carrots at Home
- Conclusion
- Real-World Experience Section (Extended): Lessons from Home Kitchens and Batch Testing
Carrots are the overachievers of the vegetable world: sweet, sturdy, colorful, and somehow always ready to jump into soup, stew, stir-fry, or snack duty. If your crisper drawer keeps turning into a carrot retirement home, dehydrating is your upgrade. Done right, dehydrated carrots are shelf-stable, lightweight, and ridiculously useful for meal prep.
This guide walks you through 10 practical steps for dehydrating carrots, from prep and blanching to storage and rehydration. It’s built on real U.S. food preservation guidance and translated into plain English for home kitchens. No fluff. No weird internet hacks. Just tested methods, smart shortcuts, and a few “learn-this-the-easy-way” tips so your carrots don’t end up chewy in the middle and suspicious in the jar.
Why Dehydrate Carrots?
Dehydrating removes enough water to slow spoilage and make carrots far more storage-friendly. You get a concentrated carrot flavor, less freezer dependence, and fast add-ins for weekday cooking.
- Longer storage: Properly dried and stored carrots can keep quality for months.
- Space-saving: A big pile of fresh carrots shrinks to a compact pantry jar.
- Meal prep friendly: Toss directly into soups, ramen, rice, and skillet meals.
- Less waste: Rescue bulk buys or garden surpluses before they soften.
Before You Start: Quick Safety + Gear Checklist
If you remember one thing, remember this: vegetables are best dehydrated with controlled heat and airflow. Sun-drying carrots is not the move for food safety in most home settings.
Gear you’ll want
- Food dehydrator (preferred) or oven capable of low, steady heat
- Large pot for blanching
- Colander or mesh basket
- Large bowl with ice water
- Sharp knife or mandoline
- Clean towels
- Airtight jars or moisture-vapor-proof bags
- Labels + marker (future you says thank you)
10 Steps for Dehydrating Carrots
Step 1: Pick Good Carrots (Seriously, It Matters)
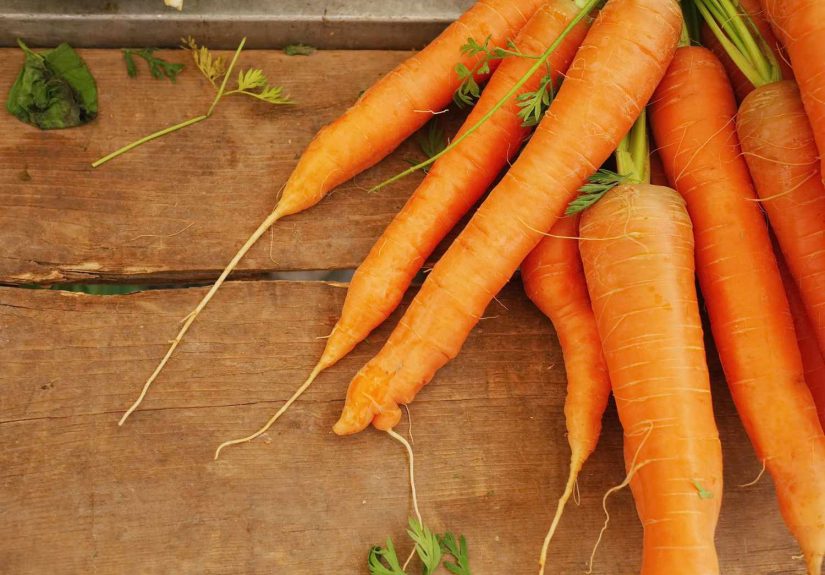
Start with carrots that are firm, crisp, and brightly colored. Skip limp, cracked, or moldy roots. Quality in = quality out. Dehydration concentrates flavor, so mediocre carrots become intensely mediocre carrots.
If possible, choose smaller or medium carrots with fewer woody cores. They tend to dry more evenly and rehydrate better.
Step 2: Wash, Trim, and Peel Thoroughly
Rinse carrots well under running water. Trim tops and root ends. Peel or scrub thoroughly to reduce surface dirt and contamination. This is one of those unglamorous steps that protects flavor, texture, and storage life.
Step 3: Cut Uniform Pieces
Uniform slicing is your secret weapon. Aim for about 1/8-inch slices or strips so pieces dry at a similar rate. Uneven cuts create a mixed bag of over-dry chips and damp centers (not ideal).
Popular options:
- Coins (great for soups/stews)
- Matchsticks (quick rehydration)
- Shreds (fast drying, good for blends)
Step 4: Blanch Carrots First
Blanching is not optional in most tested vegetable-dehydration workflows. It improves quality, helps preserve color and flavor, reduces enzyme activity, and supports food safety by lowering surface microbes.
Typical blanching window for carrot slices is around 3 to 4 minutes (with some tested guidance adjusting by elevation and method). Keep water boiling throughout.
Step 5: Shock in Ice Water, Then Drain Well
Move blanched carrots into ice water briefly to stop cooking. Don’t soak foreverjust enough to halt heat carryover. Drain thoroughly and pat dry so you’re dehydrating carrots, not starting with mini water balloons.
Step 6: Arrange in a Single Layer
Spread carrot pieces on trays in a single layer. Avoid overlaps and pileups. Airflow is the whole game in dehydration; crowding blocks airflow and creates uneven drying.
Leave slight spacing between pieces when possible. For tiny shreds, thin and even is still the goal.
Step 7: Set the Right Drying Temperature
Most tested home-preservation guidance places vegetables in a controlled range around 125°F to 140°F, with many resources centering on 140°F. Some methods start higher briefly when surface moisture is present, then reduce to finish.
Translation: follow your dehydrator’s manual plus tested extension guidance. Too low can stall drying; too high can harden the outside before the center dries (classic case-hardening trouble).
Step 8: Dry Until Tough-to-Brittle, Not Soft
Drying time varies by slice size, humidity, tray load, and machine airflow. Carrots often land in a broad window (for example, several hours up to 10+ hours depending on method and thickness).
Doneness test:
- Pieces feel dry all the way through
- No cool, damp center when broken
- Texture is tough to brittle/crisp, not spongy
Check near the end more oftenfoods can go from “almost done” to “oops, carrot charcoal” surprisingly fast.
Step 9: Cool and Condition Before Long-Term Storage
Cool carrots completely. Then condition: place loosely in jars (about two-thirds full) for several days, shaking daily. If condensation appears, the batch needs more drying.
Conditioning evens out residual moisture and helps prevent mold surprises later.
Step 10: Store Smart, Label Like a Pro
Pack fully dried carrots in airtight containers. Keep them in a cool, dry, dark place. Add labels with date and batch notes. That tiny habit saves huge confusion in six months when everything looks like “mystery orange bits.”
For best quality, rotate stock and use oldest jars first. If you notice off odors, visible moisture, or mold, discard the product.
How to Use Dehydrated Carrots
Fast rehydration options
- Direct-to-pot: Add to soups and stews while simmering.
- Quick soak: Soak in hot water before adding to stir-fries or casseroles.
- Rice/pilaf boost: Toss into cooking liquid for one-pot meals.
- Emergency prep: Keep in pantry jars for busy nights.
In many home-food-preservation references, vegetables generally rehydrate faster than fruits. Carrots are no exception when slices are thin and evenly dried.
Common Mistakes (and How to Avoid Them)
- Skipping blanching: Leads to dull color, weaker flavor, and lower quality over time.
- Cutting uneven pieces: Causes mixed doneness and storage risk.
- Overcrowding trays: Slows drying and traps moisture pockets.
- Cranking heat too high: Can cause case hardening.
- Storing while warm: Creates condensation in containers.
- No labels: Creates pantry detective work no one asked for.
FAQ: Dehydrating Carrots at Home
Do I have to blanch carrots before dehydrating?
For best safety and quality, yes. Blanching is widely recommended in tested U.S. extension guidance for vegetables before drying/dehydrating.
Can I dehydrate carrots in an oven?
Yes, if your oven can hold low temperatures consistently and provide airflow. Keep in mind that oven drying often takes longer and needs more attention than a dehydrator.
How dry is dry enough?
For vegetables, aim for brittle/crisp or very dry/tough pieces with no internal moisture when broken. If you’re unsure, dry longer and condition-check for condensation.
How long do dehydrated carrots last?
Quality depends heavily on storage temperature and moisture control. Cool, dry, dark conditions and airtight packaging are key. Many home-preservation resources suggest using dried vegetables within months for best quality.
Conclusion
Dehydrating carrots is simple once you respect the process: choose good produce, cut evenly, blanch, dry with controlled heat, then condition and store correctly. These steps give you a dependable pantry ingredient that saves money, reduces food waste, and makes weeknight cooking easier.
If you only remember one line from this whole guide, make it this: dry completely, store dry, and keep it cool and dark. That’s the difference between “awesome soup add-in” and “why is this jar foggy?”.
Real-World Experience Section (Extended): Lessons from Home Kitchens and Batch Testing
One of the most consistent experiences home preservers report is how dramatically slice thickness changes everything. In mixed batches, thick rounds may still feel flexible while thin strips are fully brittle. That gap is where frustration starts: you either over-dry some pieces or under-dry others. The practical fix is to commit to one cut style per batch. If you want coins and matchsticks, do two trays and track each separately. It sounds extra, but it saves time overall because your drying curve becomes predictable.
Another common lesson: people underestimate room humidity. A dehydrator running in a humid kitchen behaves differently than one in a dry utility room. Even with the same temperature setting, high humidity slows moisture removal. Experienced users solve this by improving airflow around the dehydrator, avoiding cramped counters near boiling pots, and planning dehydrating days when indoor humidity is lower. This is also why “my carrots took 6 hours” and “mine took 12” can both be true.
A third pattern appears in storage outcomes. Batches that looked perfect at bedtime sometimes show condensation the next day in sealed jars. That is not failure; it’s feedback. Veteran dehydrators treat conditioning as a non-negotiable checkpoint. They jar loosely, shake daily, and re-dry immediately if moisture appears. This one habit prevents most spoilage problems. In practice, conditioning feels like a quality-control bridge between drying and long-term storage.
Rehydration behavior is another hands-on discovery. Carrot shreds rehydrate quickly and nearly disappear into sauces and rice dishes. Coins hold shape better in soups but need more simmer time. Thin matchsticks are the middle ground and tend to work best in noodle bowls, fried rice, and skillet dinners. People who cook often with dehydrated vegetables usually keep multiple jar cuts for this exact reason: texture control. Same carrot, different end result.
There’s also a flavor insight that repeat users notice fast: dehydrated carrots taste sweeter than expected. Water loss naturally concentrates sugars, so they can brighten savory dishes without extra sweeteners. Some cooks lean into this by pairing them with acidic ingredients like tomatoes or vinegar to balance richness. Others grind fully dried carrots into powder for broths, sauces, or homemade seasoning blends. It’s an efficient way to add color and subtle sweetness without chopping fresh produce on busy nights.
Batch size management is another “wish I knew sooner” point. Beginners often fill every tray at once, then get overwhelmed rotating, checking, cooling, and conditioning a mountain of carrots. Seasoned preservers scale smarter: one or two controlled trays first, learn the timing, then increase volume. Small test batches create reliable notes for future runstemperature setting, cut size, average drying time, and final texture. Those notes become your personal carrot playbook, and your next batch is almost always better.
Finally, experience shows that labeling is not boring admin workit’s performance tracking. Write the date, cut type, and even the intended use (“soup coins,” “quick-stir-fry shreds”). Months later, that label tells you exactly what to grab and which batches to use first. In real kitchens, this is what makes dehydration sustainable: less guesswork, less waste, more “dinner is handled” energy.