Table of Contents >> Show >> Hide
- Quick Bulb-Planting Checklist (Save This)
- Table of Contents
- 1) Pick a sunny, well-drained site
- 2) Buy the best bulbs you can afford
- 3) Plant at the right time (temperature beats the calendar)
- 4) Prepare soil for drainage first, fertility second
- 5) Use the “2–3x bulb height” depth rule
- 6) Adjust depth for sand vs. clay
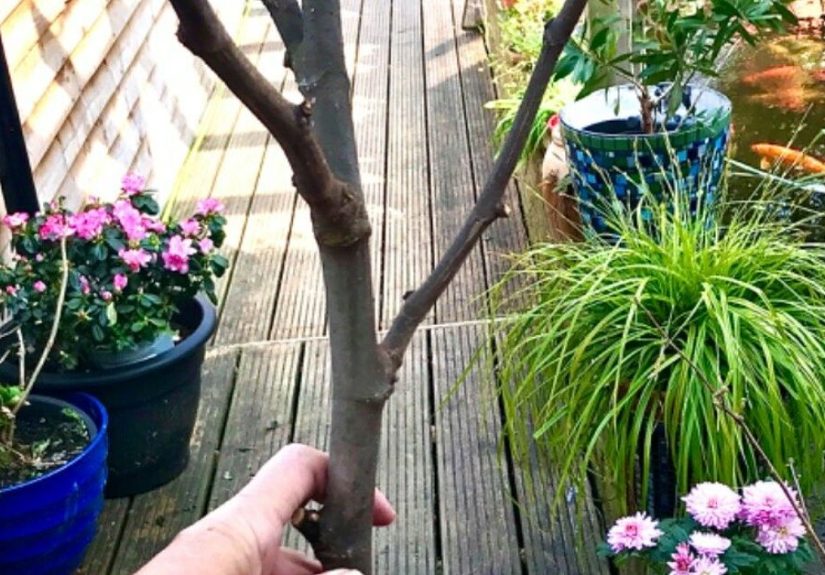
- 7) Pointy end up… but don’t panic
- 8) Space bulbs for both beauty and airflow
- 9) Plant in drifts and clusters (not lonely rows)
- 10) Water like you mean itat planting time
- 11) Mulch the smart way (timing matters)
- 12) Protect bulbs from squirrels and other “garden critics”
- 13) Containers are your secret weapon
- 14) Plan for after-bloom care so bulbs return
- Bringing It All Together
- Real-World Experiences: What Gardeners Learn After Planting Bulbs (The Stuff Labels Don’t Tell You)
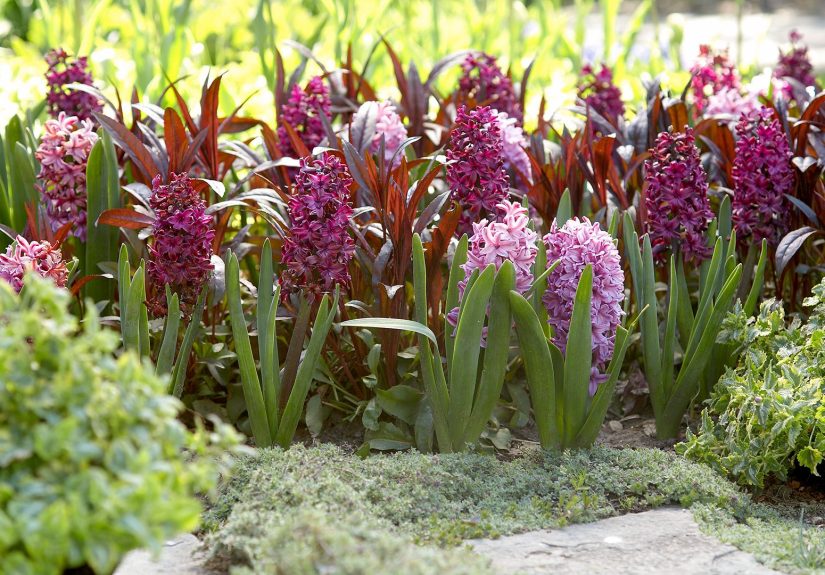
Bulbs are basically nature’s pre-packed surprise party: you bury something that looks like an onion, and months later your yard throws confetti in the form of tulips, daffodils, crocuses, and alliums. The trick is that bulbs are also picky little time capsules. They care about drainage, depth, temperature, and timingsometimes more than they care about your optimism.
This guide breaks down the most practical, science-backed ways to plant bulbs for stronger roots and bigger bloomswithout turning your fall weekend into a mud-wrestling tournament. Whether you’re planting a handful by the porch or going full “I bought 200 bulbs and I regret nothing,” these tips will help you get it right.
Quick Bulb-Planting Checklist (Save This)
- Choose firm, healthy bulbs and the right spot (sun + drainage).
- Plant at the right time (cool soil, before the ground freezes).
- Use the right depth and spacing (and adjust for your soil type).
- Water well at planting, then mulch smartly.
- Protect from pests and label what you planted (future-you will thank you).
1) Pick a sunny, well-drained site
Most spring-blooming bulbs perform best with plenty of light and soil that doesn’t stay soggy. If water puddles in winter, bulbs can rot long before they get a chance to bloom. Think “bright and breezy,” not “swampy and mysterious.”
Practical example
If you have one garden bed that dries quickly after rain and another that holds water like a bathtub, plant tulips and daffodils in the dry bed. Save the wetter area for plants that enjoy consistent moisture (or fix drainage before you plant bulbs there).
2) Buy the best bulbs you can afford
Bulb quality matters because the bulb is the plant’s storage unit. A large, firm bulb usually has more energy stored, which can translate into stronger roots and a better bloom show (especially in year one). Avoid bulbs that are soft, moldy, shriveled, or suspiciously lightweight.
What to look for
- Firm texture: like a healthy onion, not a stress ball.
- No visible mold and no wet, mushy spots.
- Intact “skin” (papery tunic) is a plus, but minor flaking isn’t a dealbreaker.
3) Plant at the right time (temperature beats the calendar)
The best planting window is when soil is cooling but not frozen. Plant too early in warm soil and bulbs can be more prone to rot or disease; plant too late and roots may not establish well before winter. In many regions, nighttime temperatures consistently in the 40–50°F range are a strong signal you’re in the sweet spot.
Microclimate move
If your area freezes early, use a slightly protected spotnear a wall, out of wind, or in full sunto buy a little extra time and help bulbs settle in.
4) Prepare soil for drainage first, fertility second
Bulbs don’t need luxury living, but they do need a dry basement. Improving drainage is usually the highest-impact upgrade you can makeespecially in heavy clay. Mix in compost or other organic matter to loosen soil structure. The goal is a bed that holds enough moisture for roots but doesn’t stay waterlogged.
A quick reality check
If your soil is clay-heavy and you plant bulbs without improving drainage, you’re essentially storing them in a wet refrigerator drawer. They may survive, but they won’t be thrilled about it.
5) Use the “2–3x bulb height” depth rule
If you only remember one bulb-planting rule, make it this: plant most bulbs about two to three times as deep as the bulb is tall. This protects bulbs from temperature swings, anchors the plant, and encourages stable root growth.
Depth examples
- Tulips & daffodils: often land around 6–8 inches deep (depending on bulb size).
- Crocus: often closer to 3–4 inches deep.
Always check the package for specific depth guidancethen use the rule-of-thumb as a sanity check.
6) Adjust depth for sand vs. clay
Soil texture changes everything. In light, sandy soil, bulbs can be planted a bit deeper because drainage is fast and soil warms/cools differently. In heavier clay, planting slightly shallower can reduce the risk of rot and help shoots emerge more easily.
How to apply it
If the label says “6 inches deep,” a sandy bed might tolerate 7–8 inches, while a sticky clay bed might do better at 5–6 inchesespecially if drainage is borderline.
7) Pointy end up… but don’t panic
Most bulbs have a clear top (pointy) and bottom (flatter root plate). Planting them the right way helps them sprout efficiently. But if you’re unsure (or the bulb looks like a tiny alien egg), planting it sideways is better than staging a backyard TED Talk about bulb anatomy.
Why it works
Many bulbs can reorient themselves as they grow, but correct placement saves energy and can improve early growth.
8) Space bulbs for both beauty and airflow
Crowding is a slow-motion problem. Bulbs may bloom fine at first, then get smaller and less impressive over time as clumps become overcrowded. Proper spacing helps roots develop, reduces competition, and can limit disease issues.
Spacing guidelines
- Large bulbs: often about 3–6 inches apart.
- Small bulbs: often about 1–2 inches apart.
Again, check the packagingbut these ranges are a solid starting point.
9) Plant in drifts and clusters (not lonely rows)
Rows are fine for vegetables. For bulbs, clusters look more natural and more dramatic. Plant in irregular groupslike little islands of colorso blooms read as intentional, not like you used a ruler and then regretted it.
Design trick
Toss a handful of bulbs onto the bed and plant them where they land (within reason). This “random-but-not-chaotic” approach creates a naturalistic drift that looks professional.
10) Water like you mean itat planting time
After you plant, water thoroughly. This settles soil around the bulb and kicks off root growth. In many climates, fall rains will handle the rest, but if autumn is unusually dry, occasional watering can help bulbs establish before winter.
A helpful rule
If the top few inches of soil are dry and it hasn’t rained in a while, your bulbs will appreciate a deep drink. Just don’t keep the bed constantly wet.
11) Mulch the smart way (timing matters)
Mulch helps insulate soil and reduce wild temperature swings, which can stress bulbs. But timing is key. In many colder areas, mulching after the ground starts to cool significantly (or after it freezes) can help prevent premature growth during warm spells.
Mulch tips that actually work
- Use about 2–4 inches of organic mulch (shredded leaves, pine straw, composted bark).
- Avoid thick mats of whole leaves that can block air and water.
- In early spring, pull mulch back a bit so shoots can emerge easily.
12) Protect bulbs from squirrels and other “garden critics”
If squirrels had a résumé, “excavation” would be right at the top. Freshly disturbed soil is basically an invitation. The good news: you can deter digging without turning your yard into a medieval fortress.
Simple defenses
- Cover the bed: lay chicken wire or hardware cloth over the planting area and secure it. Shoots grow through; squirrels get annoyed and move on.
- Clean up: remove papery bulb skins and keep the bed tidy so it’s less “new bulb buffet” scented.
- Try strategic layering: in some gardens, topping with sharp mulch (like pine cones) makes digging less comfortable.
13) Containers are your secret weapon
Short on space? Dealing with clay? Want a patio that screams “spring!” before your lawn wakes up? Containers can be a bulb lifesaver because they offer excellent drainage and easy control over soil. You can even “layer” bulbs in a pot for waves of bloom.
Container success formula
- Choose a pot with drainage holes and enough depth for roots.
- Use a quality potting mix (not heavy garden soil).
- Water after planting, then keep slightly moistnot soggy.
- In very cold areas, protect pots from extreme freeze (tuck near a wall or move to an unheated garage once dormant).
14) Plan for after-bloom care so bulbs return
The bloom is the victory lap. The real long-term work happens after flowering, when the leaves photosynthesize and recharge the bulb for next year. If you cut foliage too early, you’re basically unplugging the bulb mid-charge.
After-bloom basics
- Deadhead flowers (snip spent blooms) so energy goes back to the bulb instead of seed production.
- Keep leaves until they yellow and die back naturally.
- Divide overcrowded clumps every few years if blooms shrink or stems get shorter.
Bringing It All Together
Great bulb planting is less about fancy tools and more about a few reliable fundamentals: pick the right spot, plant at the right time, set bulbs at the right depth, and keep them out of waterlogged trouble. Add smart mulching, a little pest defense, and solid after-bloom care, and you’ll turn “I hope this works” into “wow, that’s a lot of flowers.”
Start small if you want. Or don’tgo big, plant in bold clusters, and enjoy the moment in spring when your garden suddenly looks like it’s trying to win an award.
Real-World Experiences: What Gardeners Learn After Planting Bulbs (The Stuff Labels Don’t Tell You)
Ask a group of gardeners about bulb planting, and you’ll hear the same theme: the basics are easy, but the “why didn’t this bloom?” mysteries are where the real education happens. One of the most common experiences is discovering that drainage is not a polite suggestionit’s the entire relationship. In beds that stay wet through winter, bulbs can disappear without drama: no sprouts, no blooms, just a silent shrug from the soil. Gardeners who switch those same bulbs to a slightly raised bed, a slope, or even a container often report an immediate turnaround the next season. It’s not magic. It’s oxygen. Bulbs need moisture to root, but they also need air in the soil to avoid rot.
Another classic learning moment is timing. Many people plant bulbs the same weekend every year because tradition is powerful (and because that’s when the hardware store has the big display). But gardeners who pay attention to temperaturecool nights and soil that’s no longer summer-warmoften see more consistent results. In warmer falls, planting too early can mean bulbs sit in warm, damp soil for weeks, which can increase disease risk. A lot of gardeners figure this out the hard way once, then become the person in the neighborhood who says, “Wait until it cools down,” with the confidence of someone who has lost bulbs before.
Spacing is another “it looked fine… until it didn’t” lesson. In year one, bulbs can bloom even when crowded. The next year, flowers might be smaller. By year three, you may get a sad little bloom here and there and a lot of leaves. Gardeners often describe this as the bulbs “getting tired,” but it’s usually overcrowding. Digging and dividing clumps can feel like yard surgery, yet it’s one of those strangely satisfying projects where you realize you’ve accidentally created more plants. The experience tends to convert people into dividing believersespecially when the divided bulbs come back stronger.
Then there’s pest pressure, which varies wildly by location. Some gardens are practically squirrel-free sanctuaries. Others are running an unlicensed squirrel excavation training program. Many gardeners learn that the best pest deterrent is physical: chicken wire or hardware cloth laid over the bed right after planting. You might feel ridiculous doing it the first timelike you’re building a security system for onionsbut the first spring you get intact blooms, you’ll understand why the method has such a loyal following.
Gardeners also gain a real appreciation for after-bloom care once they want bulbs to return year after year. It’s tempting to tidy up as soon as flowers fade, but people who let foliage die back naturally often report better reblooming. A common strategy is to “hide the mess” by planting bulbs among perennials that leaf out laterhostas, daylilies, ornamental grassesso the bulb foliage is still doing its job, but your bed doesn’t look like it’s in an awkward transition phase.
Finally, one of the most joyful experiences is planting in layers and sequencesespecially in containers or small beds. Gardeners who mix early, mid, and late spring bloomers often describe spring as feeling longer, almost staged, like the garden has a schedule. Snowdrops and crocus start the show, daffodils take over, then tulips and alliums bring the finale. Once you see that progression, it’s hard to go back to single-variety planting. It’s the gardening version of building a playlist instead of listening to one song on repeatstill a great song, but why limit yourself?