Table of Contents >> Show >> Hide
- Quick Answer: The 2 Best Ways
- Before You Upload: The Desktop Reel Prep Checklist
- Method 1 (Fastest): Upload a Reel Directly on Instagram.com
- Method 2 (Most Flexible): Upload & Schedule Reels with a Desktop Publisher
- Desktop Upload Troubleshooting (Because Something Will Go Wrong)
- Best Practices: Make Your Reel Perform Better (Not Just Upload Successfully)
- FAQ: Uploading Reels from a Mac or PC
- Conclusion
- : Real-World Experiences & Lessons from Desktop Reel Uploading
You edited a Reel on your computer. The color grading is chef’s kiss. The captions are perfectly timed.
The cover image looks like it paid rent. And then Instagram hits you with the classic:
“Cool. Now… please move this file to your phone like it’s 2012.”
Good news: in 2025, you can upload Instagram Reels from a Mac or PC without playing
“AirDrop Hot Potato.” Even better news: you’ve basically got two easy routes
one for fast, one-off posting, and one for planning ahead like a responsible adult (or a very organized gremlin).
In this guide, you’ll learn exactly how to upload Reels from desktop, what settings to use for best quality,
what features you might miss compared to mobile, and how to troubleshoot the annoying stuff (because technology loves character development).
Quick Answer: The 2 Best Ways
- Use Instagram on the web (Instagram.com) fastest way to upload a Reel right now from your browser.
- Use a desktop scheduler (Meta Business Suite or a trusted publishing tool) best for scheduling,
teamwork, and keeping your posting streak alive even when you’re busy.
Before You Upload: The Desktop Reel Prep Checklist
Desktop uploading is easiest when your video is already “Instagram-ready.”
Here’s the checklist that saves you from re-exporting your file five times while muttering,
“Why is it blurry… I literally edited in 4K.”
Recommended Reel specs (so Instagram doesn’t squish your masterpiece)
- Aspect ratio: 9:16 is the sweet spot for full-screen Reels (vertical). Instagram supports a range, but vertical performs best.
- Resolution: Aim for 1080 × 1920 (Full HD vertical).
- Frame rate: 30 fps or higher is a safe standard for smooth playback.
- Length: Instagram now supports longer Reels, but keep performance in mindvery long Reels may not be pushed as widely to new viewers.
- File format: MP4 is the most reliable choice across browsers and schedulers.
Pro tip: Build your Reel like a “mobile-first” video
- Keep important text and faces away from the bottom (captions + UI live there).
- Use large, high-contrast text for readability on phones.
- Export once at high quality; avoid re-encoding multiple times (quality loss stacks).
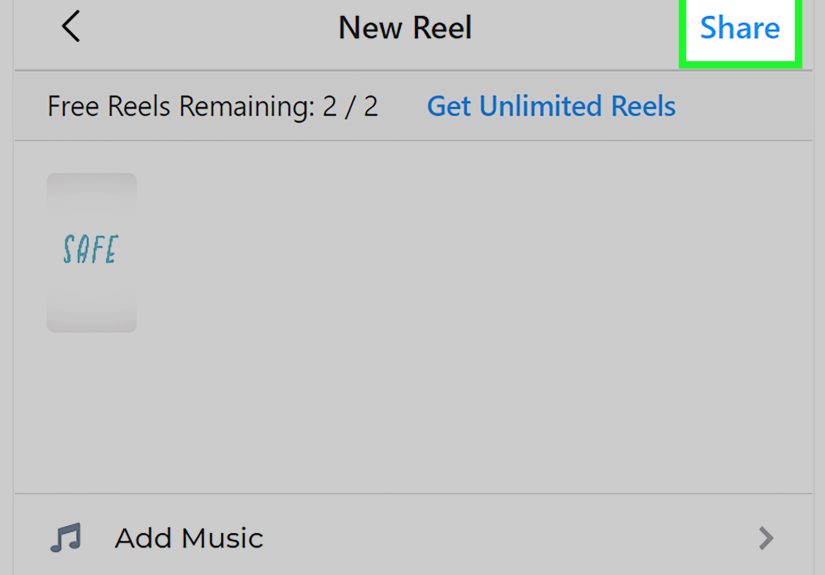
Method 1 (Fastest): Upload a Reel Directly on Instagram.com
If you want to publish right now and you already have a finished video file on your computer,
Instagram’s web experience is the simplest path.
Step-by-step: How to upload a Reel from a Mac or PC using your browser
- Open Instagram.com in Chrome, Edge, Safari, or Firefox and log in.
- Click Create (the + icon). On many layouts, it appears in the left sidebar or top area.
- Choose Post (don’t worryyour video can still publish as a Reel depending on Instagram’s current flow).
- Drag and drop your video file into the upload window, or click Select from computer.
- Choose your crop/aspect (vertical 9:16 is typically what you want for a Reel).
- Pick a cover (thumbnail). You can often select a frame or upload a cover image you designed.
- Add your caption, hashtags (sparingly), tags, location, and accessibility details if available (like alt text).
- Hit Share.
What you can (and can’t) do on desktop Instagram
Desktop uploading is great for publishing, but it’s not always great for creating.
Depending on the current web features, you may have fewer editing options than on mobile
especially for things like trending music, advanced text overlays, and sticker-style effects.
Desktop is perfect when:
- You already edited the Reel in Premiere Pro, Final Cut, CapCut Desktop, DaVinci Resolve, etc.
- Your captions are burned in, or you’re using simple on-screen text.
- You don’t need Instagram’s in-app music library to do the heavy lifting.
Desktop can be limiting when:
- You want to add trending audio directly inside Instagram.
- You rely on Instagram’s in-app templates, effects, or interactive stickers.
- You prefer mobile caption tools and quick timeline edits.
Example workflow (fast posting)
Let’s say you’re posting a Reel called “3 Kitchen Organization Hacks That Actually Work”.
You edited on desktop, exported a vertical MP4, and designed a bold cover image.
With Instagram.com, you can publish in minutesno file transfers, no “where did I save that?” spiral.
Method 2 (Most Flexible): Upload & Schedule Reels with a Desktop Publisher
If you want to schedule Reels (or manage multiple accounts, approvals, or a content calendar),
using a publishing tool is the calmer, more strategic option.
Two common flavors:
- Meta Business Suite (often free, designed for Facebook/Instagram business management)
- Trusted social publishing tools that support Instagram Reels scheduling and publishing
Why this method is worth it
- Scheduling: Upload a week (or month) of Reels in one sitting.
- Consistency: Posting regularly becomes automatic instead of emotional.
- Teams: Drafts, approvals, and collaboration get easier.
- Two publishing modes: Auto-publish, or “send a notification” so you can finish in the IG app if you need music/effects.
Option A: Schedule with Meta Business Suite (common approach)
- Make sure your Instagram is a professional account (Business or Creator), if required by your setup.
- Connect your Instagram to the management dashboard (often via a linked Facebook Page depending on your configuration).
- Click Create and choose Reel (or create a post and select Reel where applicable).
- Upload your vertical video file and add a caption, cover, and settings.
- Choose Publish now or Schedule for a future date/time.
Option B: Schedule with a trusted desktop scheduler (auto-publish or reminders)
Many desktop tools let you draft and schedule Reels from your computer. Depending on the tool and your account type,
you’ll either:
- Auto-publish: The Reel goes live automatically at the scheduled time.
- Notification publishing: The tool reminds you, and you tap a few buttons in Instagram to finishhandy if you want to add trending audio at the last second.
This is the best choice when you want to keep your editing on desktop, keep your planning on desktop,
and keep your sanity… also on desktop.
Comparison: Which method should you use?
| Feature | Instagram.com (Method 1) | Desktop Publisher (Method 2) |
|---|---|---|
| Publish immediately | Yes | Yes |
| Schedule Reels | Usually no | Yes |
| Best for teams/approvals | No | Yes |
| Best for trending audio workflows | Limited | Often best via notification publishing |
| Best for one-off creators | Yes | Maybe |
| Best for consistent posting | Okay | Excellent |
Desktop Upload Troubleshooting (Because Something Will Go Wrong)
Problem: “My Reel looks blurry after upload”
- Export at 1080×1920 with a solid bitrate (too low = mush).
- Avoid double compression: Don’t export, then run it through three converters “just to be safe.”
- Check your internet: Weak upload speeds can cause processing delays and quality dips.
- Give it time: Sometimes Instagram shows a lower-quality preview while still processing HD.
Problem: “Upload fails / stuck at 99%”
- Try a different browser (Chrome ↔ Edge is a surprisingly effective magic trick).
- Disable browser extensions that might interfere (ad blockers can be dramatic).
- Rename the file (simple names, no weird symbols).
- Re-export as MP4 (H.264 video is typically the safest compatibility choice).
Problem: “My audio is out of sync”
- Re-export with a constant frame rate if your editor allows it.
- Avoid uploading heavily variable-frame-rate phone footage without normalizing it.
- Do a quick test upload to a private account (or close friends) before the “real” post.
Problem: “I can’t add the music I want on desktop”
- Use a publisher’s notification workflow so you can add music inside the Instagram app right before posting.
- Add music in your editor (only if you have the rights to use it).
- Consider voiceover + captions as your hookmusic helps, but clarity wins.
Best Practices: Make Your Reel Perform Better (Not Just Upload Successfully)
1) Start with a “scroll-stopper” first second
Your first frame is your billboard. Put the payoff upfront:
“Watch me fix this tiny bedroom in 10 seconds” beats “Hey guys, welcome back…”
(sorry, “Hey guys,” you had a good run).
2) Use a cover image that looks good in the grid
A Reel cover is basically the movie poster for your profile. Design covers at 1080×1920,
but keep the important stuff centered so it doesn’t get cropped in the grid preview.
3) Captions aren’t optional anymore
Many people watch with sound off. Captions also boost clarity and watch time.
If desktop uploading limits caption tools, you can:
- Burn captions into the video in your editor, or
- Upload, then quickly add native captions on mobile (if that’s part of your workflow).
4) Keep it tighteven if you can go longer
Instagram supports longer Reels now, but shorter, punchier Reels often earn replays.
If you need depth, do a “Part 1 / Part 2” series and keep each episode focused.
FAQ: Uploading Reels from a Mac or PC
Can I upload a Reel from my computer without any third-party tools?
Yes. Instagram.com lets you upload video from a desktop browser using the Create (+) flow.
It’s the simplest no-extra-tools method for publishing from a Mac or PC.
Do I need a Business or Creator account?
For basic uploading on Instagram.com, you can often post without switching account types.
For scheduling and some publishing tool features, professional accounts are commonly required.
Is scheduling Reels worth it?
If you post more than once in a while, yes. Scheduling turns consistency into a system:
batch edit on desktop, batch schedule, then focus on comments and community instead of panic-posting at 11:58 PM.
Conclusion
Uploading Reels from a Mac or PC is finally normallike it always should’ve been.
If you just want to post a finished video quickly, Instagram.com is your fastest route.
If you want to plan ahead, schedule content, or manage a more serious workflow, a desktop publisher
(like Meta’s tools or a trusted scheduler) is your best friend.
The secret isn’t just knowing how to upload from desktopit’s building a workflow where your
editing, covers, captions, and scheduling all work together. Do that, and suddenly your Reel strategy feels less like chaos…
and more like you’re the director of your own tiny internet studio.
: Real-World Experiences & Lessons from Desktop Reel Uploading
In real creator workflows, desktop uploading usually starts as a “small convenience” and quickly becomes a
“wait, why wasn’t I doing this the whole time?” momentespecially for anyone who edits with a keyboard,
a real timeline, and the ability to drag files like a civilized human.
One common experience is the batch-edit weekend. People will film multiple short clips in one session,
then sit down on Saturday with a laptop and knock out five to ten Reels in a row. Desktop editing makes it easier to
keep colors consistent, apply the same caption style, and reuse templates. Once the videos are exported, uploading from
Instagram.com feels like posting an email attachmentsimple, fast, and surprisingly satisfying.
The big lesson here: batching reduces decision fatigue. When you’re already “in editing mode,” you make better
choices about pacing, hooks, and cover design than you do when you’re trying to post in a hurry.
Another frequent experience shows up with small businesses and creators who run multiple accounts.
Desktop tools become less about convenience and more about control: content calendars, approvals, and “who posted what”
stop living in someone’s head (or a chaotic group chat). Scheduling Reels is especially helpful during busy weeks
product launches, holidays, or travelbecause you can keep posting without having to open the app at the exact right moment.
The lesson: consistency is easier when it’s planned. The best posting schedule is the one you can actually maintain.
Then there’s the classic desktop surprise: audio limitations. People upload a Reel from a computer and realize
they can’t easily add the exact trending sound they wanted (or the editing tools feel limited compared to mobile).
The experience teaches a practical split-workflow: do the heavy edit on desktop, then use a reminder/notification workflow
(or a quick mobile finishing step) when you want native music, captions, or effects. The lesson: decide early what must be “native”
(music, stickers, interactive bits) versus what can be finalized in your editor (text overlays, captions burned in, sound design).
Quality is another big one. Many creators learn that “4K export” doesn’t automatically equal “4K-looking Reel.”
The experience usually goes like this: first upload looks slightly soft, second upload looks better, and eventually they learn
the real key is clean 1080×1920 exports, minimal re-encoding, and letting Instagram finish processing before judging the final look.
The lesson: optimize for the platform. Instagram is going to compress the file, so give it a strong, clean source.
Finally, the most universal experience: once desktop uploading works, it becomes the default. People stop transferring files,
stop hunting through camera rolls, and start treating Reels like any other content assetedited, exported, uploaded, published.
The lesson: your workflow should feel boring (in a good way). When uploading becomes predictable, you have more energy
for what actually grows an account: good ideas, clear storytelling, and real engagement.