Table of Contents >> Show >> Hide
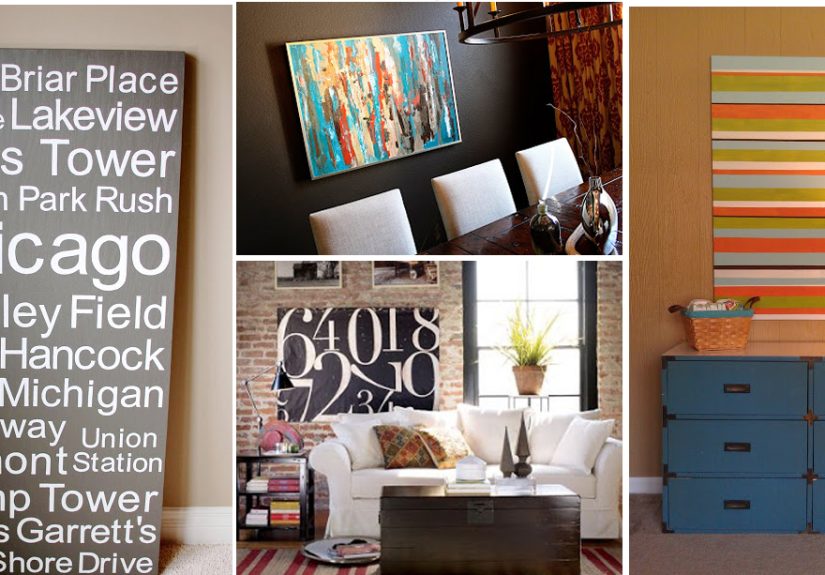
Blank walls have a suspicious talent for looking judgmental. Fortunately, you do not need a fine arts degree, a dramatic studio loft, or a beret angled at exactly 37 degrees to make art worth displaying. You need a few affordable supplies, a protected work surface, and permission to experiment.
These 25 DIY art tutorials cover painting, collage, printmaking, fiber art, natural materials, and clever upcycling. Most projects are beginner-friendly, easy to personalize, and suitable for an afternoon at home. Choose colors that already appear in your room, work in a size that fits your wall, and remember that “mistake” is often just the art-world term for “unexpected texture.”
Before You Start: Build a Simple DIY Art Kit
You can complete most of these easy art projects with acrylic paint, watercolor, brushes, heavy paper, small canvases, painter’s tape, scissors, craft glue, a black marker, and a few recycled materials. Add a palette knife or an expired gift card for spreading paint, plus a drop cloth or flattened cardboard box to protect the table.
Test unfamiliar materials on scrap paper first. Let wet layers dry before adding crisp details, use ventilation when working with sprays or strong adhesives, and follow every product label. For wall art that looks cohesive, repeat two or three colors across multiple pieces rather than attempting to use the entire paint aisle in one heroic afternoon.
Easy Painting Tutorials for Instant Wall Art
1. Painter’s Tape Geometric Canvas
You need: Canvas, painter’s tape, acrylic paint, and a foam brush.
- Apply tape in crossing lines to divide the canvas into irregular shapes.
- Paint each section, repeating a few colors for balance.
- Remove the tape while the final coat is slightly damp, then let the canvas dry flat.
Try muted neutrals for modern decor or bright primary colors for a playful, midcentury look.
2. Minimalist Color-Block Painting
Sketch two or three oversized shapes lightly in pencil. Fill them with matte acrylic paint, allowing a narrow band of the background to remain visible. Keep the edges slightly imperfect; hand-painted character is the point. A palette of clay, cream, charcoal, and olive creates an expensive-looking result without requiring an expensive-looking credit-card statement.
3. Textured Palette-Knife Abstract
Spread heavy acrylic paint or artist-approved modeling paste across a primed canvas with a palette knife. Drag the blade in short arcs, long ridges, and overlapping sweeps. Once the texture dries, leave it monochrome or brush a thin contrasting color over the highest points. Avoid building extremely thick homemade mixtures, which may crack as they dry.
4. Watercolor Gradient Landscape
Tape watercolor paper to a board. Wet the surface with clean water, then brush a dark color across the top and dilute it as you move downward. After the wash dries, add two or three simple mountain silhouettes, making each foreground layer darker than the one behind it. The gradual value change creates depth with very little drawing.
5. Loose Watercolor Florals
Paint five-petal flowers using quick curved strokes, leaving tiny white spaces between petals. Drop a darker shade into the damp centers and add stems with the tip of a small brush. Vary the height and direction of the blooms so the arrangement feels natural. Botanical accuracy is optional; cheerful flower energy is mandatory.
6. Ombre Circle Art
Trace rows of circles with a cup or round lid. Begin with one paint color, then mix increasing amounts of white as you move across the page. Fill each circle with a different tint. Frame the finished grid with a generous mat for a clean, graphic piece that quietly teaches color mixing while looking ready for a design magazine.
7. Splatter-and-Line Abstract
Paint a pale background and let it dry. Thin a small amount of acrylic paint according to the manufacturer’s guidance, load a stiff brush, and flick controlled droplets onto the surface. When dry, add a few confident lines with a paint marker. Protect the surrounding area generously unless your decorating plan includes polka-dotted flooring.
8. Painted Beach Scene from Above
Divide a canvas into sandy beige and ocean blue areas with a soft, irregular shoreline. Add small circles for umbrellas, tiny towel rectangles, and miniature figures made from dots and short lines. The overhead viewpoint eliminates difficult facial features and perspective, making this one of the easiest DIY canvas art ideas for beginners.
Collage and Paper Art Tutorials
9. Torn-Paper Organic Collage
Tear colored paper into curved, uneven shapes instead of cutting perfect edges. Move the pieces around until the composition feels balanced, then glue them from the background forward. Add small marker details after the adhesive dries. Torn edges create movement and make inexpensive construction paper feel surprisingly sophisticated.
10. Painted-Paper Botanical Collage
Cover several sheets of paper with stripes, dots, dry-brush marks, and blended colors. Once dry, cut leaves, stems, and flower shapes from the decorated sheets. Assemble them on heavy paper before gluing. Because every piece contains handmade texture, the finished botanical collage looks richer than art made from flat, store-bought colors.
11. Magazine Portrait Collage
Begin with a simple profile or face outline. Build the portrait from magazine fragments selected by color rather than literal subject matter: blue advertisements can become shadows, while warm food photography can become highlights. Overlap pieces to avoid gaps and add only a few drawn features. The result should suggest a person, not pass a passport inspection.
12. Architectural Photo Collage
Cut doors, windows, stairs, roofs, and building textures from old magazines or printed personal photos. Combine them into an imaginary streetscape with deliberately impossible scale. Add shadows beneath overlapping pieces using diluted gray paint. This mixed-media art project turns ordinary architecture into a whimsical city that obeys no zoning laws.
13. Memory Map Artwork
Draw a loose map of a meaningful neighborhood, vacation route, or hometown. Add ticket stubs, copied photographs, handwritten labels, and small painted symbols. Use reproductions rather than irreplaceable originals when possible. A limited color palette keeps the piece from looking like a bulletin board that survived a windstorm.
14. Layered Tissue-Paper “Stained Glass”
Cut translucent tissue paper into simple geometric shapes. Brush a thin layer of decoupage medium onto clear acrylic, glass from an unused frame, or translucent vellum, then overlap the pieces. Mount the finished panel where light can pass through it. Follow adhesive directions and keep the artwork away from open flames and high heat.
15. Paper-Cut Matisse-Inspired Garden
Fold colored paper and cut freehand leaves, stars, waves, and abstract plant forms. Arrange the shapes on a contrasting background, rotating pieces until the negative spaces feel as interesting as the paper itself. Glue them down and frame the composition. Do not chase symmetry; this project thrives on lively imbalance.
Printmaking and Pattern Projects
16. Foam-Plate Relief Prints
Draw a bold design into a clean foam printing plate with a dull pencil, pressing firmly without cutting through. Roll or brush a thin, even layer of water-based printing ink over the surface. Place paper on top, rub gently, and peel it away. Print several versions with different colors to create a coordinated gallery set.
17. Leaf Monoprints
Collect flat, sturdy leaves and wipe them clean. Brush a small amount of paint onto the veined side, place each leaf paint-side down on paper, cover it with scrap paper, and press evenly. Lift carefully to reveal the print. Combine several impressions into a wreath, border, or abstract botanical pattern.
18. Bubble-Wrap Pattern Print
Paint the raised side of bubble wrap with a foam brush, then press it onto paper without sliding. Repeat the print in rows, circles, or overlapping colors. Add hand-drawn lines around selected dots to create flowers, planets, berries, or a purely abstract pattern. It is recycling, printmaking, and resisting the urge to pop every bubble at once.
19. Cardboard Stamp Art
Cut simple shapes from corrugated cardboard and glue them to larger cardboard handles. Dip the stamps lightly into paint and test them on scrap paper. Build a repeating pattern by changing direction or alternating colors. Imperfect impressions add rhythm, while too much paint turns the design into a charming but mysterious blob convention.
Textile, Natural, and Upcycled DIY Art
20. Yarn-Wrapped Line Art
Draw a simple continuous-line face, flower, or abstract curve on sturdy cardboard or a small wood panel. Apply craft glue along one section at a time and press yarn into the line. Use one color for a minimalist piece or change colors at natural intersections. Let the glue dry completely before hanging.
21. No-Loom Woven Wall Hanging
Cut evenly spaced notches along the top and bottom of cardboard. Wrap vertical warp threads through the notches, then weave yarn over and under them. Alternate thick yarn, ribbon, and fabric strips for texture. Tie the ends to a dowel or branch. The finished piece can be perfectly rectangular or delightfully wonky.
22. Pressed-Flower Shadow Box
Press dry flowers between absorbent paper under heavy books until fully flattened and moisture-free. Arrange them on acid-free paper and secure them sparingly with an appropriate archival adhesive. Place the composition in a shadow box or frame with a spacer so the glass does not crush the petals. Keep it out of direct sunlight to slow fading.
23. Fabric Scrap Mosaic
Cut fabric remnants into squares, arches, or irregular tiles. Arrange them on a canvas board, mixing large quiet shapes with small patterned ones. Adhere the pieces using a fabric-compatible medium, smoothing from the center outward. A final painted line can unify the design and make leftover cloth look intentional rather than merely left over.
24. Reclaimed-Wood Patchwork Art
Sand small wood offcuts and arrange them on a plywood backing. Paint or stain individual pieces before attaching them with wood glue according to the product instructions. Keep the design geometric and verify that the finished piece is securely mounted with hardware rated for its weight. This project is best for adults comfortable with basic tools.
25. Framed Everyday-Object Collection
Gather visually related objects such as postcards, paint swatches, seed packets, vintage buttons, or travel mementos. Arrange them in a grid inside a deep frame, leaving consistent space between items. Secure lightweight pieces with removable photo corners when possible. The collection becomes personal wall art without requiring you to paint a single recognizable horse.
How to Make Homemade Art Look Finished
A strong presentation can elevate even the simplest DIY artwork. Trim paper cleanly, remove stray glue, and choose a frame that gives the piece breathing room. A white or cream mat often helps colorful work feel calmer, while a dark frame can anchor pale abstract art.
Before driving nails, arrange framed pieces on the floor or trace them onto kraft paper and tape the templates to the wall. For a gallery arrangement, repeat one elementframe color, mat color, subject, or paletteso different projects feel connected. Most importantly, hang the art where you can actually enjoy it. Your masterpiece deserves better than permanent residency behind the laundry-room door.
What I Learned from Making DIY Art Regularly
The first lesson from working through projects like these is that the easiest-looking tutorial is not always the fastest one. A geometric canvas may use only tape and paint, but clean edges require patience. A loose watercolor flower may take ten seconds to paint and another ten minutes to stop “improving” before it becomes a damp purple cabbage. The practical skill is not simply applying materials; it is recognizing when the piece has enough information.
Preparing a small color palette before starting made the biggest difference in my results. Early projects became muddy because I kept adding unrelated colors whenever an empty space made me nervous. Limiting a composition to three main hues plus black or white created instant unity. It also made leftover paint useful across a mini gallery wall. One project could be mostly blue, another mostly cream, and a third mostly rust, yet the repeated palette made them look like intentional relatives instead of strangers sharing an elevator.
I also learned to make samples. Testing paint on scrap paper sounds less exciting than attacking a fresh canvas, but a two-minute trial reveals whether the paint is too thin, the marker will bleed, the glue will wrinkle the paper, or the stamp contains enough paint to print clearly. Sample cards became a record of color mixtures and texture ideas. They also removed the pressure to make every experiment “frame-worthy,” which made the actual work more playful.
Drying time matters more than enthusiasm. Many frustrating smears came from layering details over paint that felt dry on the surface but was still soft underneath. Working on two projects at once solved the problem: while a background dried, I cut collage shapes or planned another composition. This turned waiting into part of the process rather than a personal insult delivered by acrylic paint.
The most successful pieces usually contained some contrast. Smooth watercolor looked better beside sharp ink lines. Flat paper shapes gained depth when one textured fragment was added. A neutral canvas became livelier with one saturated accent. Contrast does not require visual chaos; it simply gives the eye a reason to move around the artwork.
Framing changed my opinion of several projects I nearly discarded. A rough paper collage looked unfinished on the table but polished inside a wide mat. Small prints became more impressive when displayed as a set of three. Even children’s art, paint tests, and accidental marks can become meaningful decor when cropped thoughtfully and presented with care.
Finally, personal details matter more than technical perfection. The memory map, pressed flowers from a familiar place, and collage made from copied family notes attracted more attention than cleaner but less personal exercises. Viewers respond to a story. A slightly crooked line is easy to forgive when the artwork carries a place, person, season, or joke worth remembering.
The best routine is simple: choose one project, prepare the surface, limit the palette, test one technique, and finish before judging it. Not every attempt will earn a spot above the sofa. Some will become gift tags, sketchbook pages, or evidence that bubble wrap has a second career. Each one, however, builds confidence and makes the next blank surface feel less intimidating.
Conclusion
These 25 DIY art tutorials prove that original wall decor can begin with basic paint, paper scraps, yarn, leaves, or objects already hiding in a drawer. Start with the technique that sounds enjoyable rather than the one that seems most impressive. Keep the first version small, repeat colors you love, and treat imperfect results as useful experiments. Handmade art should reflect your taste, your memories, and your willingness to make a manageable mess in the name of better walls.
Note: Always follow manufacturer instructions for paints, adhesives, cutting tools, and hanging hardware, and provide appropriate adult supervision for children.