Table of Contents >> Show >> Hide
- Understanding Pole Barns (Before You Grab the Post Hole Digger)
- Before You Start: Planning, Permits, and Non-Negotiable Safety
- Method 1: Traditional In-Ground Post-Frame Pole Barn
- Method 2: Concrete Piers & Brackets (No Wood in the Ground)
- Method 3: DIY Pole Barn Kit (Fast-Track, Still Customizable)
- Key Details That Make Your Pole Barn Last (and Pass Inspection)
- Conclusion: Choose the Build Path That Matches Your Skills (and Sanity)
- Real-World Experiences & Pro Tips for Building a Pole Barn (Extended)
Introduction
If you’ve ever looked at your chaotic yard, overflowing garage, or tractor baking in the sun and thought, “Yeah… I need a barn,” a pole barn is your no-drama solution. Post-frame (pole barn) construction is affordable, fast, durable, and surprisingly DIY-friendly when you break it into smart steps and follow building codes like an adult.
This guide walks you through three practical ways to build a pole barnfrom fully DIY traditional builds to modern engineered systems and time-saving kitsbased on proven best practices widely used across the United States for residential, farm, and light commercial buildings. It’s written for real humans: clear structure, specific details, light humor, and no fluff.
What is a Pole Barn
Understanding Pole Barns (Before You Grab the Post Hole Digger)
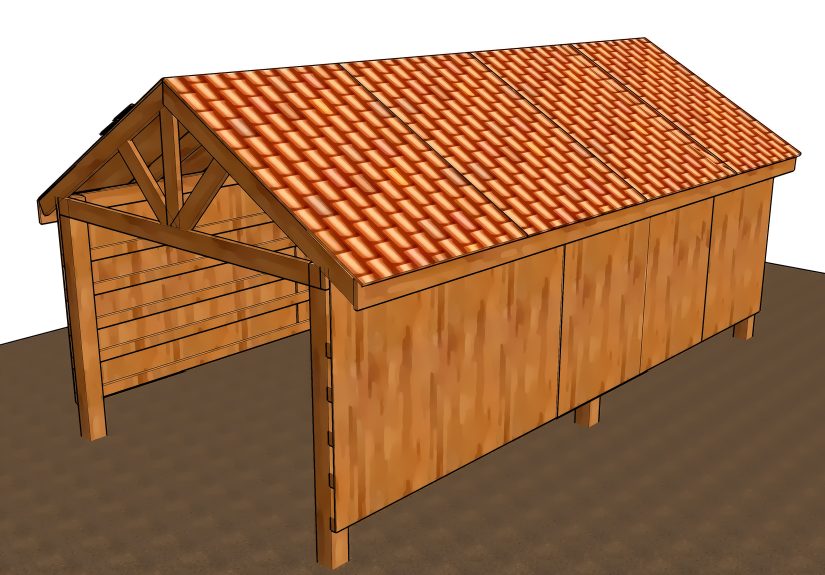
A pole barn is a post-frame structure built with widely spaced vertical columns (posts), engineered trusses, horizontal girts and purlins, and typically metal roofing and siding. Instead of a full perimeter foundation, the structure is supported by posts set in the ground or anchored to concrete piers or a slab. This reduces concrete costs, speeds up construction, and gives you big clear-span interiors ideal for storage, workshops, RVs, animals, or a future “I swear I’ll use it” home gym.
Key advantages
- Lower cost vs. conventional stick-built buildings for similar footprint.
- Faster to build with fewer components and simpler foundations.
- Wide open interior; fewer load-bearing walls, flexible layouts.
- Scales well from a small 24×32 garage to large ag or hobby buildings.
Pre-Planning
Before You Start: Planning, Permits, and Non-Negotiable Safety
1. Check codes, zoning, and utilities
- Contact your local building department to confirm if engineered plans, frost-depth footings, wind/snow load design, and inspections are required. Many jurisdictions now treat post-frame like any structural buildingno “it’s just a barn” shortcuts.
- Verify setbacks from property lines, roads, septic systems, and easements.
- Call 811 (or your local utility locator) before digging. Power + auger = bad story.
2. Choose a smart site
- Pick high, well-drained ground to avoid water pooling and heaving.
- Plan vehicle turning radius, trailer access, and big door orientation.
- Consider prevailing winds and sun (doors not facing the worst winter blast, natural light where you want it).
3. Design the building
- Common spans: 24′, 30′, 40’+; bay spacing often 8’–12′, based on engineering.
- Think ahead: overhead doors, lean-tos, insulation, interior walls, future expansion.
- Whenever possible, use engineered truss layouts and a stamped design package from a reputable supplier.
4. Safety basics (do not skip)
- Wear PPE: gloves, safety glasses, hearing protection, fall protection for roof work.
- Use proper ladders/scaffolding; secure trusses and bracing as you go.
- Never work under unsupported trusses or in high winds when sheathing/steel is acting like a sail.
METHOD 1
Method 1: Traditional In-Ground Post-Frame Pole Barn
This is the classic approach: pressure-treated posts embedded directly in the soil with concrete. When designed correctly with UC4B-rated posts (or equivalent) and proper drainage, this method has decades of proven performance and is popular for ag and storage buildings across the U.S.
Step 1: Lay out your barn
- Stake the corners using the 3-4-5 (or 6-8-10) method to ensure square.
- Run string lines for walls; mark post locations by your engineered spacing (e.g., 8′ centers).
Step 2: Dig post holes to code depth
- Use an auger to dig below frost line (commonly 30″–48″+ depending on region).
- Typical hole diameter: 18″–24″ for standard barns; follow engineering.
- Add a compacted gravel or concrete “foot” at the bottom for bearing.
Step 3: Set treated posts
- Use structural, ground-contact rated posts (e.g., 6×6 or laminated columns).
- Plumb each post carefully; brace temporarily with kickers.
- Backfill with concrete around the post or a concrete collar per design for uplift and lateral resistance.
Step 4: Install girts, trusses, and purlins
- Attach horizontal wall girts to posts (bookshelf or flat girt layouts are common).
- Set engineered trusses on top of posts, securely braced; follow manufacturer spacing and fasteners.
- Add roof purlins and permanent diagonal bracing to lock the frame.
Step 5: Add roofing, siding, and doors
- Install roof underlayment or condensation control barrier where required, then steel roofing.
- Install metal siding, windows, and overhead/slider doors.
- Finish with trim, closures, and proper screws to prevent leaks.
Best for:
Rural properties, equipment/storage barns, cost-conscious builds where code allows embedded posts and you’re comfortable with traditional post-frame construction.
METHOD 2
Method 2: Concrete Piers & Brackets (No Wood in the Ground)
Modern post-frame systems increasingly use precast or poured concrete piers with steel brackets that keep wood above grade. This method can improve durability in wet soils, meet stricter local code expectations, and appeal to owners who dislike the idea of buried lumbereven treated.
Step 1: Form and pour structural piers
- Dig holes to frost depth; install forms or use pier tubes to required diameter.
- Place rebar per engineered detail; pour concrete to precise height.
- Set wet-set brackets or anchor bolts accurately on layout lines.
Step 2: Attach columns to brackets
- Use engineered brackets rated for moment and uplift loads.
- Plumb each column; bolt per manufacturer specs; temporary brace.
Step 3: Frame and finish like Method 1
- Install girts, trusses, bracing, purlins, roof, and siding as with a traditional post-frame.
- Optionally pour a slab later inside the framed structure for a super clean interior.
Best for:
Homes, shops, and barns in high-moisture areas, stricter code regions, or long-term investment builds where concrete-supported columns are a selling point.
METHOD 3
Method 3: DIY Pole Barn Kit (Fast-Track, Still Customizable)
If you like the idea of building but not the idea of reinventing structural engineering, a pole barn kit is your sweet spot. Kits from reputable U.S. suppliers typically include engineered plans, posts/columns, trusses, metal panels, trim, fasteners, and a step-by-step manual.
Step 1: Order the right kit
- Define size, roof style (gable/monitor/lean-to), door openings, snow & wind loads, and whether you’ll insulate.
- Confirm that plans are stamped for your state when required.
Step 2: Prep the site
- Excavate, level, and compact the building pad.
- Install gravel base for drainage; set string lines to match the kit layout exactly.
Step 3: Follow the manual like it’s sacred
- Inventory materials on deliverymissing trusses at Step 6 is a vibe killer.
- Set posts/piers per the supplied drawings; brace thoroughly.
- Install trusses, purlins, roofing, siding, and trim using the specified fasteners and patterns.
Step 4: Mix DIY with pro help if needed
- Hire pros for concrete, heavy equipment, or truss setting if you’re not equipped.
- This hybrid approach keeps costs down while reducing risk.
Best for:
First-time builders, busy owners, and anyone wanting speed, predictable cost, and engineered reassurance without a full custom design process.
Build Quality & SEO-ish Helpful Section
Key Details That Make Your Pole Barn Last (and Pass Inspection)
- Use proper treated lumber: Structural, ground-contact rated where applicable; don’t cheap out with deck boards pretending to be columns.
- Respect uplift and lateral loads: Concrete collars, proper brackets, through-bolts, and diagonal bracing are essential for storms and snow.
- Ventilation & moisture control: Ridge vents, soffit vents, house-wrap or condensation control under metal roofing help prevent rot, rust, and mold.
- Plan insulation early: Choose wall girt and roof systems compatible with batts, blown-in, or spray foam so you don’t fight your own building later.
- Doors & access: Oversize overhead doors are cheaper now than rebuilding an opening when you buy a bigger truck.
Conclusion with SEO Meta Info
Conclusion: Choose the Build Path That Matches Your Skills (and Sanity)
Building a pole barn isn’t mysterious: it’s about smart planning, solid foundations, straight posts, real bracing, and following engineered details. Whether you go classic in-ground, modern pier-and-bracket, or streamlined kit, you get the same payoffa strong, versatile structure that works as hard as you do.
Pick the method that fits your soil, codes, budget, and comfort level with tools. Get your permits, respect the math, and don’t rush the layout. Do that, and your “someday barn” turns into a reliable shop, garage, or multi-use HQ that you’ll brag about for years.
sapo: Thinking about building a pole barn for storage, a workshop, or a future barndominium? This in-depth guide breaks down three proven build methodstraditional in-ground posts, concrete pier systems, and DIY kitsso you can choose the right approach for your budget, soil, and skill level. From permits and layout to posts, trusses, roofing, and real-world pro tips, you’ll get a clear, practical roadmap to a strong, code-compliant pole barn that actually stands the test of time.
Extended Experience Section (~)
Real-World Experiences & Pro Tips for Building a Pole Barn (Extended)
Talk to anyone who’s built a pole barn and you’ll hear the same two confessions: “I wish I’d built it bigger,” and “I underestimated the wind.” Let’s turn those into your competitive advantage.
1. Go bigger (strategically). Many U.S. builders and kit suppliers report that one of the top regrets from customers is not adding an extra bay or a bit more height. That extra 8′ bay often adds a relatively small percentage to your total cost but massively boosts usabilityroom for a camper, car lift, or future enclosed office. If your budget can tolerate it and your lot allows it, add one size up from your “bare minimum.” Your future selfwith the bigger truck, more tools, or side hustlewill thank you.
2. Take layout seriously. Builders with years of post-frame experience will tell you: a crooked first row of posts haunts everything. Spend extra time on strings, diagonals, and temporary bracing. Check square after every key step (posts, trusses, doors). A laser level or builder’s level is worth borrowing or renting; eyeballing a 40′ run invites pain.
3. Respect temporary bracing like it’s permanent. Many “near miss” stories involve partially set trusses tipping in a gust because “we were just about to brace it.” Install diagonal bracing as you stand each frame line, not “later.” Lock trusses in pairs; never leave tall, unbraced walls overnight if wind is forecast.
4. Don’t cheap out on the unseen upgrades. A few subtle investments make a huge difference:
- Drip edge and closure strips to keep water and pests out at the eaves and ridge.
- Condensation control (barrier, insulated panels, or proper ventilation) under metal roofing.
- Heavier-gauge metal and quality fasteners that won’t twist, strip, or rust prematurely.
5. Match the method to your climate & soil. In wet, clay-heavy, or freeze–thaw-prone regions, many experienced builders lean toward concrete piers or brackets to keep wood elevated and reduce long-term concerns. In drier or traditional ag regions, embedded UC4B/UC4C posts remain common and reliable when drainage is good. If you’re unsure, talk to your local building official or a structural engineerthose 30 minutes of advice can save thousands.
6. Use your kit supplier like a partner, not a box store. Good kit companies provide engineered drawings, helplines, and construction guides. Send them photos if something doesn’t look right; ask before you “improvise” a connection. They’ve seen every mistake; let someone else’s mistake be your free education.
7. Plan utilities and interior from day one. Even if you’re not finishing the inside immediately, rough-plan where electrical panels, outlets, water lines, drains, or mini-splits might go. Leave wall cavities, header space, and conduit paths ready. It’s far easier to run conduit during framing than to cut into finished metal laterespecially when it’s 15°F and you’re regretting life choices.
8. Think resale and versatility. A well-built pole barn with engineered plans, documented footing details, and neat workmanship adds real property value. A wobbly “sketchy shed” does not. Choose methods and details that will look respectable to an inspector, appraiser, or future buyer: straight lines, proper hardware, labeled plans, and obvious code compliance.
Bottom line: the “right” way to build your pole barn isn’t about ego or overbuilding; it’s about choosing a method you can execute safely and correctly. Traditional in-ground, concrete piers with brackets, and high-quality kits are all proven paths. Pick one, commit to doing it right, and your pole barn will quietly become one of the most useful, satisfying projects on your property.