Table of Contents >> Show >> Hide
- Before You Start: Identify What Kind of “Wicker” You Have
- Way #1: Fix Loose Strands and Patch Small Breaks (Re-Weaving Lite)
- Way #2: Stabilize the Frame, Joints, and Sagging Seats (The “Stop the Wiggle” Repair)
- Way #3: Clean, Prep, and Refinish (Because Peeling Paint Is a Vibe Killer)
- Common Wicker Repair Mistakes (So Your Chair Doesn’t Become Modern Art)
- Experience Notes: What Repairs Really Feel Like (500-ish Words of Reality)
- Conclusion
Wicker furniture is basically the overachiever of the home decor world: it looks breezy and effortless while quietly collecting dust in 400 tiny crevices. And when it gets damaged, it can feel personallike your porch chair waited until guests arrived to start unraveling in dramatic slow motion.
The good news: most common wicker problems are fixable at home with a small toolkit, a little patience, and a willingness to say, “No, I meant to do that” only once. Below are three practical, DIY-friendly repair paths that cover the majority of wicker disastersloose strands, broken weave, wobbly frames, peeling paint, and that mysterious “why does this chair feel like a trampoline?” sag.
Before You Start: Identify What Kind of “Wicker” You Have
“Wicker” is a weaving style, not a single material. Your piece may be made from natural fibers (rattan, reed, cane, bamboo) or from synthetic resin (often used for outdoor patio sets). That matters because natural wicker can be soaked and re-woven; resin wicker behaves more like a tough, flexible plastic.
Quick ID test
- Natural wicker often shows subtle fiber texture and may feel dry or slightly rough. Broken pieces can splinter.
- Resin/synthetic wicker looks more uniform and “manufactured,” and breaks tend to look like snapped plastic strips.
Once you know what you’re dealing with, pick the repair method below that matches your damage. (And yes, you can combine themwicker repair is often a “while I’m in here…” situation.)
Way #1: Fix Loose Strands and Patch Small Breaks (Re-Weaving Lite)
This is the most common wicker issue: a strand pops loose, a wrap unravels around an arm or leg, or a small section snaps and leaves a pokey end that seems determined to catch every sweater you own. The goal here is to re-secure what’s loose and replace only what’s truly broken.
What you’ll need
- Vacuum with brush attachment or a soft brush
- Small scissors or flush cutters (for clean trimming)
- Flathead screwdriver or a dull butter knife (for tucking strands)
- Wood glue (for natural wicker) or a clear, strong adhesive suitable for your material
- Clothespins, painter’s tape, or small clamps
- For natural wicker repairs: matching reed/cane/rattan strands (craft stores and online suppliers carry “cane webbing” and reed sizes)
Step-by-step: Tuck and glue loose ends
- Clean the area first. Dirt prevents glue from bonding. Brush/vacuum dust out of the weave.
- Inspect the pattern. Look at how the strand travels over/under neighboring pieces so your fix blends in.
- Apply glue sparingly. Use a toothpick or small brush to place a tiny dot under a loose wrap or endthink “dew drop,” not “frosting.”
- Tuck it back in. Use a flathead screwdriver to nudge the strand into its original path and push the end under nearby weave.
- Hold while it sets. Tape, clamp, or clothespin the area so it dries in place without springing back out like a tiny wicker jack-in-the-box.
Step-by-step: Replace a broken strand (small patch)
- Trim damage cleanly. Cut out the broken piece back to stable, intact sections. Avoid yankingwicker loves revenge.
- Soak replacement material (natural wicker). Place your replacement reed/cane in warm water for about 20–30 minutes so it becomes flexible and less likely to crack mid-weave.
- Weave to match. Follow the original over-under pattern. Work slowly, keeping tension similar to the surrounding weave.
- Secure the ends. Dab glue where the strand terminates and tuck ends under adjacent weaving so they’re hidden and protected.
- Let it dry fully. Natural fibers shrink slightly as they dry, which can help tighten the repairone of the rare times “shrinking” is a good thing.
Pro tip: When “just one strand” isn’t just one strand
If you see multiple breaks in the same area (especially seats), it may be a stress zone. Patch repairs work best when the surrounding weave is still strong. If the area feels soft, crunchy, or brittle across a wider section, consider replacing a larger panel (or skip ahead to Way #2 for seat fixes).
Way #2: Stabilize the Frame, Joints, and Sagging Seats (The “Stop the Wiggle” Repair)
Wicker is often woven over a structural framewood, rattan poles, or metal. When the frame loosens, the weave can start failing faster. A chair that wobbles or a seat that sags is basically your furniture whispering, “Please fix my skeleton before I have a public collapse.”
What you’ll need
- Wood glue (for wood/rattan frames) and clamps
- Screwdriver (to tighten hardware)
- Sandpaper (fine grit) for smoothing splits or glue areas
- Replacement cane sheet/webbing and spline (for cane-style inset seats), if needed
A. Tighten and re-glue loose joints
- Check for movement. Gently wiggle arms, legs, and back supports to find where the looseness originates.
- Tighten hardware first. Some wicker pieces hide screws under wraps or capstighten anything accessible before gluing.
- Re-glue separated joints. If a wood or rattan joint is opening up, apply wood glue into the gap, press together, wipe excess, then clamp.
- Let it cure. Follow glue cure times“feels dry” isn’t the same as “ready for Uncle Mike to plop down confidently.”
B. Repair split rattan poles (minor cracks)
Small splits in rattan framing can often be stabilized: apply wood glue to the split, press it together, wipe excess, and clamp or tape until set. Smooth any roughness lightly after it cures so future wraps don’t snag.
C. Fix a sagging cane/wicker seat (replace the seat panel)
Some chairs have a woven “cane” seat panel held into a groove with a spline. When it sags, it’s usually stretched or damaged beyond simple tightening. Replacing that panel is more work than a patch, but it’s a real upgradelike giving your chair a new mattress instead of fluffing a sad pillow.
- Remove the old spline. Carefully pry out the spline from the groove (go slowly so you don’t damage the groove).
- Lift out the old cane panel. Clean the groove thoroughly.
- Soak the new cane panel. This improves flexibility so it can be pressed into the groove without cracking.
- Press the cane into place. Use a blunt tool to seat it evenly.
- Glue and install new spline. Tap it in gently and trim excess cane after it dries.
When to call a pro
If the frame is cracked through, the metal base is bent, or a large seat area has widespread brittle breakage, professional wicker restorers can rebuild sections with the correct materials and tension. If your piece is an antique or sentimental heirloom, outsourcing can be cheaper than “learning by accidentally destroying it.”
Way #3: Clean, Prep, and Refinish (Because Peeling Paint Is a Vibe Killer)
Many wicker pieces “look broken” when they’re actually just dirty, mildewed, or wearing a flaky paint job that makes them seem older than they are. Refinishing won’t fix structural damage, but it can protect repairs and make a thrift-store rescue look like a boutique find.
Step 1: Deep clean (without soaking your problems into bigger problems)
- Dust first. Vacuum with a brush attachment to pull grit out of the weave.
- Wash gently. Use mild soap and a damp cloth or soft brush. Avoid over-saturating natural wicker.
- For mildew: Use a vinegar-and-water solution, wipe affected areas, then wipe clean with water. Let dry completely.
Step 2: Sand and spot-prep
Light sanding helps primer and paint stickespecially on glossy or previously painted wicker. You’re not trying to erase the past; you’re just scuffing it enough that new finishes don’t slide off like they’re late for an appointment.
Step 3: Prime (especially for old paint or big color changes)
Primer is the “boring grown-up” step that makes everything else look better. Use a primer suited to your material (wood/natural fiber vs. plastic/resin). Apply light coats so you don’t fill the weave and lose texture.
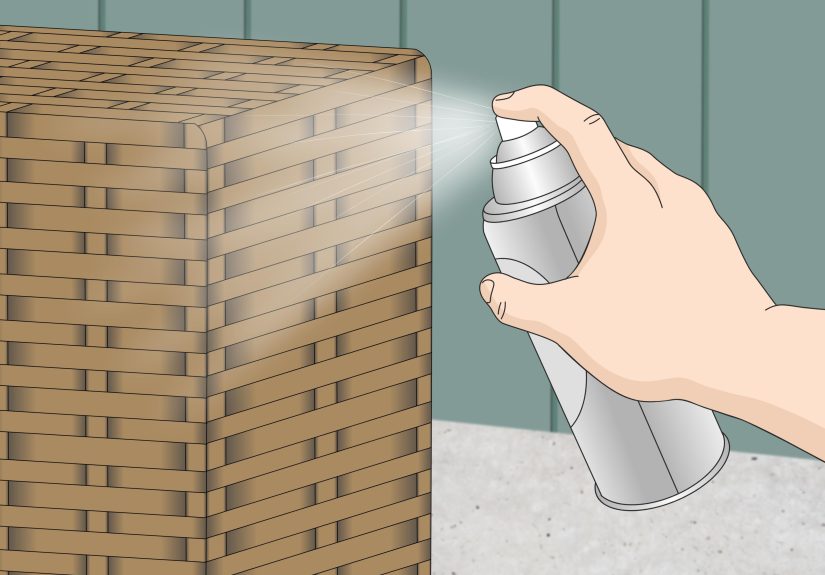
Step 4: Paint like you’re frosting a very detailed cake (aka: lightly)
- Work in thin coats. Multiple light passes beat one heavy coat that drips into every corner.
- Mind your distance. Keep the spray can at a steady distance to avoid runs and uneven coverage.
- Change angles. Paint vertically, then horizontally, and don’t forget the inside curves and underside.
- Let it cure. “Dry to the touch” is not the same as “ready for cushions and full use.” Give it real time to harden.
Optional: Add a protective topcoat
For high-use pieces or outdoor furniture, a compatible clear topcoat can improve durability. Just ensure it’s rated for your environment and won’t react with the paint (test a hidden spot if you’re unsure).
Mini checklists for outdoor success
- Let the piece dry fully after cleaningespecially after mildew treatment.
- Use products labeled for indoor/outdoor use if the piece lives on a porch or patio.
- Keep paint layers light so the weave stays crisp instead of “glazed.”
Common Wicker Repair Mistakes (So Your Chair Doesn’t Become Modern Art)
- Over-gluing: Excess glue turns into shiny blobs that collect dust forever. Use tiny amounts.
- Skipping cleaning: Glue and paint don’t bond well to grime. (Neither do friendships.)
- Rushing dry time: Wicker rewards patience. Sit too soon and you’ll undo your own work.
- Heavy paint coats: Thick paint fills the texture and can crack soonerespecially in outdoor temperature swings.
- Ignoring the frame: A stable frame prevents repeat weave failures. Fix the wiggle first.
Experience Notes: What Repairs Really Feel Like (500-ish Words of Reality)
Let’s talk about the part DIY tutorials politely skip: wicker repair is a little like detangling holiday lightsyou start confident, then you blink and suddenly it’s been 45 minutes and you’re negotiating with inanimate objects.
One of the most common “aha” moments people have is realizing that cleaning is half the repair. A chair that looks doomed can perk up dramatically after a good vacuuming and gentle wash. It’s not glamorous, but pulling grit out of the weave makes everything else easier: loose strands tuck back in more neatly, glue bonds better, and paint doesn’t turn into a gritty, lumpy texture that screams “I painted this during pollen season.”
Another real-world lesson: matching material matters more than matching color. When you’re replacing a strand, it’s tempting to grab “whatever is close.” But if the thickness is off, the repair will always look suspiciouslike a single shoelace in a basket of spaghetti. People who take five extra minutes to measure strand width and choose a similar reed/cane size usually get a patch that disappears once it dries and tightens. The soak-and-dry cycle is the unsung hero here: natural strands become flexible when soaked, then slightly tighten as they dry, which helps the repair feel integrated instead of “stuck on.”
Frame fixes are where many DIYers feel the biggest payoff. A wobbly chair can make perfectly fine wicker look broken because every sit shifts tension through the weave. Once a joint is re-glued and clamped, the whole piece often feels “newer” instantlylike your furniture just improved its posture. The trick is resisting the urge to test it every ten minutes. It’s very human to poke your repair and whisper, “Are we cured yet?” but glue does not respond well to impatience.
Painting brings its own character-building moments. The first coat can look disappointingpatchy, weirdly matte in some spots, too shiny in others. This is normal. Wicker has angles on angles, so coverage improves when you change spray direction and apply multiple light coats. People who go heavy to “finish faster” usually end up with drips that harden into permanent little paint stalactites. Meanwhile, folks who do light coats (and rotate the piece so they can hit hidden sides) get that clean, airy finish wicker is famous for.
Finally: the best “experience hack” is knowing when to stop. Wicker repair can spiral into a full makeovernew wrap here, new panel there, repaint, new cushions, maybe a new outdoor rug, maybe a new personality. If your chair is sturdy, safe, and no longer shedding wicker like it’s molting, you have succeeded. Walk away. Celebrate. Sit down carefully like a responsible adult who totally didn’t learn everything the hard way.
Conclusion
Repairing wicker furniture doesn’t require magical artisan powersjust the right approach for the damage. Start by securing loose strands and patching small breaks, stabilize the frame and joints so the weave isn’t under constant stress, and finish with a proper clean-and-refinish to protect your work and refresh the look. Do it right and your favorite wicker chair can keep living its best porch lifewithout trying to tattoo your legs with broken reed.