Table of Contents >> Show >> Hide
- Before You Start: A Quick Supply Checklist
- Step 1: Pick the Right Seeds (and Do the Timing Math)
- Step 2: Set Up a “Seed-Starting Station” You Can Actually Maintain
- Step 3: Use Fresh Seed-Starting Mix (Not Garden Dirt, Not Heavy Potting Soil)
- Step 4: Clean Containers and Label Everything Like a Responsible Future You
- Step 5: Sow Seeds Correctly (Depth, Spacing, and Moisture Matter)
- Step 6: Use Warmth for GerminationThen Cool It Down a Bit
- Step 7: Give Seedlings the Light They’re Actually Asking For
- Step 8: Water Smart, Add Airflow, and Prevent Damping-Off
- Step 9: Thin, Pot Up, Feed Lightly, and Harden Off Before Transplanting
- Troubleshooting: Fix Common Indoor Seed-Starting Problems Fast
- Putting It All Together: A Realistic Example (Tomatoes)
- Conclusion: Your Seed-Starting Success Is a System, Not a Talent
- Lessons from the Seed-Starting Trenches (Real-World Experience, ~)
Starting seeds indoors is basically giving your future garden a head startlike showing up to the airport early, but for tomatoes.
Done right, you’ll get sturdier plants, more variety than the sad “three-pack of mystery marigolds,” and the smug satisfaction of saying,
“Oh this? I started it from seed.”
Done wrong, you’ll get leggy seedlings that look like they’re auditioning for a spaghetti commercial, plus a tray of “what even is that?”
The good news: indoor seed starting isn’t complicatedit’s just a handful of small decisions that add up.
Follow the nine steps below and you’ll be transplanting confident little plants instead of hosting a plant hospital.
Before You Start: A Quick Supply Checklist
- Seeds (and the seed packetsdon’t toss the instructions like a rebel)
- Containers with drainage (cell trays, pots, soil blocks, recycled cups with holes)
- Fresh seed-starting mix (light, sterile-ish, drains well)
- Labels + permanent marker (your memory is not a label)
- Grow light or bright setup (a sunny window is often not enough)
- Humidity dome or plastic wrap (optional but helpful for germination)
- Heat mat (optional, but very helpful for warm-season crops)
- Sprayer or watering can + tray for bottom watering
- Small fan (optional, great for sturdier stems)
Step 1: Pick the Right Seeds (and Do the Timing Math)
The #1 beginner mistake is starting too early. Your seedlings don’t need a longer childhood indoorsthey need the right childhood.
Most plants want to be started a specific number of weeks before your area’s last expected frost date.
How to time it without losing your mind
- Find your local last frost date (based on your zip code/region).
- Check the seed packet for “start indoors X weeks before last frost.”
- Count backward on the calendar.
In general, many common garden favorites land around 6–8 weeks before last frost, but some take longer (hello, peppers),
and some don’t want indoor life at all.
Seeds that usually don’t love transplanting
Many root crops and fast growers (like carrots and beans) are often easier to direct sow outdoors.
Use your seed packet as the final boss of instructions.
Step 2: Set Up a “Seed-Starting Station” You Can Actually Maintain
You’re not building a NASA clean roomyou’re building a small, repeatable system that makes “daily check-ins” easy.
The best seed-starting setup is the one you’ll remember to water.
Where to put it
- Near an outlet (lights/heat mats love electricity)
- Easy to monitor (if it’s inconvenient, you’ll forget it exists)
- Protected from pets, toddlers, and accidental elbow sweeps
- Over something waterproof (trays save friendships and flooring)
A simple shelf + shop light + tray system is often more successful than “the sunniest window in the house,” especially in late winter.
Step 3: Use Fresh Seed-Starting Mix (Not Garden Dirt, Not Heavy Potting Soil)
Seed-starting mix is designed to be light and airy so tiny roots can move easily. Garden soil is heavy, inconsistent, and can carry pathogens.
Regular potting soil can work in a pinch, but many blends are too dense for the earliest stage.
How to prep your mix
- Pre-moisten it in a bucket: aim for “wrung-out sponge,” not “swamp.”
- Break up dry clumps so seeds have good contact with the mix.
- If your mix is very fine, avoid packing it downroots need oxygen, too.
Think of seed-starting mix like a mattress for seedlings: supportive, breathable, and not made of rocks.
Step 4: Clean Containers and Label Everything Like a Responsible Future You
Reusing trays and pots is greatuntil last year’s gunk becomes this year’s disease party.
Wash off old soil, then disinfect used containers before planting.
Simple sanitation that pays off
- Scrub containers with soapy water and rinse.
- Disinfect using a diluted bleach solution (common guidance is about 1 part bleach to 9 parts water), then rinse well.
- Let everything dry.
Safety note: don’t mix bleach with anything except water (and never with ammonia-based cleaners). Your lungs deserve better.
Labeling tips that prevent “mystery greens”
- Write variety name + sow date.
- Put one label inside the tray and one on the outside. Labels grow legs, apparently.
- Use waterproof marker, not “this pen seems fine.” It won’t be.
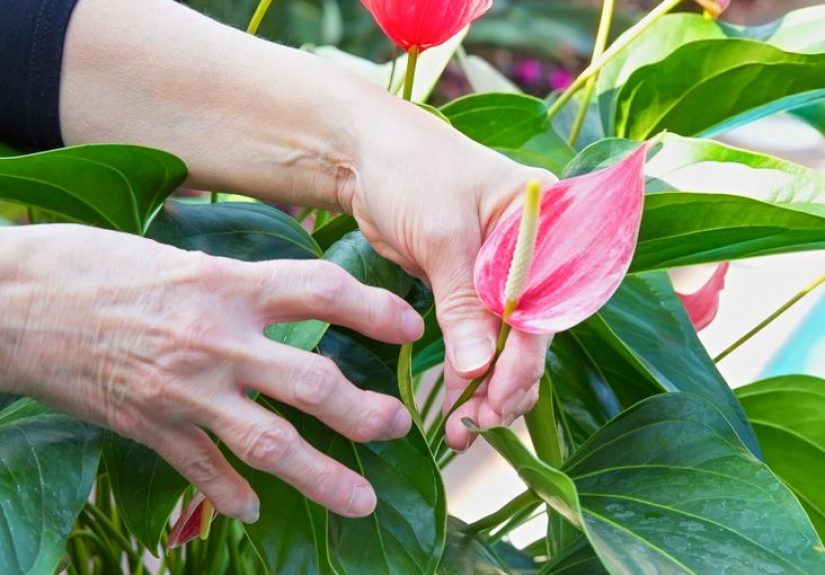
Step 5: Sow Seeds Correctly (Depth, Spacing, and Moisture Matter)
Seed packets are basically tiny instruction manuals. Follow them and you’ll avoid the two classic mistakes:
planting too deep (no sprout) or too shallow (seed dries out).
Depth rule of thumb
A common guideline is planting about 2–3 times as deep as the seed is wideunless the packet says
“needs light to germinate,” in which case you press the seed onto the surface and barely cover (or don’t cover).
Spacing rule of thumb
- If using cell packs: 1–2 seeds per cell (you can thin later).
- If using trays: sow in rows so you can identify/handle seedlings later.
- If you plant 12 seeds in one tiny cell, you’re not “saving space”you’re booking a fungal convention.
Humidity during germination
Cover trays with a dome or plastic wrap to hold humidity until germination. Once most seeds sprout, remove the cover
so airflow can do its job (and mold doesn’t).
Step 6: Use Warmth for GerminationThen Cool It Down a Bit
Many seeds germinate faster with warm soil. That’s why heat mats can be game-changers for warm-season crops
(tomatoes, peppers, eggplant) and slow germinators.
How to use a heat mat without cooking your future salad
- Use warmth primarily for germination, not forever.
- Once seedlings sprout, many do better at slightly cooler temperatures to prevent stretching.
- If you can, use a thermostat or at least monitor so the mix stays “warm,” not “sauna.”
Warm soil = faster sprouting. But after sprouting, seedlings need light and steadiness more than extra heat.
Step 7: Give Seedlings the Light They’re Actually Asking For
If you take only one thing from this article, make it this:
Most indoor seedlings need supplemental light. A window often produces seedlings that lean, stretch, and fall over like tiny drama queens.
Light duration
A common target is 14–16 hours of light per day for seedlings. Put lights on a timer so you don’t have to remember.
(Your future self will thank you. Your future self is also tired.)
Light distance
Keep lights close enough to be effective. For many common shop-light setups, that can mean just a few inches above the seedlings,
adjusting upward as they grow. Too far away is the fast track to leggy seedlings.
Signs your light is wrong
- Too little light: tall, thin, leaning seedlings; pale leaves
- Too much/too close: bleaching, dry leaf edges (less common with basic shop lights, more possible with strong LEDs)
Step 8: Water Smart, Add Airflow, and Prevent Damping-Off
Seedlings don’t need “lots of water.” They need consistent moisture plus oxygen.
Overwatering is the gateway drug to fungal problems, especially damping-off (when seedlings collapse at the soil line).
Bottom watering: the low-drama method
- Pour water into the tray under your containers.
- Let the mix wick moisture upward for 10–30 minutes.
- Pour off any extra water so roots aren’t sitting in a puddle.
Airflow: your secret weapon
- Remove humidity domes after most seeds germinate.
- Run a small fan nearby on low to strengthen stems and reduce fungal issues.
- Don’t crowd seedlingsthin them so leaves aren’t constantly touching.
Moisture cues you can trust
- Top of mix looks dry but the tray feels heavy? Probably fine.
- Mix feels dry and container is light? Time to water.
- Constantly wet surface + little airflow? That’s an invitation to trouble.
Step 9: Thin, Pot Up, Feed Lightly, and Harden Off Before Transplanting
Germination is only the opening act. The main event is growing sturdy transplants that can handle outdoor life
without collapsing in shock like someone who just discovered wind exists.
Thinning (yes, you have to)
If multiple seedlings sprout in one cell, keep the strongest and snip the others at the soil line.
Pulling can disturb roots. Snipping is quick, clean, and emotionally easier if you don’t make eye contact.
When to “pot up”
If seedlings outgrow their cellsroots circling, plants drying out fast, growth stallingmove them to a larger container
with fresh mix. Many long-season crops (like peppers) appreciate one upgrade before transplant day.
Feeding seedlings (don’t overdo it)
Seedlings typically don’t need fertilizer immediately. Once they’ve developed true leaves and start actively growing,
many gardeners use a dilute fertilizer (often around half-strength) to support steady growth.
The goal is healthy, not huge.
Hardening off: the “don’t get sunburned” boot camp
About 7–10 days before transplanting, gradually introduce seedlings to outdoor conditions:
shade first, then increasing time, brighter light, and a bit of wind. Bring plants inside at night if temperatures are too low.
This step dramatically improves transplant success.
Troubleshooting: Fix Common Indoor Seed-Starting Problems Fast
Problem: Leggy seedlings
- Likely cause: not enough light or lights too far away
- Fix: increase light intensity, move lights closer, add gentle airflow
- Extra tip: some plants (like tomatoes) can be planted deeper when potting up
Problem: White fuzzy mold on soil
- Likely cause: too much moisture + not enough airflow
- Fix: remove dome, water less often, add fan, scrape off top layer if needed
Problem: Seedlings collapsing at the soil line
- Likely cause: damping-off disease
- Fix: prevention is keyuse clean containers, fresh mix, avoid overwatering, improve airflow
Problem: Yellow, slow seedlings
- Likely cause: low light, too-wet roots, or nutrient shortage after true leaves appear
- Fix: improve light, let mix dry slightly between waterings, consider dilute feeding
Putting It All Together: A Realistic Example (Tomatoes)
- Week 0: Sow tomato seeds ~6–8 weeks before last frost. Keep warm for germination.
- Week 1–2: Sprouts appear. Remove humidity cover. Start strong light schedule.
- Week 3–4: Thin to one per cell. Begin gentle airflow. Water from below.
- Week 4–6: Pot up if needed. Feed lightly once true leaves are established.
- Final 7–10 days: Harden off gradually. Transplant after frost risk passes.
The biggest “pro move” here isn’t fancy gearit’s consistent light, careful watering, and not starting too early.
Conclusion: Your Seed-Starting Success Is a System, Not a Talent
Indoor seed starting is less about luck and more about stacking the odds:
clean containers, fresh mix, correct planting depth, warm germination, strong light, smart watering, and gradual hardening off.
Do those nine things and you’ll get stocky seedlings that look like they lift weights.
Start small your first year (a few trays, not a full indoor farm), take notes, and don’t panic when something goes weird.
Every gardener has grown at least one tray of “what in the world.” The difference is whether you learn from itand whether you labeled it.
Lessons from the Seed-Starting Trenches (Real-World Experience, ~)
If you’ve never started seeds indoors before, here’s the honest truth: your first season will teach you more than any checklist ever could.
Not because the process is hard, but because tiny plants are brutally honest about what they need. They don’t “kind of tolerate”
low lightthey stretch. They don’t “sort of accept” soggy soilthey sulk, stall, or topple over. The upside is that once you’ve seen
these signals a few times, you start catching problems early and fixing them fast.
One of the most common “aha” moments for new seed starters is realizing that light is not brightness to your eyes.
A room that looks perfectly bright to you can be dim to seedlings, especially in late winter when days are short and sun angles are low.
That’s why the first upgrade many gardeners make is a basic shop light and a timer. Suddenly, seedlings stop leaning like they’re
searching for salvation, and their stems thicken up. It feels like cheating, but it’s just physics.
The second big lesson usually shows up as a water-related misadventure. Beginners often water on a schedule (“every morning!”),
but seedlings prefer watering based on need. Bottom watering helps because it encourages roots to grow downward and keeps
the surface drierless fungus, fewer gnats, and less chance of washing seeds into awkward little clumps. Pair that with a small fan
and you get sturdier seedlings that handle transplant day like champs instead of fainting dramatically in the garden bed.
Then there’s the emotional roller coaster of thinning. It feels wrong the first time you snip perfectly healthy seedlings.
But overcrowding is a slow sabotage: cramped seedlings compete for light, stay damp longer, and invite disease. When you thin early,
the remaining plants grow faster and healthier. If it makes you feel better, call it “selective editing.” You’re not being mean
you’re being practical.
Finally, many gardeners learn that hardening off is not optional. Indoor seedlings live a pampered life: stable temperatures,
gentle air, and predictable light. Outside is chaoswind, direct sun, temperature swings. The first time you rush seedlings outdoors
without acclimating them, you may see sunscalded leaves or stalled growth. The next time, you’ll do the gradual shaded introduction
and you’ll watch plants transition smoothly, almost like they’ve been training for it. That’s the moment seed starting stops feeling
like a gamble and starts feeling like a skill you can repeat every season.