Table of Contents >> Show >> Hide
- Why Repurposed Tins Make Brilliant Storage
- Before You Start: Clean, Smooth, and Prep the Tin
- Creative Ways to Decorate Repurposed Tins
- Repurposed Tin Storage Ideas for Every Room
- Easy DIY Projects Using Repurposed Tins
- Design Tips for Making Tin Storage Look Stylish
- Common Mistakes to Avoid
- Experience Section: What Repurposed Tin Storage Teaches You Over Time
- Conclusion: Small Tins, Big Storage Personality
Some people see an empty soup can and think, “Trash.” Others see a tiny, budget-friendly storage hero wearing a paper label and smelling faintly of tomatoes. If you are in the second groupor you would like to berepurposed tins are one of the easiest ways to organize your home without buying yet another plastic bin that somehow creates more clutter than it solves.
Repurposed tins, also called upcycled tin cans or recycled food cans, are practical, charming, and surprisingly versatile. With a rinse, a little sanding, and a bit of creativity, cans that once held beans, coffee, tomatoes, tea, cookies, or mints can become desk organizers, craft supply holders, bathroom cups, pantry helpers, seed packet containers, utensil caddies, and tiny planters. In other words, they go from “where did I put the recycling?” to “why does my desk suddenly look like a boutique stationery shop?”
This guide explores how to turn old tins into thrifty, creative, and cute storage for almost every room. We will cover safety, cleaning, decorating, labeling, and specific storage ideas that look good enough to leave out in plain sight. No complicated tools, no mysterious craft jargon, and no need to own a glue gun named “Sir Melt-a-Lot”although, honestly, that would be adorable.
Why Repurposed Tins Make Brilliant Storage
The best storage solution is not always the most expensive one. Sometimes it is sitting in your recycling bin after taco night. Repurposed tins are sturdy, compact, easy to decorate, and available in many sizes. A small tuna can can organize paper clips. A tall coffee can can hold paintbrushes. A cookie tin can become a sewing kit. A tea tin can hide rubber bands, charger cords, or the mysterious collection of batteries that everyone owns but nobody trusts.
Upcycling tins also fits naturally into the “reduce, reuse, recycle” mindset. Recycling is valuable, but reusing an item first extends its life and reduces the need to buy new storage products. That is especially helpful in kitchens, offices, garages, craft rooms, and kids’ spaces where small objects multiply like they signed a secret lease.
The charm factor is real
Unlike plain plastic bins, tins have personality. Vintage cookie tins bring a cozy cottage feel. Matching painted cans can look modern and clean. Coffee cans wrapped in peel-and-stick wallpaper can create a coordinated home office look. Small mint tins can become travel-size organizers. The result is storage that feels collected, personal, and warm rather than sterile.
They are also delightfully cheap
The main material is already paid for when you buy the food. Most projects require only basic supplies: soap, a towel, sandpaper, paint, paper, fabric, twine, labels, adhesive, and maybe a piece of felt for the bottom. Even if you splurge on pretty drawer pulls or chalkboard labels, you are still spending far less than you would on store-bought organizers.
Before You Start: Clean, Smooth, and Prep the Tin
A cute storage tin should not attack your fingers. Before decorating, make sure each can or tin is safe, clean, and dry.
Step 1: Choose the right container
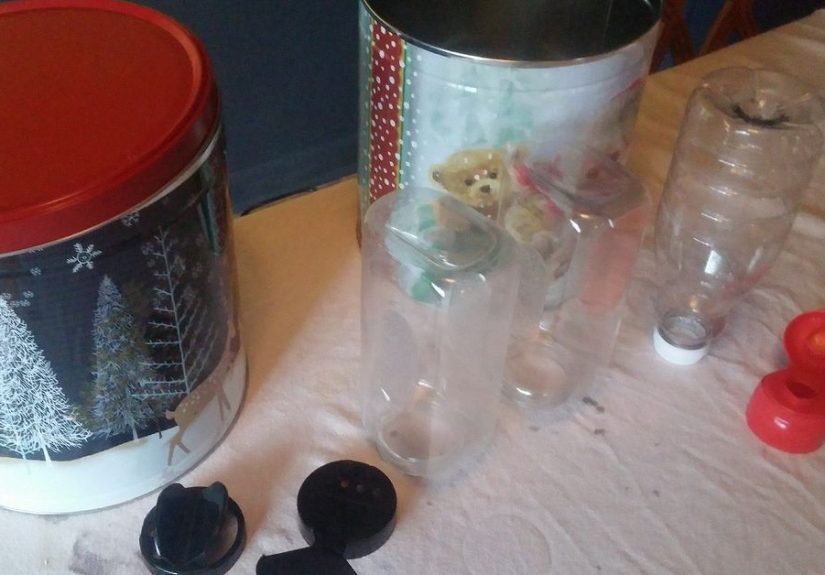
Good candidates include smooth-sided food cans, coffee cans, tea tins, cookie tins, spice tins, cocoa tins, and mint tins. Avoid cans that are deeply rusted, badly dented, sticky with old residue, or lined with mystery substances you cannot clean. If the container held strong-smelling food, such as fish, use extra care. Sometimes the best craft decision is admitting that a can has lived a full life and deserves retirement.
Step 2: Wash thoroughly
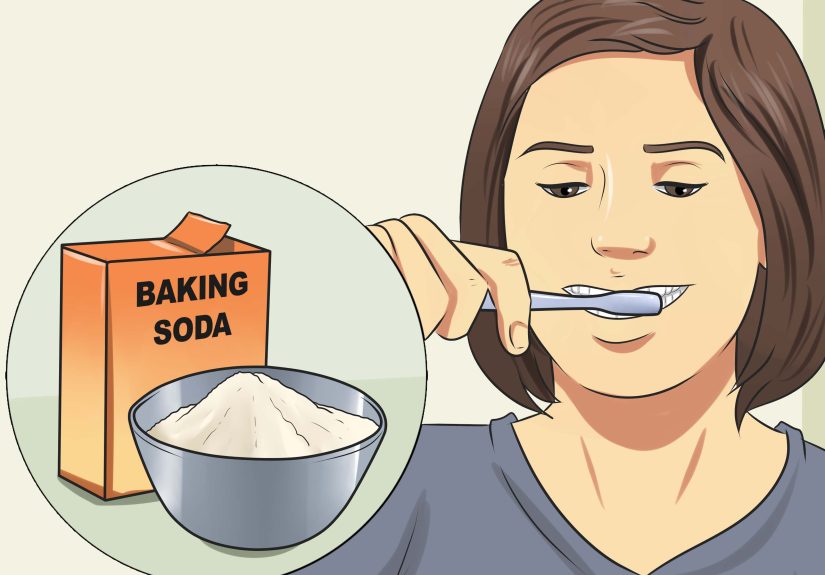
Remove the label and wash the tin with warm water and dish soap. For stubborn glue, soak the can briefly and use a gentle scrubber. Baking soda paste can help with odor and sticky spots. Dry the tin completely to reduce the chance of rust.
Step 3: Deal with sharp edges
Many modern can openers leave a smoother edge, but not all cans are friendly. Run your finger carefully near the rim without pressing hard. If it feels sharp, use fine-grit sandpaper, a metal file, or cover the rim with folded decorative tape, fabric trim, rope, or a strip of felt. For children’s storage, skip any can with a questionable rim. Tiny hands and sharp metal are not a charming combination.
Step 4: Decide whether it needs a liner
For craft supplies, office tools, wrapped snacks, and dry odds and ends, a clean tin is usually enough. For plants, add drainage holes or use a nursery pot inside the can. For bathroom items, add a protective interior coat or use the tin only for dry objects like cotton swabs, hair clips, and makeup brushes. Do not use repurposed tins for storing leftover food directly. If food has been opened, transfer leftovers to a proper food-safe glass or plastic container for better quality and freshness.
Creative Ways to Decorate Repurposed Tins
The magic of repurposed tin storage is that the same basic can can become rustic, colorful, minimalist, playful, or elegant depending on the finish. Here are easy decorating methods that work for beginners.
Painted tins
Paint is the fastest way to make mismatched cans look like a set. Use spray paint for an even finish or acrylic craft paint for small indoor projects. A primer helps paint stick better, especially on glossy metal. For a modern look, paint several cans in one color and label them neatly. For a cheerful craft room, use a rainbow palette. For farmhouse style, try soft white, sage green, navy, or matte black.
Wrapped tins
Wrapping tins is nearly foolproof. Use scrapbook paper, wallpaper scraps, contact paper, fabric, burlap, maps, old book pages, or gift wrap. Cut the material to size, attach it with double-sided tape or decoupage glue, and smooth out bubbles. This is a great way to make storage match a room without painting.
Twine, rope, and ribbon
For texture, wrap a tin with jute twine, cotton cord, macramé rope, ribbon, or yarn. Start at the bottom, glue as you go, and keep the rows snug. The result works beautifully for boho desks, rustic bathrooms, and cozy kitchen counters. It also hides dents like a tiny sweater.
Labels that actually help
Cute storage is only useful if you know what is inside. Add chalkboard labels, sticker labels, stamped tags, painted wooden tags, or simple handwritten labels. Use clear names like “markers,” “rubber bands,” “seed packets,” “paint brushes,” or “charging cords.” Avoid labels like “miscellaneous,” which is just clutter wearing a tuxedo.
Repurposed Tin Storage Ideas for Every Room
Once your tins are clean and decorated, the fun begins. Here are practical ideas for turning them into hardworking storage throughout the home.
Desk and home office organizers
Tall cans are perfect for pens, pencils, scissors, rulers, and paintbrushes. Short cans can hold paper clips, binder clips, erasers, thumbtacks, and sticky notes. For a unified desk organizer, glue three to six cans onto a scrap wood base. Arrange them in a row, cluster them like a bouquet, or mount them horizontally for a cubby-style effect.
If your desk is small, attach decorated cans to a wall board or pegboard. This keeps supplies visible and off the work surface. A magnetic strip can also hold small metal tins filled with push pins, staples, or rubber bands.
Craft room storage
Craft supplies are famous for spreading across a room with the confidence of glitter at a birthday party. Repurposed tins can tame the chaos. Use coffee cans for knitting needles, paintbrushes, or rolls of vinyl. Use soup cans for markers, colored pencils, glue sticks, and scissors. Use cookie tins for embroidery floss, beads, buttons, stamps, and washi tape.
For an extra organized setup, group tins by category and color. For example, one row for drawing tools, one row for adhesives, and one row for sewing notions. Clear labels make cleanup easier, especially if several people use the space.
Kitchen counter and pantry helpers
Repurposed tins can organize kitchen tools without touching food directly. Use large cans as utensil caddies for spatulas, wooden spoons, whisks, and serving tongs. Decorated cans also work well for napkins, paper straws, wrapped tea bags, clothespins, twist ties, or reusable produce bags.
In the pantry, tins can corral small packaged items such as seasoning packets, snack bars, birthday candles, cupcake liners, and tea envelopes. A cookie tin can store cookie cutters, icing tips, or food coloring bottles. Just remember: if you are storing unwrapped food, choose a container designed for food storage instead.
Bathroom storage
Bathrooms need small storage more than almost any room. Repurposed tins can hold cotton balls, cotton swabs, hair ties, makeup brushes, combs, nail files, and travel-size toiletries. Use moisture-resistant finishes and keep tins away from standing water. For a polished look, wrap cans in peel-and-stick marble paper or paint them in soft neutrals.
Small mint tins are especially useful for bobby pins, safety pins, and spare buttons. They fit neatly in drawers, toiletry bags, and purses. A labeled mint tin for “emergency hair ties” is the sort of small household upgrade that feels silly until the exact moment it saves your morning.
Kids’ room and homework station
For children, tins can make cleanup more visual and fun. Use smooth, safe cans only. Decorate them with bright colors, stickers, or animal faces. Store crayons, chalk, glue sticks, small building blocks, toy cars, game pieces, and flash cards. Attach several cans to a tray or board to create a portable homework station.
Because kids are honest critics, involve them in the decorating. If they help choose the color or label, they are more likely to use the organizer. No guarantees, of course. Children can ignore a laundry hamper from two feet away with Olympic-level focus.
Entryway drop zones
An entryway needs storage that catches clutter before it migrates into the living room. Use tins for keys, sunglasses, dog waste bags, lip balm, transit cards, and loose change. A wide cookie tin can become a mail tray, while a small tin can hold spare charging cables near a console table.
Give each family member a labeled tin for daily pocket items. This makes mornings smoother because everyone knows where to find the little things that usually vanish right before leaving the house.
Garage and workshop storage
Repurposed tins are tough enough for garage duty. Use them for screws, nails, washers, zip ties, drill bits, paint stir sticks, sandpaper scraps, and small hand tools. Attach cans to a pegboard or screw them to a wood strip for wall-mounted storage. If the tins are holding heavy hardware, secure them well and avoid flimsy adhesive.
For safer workshop organization, label everything clearly. Hardware looks suspiciously similar when you are holding a project together with one hand and searching with the other.
Garden shed and potting bench storage
In the garden area, tins can store seed packets, plant markers, twine, gloves, small clips, and hand tools. Larger cans make charming planters for herbs and succulents when prepared correctly. Add drainage holes, use potting mix, and avoid overwatering. If you want to protect the can, slip a plastic nursery pot inside instead of planting directly in the metal.
Painted cans can also become cute labels for garden zones or seasonal seed kits. A tea tin labeled “spring herbs” or “fall flowers” makes planning feel more intentionaland much prettier than a pile of packets hiding under the trowel.
Easy DIY Projects Using Repurposed Tins
Ready for specific projects? These ideas are beginner-friendly and useful enough to keep.
1. The three-can desk caddy
Clean three cans of different heights. Paint them the same color or wrap them in coordinating paper. Glue them together in a triangular cluster and add felt to the bottom. Use the tallest can for scissors and rulers, the medium can for pens, and the smallest can for clips or erasers.
2. The cookie tin sewing kit
Line a cookie tin with fabric or felt. Add small tins or cardboard dividers inside for buttons, needles, thread, measuring tape, and safety pins. Glue a small pincushion to the inside of the lid if you want a tidy all-in-one kit. This is also a thoughtful handmade gift for someone moving into their first apartment.
3. The magnetic spice-style supply tins
Use small metal tins with secure lids for paper clips, push pins, beads, or tiny craft parts. Add labels to the lids and attach magnets to the back if needed. Stick them to a metal board, filing cabinet, or magnetic strip. This turns tiny items into visible storage instead of drawer confetti.
4. The utensil party caddy
Decorate three large cans and label them “forks,” “spoons,” and “napkins.” Place them in a shallow tray for cookouts, birthday parties, or holiday buffets. The setup looks intentional, costs very little, and prevents guests from opening every drawer in your kitchen while asking, “Where do you keep the forks?”
5. The mini planter row
Prepare several cans with drainage holes or use removable nursery pots inside. Paint the cans in a matching palette and plant herbs or succulents. Place them on a windowsill, shelf, or balcony table. Add simple plant labels for basil, mint, parsley, or thyme. Cute, useful, and only slightly smug in the best possible way.
Design Tips for Making Tin Storage Look Stylish
The difference between “upcycled chic” and “I forgot to take out the recycling” often comes down to consistency. Here are simple design rules that make repurposed tins look polished.
Use repetition
One random can may look accidental. Five matching cans look like a system. Repeat color, label style, material, or shape to create visual order. Even mismatched vintage tins can look intentional when grouped by theme or color family.
Choose a room palette
For a calm office, try white, black, wood tones, or muted blue. For a craft room, use bright colors. For a farmhouse kitchen, use cream, sage, navy, or galvanized metal. For a child’s space, go playful with primary colors or animal designs.
Mix open and closed storage
Open cans are great for items you use daily, such as pens or brushes. Lidded tins are better for objects that look messy, such as batteries, tape rolls, game pieces, and hardware. A good storage setup hides what should be hidden and displays what is easy on the eyes.
Protect surfaces
Metal can scratch wood or painted shelves. Add felt pads, cork circles, or fabric to the bottom. This tiny step makes the project feel finished and prevents the “cute organizer” from becoming “the thing that scraped Grandma’s table.”
Common Mistakes to Avoid
Repurposed tin projects are simple, but a few mistakes can make them less useful.
Ignoring sharp rims
Always check the rim. Sand it, cover it, or choose another container. Safety matters more than cuteness, even if the paper pattern has tiny lemons on it.
Using tins in wet areas without protection
Metal can rust when exposed to moisture. In bathrooms, laundry rooms, and garden sheds, keep tins dry or use a protective finish. For planters, drainage and liners help extend the life of the container.
Overdecorating
A tin does not need paint, glitter, lace, ribbon, stickers, rhinestones, and three labels. Pick one main style and let the shape do some of the work. The goal is cute storage, not a can wearing a parade float.
Making storage too vague
If everything becomes a “stuff tin,” clutter wins. Assign each tin a clear job. One tin for pencils. One for receipts. One for seed packets. One for hair ties. Specific storage creates habits; vague storage creates archaeological layers.
Experience Section: What Repurposed Tin Storage Teaches You Over Time
After working with repurposed tins for storage, the biggest lesson is that small containers change behavior. That may sound dramatic for something that once held crushed tomatoes, but it is true. A tin creates a boundary. When you place scissors, pens, and markers into separate cans, you stop treating the desk as one large junk drawer with legs. Suddenly, everything has a little parking spot.
One of the most satisfying experiences is turning a messy drawer into a set of small zones. Short tuna cans or shallow tins can hold rubber bands, binder clips, buttons, batteries, and thumbtacks. Before organizing, the drawer feels like a tiny junk swamp. After adding tins, it becomes searchable. You open it and actually see things. This is thrilling in a very adult way, like finding a matching food storage lid on the first try.
Another useful discovery is that repurposed tins make creative supplies more inviting. When paintbrushes sit upright in a decorated coffee can, they are easier to grab. When colored pencils are sorted by color in soup cans, children use them more often. When washi tape lives in a cookie tin instead of rolling around loose, the craft table feels calmer. Organization is not only about neatness; it also removes friction. The easier supplies are to see and reach, the more likely you are to start a project.
There is also a pleasant emotional side to using tins. A vintage cookie tin from a holiday, a tea tin with a beautiful pattern, or a coffee can wrapped in leftover wallpaper carries more character than a store-bought bin. It gives a room a handmade feeling. It says, “Someone cared enough to make this useful again.” That small bit of personality matters, especially in workspaces and kitchens where practical objects often dominate.
The trial-and-error part is real, too. Not every tin deserves a second career. Some cans hold odors. Some labels refuse to leave peacefully. Some edges are too sharp to be worth the effort. Over time, you learn to save the good ones: smooth-sided cans, sturdy tins with lids, attractive tea containers, and wide cookie tins. You also learn that drying matters. A can put away damp can rust, and rust is not “vintage charm.” It is a warning sign wearing orange.
The best projects are usually the simplest. A painted can with a clean label often looks better than a heavily decorated one. A set of three matching tins on a desk can feel more elegant than a complicated organizer from a store. A mint tin in a travel bag can hold safety pins, earrings, medication packets, or tiny sewing supplies. These small wins build momentum. Once you repurpose one tin, you start seeing possibilities everywhere.
Most importantly, repurposed tin storage teaches that organization does not have to be expensive or perfect. You do not need a full weekend, a professional system, or a shopping cart full of matching containers. You can begin with one clean can, one label, and one messy corner. That is the charm of this project: it is humble, useful, and forgiving. Even if your first wrapped tin has a wrinkle in the paper, it still holds pencils. And frankly, so do we all.
Conclusion: Small Tins, Big Storage Personality
Repurposed tins prove that practical storage can be affordable, sustainable, and genuinely cute. With a little cleaning, smoothing, decorating, and labeling, ordinary food cans and old tins can organize desks, craft rooms, kitchens, bathrooms, kids’ spaces, garages, and garden sheds. They reduce waste, save money, and add personality to everyday routines.
The secret is to match the tin to the task. Use tall cans for upright tools, shallow tins for drawer dividers, lidded tins for hidden clutter, and decorative tins for visible storage. Keep safety in mind, avoid direct food storage, protect against moisture, and choose a consistent style for a polished look.
In a world full of expensive organizing products, repurposed tins are refreshingly low-pressure. They do not promise to transform your entire life by Tuesday. They simply hold the pens, the buttons, the seed packets, the hair ties, and the tiny things that make a home feel chaotic when they roam free. And for something that started as a can of beans, that is a pretty impressive promotion.
Note: This article is written in original American English for web publication and is based on practical home organization, safe reuse, recycling, and DIY crafting principles from reputable U.S. home, lifestyle, and public guidance sources.