Table of Contents >> Show >> Hide
- What Makes a Pergola an “Outdoor Retreat” (Not Just Some Posts in the Yard)
- Planning Your DIY Pergola Like a Pro (So You Don’t Rebuild It Like a Pro, Too)
- Permits, Codes, and the Unsexy Stuff That Saves Your Weekend
- Materials and Hardware That Keep Your Pergola Standing (and Looking Good)
- Foundation Options: The Part Nobody Posts on Instagram (But Everyone Should)
- Step-by-Step: How to Build a Pergola Frame
- Shade and Roof Options: From “Dappled Light” to “All-Weather Hangout”
- Design Details That Make It Look Custom (Not Like a “Lumber Receipt”)
- Finishing and Maintenance: Make It Last (So You Don’t Build It Twice)
- Common DIY Pergola Mistakes (and How to Avoid Them)
- A Realistic Example: A 12×14 Backyard Pergola Plan (Concept)
- Conclusion: Your Outdoor Retreat Starts With Four Posts and a Plan
- Extra: of Real-World Pergola Experience (So You Feel Seen)
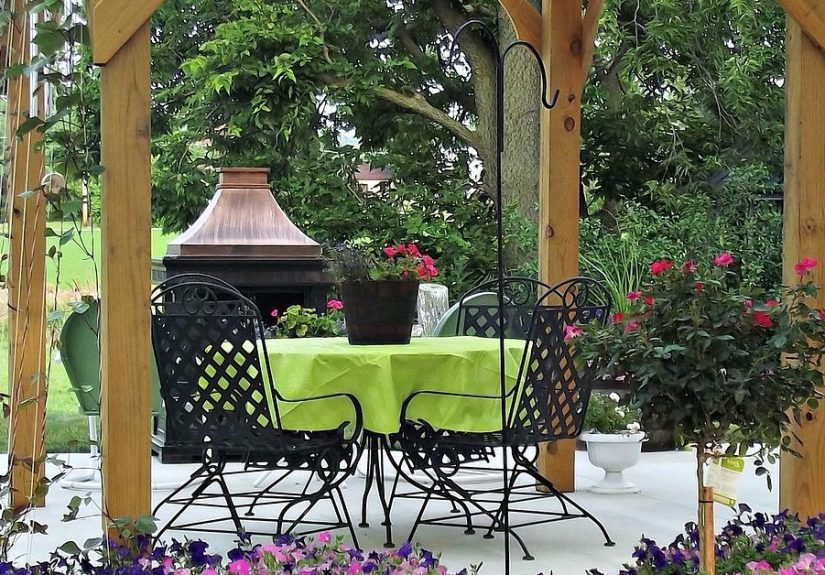
A pergola is the backyard equivalent of putting on a good blazer: it instantly makes everything look more put-together, even if you’re still wearing flip-flops. It frames a space, softens harsh sun into that “vacation dapple,” and gives you a place to hang lights, swing chairs, vines, or your sense of accomplishment.
If you’ve been searching “DIY pergola” at midnight (no judgment) and wondering if you can really build one yourself: yes. You absolutely can. You just need a plan, the right materials, and the emotional strength to accept that you’ll measure a board three times and still cut it 1/8-inch short because the universe enjoys comedy.
This guide walks you through how to build your own pergola for an outdoor retreatdesign choices, foundations, framing, hardware, shade options, finishing, and the mistakes you can avoid without learning them “the fun way.”
What Makes a Pergola an “Outdoor Retreat” (Not Just Some Posts in the Yard)
A pergola becomes a retreat when it does three things well: defines a destination, adds comfort, and creates mood. That means thinking beyond the frame.
- Destination: Place it where you naturally want to sitnear the grill, by the garden, beside the pool, or off the back door.
- Comfort: Plan for shade, airflow, and enough clearance for furniture and foot traffic.
- Mood: Lighting, greenery, and finishes turn “structure” into “stay awhile.”
Planning Your DIY Pergola Like a Pro (So You Don’t Rebuild It Like a Pro, Too)
1) Choose the right location
Start with sun, wind, and how you actually live. Morning coffee spot? Afternoon shade for kids? Dinner area that won’t blast you with sunset glare? Observe the yard for a day, then decide.
- Sun path: Afternoon sun is the usual culprit. Aim shade coverage toward the west/southwest side if possible.
- Wind exposure: Pergolas can catch windespecially if you add a canopy or privacy panelsso anchoring matters.
- Drainage: Avoid low spots that stay soggy. Wet feet are not “retreat vibes.”
2) Size it for people, not just patios
A common DIY pergola size is around 10×10, 10×12, or 12×14, but the “right” size is the one that fits your furniture layout with breathing room.
- For a dining table: allow at least 36 inches behind chairs for easy movement.
- For a lounge setup: plan the pergola footprint so the seating area sits fully “inside” the posts.
- For a grill zone: keep overhead elements away from heat and smoke; consider an offset pergola or partial coverage.
3) Freestanding vs. attached (and why attached can be trickier)
Freestanding pergolas are simpler because you’re building a complete structure on its own footings. Attached pergolas can look seamless, but the ledger connection into a house demands careful waterproofing and proper fastening into structural framingnot just siding. If you’re not confident in that, go freestanding or consult a pro for the attachment details.
Permits, Codes, and the Unsexy Stuff That Saves Your Weekend
Whether you need a permit depends on your city/county and the pergola’s size, height, roof coverage, and whether it’s attached to the house. Some places treat a pergola as an accessory structure; others care mostly when it’s roofed or wired for electricity.
The golden rules:
- Call before you dig: Have utilities marked so you don’t discover your gas line the dramatic way.
- Respect setbacks: Property line distances vary. Check before you pour anything permanent.
- Build for loads: Even an “open” pergola must resist wind and uplift; added canopies or panels increase forces.
Materials and Hardware That Keep Your Pergola Standing (and Looking Good)
Best wood choices for a backyard pergola
- Cedar: Naturally rot-resistant, lighter weight, easy to work, smells great, and looks upscale with stain or oil.
- Redwood: Beautiful and durable (availability and cost vary by region).
- Pressure-treated pine: Budget-friendly and strong, but can twist as it drieschoose straight boards and let them acclimate.
- Douglas fir or other structural lumber: Strong and clean-looking when sealed well, depending on your climate.
If you want a super-low-maintenance option, there are also aluminum or composite pergola systems and kitsbut this article focuses on building a wood pergola because it’s customizable, classic, and satisfying in a “look what my hands did” way.
Posts, beams, rafters: practical sizing guidance
Dimensions depend on span, spacing, and local requirements, but these are common DIY starting points for a medium-size pergola:
- Posts: 6×6 is common for a sturdy feel and better resistance to racking than 4×4.
- Beams: Often doubled-up 2×8, 2×10, or 2×12 on each side (laminated beams) depending on span and design.
- Rafters: Commonly 2×6 or 2×8 with spacing around 16–24 inches on center, depending on the look and shade you want.
If you’re going big (long spans, roof panels, heavy shade systems), treat it like a structural project: confirm sizing with span tables, an engineered kit, or a local professional.
Hardware matters more than you think
Outdoor structures live in weather. Use exterior-rated fasteners and connectors:
- Hot-dipped galvanized or stainless steel bolts/screws where appropriate.
- Post bases to keep wood off concrete and reduce rot risk.
- Structural connectors (angles, ties, brackets) to resist uplift and lateral loads.
Also: don’t mix incompatible fasteners with certain treated lumber unless the hardware is rated for it. Corrosion is sneaky and patient.
Foundation Options: The Part Nobody Posts on Instagram (But Everyone Should)
Option A: Concrete footings (most common for freestanding pergolas)
For a typical freestanding pergola, concrete footings are the classic choice. In many climates, footings need to extend below the local frost line to reduce heaving. Diameter and depth depend on soil and loads; your local building department can tell you the standard.
Option B: Concrete slab or patio (post bases anchored to concrete)
If you’re building on an existing slab, you can anchor post bases with appropriate concrete anchorsassuming the slab is thick and sound enough. If it’s thin or cracked, you may need to cut sections and pour proper pads/footings beneath the posts.
Option C: Building over a deck (proceed with caution)
A pergola installed on a deck must transfer loads into the deck’s framingnot just the deck boards. This can involve blocking, through-bolting, and additional framing reinforcement. Wind uplift is a real concern because pergolas can behave like sails. If your deck wasn’t designed for it, reinforce before you build.
Step-by-Step: How to Build a Pergola Frame
Below is a practical flow used in many successful DIY pergola builds. Adjust details for your design, but keep the sequence: layout → footings → posts → beams → rafters → bracing → finishing.
Step 1: Lay out the footprint with string and square it
- Mark your corners with stakes.
- Run string lines and measure diagonals corner-to-corner.
- If the diagonals match, you’re square. If not, nudge until they do.
This is the moment where patience saves you hours later. A pergola that starts out of square ends up looking like it’s trying to wander off.
Step 2: Dig holes and pour footings (or set anchors)
Dig to code depth, form your footing if needed, and pour concrete. Many DIYers set anchor brackets into wet concrete or install post bases after curingeither can work with the right hardware and alignment.
- Keep post bases aligned to your layout lines.
- Let concrete cure per the mix instructions before loading it.
- Ensure bases elevate the wood so end grain isn’t sitting in moisture.
Step 3: Set posts plumb and temporarily brace
Stand each post, plumb it in both directions, and brace it with temporary 2x4s. Don’t “eyeball plumb.” Your eyes are wonderful, but they are also easily bribed by optimism.
Step 4: Install beams (the “big rectangle” stage)
Beams typically sit on top of posts or are notched into posts for better bearing, depending on your design and code guidance. Many builders bolt beams through the post with washers and nuts, or use rated structural connectors.
Tip: If you’re laminating double beams (two boards forming one beam), clamp them, predrill, and fasten in a consistent pattern for a clean look.
Step 5: Add knee braces for stiffness
Knee braces (diagonal braces between posts and beams) dramatically reduce sway. Even if you love the “clean modern” look, consider hidden bracing or robust connectorsbecause a wobbly pergola kills the vibe fast.
Step 6: Install rafters and purlins for shade
Rafters run across the top and define the style. Purlins (or stringers) often run perpendicular over rafters to add shade and detail. Use consistent spacing for a crisp look.
- Mark layout lines on beams for rafter spacing.
- Cut rafter tails (simple angle, curve, or decorative profile).
- Fasten rafters with exterior-rated fasteners or connectors.
Shade and Roof Options: From “Dappled Light” to “All-Weather Hangout”
Open-slat roof (classic pergola)
This is the traditional pergola top: rafters and purlins create partial shade. It feels airy, looks great, and still lets rain through. If you want “shade, not darkness,” this is the move.
Fabric canopy or shade sail (adjustable comfort)
Retractable canopies and shade sails are popular because they let you choose your level of sun exposure. Just remember: more fabric = more wind load. Make sure your anchors and connections are up to the job.
Polycarbonate panels or metal roofing (more coverage)
If you want rain protection, roof panels can turn a pergola into a patio cover. That’s awesomejust understand it may change permitting, framing requirements, and drainage planning. Add slope and direct water away from the house and footings.
Design Details That Make It Look Custom (Not Like a “Lumber Receipt”)
- Post wraps or trim collars: Add a finished base and hide minor imperfections.
- Decorative rafter tails: A simple template makes every cut match.
- Black hardware accents: Modern contrast that looks intentional (and hides dirt).
- Lighting: String lights, sconces, or low-voltage uplighting make it usable after sunset.
- Greenery: Climbing plants like jasmine or wisteria can be gorgeousjust confirm your structure can handle the added weight over time.
Finishing and Maintenance: Make It Last (So You Don’t Build It Twice)
Seal it early, especially the end grain
End grain soaks up water like a sponge at a pool party. Use a quality exterior sealer/stain and pay extra attention to cut ends.
Plan for annual checkups
- Tighten bolts if wood shrinks after drying.
- Inspect connectors for corrosion.
- Recoat stain/sealer as needed based on sun exposure.
Common DIY Pergola Mistakes (and How to Avoid Them)
- Skipping layout squaring: Fix it on paper/string, not with “creative trimming” later.
- Undersized posts or beams: A pergola should feel solid, not like a gentle suggestion of shade.
- Wood touching concrete: Use post bases to reduce rot at the bottom.
- Not enough bracing: Wind finds the weak points. Add knee braces or rated connectors.
- Buying lumber before final design: You’ll end up with a “bonus” stack of boards you swear you’ll use someday.
A Realistic Example: A 12×14 Backyard Pergola Plan (Concept)
Here’s a practical concept that DIYers often use as a starting point for a backyard pergola over a patio:
- Footprint: 12′ x 14′ freestanding pergola
- Posts: (4) 6×6 posts, anchored to concrete footings or slab with rated bases
- Beams: Double 2×10 beams on the long sides (depending on your span needs)
- Rafters: 2×6 rafters spaced evenly for the look you want (commonly 16–24″ o.c.)
- Purlins: 2×2 or 2×4 purlins for added shade and detail
- Finish: Exterior stain or oil + end-grain sealer; optional black accent hardware
Use this as a concept, then validate structural sizing and footing requirements with local guidance. The goal is a pergola that looks effortlessbecause you did the effort up front.
Conclusion: Your Outdoor Retreat Starts With Four Posts and a Plan
Building your own pergola is one of those rare DIY projects that’s both practical and brag-worthy. Done right, it creates a defined outdoor room, adds comfort, and gives your backyard a “destination” that feels like a mini getaway. Plan the layout, choose durable materials, anchor it properly, brace it like you mean it, and finish it so it survives real lifenot just the day you take the photo.
And when you’re sitting under it laterlights glowing, drink sweating, breeze doing its thingyou’ll realize the best part of a pergola isn’t just the shade. It’s the feeling that you built a place you actually want to be.
Extra: of Real-World Pergola Experience (So You Feel Seen)
Let’s talk about the part of building a pergola that most tutorials politely skip: the emotional journey. Because a DIY pergola is never just wood and hardware. It’s also you, standing in the aisle of the home improvement store, holding two different boxes of screws and whispering, “Are you… exterior-rated?” like you’re choosing a life partner.
First, there’s the lumber selection optimism. You’ll tell yourself, “I’ll just grab four straight 6×6 posts.” Then you discover that “straight” is a philosophical concept. You’ll sight down boards like you’re lining up a rifle shot, only to realize the fluorescent lighting is playing tricks on your soul. Pro tip from the field: pick the straightest boards you can, and accept that wood still has opinions. If you’re using pressure-treated lumber, it may twist as it dries so build square, brace well, and don’t panic when things look slightly different a week later. Tighten hardware after the wood settles.
Next comes the layout phase, where you’ll learn that “close enough” is not a measurement system. The diagonal-check method feels tedious until you install rafters and realize that being 3/4-inch out of square turns your clean, repeating spacing into modern art. The good news: the string-and-diagonal routine is one of the easiest ways to make your pergola look professional. It’s like ironing a shirtannoying, but you’ll notice if you skip it.
Then there’s the footing adventure. Digging holes sounds simple until the shovel hits a rock the size of a microwave. Or clay. Or roots. Or all three, teamed up like villains in an action movie. This is where you earn your pergola. Take breaks, keep the holes consistent, and remember: nobody posts photos of digging because it’s not cute, but it’s the reason the finished pergola feels solid. Also, if you’re anchoring to a slab, don’t cheap out on anchorssecure, rated connections are what keep a pergola from wobbling when the wind shows up uninvited.
A surprising moment happens when you set the posts and brace them: suddenly it looks like something. You’ll feel powerful. Briefly. Because after that comes the overhead work, where gravity gets a vote. Lifting beams is easier with a helper, temporary support blocks, and a plan that does not include balancing a 2×10 on your shoulder while texting your friend “u up?” for emergency assistance. If you can borrow a second set of hands, do it. If you can’t, build smart supports and go slow.
Finally, the best part: finishing touches. This is where your pergola becomes an outdoor retreat. Add lighting. Add a canopy. Train vines (carefully) or hang planters. Put out chairs you actually want to sit in. The structure is the skeleton; the comfort is the soul. And when someone says, “Wow, who built this?” you get to answer, “Me,” while casually pretending it was easy (it wasn’t, but that’s not the point).