Table of Contents >> Show >> Hide
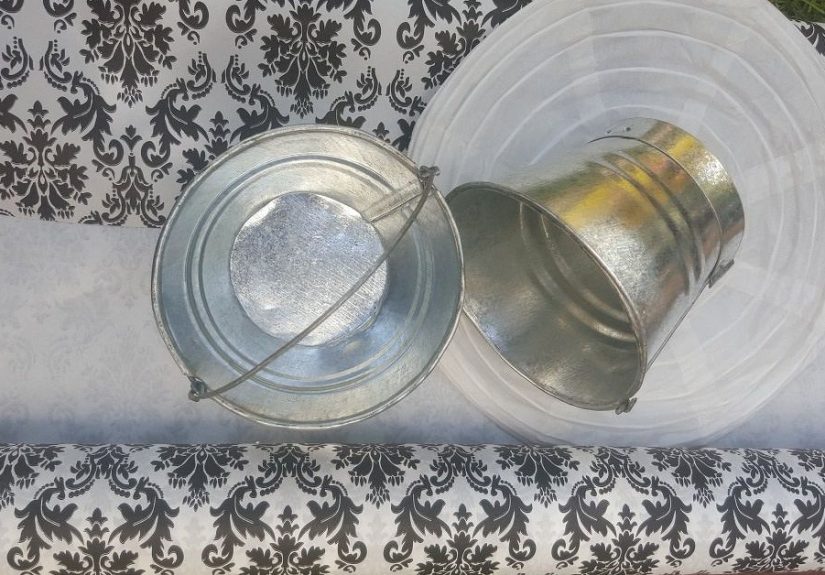
Got a stack of plain galvanized buckets and a guilty pile of leftover wrapping paper?
Perfect. Today we’re turning those humble metal pails into stylish, custom containers
that look like they came from a high-end home store (without the high-end price tag).
Think gift baskets, party centerpieces, porch planters, craft-room organizers…
all wrapped up in your favorite paper patterns.
This easy DIY project is inspired by the classic
“Cover Galvanized Buckets in Wrapping Paper” makeover: using decorative paper,
a little decoupage glue, and some simple embellishments to transform cheap
buckets into charming decor. Along the way, you’ll pick up tricks for working
with round metal surfaces, sealing paper so it survives real life, and styling
your new creations for holidays, storage, and year-round decorating.
Why Wrap Galvanized Buckets in Paper Instead of Painting?
Painting galvanized buckets can look beautiful, but wrapping them in paper has some
big advantages:
- <strongInstant style upgrade: Wrapping paper comes pre-loaded with patterns:
damask, florals, polka dots, stripes, seasonal prints, kids’ characters, you name it.
No artistic skills needed. - Budget-friendly: You can makeover a whole set of buckets with a single
roll of wrapping paper or even scraps left from the holidays. - Quick to change: Want a new look next season? You can rewrap or recover
the bucket with fresh paper instead of sanding and repainting. - Endless themes: Farmhouse, glam, rustic, minimalist, coastal, holiday…
there’s a wrapping paper for every decor style.
In other words, galvanized buckets give you the structure; wrapping paper gives you the
personality. Together, they become the ultimate flexible decor hack.
Supplies You’ll Need
You don’t need a full craft room to pull this off. Here’s a basic supply list
for your galvanized bucket makeover:
Core Materials
- Galvanized buckets (any size: mini favor pails, standard utility buckets, or oversized tubs)
- Decorative wrapping paper (standard or heavy-weight gift wrap works well)
- Decoupage medium or craft glue (like Mod Podge, matte or satin finish)
- Foam brush or soft paintbrush for applying glue
- Clear acrylic sealer spray (optional but recommended for durability)
Tools
- Scissors or a craft knife
- Measuring tape or flexible sewing tape
- Pencil or chalk for marking measurements
- Ruler or straightedge
- Clean, dry cloth for wiping the bucket
Optional Embellishments
- Ribbon, twine, or jute cord for the rim or handles
- Chalkboard labels or adhesive tags
- Beads, charms, or metal label holders
- Tissue paper or filler if using as a gift basket
Feel free to shop your home first. That leftover birthday paper, holiday wrap, or
pretty scrap you couldn’t bring yourself to toss? This is its moment.
Step-by-Step: How to Cover Galvanized Buckets in Wrapping Paper
Step 1: Prep the Bucket
Start with clean, dry buckets. Wipe each one down with a damp cloth to remove dust,
dirt, or oily fingerprints. If the bucket is especially shiny or slick, you can
lightly scuff the surface with very fine sandpaper so the glue grips better.
Make sure the bucket is completely dry before you move on. Moisture trapped under
paper is a fast track to wrinkles and bubbles.
Step 2: Measure the Bucket
Because most buckets are tapered (wider at the top than the bottom), you can’t just
wrap a rectangle and call it a day. You’ll get weird puckers. Instead:
- Use a flexible measuring tape to measure around the widest part of the bucket
(usually just below the rim). That’s your upper circumference. - Measure around the bottom as well. That’s your lower circumference.
- Measure the height of the area you want to wrap (maybe from just under the rim
to just above the bottom ridge).
If you’re not in the mood for geometry, there’s an easier hack: lay your bucket on
its side on a large piece of scrap paper, roll it edge-to-edge, and trace the path.
Cut that out to create a custom template, then trace the template onto your wrapping paper.
Step 3: Cut the Wrapping Paper
Transfer your measurements or template to the back of the wrapping paper. Add an extra
1/2 inch of width for overlap, and about 1/4 inch of extra height if you’d like to
tuck the paper slightly under the rim or over the bottom edge.
Cut carefully with scissors or a craft knife. If your paper has a directional pattern
(like text or vertical stripes), make sure it’s oriented the way you want it to appear
on the bucket.
Step 4: Apply Glue to the Bucket
Brush a thin, even layer of decoupage medium or craft glue onto a section of the
bucketstart with a 2–3 inch panel rather than coating the entire surface at once.
Working in smaller sections gives you more control and reduces bubbles.
Press the edge of your wrapping paper into the glue, lining it up with your starting
line vertically. Smooth it down with your fingers or a soft cloth.
Step 5: Wrap and Smooth
Continue brushing glue onto the bucket in sections and gradually wrapping the paper
around. As you go, gently smooth the paper to push out any air and ensure good contact.
Think of it like wrapping a gift, but your “box” is round and shiny.
If you see bubbles forming, lift the paper gently and reset it, or smooth from the
center outward. A few tiny wrinkles won’t be visible from a distance, so don’t panic.
When you reach the starting point, overlap the end of the paper over the first edge
by about 1/4–1/2 inch. Use extra glue at the seam so it stays flat.
Step 6: Tuck the Edges (Optional)
For a polished finish, you can tuck the top and bottom edges slightly:
- Top edge: Cut little notches or tabs into any extra paper that rises
above the rim. Add a bit of glue to each tab and fold it inside the bucket. - Bottom edge: If your bucket’s bottom has a lip, you can tuck the
paper under it the same way, or simply trim flush if the bottom won’t be seen.
If you prefer a super clean look, cut the paper so it ends exactly at the rim and
bottom line and skip the tucking step.
Step 7: Seal the Surface
Once the glue under the paper is dry to the touch, brush on a thin coat of decoupage
medium over the top of the paper. This seals the design and gives it a durable finish.
Let it dry completely. For extra protection (especially if you’ll use the bucket
outdoors or as a planter), finish with a light coat of clear acrylic spray sealer.
Use it in a well-ventilated area, following the label instructions.
Step 8: Add Final Embellishments
Now comes the fun styling:
- Wrap ribbon or twine around the bucket’s rim and tie in a bow.
- Add a chalkboard tag for names, labels, or seasonal messages.
- Glue on beads, charms, or a metal label holder for a “vintage crate” vibe.
- Line the inside with tissue or shred if you’re building a gift basket.
The goal is simple: make it look intentional, not like you were hiding a boring bucket
under leftover gift wrap (even if you absolutely were).
Creative Ways to Use Wrapped Galvanized Buckets
1. Gift Baskets for Every Occasion
A beautifully wrapped bucket makes an instant gift basket base. Match the paper to
your theme:
- Spa night: Soft florals or watercolor patterns with bath salts,
lotions, and a candle. - Coffee lover: Kraft-style paper with coffee cups, filled with
beans, a mug, and syrups. - Kids’ birthday: Bright character or cartoon wrapping paper with
small toys, coloring supplies, and snacks. - Holiday: Plaid or metallic paper filled with cookies, ornaments,
or hot cocoa mixes.
Bonus: the bucket itself becomes part of the gift as storage or decor.
2. Party and Event Centerpieces
Wrapped buckets make easy centerpieces for showers, weddings, backyard barbecues,
and seasonal parties. Fill them with:
- Fresh or faux flowers
- Utensils and napkins at a buffet
- Wrapped candy or favor bags
- Mini pumpkins, pinecones, or ornaments, depending on the season
Coordinate the paper with your table runner or napkins for a pulled-together look
that says “I planned this” even if you totally didn’t.
3. Storage That Doesn’t Look Like Storage
Use your wrapped buckets to corral the daily chaos:
- Craft supplies, markers, and scissors in the playroom
- Cleaning products under the sink
- Dog toys in the living room
- Gloves, hats, and scarves in the entryway
When storage looks pretty, it’s more fun to useand more likely to stay organized.
4. Seasonal Porch or Patio Decor
Slip a plastic liner or nursery pot inside and use your wrapped buckets as decorative
planters. Try:
- Bright florals in spring
- Herbs or succulents in summer
- Mums and mini pumpkins in fall
- Evergreens and fairy lights for winter holidays
Just remember that wrapping paper is not waterproof. If the bucket will live outside
or near water, keep it under a covered area and use extra sealer.
Tips, Tricks, and Troubleshooting
Dealing with Wrinkles and Bubbles
A few small wrinkles are normal, especially on tapered or curved surfaces. To keep
things looking neat:
- Use slightly thicker, higher-quality wrapping paper if you can. Ultra-thin paper
tears easily and shows every bump. - Work in small sections, smoothing as you go.
- If a big bubble appears, gently lift that area of paper, add a bit more glue,
and reset it.
What If the Paper Tears?
If your paper tears during wrapping:
- For a small tear, patch from the inside with a scrap of matching paper and seal
over it. Most people will never notice. - For major damage, peel the paper off while the glue is still wet and start again
with a fresh piece.
Choosing the Right Finish
The finish you choose will affect the final look:
- Matte: Gives a soft, paper-like, almost fabric feel. Great for
farmhouse or rustic styles. - Satin: A subtle sheen that looks polished but not too shiny.
- Gloss: Bold and bright, perfect for party or holiday designs.
You can also mix finishes: matte or satin for the paper, with a bit of glossy ribbon
or metallic embellishments for contrast.
Extra : Real-World Experiences and Pro Tips
After you’ve wrapped a few galvanized buckets, you start to pick up tiny tricks that
never show up in the basic instructions. Consider this your “talking to a friend
who’s already made a few mistakes so you don’t have to” section.
Lesson 1: Pattern Scale Matters
One of the first surprises people notice is how different a print looks once it’s
wrapped around a curved surface. A large floral that looked gorgeous on the roll can
suddenly feel overwhelming on a small bucketyou may only see half a rose and a random
leaf. Smaller-scale patterns (polka dots, small florals, tight geometrics) often read
more clearly on mini buckets and party favors.
For larger buckets or tubs, big damask or bold stripes create a statement piece. The
rule of thumb: the bigger the bucket, the bigger the pattern you can safely use
without losing detail.
Lesson 2: Don’t Skip the Test Piece
It’s tempting to jump straight in with your favorite expensive wrapping paper. Resist.
Always do a test wrap with a scrap firsteither on a spare bucket or on part of the
one you’re using. This test helps you figure out:
- How fast your glue dries
- Whether the paper bleeds or wrinkles easily
- How much overlap you really need at the seam
That five-minute test can save you from wasting a whole sheet of specialty paper.
Lesson 3: Handles Can Be TrickyWork Around Them
Many galvanized buckets have swinging handles. You have three main options:
- Remove the handle (if possible), wrap the bucket, then reattach it.
- Work underneath by pushing the handle up out of the way while you
glue and wrap. - Incorporate the handle by wrapping it with twine, ribbon, or
coordinating paper for a layered look.
If the handle constantly flops into your glue, use a bit of tape to hold it upright
until everything dries.
Lesson 4: Inside Finish vs. Bare Metal
You don’t have to decorate the inside of the bucket, but your choice depends on
how you’ll use it:
- For storage: Leaving the inside plain metal is fine and more durable.
- For gift baskets: Line the inside with tissue or fabric so the
recipient sees a soft backdrop, not a raw metal interior. - For planters: Keep the inside metal and use a plastic liner so
moisture doesn’t ruin your paper exterior.
Some crafters like to paint just the rim or the very top inch inside the bucket so
that when you look down, the inside color ties into the paper design. It’s a small
detail, but it looks very intentional.
Lesson 5: Storage and Longevity
Wrapped buckets are sturdier than they look, but they still appreciate a little
kindness:
- Avoid stacking them tightly inside each other if the rims might rub and scratch
the paper. - Store them in a dry place away from moisture and direct sunlight to prevent
fading and peeling. - If they get dusty, wipe gently with a soft, dry cloth instead of a wet rag.
With basic care, your wrapped buckets can last through multiple seasons, parties,
and decor rearrangements.
Lesson 6: Mix-and-Match Collections Look Amazing
One of the most satisfying ways to style these is in a group. Try wrapping several
buckets in coordinating papers:
- Same color palette, different patterns (stripes, tiny florals, dots)
- Same pattern in different colorways (all blues, or all neutrals)
- One bold “star” bucket and a few subtle supporting designs
Arrange them on a mantel, console table, or porch step with varying heights and
fillingsflowers in one, books or magazines in another, a candle in a third. Suddenly
your plain metal pails are a styled vignette.
Lesson 7: Make It a Group or Kids’ Project
This project is also fantastic for family craft nights, kids’ parties, or bridal
showers. Pre-cut the paper pieces, set up a “bucket bar” with different patterns and
embellishments, and let everyone design their own. Just protect your table with a
plastic cloth, because glue will happen.
Kids love choosing their own prints, and adults love leaving with a useful,
personalized piece they can actually use at home.
In the end, covering galvanized buckets in wrapping paper is one of those rare DIYs
that checks all the boxes: affordable, beginner-friendly, customizable, and genuinely
useful. Once you make one, you’ll start seeing every plain bucket and every roll of
paper as your next little makeover waiting to happen.
Conclusion
A simple galvanized bucket plus wrapping paper equals a surprisingly powerful decor
upgrade. Whether you’re pulling together last-minute gift baskets, styling a party,
organizing clutter, or refreshing your porch, these wrapped buckets offer a quick,
easy, and stylish solution. With the right paper, a bit of glue, and a few clever
embellishments, you’ll turn basic metal pails into personalized pieces that fit your
home, your event, and your personality perfectly.