Table of Contents >> Show >> Hide
- What Are Chalkboard Eggs (and Why Make Them)?
- Materials and Tools
- Before You Start: Food Safety and “Decor vs. Eat” Rules
- How to Make DIY Chalkboard Eggs (Step-by-Step)
- How to Keep Chalkboard Eggs Looking Great
- Pro Tips for Better-Looking Chalkboard Eggs
- Creative Ways to Use DIY Chalkboard Eggs
- Troubleshooting: Common Problems (and Fixes)
- 500+ Words of Real-World “DIY Chalkboard Eggs” Experiences (What Crafters Often Notice)
- Conclusion
If regular Easter eggs are the sweet, pastel choir… chalkboard eggs are the lead singer who shows up in sunglasses
and immediately starts taking requests. They’re reusable, customizable, and weirdly satisfying: paint an egg black,
“season” it like a tiny cast-iron skillet (but with chalk), and suddenly you’ve got a mini message board you can
doodle on, label, and erase over and over.
In this guide, we’ll cover the best materials (real eggs, wooden eggs, plastic eggs), the easiest painting methods,
how to prevent smudges and ghosting, and a bunch of clever ways to use chalkboard eggs beyond the classic “Happy Easter!”
You’ll also get a long, real-world “what actually happens” section at the endbecause crafts are fun, but they’re also
basically tiny science experiments conducted in a kitchen.
What Are Chalkboard Eggs (and Why Make Them)?
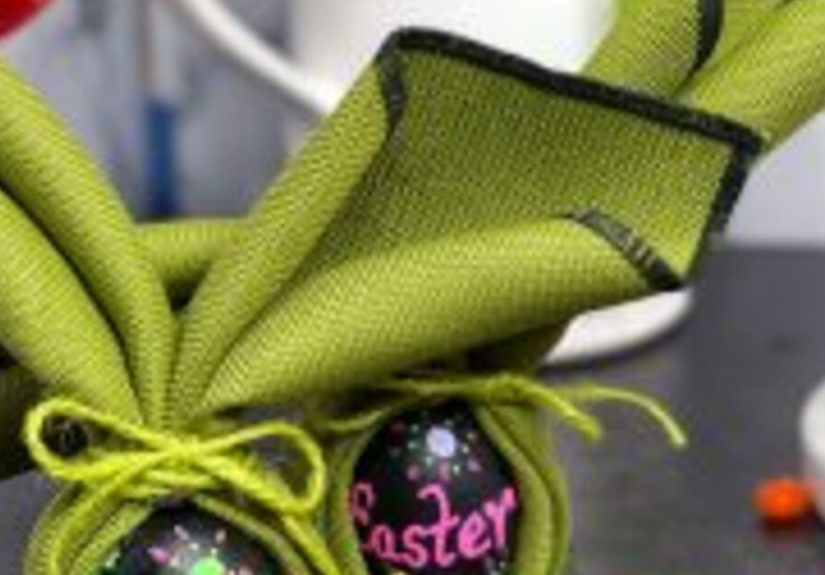
Chalkboard eggs are eggsreal or fauxcoated with chalkboard paint (or chalkboard-style coating) so you can write on them
with traditional chalk or liquid chalk markers. They work as:
- Easter table place cards (write names, menu notes, or “Reserved for the person who brought dessert”).
- Egg hunt clues (messages inside plastic eggs, or written on the outside if they’re decorative-only).
- Reusable decor (switch designs daily: bunnies today, spring quotes tomorrow).
- Mini learning tools (letters, simple math, spelling words for kidstiny blackboard, big energy).
Materials and Tools
Choose Your “Egg Base”
- Wooden eggs: The easiest and sturdiest. Great for kids, great for reusing year after year.
- Plastic eggs: Lightweight and unbreakable. Best if you want to put treats inside or use them for hunts
(decorative hunts, not “let’s eat these later” hunts). - Real eggs: You can use blown eggs (hollowed shells) for lightweight, traditional charm. Hard-boiled eggs
can be painted, but if you use non-food-safe coatings, treat them as decor-only.
Paint and Writing Supplies
- Chalkboard paint (brush-on) or chalkboard spray paint (faster coverage, more ventilation needed).
- Foam brush or small craft brush (smooth coats) and/or a fine sanding sponge.
- Painter’s tape (optional for patterns or clean lines).
- White chalk (classic) and/or liquid chalk markers for brighter, sharper writing.
- Egg holders: egg carton, ring stand, or a DIY setup (even a little foil nest works).
Optional (But Handy) Extras
- Primer (especially helpful on glossy plastic or very smooth wood).
- Matte clear sealer or water-based polyurethane (only if you want the writing to be more permanent).
- Rubbing alcohol (for cleaning plastic eggs) and mild soap/water for wood.
- Skewer + putty (helpful if you’re painting blown eggs by holding them from a hole).
Before You Start: Food Safety and “Decor vs. Eat” Rules
Let’s be crystal clear: chalkboard eggs are usually not meant to be eaten. Chalkboard paint, spray paint,
sealers, and many craft finishes are not food-safe.
- If you want eggs you can eat, stick to food-safe dyes and refrigerate promptly. Cooked eggs should not sit out
longer than about 2 hours (and less time in hot conditions). - If you want chalkboard eggs for décor, make a separate batch: use wooden, plastic, or blown eggs. This keeps your décor
adorable and your snack decisions smarter.
How to Make DIY Chalkboard Eggs (Step-by-Step)
Step 1: Prep Your Eggs for Paint
Wooden eggs: Wipe off dust. If the surface feels rough, lightly sand and wipe clean.
Plastic eggs: Wash with soap and water, dry completely, then wipe with rubbing alcohol to remove oils.
Blown eggs (real shells): Make sure they’re fully emptied, rinsed, and dried. Moisture is the enemy of good paint
adhesion and also the fastest route to “Why does my craft smell… suspicious?”
Step 2: Decide Your Finish: Full Chalkboard or “Dipped” Look
- Full coverage: The whole egg becomes a writable surfacebest for labeling and doodles.
- Dipped/half-and-half: Paint the top half (or bottom) for a modern look and an easier grip zone.
- Patterns: Use painter’s tape for stripes, zigzags, or a “tiny tuxedo egg” vibe.
Step 3: Apply Chalkboard Paint (Thin Coats Win)
Whether you brush or spray, your best friend is multiple thin coats. Thick coats can drip, look lumpy, and take
forever to cure (which is craft-speak for “still soft, still smudgy, still ruining your day”).
Brush-on method:
- Place eggs in a carton or stand so they don’t roll away like tiny escape artists.
- Stir paint well. Apply a thin coat with a foam brush for fewer streaks.
- Let dry fully, then apply 2–3 coats total for solid coverage.
- If needed, lightly sand between coats for extra smoothness (especially on wooden eggs).
Spray method:
- Work outside or in a well-ventilated area. Protect surfaces.
- Spray light passes from different angles (don’t “flood” the egg).
- Let dry and recoat as directed. Usually 2–3 coats looks best.
Step 4: Let Them Cure (Yes, This Matters)
Dry-to-the-touch is not the same as fully cured. If you write on chalkboard paint too early, you can scratch, smudge,
or “ghost” the surface (faint leftovers from earlier writing).
A good rule of thumb: let chalkboard paint cure for at least 24–72 hours depending on the brand, humidity,
and thickness. If you can, give it the longer endyour future self will thank you.
Step 5: Season the Chalkboard Surface (Anti-Ghosting Magic)
Seasoning is simple: rub the side of a piece of chalk over the entire painted area, then wipe it off with a dry cloth.
This “primes” the surface so the first thing you write doesn’t become a permanent ghost story.
- Use the side of white chalk and coat the painted area.
- Wipe away with a soft, dry cloth or felt eraser.
- Repeat once more if you want extra insurance.
Step 6: Write, Doodle, and Label
Now the fun part. You can write with:
- Traditional chalk: Softer, more vintage, easy to erase.
- Liquid chalk markers: Brighter lines, better for photos, more controlled lettering.
Easy design ideas:
- Place-card names in big block letters (or fancy script if you’re feeling brave).
- “Bunny bait,” “Open me,” or clue phrases for a scavenger hunt.
- Simple icons: carrots, tiny flowers, stars, polka dots.
- Countdown eggs: “3 days to Spring Break,” “2 days,” etc.
How to Keep Chalkboard Eggs Looking Great
Erase Without Regret
- Use a soft cloth or felt eraser for chalk dust.
- For chalk marker residue, a slightly damp cloth usually works; stubborn marks may need a gentle wipe with water.
- Avoid soaking real eggshellsmoisture can weaken them.
Should You Seal Chalkboard Eggs?
It depends on how you plan to use them:
- If you want erasable: Do not seal the surface. Sealing can reduce erasability and change the “chalkboard feel.”
- If you want permanent lettering: Seal after you write. A light, compatible clear coat can help lock in a design,
but test first on a spare eggsome sealers can smear markers or alter the finish.
A practical compromise: keep the eggs unsealed for day-to-day use, and only seal a few “final” eggs you want to display longer-term.
Pro Tips for Better-Looking Chalkboard Eggs
1) Use a Foam Brush for Smoother Coats
Foam brushes often leave fewer brush lines than bristles. If you do see lines, don’t panicthin coats and light sanding between
layers usually fix it.
2) Paint the Egg in Two Sessions
If you’re doing full coverage, paint the top two-thirds first, let it dry, then flip and paint the bottom. This prevents
fingerprint dents and “egg stuck to carton” tragedy.
3) Less Pressure When Writing
Pressing too hard can scratch the paint. Light pressure gives smoother lines and keeps the surface nicer longer.
4) Photograph Them Right Away
Chalk and chalk markers look best freshly applied. If you’re making eggs for a party or a blog photo, do your final lettering
close to the time you’ll display or shoot them.
Creative Ways to Use DIY Chalkboard Eggs
Easter Brunch Place Cards
Put one chalkboard egg at each plate with a name and a tiny doodle (like a flower or bunny face). It’s practical and feels
oddly fancy for something that started in an egg carton.
Message Eggs for Kids
Hide a few chalkboard eggs with encouraging notes: “You’re a great helper,” “Extra clue: check the porch,” or “Trade this egg
for a high-five.” (Kids will remember the high-five. Adults will remember you didn’t hide candy in the couch cushions.)
Spring Countdown Decor
Line them up in a bowl and change the writing daily: spring quotes, daily intentions, or the week’s dinner plan if you’re
feeling ambitious.
Gift Tags That Don’t Get Tossed
Tie a chalkboard egg onto a basket handle with twine and write the recipient’s name. Later, erase and reuse next year.
It’s the rare gift tag that survives the holiday.
Troubleshooting: Common Problems (and Fixes)
Problem: Paint looks streaky
Fix: Add another thin coat after drying. Foam brush helps. Light sanding between coats can smooth it out.
Problem: Writing won’t erase cleanly
Fix: Make sure you seasoned the surface. Also verify the paint is fully cured. If using chalk markers,
try a damp cloth and gentle wiping; some markers “set” more than basic chalk.
Problem: The first message “ghosted” permanently
Fix: That’s exactly what seasoning prevents. Repaint or embrace it as your egg’s “origin story.”
Problem: Paint chips on plastic eggs
Fix: Prep better next timeclean with alcohol and consider a primer made for slick surfaces. Also avoid
dropping them onto tile floors (tile is undefeated).
500+ Words of Real-World “DIY Chalkboard Eggs” Experiences (What Crafters Often Notice)
Chalkboard eggs sound simplepaint, dry, writebut the lived reality (as many crafters report) is a charming mix of “Wow, I’m so creative”
and “Why is my egg glued to the carton like it pays rent?” Here are the most common experiences people run into, plus the little lessons
that make the second batch dramatically smoother.
1) The drying-time impatience is real. A painted egg can feel dry quickly, but if you pick it up too soon, you’ll leave
fingerprints that look like fossilized regrets. The trick many makers learn: plan your steps like a tiny assembly line. Paint batch one,
set it down, paint batch two, clean up, snack, do literally anything elsethen come back for coat two. If you treat cure time as part of
the craft (not an annoying pause), you end up with eggs that write and erase better.
2) The “seasoning” step is where the magic happens. People often skip it the first time because it feels unnecessary,
then notice the first lettering leaves a faint shadow. The second time around, they season properly and suddenly the egg erases like a dream.
The experience is usually: “Oh. So that’s why everyone keeps saying to do that.”
3) Plastic eggs are both easier and trickier than expected. Easier because they don’t break. Trickier because paint adhesion
can be fussy. Many crafters report that the eggs that were wiped down well (soap + water + a quick alcohol wipe) behave beautifully, while the
ones touched with lotion-y hands or left a little damp tend to chip sooner. The “aha” moment is realizing prep matters more on plastic than wood.
4) Chalk markers feel like cheatingin a good way. Traditional chalk looks charming but can be dusty and faint. Liquid chalk markers
often give crisp lines, which is why people love them for photos, parties, and neat lettering. The common experience is excitement… followed by the
discovery that some markers erase differently depending on brand and cure time. Most makers end up doing a quick test scribble on one egg first
(and that single test saves a lot of frustration later).
5) The best eggs become “reusable signage,” not just Easter décor. Many people find themselves using chalkboard eggs beyond the holiday:
labeling a spring centerpiece, writing lunchbox notes on plastic eggs, or using them as tiny desk reminders. It’s surprisingly satisfying to have a
decorative object you can update whenever your mood (or your meal plan) changes.
6) The biggest win is how forgiving the project is. If the paint is uneven, add a thin coat. If the writing looks messy, erase it.
If one egg goes completely off the rails, it becomes the “practice egg” and everyone pretends that was the plan. This is why chalkboard eggs are such
a popular craft: the process encourages experimentation, and “mistakes” usually turn into design choices with a confident nod.
In short: the most common “experience arc” is messy beginnings, a quick lesson in patience and seasoning, then a final set of eggs that looks custom,
personal, and honestly kind of impressiveespecially considering you made them with paint, chalk, and the same egg carton that was headed for recycling.
Conclusion
DIY chalkboard eggs are one of those rare crafts that checks every box: easy to make, fun to personalize, and reusable enough to feel like a smart
projectnot just a one-day glitter explosion. Choose a sturdy egg base (wood or plastic for low-stress crafting), apply thin coats, let the paint cure,
season the surface, and then write your heart out. Whether you’re labeling place settings, leaving hunt clues, or making a spring centerpiece that can
change messages whenever you feel like it, chalkboard eggs deliver maximum charm with minimal fuss.