Table of Contents >> Show >> Hide
- Why Make a DIY Jewelry Holder Instead of Buying One?
- Best DIY Jewelry Holder Ideas for Every Style
- 1. Picture Frame Earring Holder
- 2. Wall-Mounted Necklace Organizer With Hooks
- 3. Pegboard Jewelry Display
- 4. DIY Jewelry Box From Any Small Box
- 5. Driftwood or Branch Jewelry Holder
- 6. Drawer Insert Jewelry Organizer
- 7. Cork Board Jewelry Holder
- 8. Vintage Shutter Jewelry Holder
- 9. Ring Dish and Trinket Tray Station
- 10. Mirror Jewelry Cabinet
- DIY Jewelry Holder Ideas by Jewelry Type
- Materials You Can Use for a DIY Jewelry Organizer
- How to Make Your DIY Jewelry Holder Look Expensive
- Small-Space DIY Jewelry Holder Ideas
- Common Mistakes to Avoid
- My Favorite Practical DIY Jewelry Holder Setup
- Extra Experience: What I Learned From Trying DIY Jewelry Holder Ideas
- Conclusion
Jewelry has a funny way of multiplying when nobody is looking. One day you own a few rings, a favorite pair of hoops, and one necklace you wear with everything. The next day your dresser looks like a tiny dragon’s treasure cave, except the dragon has terrible filing habits. Necklaces tangle, earrings disappear into alternate dimensions, and bracelets roll behind the furniture like they have somewhere important to be.
That is exactly why DIY jewelry holder ideas are so useful. A handmade jewelry organizer is not just a cute craft project; it is a practical way to keep accessories visible, protected, and easy to grab when you are already running five minutes late. Even better, you do not need a woodworking degree, a luxury closet, or a craft room with dramatic natural lighting. Many of the best jewelry holder ideas use items you may already own: picture frames, small dishes, old boxes, drawer inserts, pegboards, hooks, cork boards, driftwood, trays, fabric scraps, and even thrift-store finds.
This guide explores stylish, budget-friendly, and beginner-friendly ways to create a DIY jewelry holder that fits your space, your collection, and your personal style. Whether your vibe is modern minimalist, farmhouse, boho, glam, colorful, vintage, or “I made this at midnight and somehow it looks amazing,” there is a jewelry storage solution here for you.
Why Make a DIY Jewelry Holder Instead of Buying One?
Buying a jewelry organizer is easy, but making one gives you something store-bought options rarely deliver: customization. Your jewelry collection is personal. Maybe you have many necklaces and only three rings. Maybe you own enough earrings to start a small museum. Maybe you love chunky bracelets, delicate chains, or sentimental heirlooms that need a safe landing spot. A DIY jewelry organizer lets you design around what you actually wear.
Another benefit is visibility. When jewelry is hidden in a crowded box, it becomes easy to forget what you own. A wall-mounted jewelry holder or open display keeps your favorite pieces in sight, which means you are more likely to wear them. It also prevents the dreaded necklace knot, a tiny metal puzzle no one asked to solve before coffee.
DIY jewelry holders can also be more affordable and sustainable. Repurposing an old frame, wooden tray, shutter, small box, branch, or cabinet reduces waste while creating a one-of-a-kind organizer. Add paint, hooks, fabric, cork, velvet, mesh, or decorative knobs, and suddenly a forgotten object becomes functional decor.
Best DIY Jewelry Holder Ideas for Every Style
The best jewelry holder is the one that solves your real storage problem. Before choosing a project, separate your jewelry by type: necklaces, earrings, rings, bracelets, watches, brooches, and special occasion pieces. Once you see what you own, it becomes much easier to choose a smart design.
1. Picture Frame Earring Holder
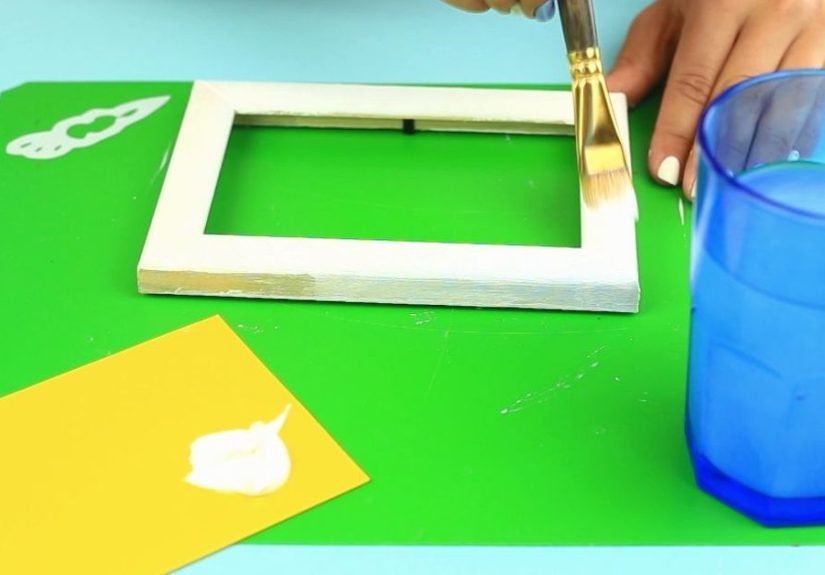
A picture frame earring holder is one of the easiest and prettiest DIY jewelry holder ideas. Remove the glass and backing from an old frame, then attach wire mesh, lace, burlap, screen material, or decorative metal sheeting across the opening. Studs, hooks, and dangling earrings can hang neatly through the material.
This project works especially well for people who own lots of earrings. It turns your collection into wall art and makes it simple to see pairs at a glance. Choose a gold frame for a glam look, white paint for a cottage style, matte black for modern decor, or natural wood for a warm handmade feel.
2. Wall-Mounted Necklace Organizer With Hooks
If tangled necklaces are your daily villain origin story, a wall-mounted necklace organizer is your hero. Use a strip of wood, a narrow shelf, or a salvaged board. Sand it smooth, stain or paint it, then install small cup hooks, brass hooks, adhesive hooks, or decorative knobs along the front.
Spacing matters. Leave enough room between hooks so necklaces do not overlap too heavily. For long necklaces, mount the holder higher on the wall. For everyday pieces, place it near your mirror or closet so choosing accessories becomes part of your getting-ready routine.
3. Pegboard Jewelry Display
A pegboard is a flexible storage superstar. Paint a small pegboard to match your bedroom or closet, then use hooks, mini shelves, cups, and small baskets to organize necklaces, bracelets, earrings, sunglasses, watches, and hair accessories.
The biggest advantage of pegboard is adjustability. If your collection changes, move the hooks around. Add a small shelf for perfume, a dish for rings, or a tiny basket for everyday studs. It is perfect for renters, small rooms, craft lovers, and anyone who likes a storage system that can evolve without requiring a full remodel.
4. DIY Jewelry Box From Any Small Box
Do not underestimate a sturdy little box. A cigar box, wooden keepsake box, decorative gift box, or thrifted container can become a beautiful DIY jewelry box with a few simple upgrades. Line the inside with velvet, felt, cotton fabric, or faux suede. Add rolled fabric tubes for rings, small dividers for earrings, and tiny compartments for pendants or brooches.
This idea is excellent for delicate jewelry that should not sit out in open air. It also works well for sentimental pieces, travel jewelry, or small collections. The outside can be painted, decoupaged, stenciled, or left as-is for a vintage look.
5. Driftwood or Branch Jewelry Holder
For a boho or coastal look, turn a clean branch or piece of driftwood into a necklace and bracelet holder. Choose a sturdy piece with interesting shape, clean it thoroughly, let it dry completely, and seal it if needed. Add hooks along the underside or use the natural branches as hanging points.
Attach twine, leather cord, or picture-hanging hardware to mount it on the wall. This type of jewelry holder looks relaxed and artistic, especially when paired with beaded necklaces, shell jewelry, woven decor, or plants. Just make sure the wood is strong enough to support your jewelry and smooth enough not to snag chains.
6. Drawer Insert Jewelry Organizer
If you prefer a clutter-free dresser, create a DIY jewelry drawer organizer. Use shallow trays, cardboard dividers, small boxes, velvet inserts, ice cube trays, muffin tins, or craft organizers to separate pieces inside a drawer.
This idea is especially practical for rings, studs, pins, and delicate bracelets. To make it feel more polished, line the drawer with felt or fabric before adding dividers. Keep everyday jewelry toward the front and special occasion pieces toward the back. Your future self will appreciate not digging through a sparkly junk drawer.
7. Cork Board Jewelry Holder
A cork board is another simple DIY jewelry organizer that works beautifully for necklaces, bracelets, and lightweight earrings. Cover the cork with fabric for a softer look, then use push pins, small hooks, or decorative tacks to hang pieces.
This is a great low-cost option for dorm rooms, apartments, teen bedrooms, or small closets. You can frame the cork board to make it look more finished or use a simple square panel for a clean, functional design. For extra charm, arrange necklaces in a gentle curve or group jewelry by color.
8. Vintage Shutter Jewelry Holder
An old wooden shutter can become a character-packed jewelry display. The slats are useful for hanging earrings, while hooks or knobs can be added for necklaces and bracelets. Paint it in a fresh color, distress the edges for a farmhouse look, or leave the original finish if it already has that charming “found in a cute antique shop” personality.
Because shutters are often tall and narrow, they make excellent vertical storage. Mount one behind a door, beside a vanity, or inside a closet. This project is ideal for anyone who loves upcycled home decor and wants a jewelry holder that doubles as a conversation piece.
9. Ring Dish and Trinket Tray Station
Sometimes the best DIY jewelry holder idea is the simplest. A ring dish or trinket tray placed near the sink, nightstand, or entryway gives your daily jewelry a safe temporary home. You can make one from air-dry clay, a small ceramic saucer, a thrifted teacup plate, a shell, or a painted wooden tray.
The trick is to use these stations intentionally. A tray should hold your current everyday items, not become a retirement village for every necklace you have ever owned. Keep one near your bed for rings and earrings, and another near your closet for the pieces you wear most often.
10. Mirror Jewelry Cabinet
A mirror jewelry cabinet is a more advanced DIY project, but it is incredibly useful. The concept is simple: build or repurpose a shallow cabinet, add hooks and compartments inside, and attach a mirror to the front. This keeps jewelry hidden, protected, and organized while giving you a mirror for outfit checks.
This option works well in small bedrooms because it combines two functions in one piece. If you are not ready to build from scratch, start with a thrifted medicine cabinet or shallow wall cabinet and customize the interior with hooks, felt strips, ring rolls, and small shelves.
DIY Jewelry Holder Ideas by Jewelry Type
Different jewelry needs different storage. A good DIY jewelry organizer prevents damage while making pieces easy to access. Here is how to plan by category.
For Necklaces
Necklaces need vertical space. Hooks, knobs, pegboards, wall rails, driftwood, and framed displays all work well. Hang delicate chains separately when possible to prevent tangles. Heavy statement necklaces should go on stronger hooks or knobs that are secured firmly into wood or wall anchors.
For Earrings
Earrings are happiest when paired and visible. Mesh frames, acrylic sheets with drilled holes, cork boards, fabric panels, and slotted organizers make it easy to store them together. Stud earrings do well in small trays, velvet compartments, or foam inserts.
For Rings
Rings need soft, snug storage. DIY ring rolls made from fabric-covered foam or cotton batting are a classic choice. Small dishes also work for everyday rings, but fine jewelry should be stored in a lined box or protected compartment to reduce scratching.
For Bracelets and Watches
Bracelets can be stored on dowels, paper towel holders, mug trees, hooks, or small display bars. Watches benefit from padded rolls or soft compartments. Keep heavier items low and stable so your jewelry holder does not tip over like a dramatic stage actor.
Materials You Can Use for a DIY Jewelry Organizer
You do not need expensive supplies to make a useful jewelry holder. Start with what you have, then fill in with basic hardware if needed. Good materials include wood scraps, old frames, cork tiles, pegboards, drawer dividers, fabric, felt, velvet, batting, hooks, knobs, dowels, small trays, shallow boxes, acrylic sheets, wire mesh, ribbon, adhesive strips, and wall anchors.
For a polished look, repeat one finish throughout the project. For example, use all brass hooks, all black knobs, or all natural wood accents. If your style is more eclectic, mix materials intentionally: wood and gold, acrylic and brass, cork and linen, or painted wood and ceramic dishes.
How to Make Your DIY Jewelry Holder Look Expensive
A handmade organizer can look high-end with a few thoughtful details. First, choose a limited color palette. White, black, natural wood, brass, blush, sage green, and soft gray are easy to style. Second, use matching hardware. Even a simple board looks boutique-worthy when the hooks line up neatly and share the same finish.
Third, pay attention to spacing. Crowded jewelry storage looks messy even when it is technically organized. Leave breathing room around statement pieces. Fourth, add texture with velvet, linen, leather, cane webbing, or woven fabric. Finally, hide rough edges. Sand wood, trim fabric cleanly, and use paint or stain to create a finished appearance.
Small-Space DIY Jewelry Holder Ideas
If you have limited space, go vertical. Wall-mounted jewelry holders, pegboards, narrow hook rails, over-the-door organizers, and mirror cabinets can hold a surprising amount without taking over your dresser. Inside a closet, use the side wall, the back of the door, or the empty space above a small shelf.
For renters, removable adhesive hooks and lightweight organizers are helpful, but always check the weight limit. A tiny tray on a floating shelf can hold daily rings and earrings. A small framed earring holder can fit beside a mirror. A compact jewelry roll can tuck into a drawer when not in use.
Common Mistakes to Avoid
The first mistake is making a jewelry holder that looks beautiful but does not fit your habits. If you always take earrings off at your nightstand, place storage there. If you choose necklaces while standing at your closet, install hooks nearby. Organization works best when it follows your routine instead of trying to turn you into a brand-new person by Tuesday.
The second mistake is ignoring weight. Heavy necklaces, watches, and chunky bracelets need secure support. Use screws, anchors, or sturdy hooks when necessary. The third mistake is storing everything in one crowded place. Give delicate chains, fine jewelry, and costume pieces enough separation to avoid scratches and tangles.
The fourth mistake is skipping maintenance. Even the best DIY jewelry holder needs a quick refresh. Every few months, remove pieces you no longer wear, wipe dust from trays, check hooks, and reorganize by season or frequency of use.
My Favorite Practical DIY Jewelry Holder Setup
For most people, the best system is a combination of three zones. First, create a wall-mounted necklace holder with hooks. This handles chains, pendants, and bracelets that tangle easily. Second, add a framed mesh or acrylic earring holder so pairs stay visible. Third, place a small tray or ring dish near the bed for daily pieces.
This setup is affordable, attractive, and easy to maintain. It also prevents one organizer from doing too much. Necklaces get vertical storage, earrings get display storage, and rings get quick-drop storage. Simple? Yes. Effective? Absolutely. Fancy enough to make your dresser feel like it has its life together? Also yes.
Extra Experience: What I Learned From Trying DIY Jewelry Holder Ideas
The biggest lesson from experimenting with DIY jewelry holder ideas is that the prettiest solution is not always the most useful one. I have made organizers that looked wonderful for exactly twelve minutes, then failed the moment real life got involved. One tiny dish for all my earrings? Adorable. Also a disaster. A necklace hook placed too low? Stylish until the longest chain started sweeping the dresser like a tiny metal broom.
What works best is designing around behavior. If you take off jewelry in a hurry, you need a landing zone. A small tray near the bed or mirror prevents rings and studs from migrating into pockets, laundry baskets, and mysterious household black holes. If you rotate jewelry often, open storage is better than closed boxes because you can see everything. If you own fine jewelry, however, closed and lined storage is smarter because it protects pieces from dust, scratches, and accidents.
Another experience worth sharing: do not underestimate hardware quality. Cheap hooks can work for lightweight pieces, but they may bend or loosen over time. If you are hanging heavy necklaces, install hooks into solid wood and use proper wall anchors. A jewelry holder falling off the wall is not a charming DIY moment; it is a dramatic percussion performance starring your accessories.
I also learned that grouping jewelry by how often you wear it makes mornings easier. Everyday pieces should be front and center. Special occasion jewelry can go in a box, drawer insert, or less-accessible section. Sentimental pieces deserve their own protected spot. This prevents your organizer from becoming a glittery obstacle course.
Finally, leave room to grow. Jewelry collections change. You may buy new earrings, inherit a bracelet, start wearing more necklaces, or decide that rings are suddenly your entire personality. A flexible DIY jewelry organizer, such as a pegboard, hook rail, or modular drawer system, can adapt over time. The goal is not perfection. The goal is a setup that makes your jewelry easier to wear, easier to protect, and easier to enjoy every day.
Conclusion
DIY jewelry holder ideas are the perfect mix of organization, creativity, and personal style. With a few simple materials, you can turn a cluttered dresser into a display that feels intentional and beautiful. From picture frame earring holders and pegboard organizers to ring dishes, drawer inserts, driftwood displays, and hidden mirror cabinets, there is a project for every room size and skill level.
The secret is to match the organizer to your jewelry and your routine. Use vertical storage for necklaces, soft compartments for rings, visible displays for earrings, and sturdy supports for heavier bracelets or watches. Add a little paint, fabric, hardware, or thrifted charm, and your DIY jewelry holder can become both practical storage and decor you actually enjoy looking at.
In other words, your jewelry does not have to live in a tangled pile of chaos. Give it a home, give yourself easier mornings, and give that lonely old picture frame or box a second career. Everybody wins.