Table of Contents >> Show >> Hide
- Why Homemade Gummies Are Worth It
- Ingredients That Matter (and Why)
- Tools You’ll Want (No Candy Lab Required)
- The Base Recipe: Classic DIY Gummy Bears (Juice Version)
- Level Up: The Chewier “Candy-Shop” Method (Optional)
- Flavor Ideas That Actually Taste Like Something
- How to Make Sour Gummies Without the Sticky Meltdown
- Troubleshooting: When Your Bears Misbehave
- Storage and Food Safety (Because Candy Can Still Be Perishable)
- of Real-World “DIY Gummy Bear” Experience (So You Don’t Learn the Hard Way)
- Conclusion
- SEO Tags
If you’ve ever eaten a gummy bear and thought, “I could totally make these at home,” you were rightwith one tiny catch: gummies are basically a science fair project you can snack on. The good news? It’s the fun kind of science: stir, pour, chill, and suddenly your kitchen is a tiny candy factory (minus the OSHA paperwork).
This guide walks you through a reliable DIY gummy bears recipe, explains why each step matters, and shows how to customize flavor, texture, and sour “zing” without turning your gummies into sticky, weepy chaos. You’ll also get troubleshooting tips so your bears come out cutenot tragic.
Why Homemade Gummies Are Worth It
Store-bought gummy bears are engineered for that bouncy chew and long shelf life. Homemade gummy bears are more like “fresh pasta” in candy form: softer, brighter tasting, and customizable. You can make them:
- Fruitier (real juice and zest)
- Tangier (citric acid or lemon)
- Less sweet (you control the sugar)
- Different shapes (bears, worms, hearts, dinosaurs… the important food groups)
The trade-off is that homemade gummies are usually not as shelf-stable as commercial candy. Translation: you’ll want to store them properly and eat them within a reasonable window (which is rarely a problem, emotionally or practically).
Ingredients That Matter (and Why)
Gelatin: The “Chew” Button
Gelatin is the backbone of classic gummy bears. More gelatin = firmer and chewier. Less gelatin = softer, more Jell-O-adjacent. The key technique is blooming (hydrating gelatin in cold liquid first) so it dissolves smoothly instead of forming lumps that haunt your gummies forever.
Liquid Base: Juice, Lemonade, or “Whatever’s in the Fridge” (With Limits)
Juice gives flavor. Water gives control. Many great gummy recipes use a mix, because very acidic or very “active” juices can affect setting. A practical rule: use shelf-stable juice, pasteurized juice, or juices without fresh enzymes. If you want to use fresh pineapple/kiwi/papaya juice, cook it first to help it gel.
Sweeteners: Sugar, Corn Syrup, Honey
Sugar sweetens and also helps create a better gummy texture. Corn syrup (or honey) helps reduce crystallization and can make gummies feel smoother. You can reduce sugar, but go too low and you’ll get a softer set and shorter freshness window.
Acid: Bright Flavor, Optional Sour Kick
A tiny amount of citric acid or lemon juice makes fruit flavors pop. Too much acid can cause “weeping” (moisture leaking out) or a sticky surfaceso we add it at the right moment and offer a smart sour-coating option.
Tools You’ll Want (No Candy Lab Required)
- Silicone gummy bear molds (or any small silicone candy mold)
- Small saucepan
- Whisk or silicone spatula (gentle stirring = fewer bubbles)
- Dropper / squeeze bottle (makes filling molds way less dramatic)
- Fine-mesh strainer (optional, for foam or stray bits)
- Sheet pan + parchment (for chilling and optional drying)
- Digital thermometer (optional, for the “candy shop” method)
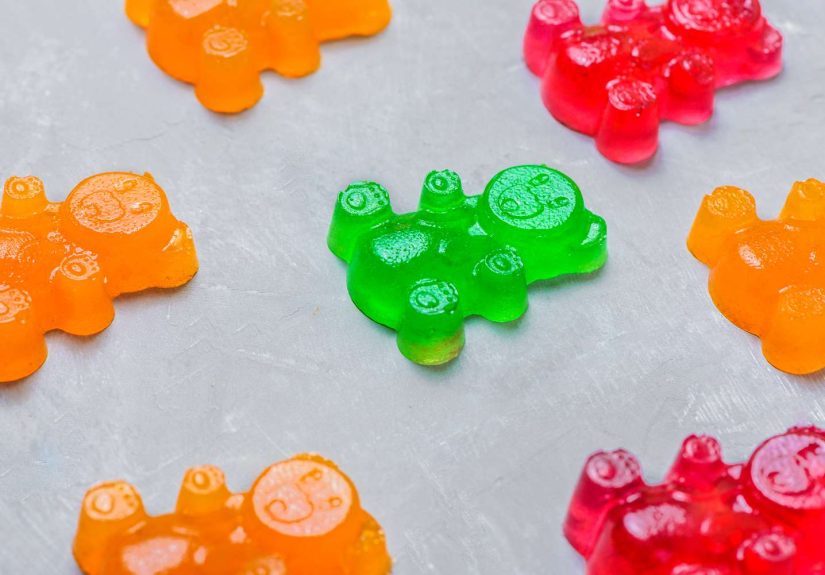
The Base Recipe: Classic DIY Gummy Bears (Juice Version)
This is the friendly, reliable method: warm the sweetened juice, dissolve bloomed gelatin, pour into molds, chill. The texture is pleasantly chewy and very snackable.
Ingredients (makes about 100–140 mini bears, depending on mold size)
- 3/4 cup (180 g) fruit juice (apple, cherry, grape, cranberry blend, or lemonade)
- 1/4 cup (60 g) cold water (for blooming)
- 4 tablespoons (about 28 g) unflavored powdered gelatin (about 4 packets)
- 1/4 cup (50 g) granulated sugar (adjust to taste)
- 2 tablespoons (30–40 g) light corn syrup or mild honey
- Pinch of salt (tiny, but it makes fruit flavors taste more “real”)
- 1–2 teaspoons fresh lemon juice or 1/4 teaspoon citric acid (optional, for brightness)
- Optional: 1/4–1/2 teaspoon vanilla extract or a few drops of candy flavoring (use sparingly)
Step-by-step instructions
- Prep the molds. Set silicone molds on a flat sheet pan so you can move them easily. If your molds are older or very detailed, a tiny mist of neutral nonstick spray can help releasethen wipe excess with a paper towel.
- Bloom the gelatin. Pour 1/4 cup cold water into a bowl. Sprinkle gelatin evenly over the surface. Let it sit 5–10 minutes until it looks like thick applesauce. (Unappetizing stage, necessary stage.)
- Warm the juice and sweeteners. In a saucepan over medium-low heat, add juice, sugar, corn syrup (or honey), and salt. Warm, stirring gently, until the sugar dissolves and the mixture is hot but not boiling.
- Dissolve the gelatin. Remove the pan from heat. Add the bloomed gelatin and whisk gently until fully melted and smooth. If you see stubborn bits, return to very low heat for 30–60 seconds while stirring gentlystill avoid boiling.
- Add acid and flavor at the right time. Let the mixture cool for about 3–5 minutes (hot, but not raging hot), then stir in lemon juice or citric acid and any extracts. This helps preserve fresh flavor and reduces “mystery texture issues.”
- De-bubble like a pro. Let the mixture sit for 2 minutes. Skim foam with a spoon, or pour through a fine-mesh strainer. (Bubbles are harmless, but they make your bears look like they’re wearing scuba gear.)
- Fill the molds. Use a dropper or squeeze bottle. Fill each cavity to the top, then tap the sheet pan lightly to settle the mixture.
- Chill until set. Refrigerate 20–40 minutes, or until gummies feel firm to the touch.
- Unmold and optionally “dry.” Pop gummies out. For a slightly firmer, less-sticky bite, spread on parchment and let them air-dry at cool room temperature 6–24 hours, turning once or twice.
Level Up: The Chewier “Candy-Shop” Method (Optional)
Want a more classic gummy chew? The trick is cooking a sugar syrup to a candy stage, then combining it with bloomed gelatin. This reduces excess water and can produce a firmer, bouncier texture.
How it works
- You still bloom gelatin in cold liquid.
- You cook sugar + water + corn syrup to around the soft-ball zone.
- Then you combine and flavor, fill molds, and set.
Quick formula (for experimenters)
Try: 1/2 cup water + 3/4 cup sugar + 1/2 cup corn syrup cooked to soft-ball, then carefully mix in your bloomed gelatin + flavoring. This method is hotter and more intenseuse caution and consider adult supervision for younger cooks. Hot syrup doesn’t play.
Flavor Ideas That Actually Taste Like Something
“Juice Bar” Bears (fresh and bright)
- Apple juice + lemon juice + tiny pinch of cinnamon
- Tart cherry juice + lime zest
- White grape juice + orange zest + vanilla
“Lemonade Stand” Bears
- Lemonade + extra lemon zest + pinch of salt
- Add a whisper of vanilla for “creamsicle lemonade” vibes
“Grown-Up Candy” (still kid-friendly)
- Grapefruit juice + honey + pinch of salt (no alcoholjust the flavor combo)
- Cranberry blend + orange zest (holiday energy without the sweater)
How to Make Sour Gummies Without the Sticky Meltdown
Sour is tricky because acid + sugar coatings can pull moisture to the surface, especially if your gummies are juicy and soft. Two reliable approaches:
Option A: Add mild acidity inside the gummy
Stir in 1/4 teaspoon citric acid (or 1–2 teaspoons lemon juice) after dissolving gelatin and cooling for a few minutes. This gives “bright fruit” more than “face-pucker.”
Option B: Sour-sugar coating (do it at the right time)
- Let unmolded gummies air-dry on parchment for several hours so the surface isn’t wet.
- Mix 4 tablespoons sugar with 1 tablespoon citric acid (reduce acid if you’re sensitive).
- Toss gummies lightly, then shake off excess in a sieve.
If your coated gummies start looking “sweaty,” your coating is probably too acidic for your gummy’s moisture level. Dry longer, reduce acid, or skip coating and build tang into the gummy itself.
Troubleshooting: When Your Bears Misbehave
Problem: Gummies won’t set
- Gelatin didn’t bloom long enough or clumpedbloom properly and dissolve fully.
- Juice issuessome fresh enzyme-rich juices can prevent setting unless heated first.
- Too much liquidreduce juice slightly or increase gelatin by 1/2–1 tablespoon next batch.
Problem: Lots of bubbles
- Stir gently, not like you’re trying to summon a storm.
- Let the mixture sit 2–3 minutes before filling molds.
- Skim foam or strain before pouring.
Problem: Gummies are too rubbery
- Reduce gelatin by 1 tablespoon next batch.
- Skip long drying; eat sooner for a softer bite.
Problem: Gummies are sticky
- Air-dry longer on parchment (cool, dry room).
- Store airtight with minimal humidity exposure.
- If you coat, do it after dryingnot immediately after unmolding.
Storage and Food Safety (Because Candy Can Still Be Perishable)
Homemade gummiesespecially juice-based onesdon’t have the same preservatives as commercial candy. Best practice:
- Refrigerate in an airtight container for best freshness.
- For most batches, aim to enjoy within 1–2 weeks.
- If you made a higher-sugar, candy-syrup style gummy, you can often keep them at cool room temperature for a few days, but the fridge is still safest.
- Freeze for longer storage; thaw in the fridge to reduce condensation.
And a common-sense reminder: if anything smells off, looks moldy, or feels slimy in a suspicious way (not the “sour gummy” way), it’s time to let the bears go.
of Real-World “DIY Gummy Bear” Experience (So You Don’t Learn the Hard Way)
The first time most people make gummy bears, they expect a magical one-step moment where liquid turns into perfect candy with zero mess. The second time, they accept the truth: gummies are a tiny logistics game. Once you make peace with that, it becomes weirdly satisfying.
The biggest “aha” moment is usually how fast gummies start to thicken. You don’t need to panic-pour, but you do want your molds ready before you heat anything. Set the molds on a sheet pan, have your dropper or squeeze bottle within reach, and clear a path in the fridge. Otherwise, you’ll be doing that one-handed fridge Tetris while holding warm gummy liquid like it’s a precious sports drink.
Flavor is the next surprise. Warm gelatin mixtures can taste a little mutedalmost blandright up until they set and chill. That’s why a tiny pinch of salt and a touch of acid can make such a big difference. The salt doesn’t make it salty; it makes fruit taste more like itself. The acid doesn’t have to be “sour candy.” Think of it like adjusting a stereo: you’re turning up clarity, not volume.
Texture changes over time, too. Freshly unmolded gummies tend to be softer and a bit tacky. After a few hours of air-drying, they usually get noticeably firmer and less stickyespecially around the edges. If you’ve ever wondered why store gummies feel “finished,” that little drying window is a big part of it. People often discover they prefer gummies after an overnight rest on parchment, because the chew becomes more even and the flavor feels more concentrated.
Bubbles are another rite of passage. Early batches often come out with tiny air pockets, and honestly, it’s fineyour bears are just “extra aerated.” But if you want that clean, gem-like look, the trick isn’t fancy equipment; it’s patience. Stir gently, let the mixture sit for a minute or two, skim foam, and tap the mold tray once it’s filled. You’ll be amazed how much more professional everything looks with those small habits.
Sour coating is where many DIY candy makers hit their first dramatic plot twist. You toss your gummies in sour sugar, feel proud, and then come back later to find them sweating like they just ran a marathon. That’s not you failingit’s chemistry. Acid and sugar pull moisture to the surface, especially on juicy gummies. The workaround is drying first, using less acid, or building tang into the gummy instead of relying on a coating.
Finally, customization is where the hobby gets dangerously fun. Once you’ve made one successful batch, it’s hard not to start thinking like a candy developer: “What if I do cherry-lime?” “What if I use lemonade and orange zest?” “What if I make them tiny and pretend portion control is real?” And that’s the best part: DIY gummy bears aren’t just a recipethey’re a choose-your-own-adventure that ends in snacks.
Conclusion
Making your own gummy bears at home is equal parts simple and weirdly technicalin the best way. Bloom your gelatin, warm your sweetened juice gently, add flavor thoughtfully, and treat bubbles and stickiness like solvable problems (because they are). Start with the base recipe, then tweak one variable at a time: more gelatin for chew, more acid for brightness, longer drying for a firmer bite.
Once you get your first tray of wobbly little bears out of the molds, you’ll understand the true secret of DIY candy: it tastes better when you made it yourself and it’s twice as funny when your gummies come out looking like abstract art.