Table of Contents >> Show >> Hide
- What Does “Bleeding a Cooling System” Actually Mean?
- Signs You Need to Bleed (or “Burp”) the Cooling System
- Before You Start: Safety, Tools, and Coolant Basics
- Easy Method: How to Bleed a Cooling System (Most Cars)
- Step 1: Start cold and park smart
- Step 2: Set the heater to help you
- Step 3: Install a spill-free funnel (or regular funnel if that’s what you’ve got)
- Step 4: Start the engine and watch for bubbles
- Step 5: Wait for the thermostat to open
- Step 6: Encourage stubborn air to move
- Step 7: Confirm the fan cycle and cabin heat
- Step 8: Seal it up and recheck later
- Faster Option: Bleeding a Cooling System With Bleeder Screws
- The “Nose-Up” Trick: Let Gravity Do Some Work
- Pro Method: Vacuum-Filling the Cooling System (Clean, Fast, Fancy)
- Common Mistakes That Keep Air in the System
- Troubleshooting: If It Still Overheats After Bleeding
- FAQ: Cooling System Bleeding Questions People Google at 1:00 AM
- Extra: 500+ Words of Real-World “Bleeding the Cooling System” Experiences (So You Don’t Learn the Hard Way)
- Conclusion
If your car’s temperature gauge is doing the cha-cha and your heater is blowing “icy betrayal” instead of warm air,
you might not have a haunted vehicleyou might have air trapped in the cooling system.
The good news: bleeding (a.k.a. “burping”) your cooling system is usually a very DIY-friendly fix.
The even better news: you don’t need a wizard hatjust patience, the right coolant, and a healthy respect for hot pressurized fluid.
This guide walks you through how to bleed a cooling system safely, step-by-step, with options for cars that
have bleeder screws, cars that don’t, and the pro-level vacuum-fill method that makes spilled coolant a thing of the past.
Let’s get those air pockets out of your radiator, heater core, and engine so your cooling system can do its one job:
keeping your engine from turning into a very expensive space heater.
What Does “Bleeding a Cooling System” Actually Mean?
Bleeding a cooling system means removing trapped air from the coolant passages after a repair, coolant change,
or any time the system has been opened. Air pockets can block coolant flow (especially through narrow areas like the heater core),
cause overheating, trigger erratic temperature readings, and make unsettling gurgling soundslike your dashboard is brewing soup.
When the system is properly bled, coolant circulates smoothly, the thermostat opens as it should, the radiator fan cycles normally,
and your cabin heat returns to “toasty,” not “arctic.”
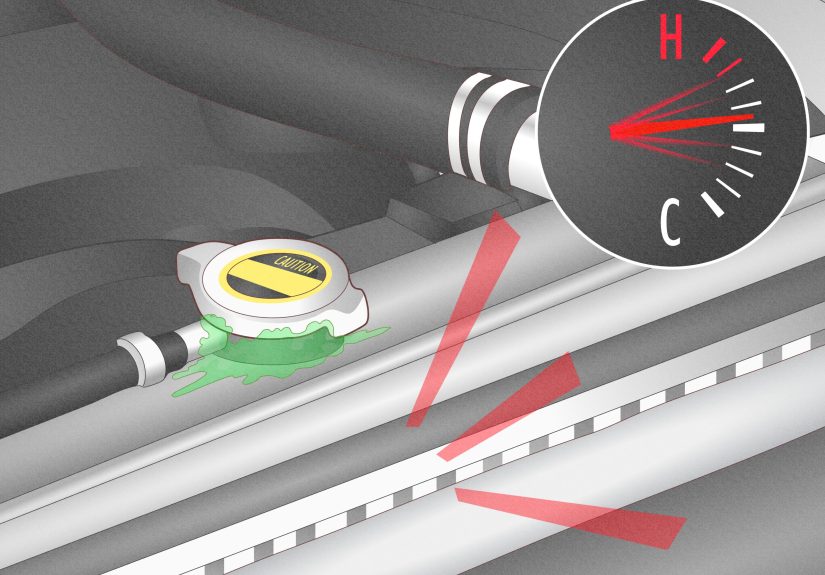
Signs You Need to Bleed (or “Burp”) the Cooling System
- Engine overheating even though coolant level looks “fine”
- Heater blows cold or alternates hot/cold while driving or idling
- Temperature gauge fluctuates (steady… then spikes… then calms down like nothing happened)
- Gurgling/bubbling sounds behind the dash or near the radiator
- Coolant level drops after a refill (air escapes, level settles)
- Recent cooling-system work (thermostat, water pump, radiator, hoses, coolant flush)
Before You Start: Safety, Tools, and Coolant Basics
Safety rules (read these like your knuckles depend on itbecause they do)
- Never open a hot radiator cap or pressurized reservoir. Hot coolant can spray out and cause severe burns.
- Work on a cool engine. If you just drove, wait until everything is cool to the touch.
- Coolant is toxic. Keep pets and kids away. Clean spills immediately.
- Use gloves and safety glasses. Coolant in the eyes is not a personality trait.
- Dispose of old coolant responsibly (many auto parts stores and local recycling centers accept it).
Tools and supplies you’ll want
- Correct coolant for your vehicle (check owner’s manual)
- Distilled water (if mixing concentrate)
- Catch pan + funnel
- Spill-free/no-spill coolant funnel kit (highly recommended)
- Shop towels, gloves, safety glasses
- Basic hand tools (for bleeder screws, hose clamps, engine covers)
- Optional: ramps or jack + stands (for the “nose-up” method)
- Optional pro method: vacuum-fill tool + air compressor
Coolant basics (so you don’t accidentally invent corrosion)
Use the coolant type specified by your manufacturer. “Universal” coolants exist, but mixing types can cause sludge,
reduce corrosion protection, or shorten component life. If you’re using concentrate, a 50/50 mix with
distilled water is the common target for most climates. Pre-mixed coolant makes this easy.
Easy Method: How to Bleed a Cooling System (Most Cars)
This is the classic coolant burping procedure: fill slowly, run the engine, let the thermostat open,
and allow air bubbles to escape at the highest fill point. If your car has a radiator cap directly on the radiator,
you’ll usually bleed there. If it has a pressurized expansion tank (common on many modern cars), you’ll bleed at that tank.
Step 1: Start cold and park smart
- Park on a level surface. Set the parking brake.
- Let the engine cool completely.
- Locate your fill point: radiator cap, expansion tank, or service port.
Step 2: Set the heater to help you
Set the climate control to maximum heat. On many vehicles, this encourages coolant flow through the heater core,
which is a common place for air to get trapped. (If your vehicle uses an electronically controlled valve, this still generally helps
and it’s an easy, harmless step.)
Step 3: Install a spill-free funnel (or regular funnel if that’s what you’ve got)
- Remove the radiator cap or pressurized reservoir cap (engine cold!).
- Attach the spill-free funnel kit to create a higher “fill column.”
- Slowly add coolant until the system reaches the proper level.
Tip: Filling slowly matters. Pouring coolant in like you’re trying to win a speed-drinking contest can trap more air.
Slow and steady wins the “not overheating on the highway” race.
Step 4: Start the engine and watch for bubbles
- Start the engine and let it idle.
- Keep the funnel at least partially filled so it doesn’t suck air back in.
- Watch for bubbles rising through the coolant in the funnelthis is trapped air leaving the system.
Step 5: Wait for the thermostat to open
As the engine warms up, the thermostat will open and coolant will begin circulating fully through the radiator.
When that happens, you’ll often see a sudden drop in the coolant level in the funnel, followed by a new round of bubbles.
Top off as needed. This is normalyour engine is not drinking coolant, it’s just finally letting it travel where it needs to go.
Step 6: Encourage stubborn air to move
- Gently squeeze the upper radiator hose (carefullyavoid belts/fans). This can help dislodge trapped bubbles.
- If safe and recommended for your vehicle, you can raise engine speed briefly (a mild “blip,” not a drag race).
Step 7: Confirm the fan cycle and cabin heat
Let the engine reach normal operating temperature. Many vehicles will cycle the radiator fan on and off.
Check that your heater is blowing consistently warm air. If the heat is steady and the bubbling has mostly stopped,
you’re winning.
Step 8: Seal it up and recheck later
- Turn the engine off and let it cool.
- Remove the funnel, install the cap securely.
- Fill the overflow reservoir to the correct “COLD” mark (not to the moon).
- After your next drive and full cool-down, recheck the level and top off if needed.
Faster Option: Bleeding a Cooling System With Bleeder Screws
Some engines include bleeder screws at high points (often near the thermostat housing, radiator, or coolant outlet).
If your vehicle has one (or several), use them. They’re basically a designated “air exit door” so bubbles don’t throw a house party in your heater core.
How to use a coolant bleeder screw
- Engine cold: open the fill cap and begin adding coolant slowly.
- Crack the bleeder screw open (do not remove it completely).
- Listen for hissing air. Continue filling until coolant flows out in a steady stream with no bubbles.
- Tighten the bleeder screw to spec (snug, not “gorilla tight”).
- Continue with the warm-up burp method if needed, especially after major drainage.
If there are multiple bleeders, open them as instructed by the service procedure (often highest points first).
When in doubt, follow the factory fill/bleed guidance for your specific model.
The “Nose-Up” Trick: Let Gravity Do Some Work
Air rises. Coolant fill necks aren’t always positioned at the highest point of the system, especially on modern cars.
Lifting the front of the vehicle slightly (ramps or a safe jack-and-stands setup) can help air migrate toward the fill point.
- Only do this if you can do it safelystable ramps, proper jack stands, level ground.
- Then follow the standard burping steps while the fill point is effectively higher than the rest of the system.
Pro Method: Vacuum-Filling the Cooling System (Clean, Fast, Fancy)
A coolant vacuum-fill tool removes air by pulling the system into a vacuum, then using that vacuum to draw coolant in.
It’s especially useful on modern sealed systems and after major repairs where lots of air is trapped.
Bonus: if the system won’t hold vacuum, you may have a leakbefore you waste fresh coolant.
High-level steps (exact tool steps vary by kit)
- Engine off, cool, and drained as needed.
- Attach the tool to the radiator neck or reservoir/service port with the correct adapter.
- Use shop air to pull a vacuum on the system.
- Close the valve and confirm the system holds vacuum for a short period.
- Open the coolant feed valve so the vacuum draws coolant into the system.
- Remove the tool, reinstall the cap, and verify level after a heat cycle.
If you do a lot of cooling-system work, this method feels like cheatingin the best way.
Less mess, fewer hot-idle burp sessions, and fewer “why is the heater still cold?” mysteries.
Common Mistakes That Keep Air in the System
- Opening the system hot (dangerous and unnecessary)
- Filling too fast, trapping air behind the coolant
- Ignoring bleeder screws when your vehicle has them
- Not running the heater, leaving air stuck in the heater core
- Overfilling the reservoir (it expands when hot and can puke coolant out)
- Using the wrong coolant or mixing incompatible types
- Skipping the recheck after a full heat cycle and cool-down
Troubleshooting: If It Still Overheats After Bleeding
If you’ve properly bled the cooling system and the vehicle still overheats, don’t keep “burping” forever hoping it’ll get bored and stop.
Something else may be wrong.
Quick checks
- Coolant level drops repeatedly: likely a leak (hoses, radiator, water pump, cap, etc.).
- No cabin heat + overheating: could still be air, a clogged heater core, thermostat issue, or flow problem.
- Continuous bubbles at the fill point after multiple cycles: could indicate combustion gases entering the coolant (possible head gasket issue).
- Temp spikes at idle: cooling fan, fan relay, or airflow issue may be involved.
- Upper hose stays cold while engine gets hot: thermostat may not be opening.
When the symptoms point beyond trapped air, it’s worth doing a pressure test, cap test, or having a shop diagnose it
because engines are expensive and pride is free.
FAQ: Cooling System Bleeding Questions People Google at 1:00 AM
How long does it take to bleed a cooling system?
Many cars take 15–30 minutes for a basic burp, plus cool-down time. After major repairs, you might need multiple heat cycles.
Do I need a spill-free funnel to burp coolant?
No, but it makes the job easier and cleaner. It also helps maintain a higher fill point, which encourages air to rise out.
Can air in the cooling system cause no heat?
Yes. Air often gets trapped in the heater core, blocking hot coolant flowso the engine may run hot while the cabin stays cold.
Is it safe to drive with air in the cooling system?
Not really. Air pockets can cause overheating and erratic temperature behavior. If the car is overheating, minimize driving and fix the issue.
Extra: 500+ Words of Real-World “Bleeding the Cooling System” Experiences (So You Don’t Learn the Hard Way)
DIYers usually discover cooling-system bleeding in one of two ways: (1) a planned coolant change, or (2) a panicked glance at a temperature gauge
climbing like it’s training for Everest. The second way is more exciting. It is also less fun.
A common experience: someone replaces a thermostat, refills coolant, and calls it a day. The next morning, the heater blows cold at stoplights,
the temp gauge flirts with “hot,” and a mysterious glug-glug sound starts under the dash. That sound is often air moving through the heater core
or hoses. The “aha” moment hits when they open the system cold, top it off, run the engine, and watch a whole aquarium’s worth of bubbles rise.
Suddenly the heater works again, and the car stops acting dramatic. The lesson: thermostats don’t fix air pocketsbleeding does.
Another classic: “I filled the reservoir to MAX, why is it still low?” Because reservoirs lie a littlewell, they don’t lie, but they don’t tell
the whole story. As trapped air escapes during warm-up, the coolant level can drop. People who recheck after the first drive and cool-down usually
get rewarded with a stable level. People who don’t recheck get rewarded with anxiety and an extra roadside stop. Make the recheck part of the job,
like returning your shopping cart (but with fewer witnesses judging you).
Then there’s the “my car has no radiator cap” confusion. Many modern vehicles use a pressurized expansion tank and hide the radiator cap like
it’s a family secret. In those cases, bleeding can take longer, because the system is designed to be sealed and self-managinguntil you open it.
This is where spill-free funnels, nose-up parking, and patience are your best friends. If the vehicle also has a bleeder screw, that’s basically
a cheat code: open it, fill until you get a steady stream, close it, and you’ll often save yourself a long burp session.
People also learnsometimes too latethat coolant spills are a big deal. The sweet smell might seem harmless, but pets can be attracted to it,
and ingestion can be dangerous. Many experienced DIYers keep a spray bottle of water and towels nearby, clean immediately, and store used coolant
in a sealed container. It’s not glamorous, but neither is explaining to a vet why your driveway tastes like antifreeze.
Finally, there’s the “why won’t the bubbles stop?” story. If bubbles keep coming endlessly (not just during the thermostat-opening phase),
many experienced techs start thinking beyond trapped air: small leaks that draw air in as the system cools, a weak radiator cap that can’t hold
pressure, or in worst cases, combustion gases entering the coolant. The practical takeaway: bleeding is a great first step, but it shouldn’t be an
infinite loop. If symptoms persist, diagnose the root cause before you turn your weekends into an ongoing coolant soap opera.
Conclusion
Bleeding a cooling system is one of those satisfying DIY tasks where patience pays off: remove trapped air, restore proper coolant circulation,
bring your heater back to life, and keep your engine running at the right temperature. Start cold, fill slowly, let the thermostat open, watch
the bubbles, and always recheck after a full heat cycle. If your car has bleeder screws, use them. If you want the cleanest win, consider a
vacuum-fill toolespecially on modern sealed systems.
Most importantly: if overheating continues after a proper bleed, don’t ignore it. Air is common, but it’s not the only cause. Fix the real issue
nowso you don’t pay for it later with a tow truck and a sad face.