Table of Contents >> Show >> Hide
- Why Build Your Own Bookshelf?
- Before You Build: Plan Like a Sane Person
- Choose the Best Wood for a Bookshelf
- Tools and Supplies You’ll Need
- How To Build A Bookshelf Step by Step
- 1. Create a simple cut list
- 2. Cut your plywood carefully
- 3. Add rabbets or keep the case simple
- 4. Lay out the shelf positions
- 5. Drill pilot holes or pocket holes
- 6. Assemble the case
- 7. Install the back panel
- 8. Cover the plywood edges
- 9. Sand like you mean it
- 10. Paint or stain the bookshelf
- 11. Anchor the bookshelf to the wall
- How To Prevent Shelf Sag
- Common Bookshelf-Building Mistakes to Avoid
- Safety Tips for Building a Bookshelf
- What the Experience of Building a Bookshelf Is Really Like
- Final Thoughts
- SEO Tags
Note: This article is written in standard American English, formatted for web publication, and cleaned of unnecessary citation artifacts.
Bookshelves are sneaky little projects. They look simple enough to make you think, “How hard could four boards and a dream be?” Then you remember those boards need to be straight, square, sturdy, attractive, and not collapse the first time your hardcover collection stages a reunion tour. The good news is that building a bookshelf is absolutely doable for a beginner with patience, basic tools, and a willingness to measure twice instead of trusting your eyeballs and pure optimism.
If you want a piece that fits your room, your books, and your style better than most store-bought options, a DIY bookshelf is one of the smartest woodworking projects you can tackle. It teaches layout, cutting, assembly, sanding, finishing, and the fine art of pretending you always meant for that one tiny imperfection to be “character.” In this guide, you’ll learn how to build a bookshelf step by step, choose the right wood, avoid sagging shelves, and end up with a finished piece that looks custom instead of “garage-adjacent.”
Why Build Your Own Bookshelf?
A homemade bookshelf gives you control over the size, shelf spacing, finish, and style. That matters more than people think. Maybe you need a narrow bookcase for a hallway, a low shelf for a kid’s room, or a tall unit that turns an awkward wall into a mini library. Building your own means you are not stuck with whatever dimensions a retailer decided were “close enough.”
It can also be more practical than buying something flimsy. A well-built bookshelf made from quality plywood or hardwood can hold heavy books without bowing like it just heard terrible news. Plus, you can choose whether you want fixed shelves for maximum rigidity or adjustable shelves for flexibility. In other words, you get storage with a little dignity.
Before You Build: Plan Like a Sane Person
The most important part of building a bookshelf happens before you cut a single board. Start by deciding where the bookshelf will live and what it will hold. Books are heavy. Art books are extra heavy. Decorative vases somehow weigh as much as bowling balls. Measure the wall, note the baseboards, and think about whether the unit should sit flush against the wall or include trim for a built-in look.
Questions to answer first
- How tall and wide should the bookshelf be?
- Will it be freestanding or anchored to the wall?
- Do you want fixed shelves, adjustable shelves, or both?
- Will you paint it or stain it?
- Are you storing paperbacks, heavy hardcovers, décor, or all three?
For a beginner-friendly project, a classic size is about 72 inches tall, 30 to 36 inches wide, and 11 to 12 inches deep. That depth works well for most books without swallowing half the room. Shelf spacing around 10 to 12 inches handles standard books nicely, while one taller opening is useful for oversized titles, baskets, or display pieces.
Choose the Best Wood for a Bookshelf
If you are wondering what wood to use for a bookshelf, here is the practical answer: 3/4-inch plywood is usually the sweet spot for beginner and intermediate builders. It is stable, widely available, easier to work with than solid hardwood in large panels, and strong enough for most bookshelf projects when used correctly.
Best material options
- Birch plywood: A favorite for DIY bookshelves because it is sturdy, relatively clean-looking, and takes paint or stain well.
- Oak plywood: Strong, classic, and attractive, but heavier and more expensive.
- Pine plywood: Budget-friendly and workable, though softer and more prone to dents.
- Solid hardwood: Beautiful and durable, but pricier and less forgiving for beginners.
If you plan to stain the bookshelf, plywood with a good face veneer is usually a safer bet than bargain-bin mystery wood. If you plan to paint, you have a bit more freedom. Still, for shelves that need to carry real weight, avoid treating soft, knotty material like a heroic structural element. Pine can work, but it is not the best choice for long, heavily loaded shelves.
One more smart move: use a 1/4-inch plywood back panel. It does more than cover the rear. It helps keep the case square and adds stability, which is a fancy way of saying it helps your bookshelf avoid turning into a polite parallelogram.
Tools and Supplies You’ll Need
You do not need a cathedral-sized workshop to build a bookshelf. A straightforward setup is enough.
Basic tools
- Tape measure
- Speed square or combination square
- Circular saw with guide, track saw, or table saw
- Drill/driver
- Pocket hole jig or countersink bit
- Clamps
- Orbital sander
- Stud finder
- Level
Materials
- 3/4-inch plywood for sides, top, bottom, and shelves
- 1/4-inch plywood for the back
- Wood glue
- 1 1/4-inch pocket screws or wood screws
- Edge banding or solid wood edging
- Wood filler
- Sandpaper in 120-, 180-, and 220-grit
- Paint, stain, and clear topcoat
- Wall anchors or screws for studs
How To Build A Bookshelf Step by Step
1. Create a simple cut list
For a standard bookshelf, you usually need two side panels, one top, one bottom, several shelves, and one back panel. If you are using 3/4-inch plywood, remember to account for material thickness in your math. This is where many innocent builders accidentally create a shelf that is either too short or emotionally distant from the side panel.
Sketch the bookshelf on paper and label every piece with its dimensions. That simple habit saves wood, time, and dramatic sighing.
2. Cut your plywood carefully
Make your cuts with a circular saw and straightedge guide, a track saw, or a table saw. Accuracy matters. Crooked cuts create assembly headaches later, and wood is not known for its sympathy. If possible, label each part immediately after cutting so you do not mix up the top with a shelf or the shelf with your confidence.
3. Add rabbets or keep the case simple
If you want a cleaner, stronger build, cut a rabbet along the back edges of the side panels to receive the back panel. You can also cut dadoes for fixed shelves if you want extra strength and alignment. Dadoes are grooves that hold a shelf in place and make assembly easier because the shelf has a home instead of floating in space while you chase it with screws.
If you are new to woodworking, don’t panic. A pocket-screw bookshelf or a carefully glued and screwed case can still work very well. Dadoes are wonderful, but they are not a legal requirement.
4. Lay out the shelf positions
Mark your shelf locations on both side panels at the same time so everything stays consistent. Use a square to carry those lines across the inside faces. For fixed shelves, these lines guide your joinery and assembly. For adjustable shelves, this is the stage where you decide where your shelf-pin holes will go.
Adjustable shelves are great if your needs may change. A row of evenly spaced pin holes gives you flexibility later, and clean, consistent drilling makes the finished bookshelf feel more professional.
5. Drill pilot holes or pocket holes
If you are using screws, pre-drill. Always. Wood splits, plywood veneers chip, and regrets last forever. Pocket holes are especially beginner-friendly because they create a strong connection while hiding most of the hardware on the inside or underside of the case.
For a clean build, use wood glue at every major joint. Glue adds strength, reduces movement, and helps the bookshelf feel solid instead of vaguely negotiable.
6. Assemble the case
Attach the bottom and top between the side panels first. Then add the fixed shelves. Clamp as you go, check for square, and keep the front edges flush. If anything starts creeping while you drive screws, stop and correct it. A bookshelf assembled out of square only gets more stubborn later.
Once the main box is together, measure diagonally from corner to corner in both directions. If the measurements match, the case is square. If they don’t, nudge it into alignment before the glue sets and before the back goes on.
7. Install the back panel
The back panel is one of the most important parts of the whole project. Lay the bookshelf face down, apply glue if desired, position the back so all edges are flush, and nail or screw it in place. This locks the case into square and dramatically improves rigidity.
If you want extra style points, paint the back a contrasting color before installation. It creates visual depth and makes the whole bookshelf look more custom without making your wallet cry.
8. Cover the plywood edges
Raw plywood edges can look unfinished. You have two good options: iron-on edge banding or solid wood edging. Edge banding is quick and beginner-friendly. Solid wood edging takes longer, but it adds strength to the front of the shelf and helps fight sag over time.
If your shelves are on the longer side, edging is not just decorative. It is one of the little upgrades that can make a shelf stiffer and more durable.
9. Sand like you mean it
Sand the whole piece starting at 120 grit, then move to 180, and finish with 220 for a smooth surface. Ease the sharp edges slightly so the bookshelf feels finished and friendly instead of capable of drawing blood during casual dusting.
Fill visible holes, seams, or imperfections with wood filler before your final sanding pass. Wipe away dust thoroughly. Finishing over dust is how you end up preserving your mistakes under a beautiful, permanent clear coat.
10. Paint or stain the bookshelf
If you love visible grain, stain is the move. If you want a crisp built-in look, paint is often easier. Either way, add a protective topcoat. A clear polyurethane or polycrylic finish helps guard against scratches, scuffs, spills, and the low-level abuse furniture receives from daily life.
For lighter woods and painted-adjacent looks, a clear water-based finish can help maintain a cleaner color. For warmer tones, oil-based finishes often deepen the wood nicely. Test your stain and finish on scrap first. That tiny extra step can save you from discovering too late that your “natural oak” finish actually looks like toasted pumpkin soup.
11. Anchor the bookshelf to the wall
If the bookshelf is tall, narrow, or loaded with books, anchor it to wall studs. This is not optional in homes with kids, pets, or energetic adults who treat lower shelves like ladders. Use a stud finder, locate the studs, and secure the case properly. Store heavier items on lower shelves whenever possible to improve stability.
How To Prevent Shelf Sag
Sagging is the villain of bookshelf design. It starts small, then one day your shelf looks like it is trying to nap in the middle. The best prevention is planning.
Ways to keep shelves straight
- Use 3/4-inch plywood or thicker material for most shelves.
- Keep long spans reasonable, especially for heavy books.
- Add a solid wood front edge to stiffen the shelf.
- Use fixed shelves or vertical dividers to break up wide openings.
- Do not overload softwood shelves with heavy hardcovers.
In plain English: the longer the shelf and the heavier the load, the more you need thickness, edging, or extra support. If your design includes especially wide spans, reinforce them early instead of acting surprised later.
Common Bookshelf-Building Mistakes to Avoid
- Skipping the planning stage: This leads to awkward dimensions and wasted material.
- Using weak material for long spans: Budget wood is not magic.
- Forgetting the back panel: Without it, the case can rack out of square.
- Ignoring edge treatment: Exposed plywood edges can make the project look unfinished.
- Rushing the finish: Sanding and dust removal matter more than most beginners expect.
- Not anchoring tall furniture: A beautiful bookshelf should not also be a tipping hazard.
Safety Tips for Building a Bookshelf
Woodworking should be satisfying, not a dramatic reenactment of poor decisions. Wear eye protection when cutting, drilling, and sanding. Use hearing protection around loud tools. Manage wood dust with a shop vacuum, dust collection, or local extraction if available. Fine wood dust is not something you want in your lungs, your eyes, or drifting through the room like workshop confetti.
Also, support sheet goods properly when cutting them. Full plywood sheets are awkward, heavy, and surprisingly good at reminding you about leverage. Break down large sheets safely before making final cuts.
What the Experience of Building a Bookshelf Is Really Like
Building your first bookshelf is less like a glamorous TV makeover and more like a very educational conversation between you, your tape measure, and a board that somehow became 1/8 inch shorter than reality. It begins with confidence. You look at a stack of plywood and think, “This will be simple.” Then you start planning, and suddenly you are learning that every shelf has a thickness, every cut has consequences, and every “close enough” decision comes back later wearing boots.
That said, the experience is wildly rewarding. One of the first things people notice is how quickly a bookshelf feels like a real piece of furniture. Unlike tiny practice projects that end up living in a drawer, a bookshelf has immediate presence. The moment the sides, top, and bottom come together, you stop seeing random wood parts and start seeing something useful. That is a great boost for new woodworkers, especially if they have spent a week making test cuts and wondering whether they are just very committed owners of expensive clamps.
Another common experience is discovering how important squareness is. At the beginning, “square” sounds like one of those boring woodworking words adults say while ruining the fun. By the middle of the project, it becomes your entire personality. If the case is out of square, the back panel fights you, the shelves look slightly off, and the whole build starts giving “haunted hallway cabinet” energy. When you get it right, though, everything clicks. The back drops into place, the shelves line up, and you feel like you have unlocked one of the secret levels of DIY.
Finishing is its own emotional journey. You sand, then sand more, then discover a scratch you missed, then sand again while negotiating with yourself. But once the paint or stain goes on, the project transforms fast. Suddenly the plywood edges disappear under banding or trim, the grain pops, and the bookshelf starts looking like something you would proudly keep in your living room instead of hiding in a laundry corner.
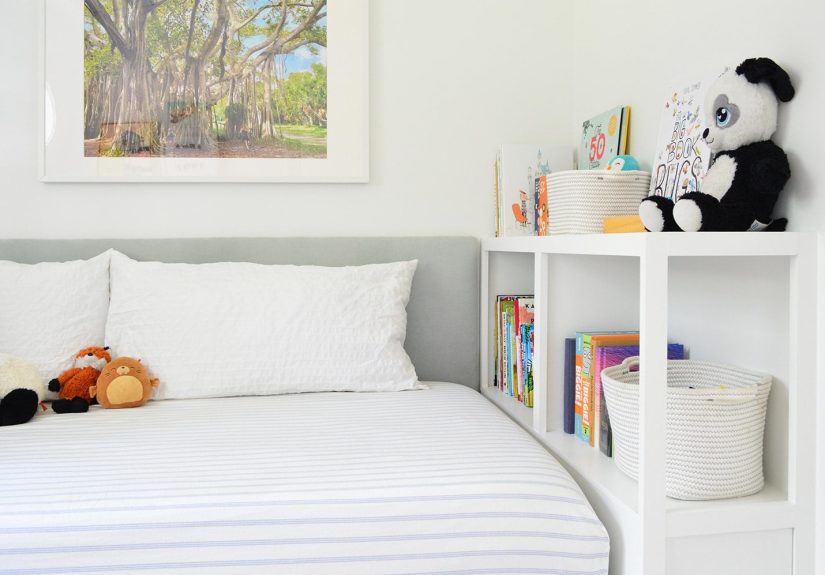
Then comes the best part: loading it up. Books, framed photos, baskets, plants, and little objects finally have a home. A handmade bookshelf changes a room because it adds both storage and personality. It says, “Yes, I needed more organization, but I also wanted a little charm.” And every time someone compliments it, you get to casually say, “Thanks, I built it,” which is one of the top-tier sentences in home improvement.
The experience also teaches patience. You learn that careful layout saves headaches, pre-drilling is worth it, and rushing a finish is the woodworking version of tripping at the end of the race. Most of all, you learn that a bookshelf is not just a box with shelves. It is a project that teaches confidence. After building one, you start looking around your house differently. Suddenly you are not just seeing furniture. You are seeing future projects. A console table? Possible. Built-ins? Tempting. A reading nook with matching shelves? Now we are getting dangerous.
So if you are on the fence, build the bookshelf. It is practical, customizable, beginner-friendly, and satisfying in a way flat-pack furniture can only dream about. Even if you make a few mistakes, you will end up with better skills, a sturdier shelf, and a story to tell every time someone asks where you bought it.
Final Thoughts
If you want to learn how to build a bookshelf that looks good and lasts, focus on the fundamentals: smart planning, quality materials, accurate cuts, square assembly, strong shelf support, and a durable finish. Keep the design simple for your first build, and do not underestimate the value of a back panel, edge treatment, and wall anchoring.
A great bookshelf is not about showing off complicated joinery. It is about building something useful, sturdy, and tailored to your space. Start with a clear plan, take your time, and remember: the goal is a bookshelf, not a character-building crisis. Though, to be fair, woodworking usually offers a little of both.