Table of Contents >> Show >> Hide
- Quick Safety Note (Especially If You’re Under 18)
- What “Framing a Bathroom Mirror” Usually Means
- Pick Your Method: Two Reliable Options
- Tools and Materials Checklist
- Step 1: Choose a Frame Style That Works in a Bathroom
- Step 2: Measure the Mirror Like You Want Your Corners to Line Up
- Step 3: Choose Your Corner Joinery (Don’t Overthink, Just Choose)
- Step 4: Cut Your Wood (Or Let the Store Do It)
- Step 5: Dry-Fit on the Mirror Before You Glue Anything
- Step 6: Prep Surfaces (This Is Why Frames Stay Put)
- Step 7: Finish the Wood Before Installation (Cleaner, Faster, Less Swearing)
- Step 8: Attach the Frame (Method A: Frame-On-Mirror)
- Step 9: Attach the Frame (Method B: Removable Cap Frame)
- Step 10: Final Touches That Make It Look Custom
- Troubleshooting: Common Problems and Fixes
- Cost, Time, and What This Project Really Takes
- Conclusion
- Real-World DIY Experiences (The Stuff People Wish They Knew First)
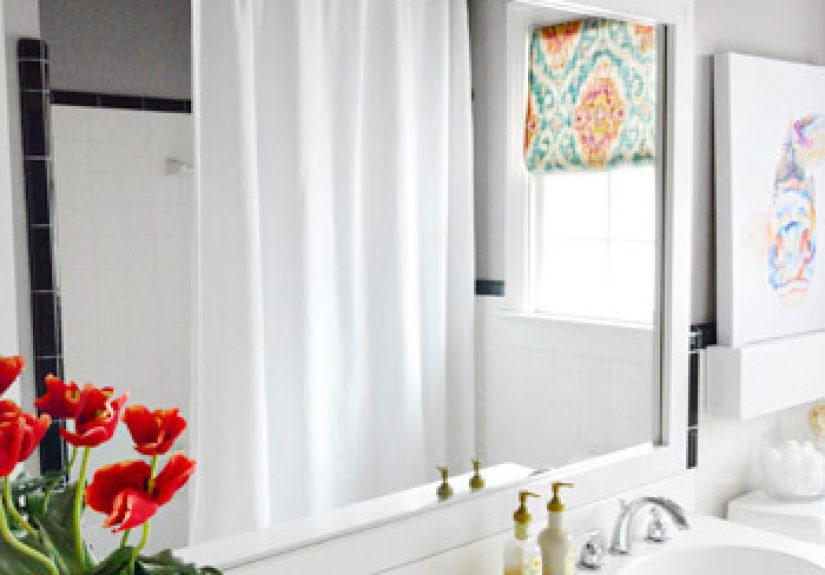
Builder-grade bathroom mirrors are the khaki pants of home design: practical, everywhere, and nobody’s first choice for a night out. The good news is you don’t need to replace the mirror to make it look custom. A simple wood frame can add warmth, hide clips, and instantly upgrade your vanity walloften in a single weekend.
This guide walks you through how to build a wood frame around a bathroom mirror the smart way: choosing the right trim, measuring so your corners actually meet, finishing so humidity won’t wreck your hard work, and attaching the frame safely without damaging the mirror backing.
Quick Safety Note (Especially If You’re Under 18)
Cutting wood and using adhesives can be risky. If you’re a teen DIYer, do the cutting and adhesive steps with a parent/guardian or a trusted adult. Wear eye protection, keep fingers away from blades, and work in a well-ventilated areabathrooms love humidity, but adhesives and finishes do not love being inhaled.
What “Framing a Bathroom Mirror” Usually Means
Most bathrooms with a “plain mirror” have a large, frameless mirror glued to the wall (often above a vanity). In that common setup, you’re not building a traditional picture frame that the mirror sits inside. Instead, you’re creating a decorative wood trim frame that attaches to the face of the mirror (or sometimes to the wall around it), giving the look of a built-in framed mirror.
Pick Your Method: Two Reliable Options
Method A: Frame-On-Mirror (Fastest, Most Common)
You build a four-sided wood frame and adhere it directly onto the mirror surface. This is the go-to approach for builder-grade mirrors you don’t want to remove from the wall. Many DIY guides recommend mirror-safe construction adhesive and careful placement so the frame sits evenly and doesn’t squeeze adhesive onto the visible glass.
Method B: Removable “Cap Frame” (More Carpentry, Easier Future Changes)
You build a shallow, box-like frame that “caps” the mirror edges (sometimes hiding clips), and it can be attached using hidden fasteners, brackets, or a support system. This approach borrows from simple mirror-frame plans that create depth and conceal hardware. It can be a great choice if you want a more furniture-like look or plan to repaint later without scraping adhesive off glass.
Tools and Materials Checklist
Tools (Choose What You Have)
- Tape measure and pencil
- Level (a small torpedo level works fine)
- Miter saw or miter box (or have trim cut at the store)
- Sandpaper (120–220 grit) or a sanding sponge
- Caulk gun (for adhesive)
- Painter’s tape (optional but helpful for layout)
- Clamps (optional for assembling the frame before installing)
Materials
- Trim, molding, or 1x lumber (pine, poplar, oak, or MDF rated for interior trim)
- Wood glue (if assembling joints off the mirror)
- Finish nails or brad nails (optional, depending on method)
- Mirror-safe construction adhesive (importantsome adhesives can damage mirror backing)
- Wood filler (if needed)
- Primer/paint or stain + clear coat suited for humid spaces
- Caulk (paintable) for any gaps at the wall edge, if your frame touches the wall
Step 1: Choose a Frame Style That Works in a Bathroom
Trim vs. 1x Lumber
Trim (like casing or decorative molding) is light and easy to work with. 1x lumber (like 1×3 or 1×4) gives a chunkier, modern look and can even support an optional ledge. Both look greatyour choice should match the vibe of your vanity and lighting.
Moisture Reality Check
Bathrooms get steamy. That doesn’t mean wood can’t live thereit absolutely canbut it does mean you should finish it properly. A clear protective topcoat designed for humidity helps prevent swelling, staining, and that “why does my frame feel fuzzy?” moment. Many DIYers prefer quick-drying, low-odor water-based options for indoor work, and there are finishes marketed for humid or moisture-prone areas.
Clip Problems? Plan for It Now
If your mirror has plastic clips at the edges, decide whether the frame will cover them (using thicker trim or a cap-style frame), or whether you’ll work around them. Some DIYers swap bulky clips for flatter hardware (like washers with screws) so the frame can sit closer to the mirror face.
Step 2: Measure the Mirror Like You Want Your Corners to Line Up
Measuring is where most “easy weekend projects” quietly become “why is there a gap big enough to mail a letter through?” projects. Don’t worrythis is fixable with a good plan.
Measure Width and Height (Twice)
- Measure the mirror width (left to right) and height (top to bottom).
- Check top and bottom widthswalls aren’t always square, and mirrors aren’t always perfectly placed.
- If the mirror is slightly out of level, you can still make the frame level (recommended) and let the tiny mismatch be visually invisible.
Decide on a “Reveal” (Optional, But Looks Professional)
A reveal is how much mirror you want to show between the edge of the wood and the mirror edge (often 1/4 to 1/2 inch). A small reveal looks intentional and can help if the mirror edges are rough or if clips sit right at the edge.
Example Measurement Plan
Suppose your mirror measures 36″ wide by 42″ tall, and you want a 1/4″ reveal all around. Your frame’s inner opening should be: 35-1/2″ by 41-1/2″ (subtract 1/2″ total in each direction because you’re revealing 1/4″ on both sides).
Step 3: Choose Your Corner Joinery (Don’t Overthink, Just Choose)
Option 1: Mitered Corners (45° Cuts)
Miters look the most “frame-like” and polished. The tradeoff is they demand accurate cuts. If your saw is slightly off, the corners will tell on you immediately.
Option 2: Butt Joints (Square Cuts)
Butt joints are simpler: the top and bottom pieces run full width, and side pieces fit between (or vice versa). It’s easier to cut, easier to adjust, and still looks greatespecially with thicker 1x lumber or modern trim.
Option 3: Cap Frame / Box Frame
This is a deeper frame that can hide clips and create a shadow line, like a real framed mirror. Some simple mirror-frame plans use pocket holes, mirror clips, or a recessed lip to hold a mirror in a frameideas you can adapt if you’re building something removable and sturdier.
Step 4: Cut Your Wood (Or Let the Store Do It)
If you have a miter saw: set up a stop block if possible for repeatable cuts. If you don’t: many home improvement stores will do straight cuts, and you can use pre-mitered molding corners or a simple miter box for smaller trim.
Cut List (Example for Butt Joints)
- Top piece: mirror width (or inner opening width + your reveal plan)
- Bottom piece: same as top
- Left side: mirror height minus thickness of top + bottom pieces (if sides fit between)
- Right side: same as left
Cut List (Example for Mitered Corners)
With mitered corners, each piece is cut with 45° angles, and your “length” should be measured consistently (either long point to long point, or short point to short point). Pick one method and stick to it.
Step 5: Dry-Fit on the Mirror Before You Glue Anything
Place the pieces against the mirror to confirm the fit. Use painter’s tape to mark reference lines if it helps: one at the top edge of the frame, one on each side. This is your “no surprises” step.
Pro Layout Trick
Make a temporary “hinge” with painter’s tape at each corner while the pieces are on the mirror. This lets you lift the frame away as one unit, apply adhesive, and put it right back into the taped outline without drifting.
Step 6: Prep Surfaces (This Is Why Frames Stay Put)
- Clean the mirror where the frame will attach. Remove dust, toothpaste mist (yes, that’s a thing), and any oily residue.
- Lightly sand the back of the trim where adhesive will go to improve grip (especially if it’s glossy pre-primed molding).
- Wipe off sanding dust.
Step 7: Finish the Wood Before Installation (Cleaner, Faster, Less Swearing)
It’s easier to stain/paint and topcoat your frame pieces before they’re attached to the mirror. Touch-ups are simple afterward, but doing the main finishing work on a flat surface saves time and avoids getting finish on glass.
Bathroom-Friendly Finishing Approach
- Paint: Prime if needed, then use a quality interior paint. Add a clear coat only if desired for extra protection.
- Stain: Stain, let it dry fully, then seal with a protective clear coat. Many water-based clear coats have lower odor and faster recoat times.
- High-humidity areas: Consider a protective finish marketed for humidity and moisture exposure, and follow the label for cure time.
If you use painter’s tape for crisp edges, remove it carefullypulling back on itself at an angle helps prevent peeling and ragged lines.
Step 8: Attach the Frame (Method A: Frame-On-Mirror)
Use Mirror-Safe Adhesive (Non-Negotiable)
Mirror backing can be sensitive. Some adhesives can damage the reflective coating over time, causing dark spots or edge deterioration. Choose a construction adhesive specifically labeled for mirrors or noted as safe for mirror backing.
How to Apply Adhesive Without Making a Mess
- Flip the finished frame pieces face-down on a protected surface.
- Apply adhesive to the back of each piece. Avoid running adhesive right to the edgeleave a margin so nothing squeezes onto the visible mirror. (Some guides recommend staying at least about an inch in from the edge and using beads rather than a full smear.)
- Don’t use one giant, continuous bead all the way around like you’re icing a cake. A broken bead, zigzag, or spaced dollops help airflow and curing.
- Press the pieces onto the mirror using your taped outline as a guide.
- Hold in place briefly, then brace if needed. Painter’s tape can help “clamp” the frame while adhesive grabs.
Bracing and Cure Time
Follow your adhesive’s instructions. Many mirror-rated adhesives recommend bracing and allowing time to cure; humidity and temperature can affect this. The safest move is to avoid heavy steam showers until the adhesive is well-cured (aka: treat your bathroom like a spa later).
Step 9: Attach the Frame (Method B: Removable Cap Frame)
If you want a deeper, removable frame, build the frame as a rigid unit firstthen mount it around the mirror. This style often uses a shallow box with an inner lip so the frame “hugs” the mirror edges.
Basic Build Strategy
- Assemble the outer frame with wood glue and your preferred joinery (miters, butt joints, pocket-hole screws, etc.).
- Add a thin inner “stop” or spacer strip on the back side to create a lip that keeps the frame centered around the mirror. This is similar to how simple mirror frames create depth and hide backside hardware.
- Mount using discreet hardware (small brackets, mirror channels, or other support methods) so the frame can be removed later without scraping glass.
Why People Like This Method
- Hides clips more easily
- Feels more like a real framed mirror
- Easier to repaint the wall later
- No adhesive cleanup on the mirror face
Step 10: Final Touches That Make It Look Custom
Caulk the Gaps (If the Frame Touches the Wall)
If your frame sits partly on the wall (common with thicker builds), a thin bead of paintable caulk can hide uneven drywall lines. Keep it neatthis is not the moment for “abstract caulk expressionism.”
Add a Mini Ledge (Optional, Surprisingly Useful)
A small ledge at the bottom can hold a razor, a tiny plant, or a candle you’ll forget is there until it scares you mid-shower. If you go this route, make sure it’s sealed well and doesn’t interfere with faucet clearance.
Clean the Mirror Like You Mean It
Remove tape carefully, clean any smudges, and polish the glass. The frame will draw attention to the mirrorso now the mirror needs to behave.
Troubleshooting: Common Problems and Fixes
“My Corners Don’t Meet”
- Small gap (1/32–1/16 inch): Wood filler + touch-up paint can save the day.
- Bigger gap: Re-cut the offending piece. Often it’s one miter angle slightly off.
- Walls out of square: Consider butt joints or a slightly larger reveal so the frame reads square even if the room isn’t.
“Adhesive Squeezed Onto the Mirror”
Wipe immediately if it’s still uncured, following the adhesive label for safe cleanup. Next time: keep adhesive further from the inside edge, and use less. Adhesive should act like a helper, not a contestant in a squeezing contest.
“My Mirror Has Clips and the Frame Won’t Sit Flat”
- Use thicker trim or a cap frame that spans over clips.
- Consider flatter hardware options so the frame can sit closer.
- Increase the reveal so the frame doesn’t collide with clip locations.
“The Finish Feels Sticky or Dull in Humidity”
Some finishes need more cure time than “dry to the touch.” Give it longer, run the bathroom fan, and avoid direct water exposure until cured. In high-humidity spaces, a finish designed for moisture exposure can be a better long-term choice.
Cost, Time, and What This Project Really Takes
- Typical cost: Often less than replacing the mirrortrim + adhesive + finish is usually the main spend.
- Time: Cutting and assembly can be a few hours; finishing and cure time can stretch it to a weekend.
- Skill level: Beginner-friendly with careful measuring and safe cutting support.
Conclusion
If your bathroom mirror is functional but bland, building a wood frame around it is one of the highest-impact upgrades you can do without plumbing, demolition, or existential dread. Pick a style that matches your space, measure like a responsible adult, finish for humidity, and use mirror-safe adhesive so your reflective friend stays spotless. You’ll end up with a mirror that looks customwithout paying custom prices.
Real-World DIY Experiences (The Stuff People Wish They Knew First)
Most people start this project thinking, “It’s just four sticks of wood.” And honestly? That’s the vibe. But the difference between “four sticks of wood” and “wow, did you have that made?” is the tiny stuff: the reveal, the corners, and the finish.
A super common experience: the mirror looks perfectly rectangularuntil you put a level on it. Bathrooms are famous for being a little out of square, and builder-grade mirrors are often installed to “look right” rather than “measure right.” The best workaround is to build your frame square and level (because your eyes love level), then use a small reveal so any microscopic mismatch disappears. If you try to perfectly match a slightly crooked mirror edge with tight, no-reveal trim, you’ll notice every wobble forever.
Another classic moment is the clip surprise. People measure, cut, dry-fit… and then the frame rocks like a tiny seesaw because one clip is thicker than expected. The fixes are straightforward: choose thicker molding, build a cap-style frame that spans the clip, or plan a reveal that avoids the clip zone. The lesson: do a dry-fit early, and do it with the clips in place (not in your imagination).
Adhesive is where enthusiasm meets reality. DIYers often use too much because it feels “more secure,” and then it squeezes toward the inside edge. A better experience comes from using a mirror-rated adhesive, applying it in controlled beads or dollops away from the inside edge, and letting the adhesive do its job without turning into a cleanup project. Also, bathrooms are humidso cure time matters. The frame may feel solid in an hour, but giving it extra time (and avoiding steamy showers right away) tends to prevent shifting and helps the bond last.
Finishing is the long game. Paint is forgiving, but stain and clear coat show everything: fingerprints, uneven sanding, and that one spot you “totally meant to fix later.” People who finish the wood before installation usually have a calmer experience because they can work flat, sand evenly, and avoid dripping finish onto glass. If you do stain, many DIYers find that a durable clear topcoat is what keeps the frame from looking tired after months of humidity and daily wipe-downs.
Finally, the most satisfying experience is the instant transformation. A framed mirror changes how the whole vanity wall readsit can make basic lighting feel more intentional, help your faucet and hardware look upgraded, and make the bathroom feel “designed” instead of “default.” And when someone says, “Wait… was that mirror always like that?” you get to enjoy the rarest DIY reward: confusion mixed with respect.