Table of Contents >> Show >> Hide
- Quick Reality Check: When Should You Replace a Brake Caliper?
- Tools and Supplies You’ll Want Nearby
- Before You Start: Safety and Setup
- Step-by-Step: How to Change a Brake Caliper
- 1) Inspect everything before unbolting
- 2) Remove the caliper bolts and support the caliper
- 3) Remove pads and (if needed) the caliper bracket
- 4) Disconnect the brake hose (the “don’t panic” moment)
- 5) Prep the new caliper like a pro
- 6) Reconnect the brake hose correctly (and leak-free)
- 7) Install the bracket, pads, and new caliper
- Bleeding the Brakes After Caliper Replacement
- Final Checks Before You Drive
- Troubleshooting: Common “Uh-Oh” Moments
- Conclusion
- DIY Experiences and Lessons Learned (Extra 500+ Words)
- Chapter 1: “This bolt has been here since the dinosaurs”
- Chapter 2: The “Why is the new caliper on the wrong side?” plot twist
- Chapter 3: The “brake fluid is basically paint remover” moment
- Chapter 4: Bleedingwhere patience becomes a personality trait
- Chapter 5: The post-repair “is this pedal normal?” anxiety
- Chapter 6: The victory lapdone correctly, it feels great
Replacing a brake caliper sounds like something only a grizzled mechanic named “Big Mike” should do while sipping coffee that’s mostly diesel. In reality, it’s a very doable DIY jobif you respect the fact that brakes are not the place for “good enough” energy. Do it right and you’ll save money, learn something, and stop your car with confidence. Do it wrong and you’ll learn what a tow truck driver’s playlist sounds like.
This guide walks you through the full process in standard American English, with safety-first steps, practical tips, and the “why” behind the “what.” It applies to most disc-brake vehicles, but always check your vehicle’s service manual for exact torque specs, bleeding sequence, and any ABS-specific procedures.
Quick Reality Check: When Should You Replace a Brake Caliper?
Calipers usually don’t fail dramatically with fireworks. They fail in annoying, expensive-to-ignore ways. Common signs include:
- Pulling to one side when braking (a caliper may be sticking).
- Uneven brake pad wear (inner pad gone, outer pad still living its best life, or vice versa).
- Brake drag or overheating (wheel feels hot, burning smell, reduced fuel economy).
- Fluid leak around the caliper, bleeder screw, or hose connection.
- Spongy pedal after a leak or repair (air in the system).
If one caliper failed, the other side is often not far behindespecially on high-mileage vehicles or in rust-belt climates. Many DIYers replace calipers in pairs (left and right on the same axle) for balanced braking.
Tools and Supplies You’ll Want Nearby
Gather everything before you lift the car. “I’ll just run to the store real quick” is how projects become weekend-long sagas.
Tools
- Floor jack and jack stands (never rely on the jack alone)
- Lug wrench or impact wrench (optional)
- Socket set and ratchet (plus breaker bar if bolts are stubborn)
- Torque wrench (brakes deserve proper torque)
- Line wrench (flare-nut wrench) for brake line fittings
- C-clamp or caliper piston tool (depending on design)
- Wire brush, brake cleaner, rags
- Bungee cord or caliper hanger (don’t hang it by the hose)
- Clear tubing and catch bottle (for bleeding)
Parts and fluids
- New (or remanufactured) brake caliper (correct side!)
- New brake pads/hardware if worn or uneven
- New copper crush washers if your caliper uses a banjo bolt
- Correct brake fluid (DOT 3 / DOT 4 / DOT 5.1check cap/manual)
- High-temp silicone brake grease for slide pins (not petroleum on rubber)
Before You Start: Safety and Setup
- Park on level ground, set the parking brake, and chock the wheels that stay on the ground.
- Crack the lug nuts loose while the wheel is still on the ground (don’t remove them yet).
- Open the hood and locate the brake fluid reservoir. Keep an eye on the fluid level throughout the jobespecially when bleeding. Brake fluid eats paint, so wipe spills immediately.
- Lift the vehicle with a floor jack and set it securely on jack stands. Give the car a gentle shake. If it wobbles, fix that nownot after your hand is in the wheel well.
- Remove the wheel and set it aside.
Step-by-Step: How to Change a Brake Caliper
1) Inspect everything before unbolting
Take 30 seconds to look at the layout: hose routing, bracket orientation, and where the bleeder screw sits. The bleeder must end up at the top of the caliper (otherwise air gets trapped and you’ll never get a firm pedal). Snap a quick photo if you’re the kind of person who forgets how you got here after one coffee refill.
2) Remove the caliper bolts and support the caliper
Most floating calipers are held by two slide-pin bolts. Remove them and slide the caliper off the rotor. If it’s stubborn, gentle wiggling and a little persuasion usually does it. Avoid yanking the hose.
Important: Hang the caliper using a bungee cord or hook. Do not let it dangle by the brake hose. That hose has feelings. And a job. And if it fails, your stopping power will ghost you.
3) Remove pads and (if needed) the caliper bracket
Depending on your vehicle and caliper style, you may need to remove the caliper bracket (also called the carrier) to swap everything cleanly or to access bolts. Bracket bolts are often tighter than slide pinsuse a breaker bar if needed.
If your pads show uneven wear, now is the time to decide: reuse, replace, or replace everything on both sides. Sticking calipers commonly chew pads unevenly, so fresh pads (and sometimes rotors) are a smart pairing.
4) Disconnect the brake hose (the “don’t panic” moment)
Put a drain pan under the caliper. Brake fluid will dripbecause gravity is consistent like that. There are two common hose connections:
- Banjo bolt connection (a hollow bolt through a round fitting): usually requires new copper crush washers.
- Threaded hard line into caliper: use a line wrench to avoid rounding the fitting.
Once disconnected, plug or cap the hose end if possible to reduce fluid loss and minimize air entry. Some DIYers gently clamp the flexible hose with a proper brake line clampif you do, be gentle and avoid damaging the hose.
5) Prep the new caliper like a pro
Before bolting anything on, compare old and new calipers side-by-side:
- Correct side (left vs. right)
- Bleeder location (must be on top)
- Hose port/banjo orientation
- Mounting ear spacing and hardware
Install any included hardware (anti-rattle clips, pad shims) the same way the old caliper had it. If your caliper is a remanufactured unit, confirm the slide pins move smoothly. Clean and lightly lubricate the slide pins with appropriate brake grease.
6) Reconnect the brake hose correctly (and leak-free)
If you have a banjo bolt setup, use new copper washerstypically one washer on each side of the banjo fitting. Start the bolt by hand to avoid cross-threading.
Tighten to the manufacturer’s spec (banjo bolts are often in the general neighborhood of a few dozen ft-lb, but this varies). Over-tightening can strip threads; under-tightening can leak. Either way, brake fluid will find the fastest route to ruin your day.
Make sure the hose isn’t twisted and that any retaining clips or brackets are reinstalled.
7) Install the bracket, pads, and new caliper
- If removed, reinstall the caliper bracket and torque the bracket bolts to spec. Clean bracket pad channels and apply a tiny amount of brake grease where the pads slide (not on friction material).
- Install brake pads and hardware. Double-check pad orientation (inner vs. outer) and any wear sensor placement.
- Slide the caliper over the pads/rotor and install the slide-pin bolts. Torque these bolts to spec.
Rear caliper note: Some rear calipers (especially with integrated parking brake mechanisms) require the piston to be rotated and pushed in using a special toolpushing straight in can damage the mechanism. If the piston doesn’t compress normally, stop and confirm your caliper type.
Bleeding the Brakes After Caliper Replacement
Any time you open the hydraulic system, you risk introducing air. Air compresses; brake fluid doesn’t. That’s why “air in the lines” feels like a soft pedal and a sudden desire to drive only in first gear forever.
Bleeding basics (what matters most)
- Keep the reservoir full. If it runs dry, you’ll introduce air into the master cylinder and multiply your work.
- Use fresh, correct brake fluid. Brake fluid absorbs moisture over time.
- Follow the proper bleed sequence. Often it’s farthest wheel to closest (commonly RR, LR, RF, LF on left-hand-drive vehicles), but check your manual.
- ABS may require a special procedure (sometimes a scan tool is needed to cycle the pump/solenoids).
- If a caliper has two bleeder screws, you may need to bleed them in a specific order (commonly inboard first, then outboard).
Two-person bleeding method (classic and effective)
- Put a clear hose on the bleeder screw and run it into a catch bottle with a little brake fluid at the bottom (hose end submerged).
- Have your helper press the brake pedal slowly 3–5 times and then hold pressure.
- Open the bleeder screw briefly. Fluid/air will flow. Close the screw before your helper releases the pedal.
- Repeat until you see clean fluid with no bubbles. Top off the reservoir frequently.
- Move to the next wheel in the proper sequence.
One-person options (vacuum or pressure bleeders)
Vacuum bleeders and pressure bleeders can make the job easier and cleaner. They’re especially nice if your “helper” is a golden retriever who can’t work the pedal without also licking your face. Follow the tool instructions and still keep the reservoir topped up.
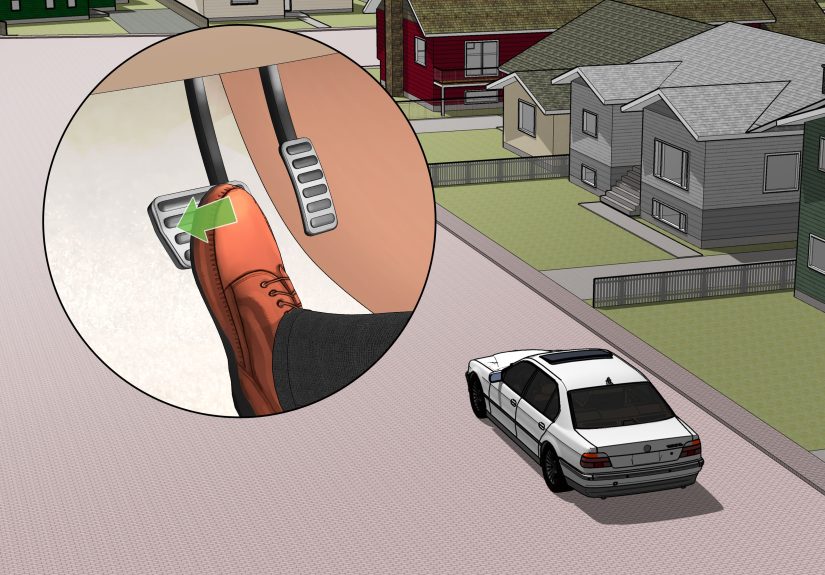
Final Checks Before You Drive
- Pedal test (engine off): Pump the brake pedal until it feels firm.
- Leak check: Inspect the hose connection, bleeder screw, and around the caliper for seepage.
- Reinstall the wheel and torque lug nuts to spec in a star pattern.
- Pedal test (engine on): The pedal may drop slightly with vacuum assist, but it should still feel solid.
- Low-speed test drive: Start in a safe area. Test braking gently, then progressively.
- If you replaced pads/rotors, follow a proper bedding-in process (gradual heat cycling) to reduce noise and improve performance.
Troubleshooting: Common “Uh-Oh” Moments
Spongy pedal
- Most likely: air still in the lines (bleed again, verify bleeder is on top).
- Reservoir ran low during bleeding (you may need a more thorough bleed, possibly including master cylinder/ABS procedure).
Car pulls to one side
- Caliper slide pins sticking, hose restricted, or pads uneven on the other side.
- Replace/inspect both sides on the same axle for balance.
Fluid leak at the banjo bolt
- Old crush washers reused (install new washers).
- Improper torque or misalignment of the banjo fitting.
Brake drag / wheel gets hot
- Slide pins dry or seized, pads not moving freely in the bracket, or hose acting like a one-way valve.
Conclusion
Changing a brake caliper is one of those DIY repairs that feels intimidating until you do it carefullythen it feels empowering. The keys are simple: support the car safely, keep everything clean, use the right tools (especially a line wrench and torque wrench), install new sealing washers where required, and bleed the brakes thoroughly without letting the reservoir run low.
When you’re finished, the reward is immediate: smoother stops, more consistent pedal feel, and the quiet satisfaction of knowing your vehicle is safer because you did the job correctly.
DIY Experiences and Lessons Learned (Extra 500+ Words)
Here’s the part nobody tells you: the hardest section of “How to change a brake caliper” often isn’t the caliperit’s everything around it. Real-world DIY experiences tend to fall into a few predictable chapters, like a sitcom where the villain is rust.
Chapter 1: “This bolt has been here since the dinosaurs”
Caliper bracket bolts can be shockingly tight, and years of road salt can turn them into one with the knuckle. A breaker bar helps, but technique matters too: steady pressure beats frantic jerking, and a little penetrating oil plus patience can feel like wizardry. If the bolt finally breaks free with a loud crack, congratulationsyou’ve just experienced the universal sound of “that’s normal, right?” (It usually is.)
Chapter 2: The “Why is the new caliper on the wrong side?” plot twist
Lots of DIYers learn this lesson exactly once: calipers are side-specific, and the easiest check is the bleeder screw. If the bleeder ends up on the bottom, you’ve got the calipers swapped left-to-right. The car might still assemble beautifully, but it won’t bleed properlyair rises, and it will camp out at the top like it paid rent. The fix is simple (swap them), but it’s a perfect example of why a quick side-by-side comparison before installation saves time and sanity.
Chapter 3: The “brake fluid is basically paint remover” moment
Brake fluid is excellent at two things: enabling hydraulic braking, and ruining whatever finish it touches. In the real world, people spill it. The experienced move is to keep water and rags handy. If you drip fluid on painted surfaces, wipe quickly and rinsedon’t let it sit while you admire your progress. Also: wear gloves. Brake fluid isn’t instant doom for skin, but it’s drying and irritating, and nobody wants hands that feel like sandpaper.
Chapter 4: Bleedingwhere patience becomes a personality trait
Bleeding brakes can be oddly meditative, until it isn’t. The most common DIY hiccup is letting the reservoir get too low. It happens because you’re focused on the bubble stream at the caliper, and meanwhile the master cylinder is quietly sipping itself empty. Then the pedal goes soft, your heart rate spikes, and you realize you just promoted a simple bleed into a bigger project. The practical habit is to check the reservoir every few cyclesset a rule like “top off every 4–5 bleeds,” even if you think you don’t need to.
Chapter 5: The post-repair “is this pedal normal?” anxiety
After bleeding, the pedal should feel firm. But real-world feel varies with vehicle design, brake booster behavior, and even your own expectations. A helpful tip: with the engine off, pump the pedal until it firms up. That’s your baseline. When you start the engine, the pedal may drop slightly because the vacuum booster is assistingthis is normal. What’s not normal is a pedal that sinks steadily to the floor or feels mushy no matter how many times you pump. In that case, stop driving and re-check for leaks and trapped air.
Chapter 6: The victory lapdone correctly, it feels great
The best real-world experience is the test drive: calm, controlled, and intentionally boring. You start at low speeds, confirm straight stops, listen for weird noises, then gradually build confidence. When everything feels right, it’s incredibly satisfyingbecause you didn’t just bolt parts on. You handled safety-critical hardware, followed a process, and improved how your car stops. That’s the kind of DIY win that makes you look at other repairs and think, “Okay… what else can I fix?” (Just remember: brakes are still not the place for improvisational theater.)