Table of Contents >> Show >> Hide
- Why Knowing How to Change an Ink Cartridge Matters
- Before You Start: What You Need
- How to Change an Ink Cartridge in 7 Steps
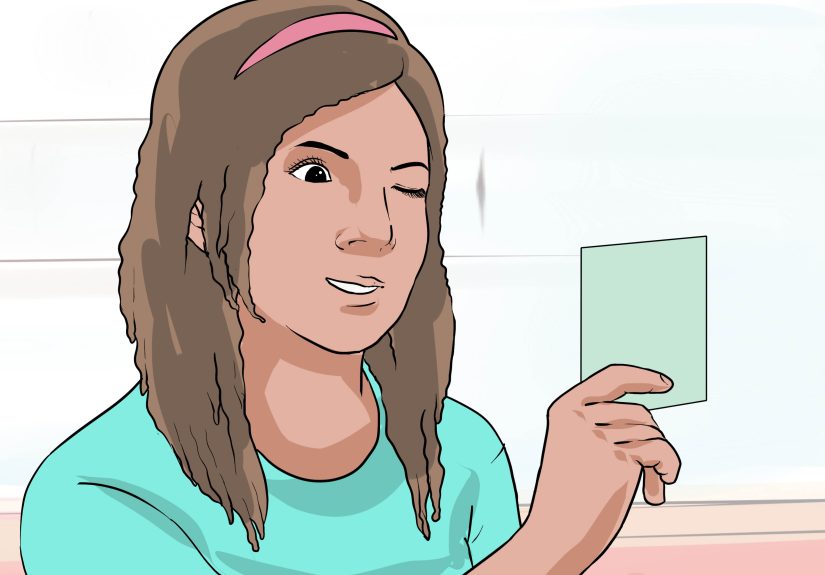
- Step 1: Confirm the Correct Cartridge Type
- Step 2: Turn the Printer On and Wait for It to Settle
- Step 3: Open the Cartridge Access Door
- Step 4: Remove the Empty Ink Cartridge
- Step 5: Prepare the New Ink Cartridge
- Step 6: Insert the New Cartridge Until It Clicks
- Step 7: Close the Printer and Run a Test Print
- Common Mistakes to Avoid When Replacing Printer Ink
- Troubleshooting After You Change an Ink Cartridge
- How to Recycle Old Ink Cartridges
- How Often Should You Replace Ink Cartridges?
- Best Practices for Cleaner, Cheaper Printing
- Extra Experience: Real-Life Lessons From Changing Ink Cartridges
- Conclusion
Changing an ink cartridge sounds like one of those tiny household tasks that should take thirty secondsright up until the printer starts blinking, the cartridge refuses to click, and your hands look like you just lost a duel with a squid. The good news? Replacing printer ink is usually simple once you know the right order of operations.
This guide explains how to change an ink cartridge in seven clear steps, whether you use a common home inkjet printer from HP, Canon, Epson, Brother, or a similar brand. Printer models vary, of course, but the basic process is surprisingly universal: confirm the cartridge type, turn the printer on, open the access area, remove the old cartridge, prepare the new one, install it properly, and run a test print.
Before you begin, remember one golden rule: never force anything. Ink cartridges are designed to fit in a specific direction, slot, and color position. If something feels like it needs the strength of a superhero, stop and recheck the cartridge number, protective tape, and alignment. Your printer may be dramatic, but it is not a gym machine.
Why Knowing How to Change an Ink Cartridge Matters
Printers often seem to run out of ink at the least convenient moment: right before a school project is due, five minutes before a client meeting, or exactly when you need one shipping label to save your afternoon. Learning how to replace an ink cartridge correctly helps you avoid smudged pages, warning messages, printhead errors, and unnecessary trips to the store.
Proper cartridge installation also protects the printer. Touching copper contacts, leaving ink slots empty too long, inserting the wrong cartridge, or forgetting to remove the protective tape can cause poor print quality or detection errors. A careful replacement takes only a few minutes and can keep your printer running smoothly for many print jobs to come.
Before You Start: What You Need
Gather a few basic items before opening the printer. You will need the correct replacement ink cartridge, a clean paper towel, a small trash bag or recycling envelope, and a few sheets of plain white paper for testing. It is also smart to keep your printer’s model number nearby. The model number is usually printed on the front, top, inside door, or back label of the machine.
Most inkjet printers use either two cartridgesone black and one tri-coloror separate cartridges for black, cyan, magenta, and yellow. Some photo printers include extra colors such as photo black, gray, light cyan, or light magenta. Matching the cartridge number matters more than matching the cartridge shape by eye. Two cartridges can look like cousins and still be completely incompatible.
How to Change an Ink Cartridge in 7 Steps
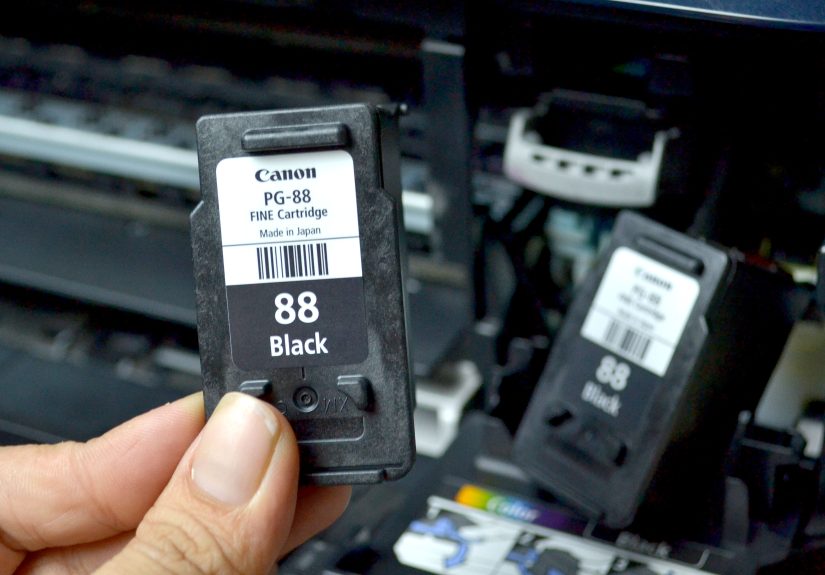
Step 1: Confirm the Correct Cartridge Type
Start by checking which cartridge your printer needs. You can find this information on the printer screen, in the printer software, on the old cartridge label, inside the cartridge access door, or in the printer’s manual. Many printers display messages such as “Replace Black Ink,” “Install Cyan Cartridge,” or “Low Color Ink.”
Do not rely only on brand name. For example, an HP printer may use HP 67, HP 902, HP 952, or many other cartridge families. Canon printers may use FINE cartridges or individual ink tanks. Epson and Brother models may use separate color tanks or cartridges with tabs and lock levers. The correct cartridge number is the key that keeps this little adventure from turning into a return-counter field trip.
If you use high-yield cartridges, such as XL versions, make sure your printer supports them. High-yield cartridges often cost more upfront but print more pages, which may make sense for home offices, students, teachers, or anyone who prints more than the occasional concert ticket.
Step 2: Turn the Printer On and Wait for It to Settle
Most inkjet printers should be powered on before you replace the cartridge. Turning the printer on allows the cartridge carriage to move into the correct replacement position. If the printer is off, the carriage may be locked in place, and pulling on it can damage internal parts.
After pressing the power button, wait until the printer becomes quiet. You may hear whirring, clicking, or short movement sounds. That is normal. The printer is waking up, checking itself, and possibly wondering why you waited until the ink was completely empty before showing concern.
If your printer has a touchscreen or control panel, follow any on-screen instructions. Some models ask you to confirm that you want to replace a cartridge. Others move the printhead automatically when you open the lid or cartridge door.
Step 3: Open the Cartridge Access Door
Open the cartridge access door, front cover, scanner unit, or top lid, depending on your printer design. On many HP and Canon home printers, the access area is behind a front door or beneath the scanner bed. On many Epson models, you may lift the scanner unit. On many Brother inkjet printers, the ink cover is often on the front right side.
Once the door is open, wait for the cartridge carriage or printhead to stop moving. Never reach into the printer while the carriage is still traveling. It may be small, but it moves with purpose, and your fingers do not need to become part of the mechanism.
Look carefully at the cartridge layout before removing anything. Notice which slot is black, which slot is color, and how the cartridges are angled. If separate color cartridges are used, check the labels for cyan, magenta, yellow, and black. Many printers also use color-coded markings near the slots to help prevent mix-ups.
Step 4: Remove the Empty Ink Cartridge
Remove the old cartridge according to your printer’s design. Some cartridges release when you gently press down. Others have a tab you squeeze. Brother-style cartridges may use a lock release lever. Canon FINE cartridges may tilt out after being pushed down. Epson cartridges may lift straight up after you press or squeeze the tab.
Pull the cartridge out slowly and keep it upright if possible. Ink residue may remain around the nozzle area, so place the old cartridge on a paper towel or directly into a recycling bag. Avoid shaking it like a magic eight ball. Empty cartridges can still leak enough ink to decorate your desk in a style best described as “accidental modern art.”
Do not touch the internal cartridge contacts or the printhead area inside the printer. Oils from your fingers can interfere with detection or print quality. If you see dried ink around the slot, resist the urge to attack it with random cleaners. Use only the cleaning method recommended for your printer model.
Step 5: Prepare the New Ink Cartridge
Open the new cartridge package only when you are ready to install it. Ink cartridges can dry out if left exposed for too long. Remove the cartridge from its packaging, holding it by the plastic sides. Then remove any orange cap, protective clip, pull tab, or plastic tape according to the instructions included with the cartridge.
This step is important. Many “new cartridge not printing” problems happen because the protective tape is still covering the nozzle or vent. The printer may recognize the cartridge but print blank pages, faded lines, or missing colors. If your printer acts offended after installation, checking for leftover tape should be one of your first troubleshooting moves.
Avoid touching copper-colored contacts, gold chips, or ink nozzles. These parts help the printer detect the cartridge and deliver ink properly. Touching them can lead to cartridge errors, streaks, or poor print quality.
Step 6: Insert the New Cartridge Until It Clicks
Slide the new cartridge into the correct slot. Match black to black, color to color, and individual color cartridges to their labeled positions. Most cartridges insert at a slight upward or inward angle, then click into place when seated correctly.
Listen and feel for the click. A properly installed cartridge should sit securely and evenly. If it sticks out, rocks loosely, or refuses to lock, remove it and check the orientation. Also confirm that you bought the correct cartridge number. The wrong cartridge may almost fit, which is exactly the kind of “almost” that printers enjoy using to ruin your day.
Never force the cartridge. If it does not slide in smoothly, compare it with the old cartridge. Check the label, shape, chip location, and any plastic protective pieces. Forcing the wrong cartridge can damage the carriage, lock lever, or contacts.
Step 7: Close the Printer and Run a Test Print
Close the cartridge access door, scanner unit, or ink cover. The printer may spend a few moments recognizing the new cartridge. It may also prompt you to align the printhead, print an alignment page, or confirm that a new cartridge has been installed.
Always run a test print after changing ink. A simple printer status page, alignment sheet, or one-page document is enough. Look for clean text, accurate colors, and no missing lines. If the printout has streaks or gaps, use the printer’s built-in cleaning or alignment tool. Most printer software includes options such as “Clean Printhead,” “Align Cartridges,” or “Print Quality Diagnostic.”
If the printer still shows an error, remove and reinstall the cartridge. Check for protective tape, make sure the door is fully closed, restart the printer, and confirm that the cartridge is compatible. If the cartridge is a third-party or refilled model, be aware that some printers may reject or warn about non-original cartridges, especially after firmware updates.
Common Mistakes to Avoid When Replacing Printer Ink
Using the Wrong Cartridge Number
This is the most common mistake. A cartridge from the same brand is not automatically compatible. Always match the exact number or product code recommended for your printer.
Touching the Nozzle or Contacts
Touching sensitive parts can cause detection issues or poor print quality. Hold cartridges by their sides and keep fingers away from chips, contacts, and ink openings.
Leaving the Printer Open Too Long
Once an old cartridge is removed, install the new one promptly. Leaving the cartridge area exposed for a long time may allow ink to dry around the printhead or nozzles.
Forgetting the Protective Tape
If your new cartridge prints blank pages, do not panic. Check whether the protective strip or cap is still attached. This tiny piece of plastic has embarrassed many perfectly capable adults.
Forcing the Cartridge Into Place
A cartridge should click in with firm but reasonable pressure. If it feels wrong, it probably is wrong. Stop, check the slot, and compare the cartridge with the old one.
Troubleshooting After You Change an Ink Cartridge
Sometimes the printer does not immediately cooperate after a cartridge replacement. Try these practical fixes before assuming the printer has chosen a life of rebellion.
The Printer Says “Cartridge Not Recognized”
Remove the cartridge and reinstall it firmly. Check that the cartridge number is correct and that no tape or plastic remains. Restart the printer. If you are using a third-party cartridge, the printer may display a warning even if the cartridge works.
The Page Prints Blank
Look for protective tape on the cartridge nozzle. Then run a printhead cleaning cycle. If the printer has been unused for weeks or months, dried ink may be blocking the nozzle.
The Colors Look Wrong
Make sure each color cartridge is in the correct slot. Run an alignment or cleaning cycle. If you replaced only one color, another low cartridge may still affect the final print.
The Printer Still Shows Low Ink
Some printers estimate ink levels based on chip data or previous usage. Restart the printer and check the printer software. If the cartridge is refilled or remanufactured, the ink level indicator may not reset accurately.
How to Recycle Old Ink Cartridges
Do not toss empty ink cartridges into the regular trash if you have a recycling option nearby. Cartridges contain plastic, metal, and residual ink, and many manufacturers and retailers offer take-back programs. HP, Canon, and other major brands provide recycling options for eligible cartridges. Office supply stores may also accept used cartridges and sometimes offer rewards or discounts.
Before recycling, place the old cartridge in the packaging from the new one or in a small plastic bag to prevent leaks. If your new cartridge came with a prepaid return envelope, use it. If not, check manufacturer programs, office supply retailers, or local electronics recycling resources.
How Often Should You Replace Ink Cartridges?
You should replace an ink cartridge when the printer reports that it is empty, when print quality becomes poor, or when cleaning cycles no longer fix faded output. However, do not replace cartridges at the first “low ink” warning unless you need reliable printing immediately. Many printers give early warnings, and you may still have enough ink for several pages.
If you print rarely, cartridges may dry out before they are fully empty. To reduce this risk, print a small page every week or two. A quick test page can keep ink flowing and help prevent clogs. Store unopened cartridges in their original packaging, away from heat and direct sunlight.
Best Practices for Cleaner, Cheaper Printing
Replacing ink correctly is only part of smart printer ownership. You can also stretch cartridge life by printing in draft mode for everyday documents, using grayscale when color is not needed, previewing pages before printing, and avoiding unnecessary full-page graphics. For photos, use the correct photo paper and quality setting so you do not waste ink on disappointing results.
If you print frequently, compare standard cartridges, XL cartridges, ink tank printers, and subscription plans. The cheapest printer on the shelf may not be the cheapest printer over time. Ink cost per page matters, especially for families, small businesses, teachers, and remote workers.
Extra Experience: Real-Life Lessons From Changing Ink Cartridges
After helping many people replace ink cartridges, one pattern becomes obvious: the actual task is rarely the hard part. The confusion usually starts before the printer is even opened. Someone buys “Canon ink” or “HP ink” and assumes that is specific enough. It is not. Printer ink is like a house key. It may be the right brand of key, shiny and official-looking, but if the cut is wrong, it will not open the door.
One useful habit is to take a photo of the old cartridge before going shopping. Capture the cartridge number, color label, and printer model. This saves time and prevents the classic store-aisle stare, where every cartridge box begins to look exactly the same. If you order online, double-check compatibility on the product page and compare it with your printer model. Spending two extra minutes here can save two days of waiting for the correct replacement.
Another experience-based tip is to prepare the area before opening the printer. Ink replacement is not usually messy, but when it is messy, it is impressively committed. Put down a paper towel, keep the new cartridge close, and avoid wearing your favorite white shirt. Ink has a mysterious attraction to light-colored fabric, important documents, and anything you planned to keep clean.
It also helps to be patient with the printer after installation. Many people close the lid, instantly try to print, and assume something is wrong when the machine pauses. In reality, the printer may be checking the cartridge, charging ink, or preparing an alignment page. Give it a moment. Printers are not fast thinkers. They are more like tiny office appliances with a flair for suspense.
If a cartridge error appears, do not immediately declare the printer broken. Most problems come from simple causes: the cartridge is not fully seated, the tape is still attached, the wrong slot was used, or the printer needs a restart. Remove the cartridge, inspect it calmly, and reinstall it. A firm click is your friend. A vague wobble is not.
Finally, keep old cartridges out of drawers. Many people create a “maybe I’ll recycle this later” pile that slowly becomes an archaeological site of office supplies. Place empties in the new cartridge box, seal them in a bag, and recycle them during your next errand. It is cleaner, better for the environment, and far less weird than discovering seven dried cartridges next to old batteries and mystery cables two years later.
The biggest lesson is simple: changing an ink cartridge is not about being technical. It is about being methodical. Confirm the cartridge, turn the printer on, wait for the carriage, remove the old ink carefully, prepare the new one properly, click it into place, and test the result. Follow those steps, and your printer may still be dramaticbut at least it will be dramatic while printing.
Conclusion
Changing an ink cartridge is a quick maintenance task once you understand the process. The most important steps are choosing the correct cartridge, handling it carefully, removing protective tape, installing it in the right slot, and running a test print afterward. Whether you own an HP, Canon, Epson, Brother, or another inkjet printer, the same basic principles apply: do not force parts, do not touch sensitive contacts, and do not ignore alignment or cleaning prompts.
With a little care, you can avoid cartridge errors, blank pages, streaky prints, and unnecessary frustration. Better yet, you can recycle the old cartridge responsibly and keep your workspace free from ink-related chaos. Your printer may never become your favorite household device, but at least it can stop being the villain of your home office.