Table of Contents >> Show >> Hide
- Why Wooden Cutting Boards Need Different Care (And Why They’re Worth It)
- The Everyday Routine: Clean It in Under 2 Minutes
- When to Sanitize a Wooden Cutting Board
- How to Remove Smells (Garlic, Onion, Fish, and “What Happened Here?”)
- How to Remove Stains (Without Turning Your Board Into a Science Fair Project)
- Deep Cleaning: When Your Board Feels Rough, Fuzzy, or Overworked
- How to Oil a Wooden Cutting Board (The “New Board” Secret)
- Habits That Keep a Wooden Cutting Board Looking New
- Real-Kitchen Experiences: What Actually Happens When You Start Caring for Your Board (500+ Words)
- Conclusion: Clean, Condition, Repeat (Your Board Will Thank You Quietly)
A wooden cutting board is basically the “good jeans” of the kitchen: it looks better with time, it fits into every situation,
and you feel oddly proud whenever it’s clean. The only problem? Wood is also the “good jeans” of the kitchen in another way:
if you treat it badly (soaking, overheating, ignoring stains), it will punish you with warping, cracking, and that mysterious
onion smell that follows you like a clingy ex.
The good news: keeping a wooden cutting board clean, sanitary, and ridiculously good-looking isn’t complicated. It’s a handful of
simple habitsplus a little oilingdone consistently. Below is the best, real-world way to clean a wooden cutting board and keep it
looking new, with practical steps, a few “don’t do this unless you enjoy regret” warnings, and some specific examples you can copy
straight into your routine.
Why Wooden Cutting Boards Need Different Care (And Why They’re Worth It)
Wood is tough but not invincible. It expands and contracts with water and heat. That means two things:
- Your board hates long baths. Soaking forces water deep into the wood, which can lead to warping and cracking.
- Your board hates high heat + long wet cycles. Dishwashers are basically a spa day from a horror movie for wood.
But when you treat wood well, it rewards you with a surface that’s gentle on knives, sturdy under pressure, and beautiful enough to
make your countertop look like you have your life together (even if dinner is “cereal, but in a bowl”).
The Everyday Routine: Clean It in Under 2 Minutes
For day-to-day useslicing fruit, chopping herbs, prepping sandwichesyour goal is simple: remove food residue, wash the surface, dry it fast.
This keeps odors down and prevents moisture damage (which is the root of most cutting board heartbreak).
Step-by-Step: Daily Cleaning
- Scrape first. Use a bench scraper, spatula edge, or even the dull side of a knife to remove stuck bits.
- Wash with hot, soapy water. Use a soft sponge or brush. Clean both sides and the edgesyes, even if you “only used one side.”
- Rinse quickly. You want “clean,” not “waterlogged.”
- Dry immediately. Wipe with a clean towel, then let it air-dry standing on its edge or in a rack so air can circulate.
Daily “Please Don’t” Rules
- Don’t soak your board in the sink.
- Don’t run it through the dishwasher (heat + water + time = warp city).
- Don’t leave it flat and wet on the counter. That’s how you get a board-shaped banana.
When to Sanitize a Wooden Cutting Board
Washing removes grime; sanitizing is about reducing germs after higher-risk foods. You don’t need to sanitize after cutting a lemon.
But if your board was used for raw meat, poultry, seafood, or you’re prepping food for someone with a higher risk of illness,
add a sanitizing step.
Option A: Bleach Sanitizing (Simple, Effective, Food-Safe When Diluted Correctly)
After washing and rinsing the board:
- Mix a sanitizing solution using unscented household chlorine bleach and cool water (exact ratio in the “References used” note below).
- Apply enough solution to wet the surface (spray or pour).
- Let it sit briefly so it can work (don’t immediately wipe it off).
- Rinse or wipe with clean water if desired, then air-dry completely standing on edge.
Important: never mix bleach with vinegar, lemon juice, or other acids. That’s not “extra clean”that’s “call-and-open-windows clean.”
Option B: Hydrogen Peroxide (Good for Stains + Freshening)
Many home cooks use standard 3% hydrogen peroxide to help freshen and lighten stains on wood. Use it as a separate step
(not mixed with vinegar or bleach). Lightly wet the surface, let it sit briefly, then rinse and dry thoroughly.
What About Vinegar?
White vinegar is great for deodorizing and general cleaning, but when the situation calls for true sanitizing (like after raw chicken),
it’s smart to use a proven sanitizer (like properly diluted bleach) or a commercial food-safe sanitizer.
How to Remove Smells (Garlic, Onion, Fish, and “What Happened Here?”)
Odors cling to wood when liquids seep into dry fibers or when tiny food particles get cozy in knife marks. The fix is usually quick.
Lemon + Coarse Salt: The Classic Deodorizing Scrub
- Sprinkle coarse salt (kosher salt is perfect) over the board.
- Cut a lemon in half and rub it over the salt in circles, squeezing slightly as you go.
- Let it sit for a few minutes, then scrape off the paste.
- Rinse quickly and dry thoroughly.
This works especially well for onion/garlic smells and light staining. Plus your kitchen smells like you’re starring in a citrus commercial.
Baking Soda Paste for Stubborn Funk
If the board smells like it’s trying to join a gym locker room:
- Make a paste with baking soda + a little water.
- Scrub gently along the grain.
- Rinse and dry thoroughly.
How to Remove Stains (Without Turning Your Board Into a Science Fair Project)
Light Stains: Soap + Scrub + Dry
Many stains fade with normal washing and timeespecially if your board is well-oiled. The key is drying fast so discoloration doesn’t set.
Dark Spots or “I Cut Beets Once and Regret Everything”
Try one of these, then rinse and dry:
- Hydrogen peroxide (3%) to help lighten organic stains.
- Lemon + salt for mild stains and odors together.
- Baking soda paste for discoloration that comes with lingering smells.
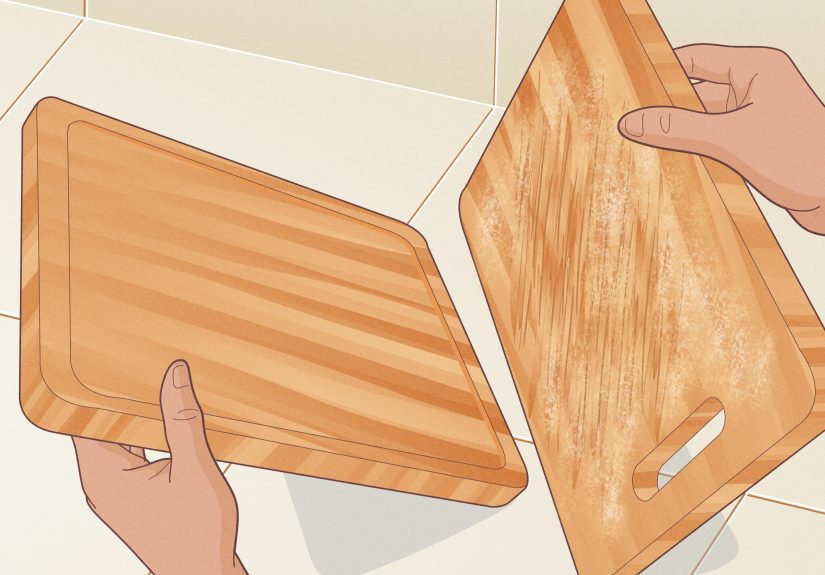
Deep Cleaning: When Your Board Feels Rough, Fuzzy, or Overworked
Over time, wood grain can raise slightly (especially if you’ve been washing with hotter water or the board has dried out).
You’ll notice the surface feeling fuzzy or roughlike it’s trying to grow a tiny beard.
Quick Resurface (Beginner-Friendly)
- Make sure the board is clean and fully dry.
- Lightly sand with fine sandpaper (start around 220 grit) along the grain.
- Wipe away dust with a dry cloth.
- Condition with mineral oil (steps below).
This refreshes the surface, reduces places for food to cling, and makes the board look new again without any fancy tools.
How to Oil a Wooden Cutting Board (The “New Board” Secret)
If cleaning is brushing your teeth, oiling is skincare. It keeps wood from drying out, helps resist water, and reduces staining.
A well-oiled board is easier to clean and stays prettier longer.
Choose the Right Oil
- Use: food-grade mineral oil, or a cutting board conditioner that combines mineral oil + beeswax.
- Avoid: olive oil, vegetable oil, canola oil, and other cooking oils. They can oxidize over time and develop odors.
How Often to Oil
A simple rule: oil when the board looks dry or feels roughoften about once a month for frequently used boards. If you wash it a lot,
live in a dry climate, or your board is new and thirsty, oil more often at first.
Step-by-Step: Oiling Like You Mean It
- Start clean and bone-dry. If you can, let the board air-dry overnight after washing.
- Apply mineral oil generously. Use a clean cloth or paper towel and rub it in along the grain.
- Don’t forget the edges. End grain and edges drink up oil fast.
- Let it soak. Give it a few hoursovernight is even better.
- Wipe off excess. The board should feel conditioned, not greasy.
- Optional: add board cream. A beeswax-based conditioner can help lock in moisture and add a soft sheen.
Habits That Keep a Wooden Cutting Board Looking New
The “new board” look is less about fancy products and more about avoiding the things that beat wood up.
Dry It Like You Respect It
- After washing, towel-dry immediately.
- Store upright or in a rack so air can hit both sides.
- Keep it away from direct heat (like resting against the oven vent).
Use the Right Board for the Job
- Consider keeping one board for raw meat and another for produce/bread.
- If you only have one board, sanitize after raw proteins and dry thoroughly.
Know When It’s Time to Repair or Replace
If your board has deep cracks, severe warping, or splintering that you can’t sand smooth, it may be time to retire it from food duty.
(It can still live a happy second life as a plant stand, a trivet, or the world’s most responsible craft surface.)
Real-Kitchen Experiences: What Actually Happens When You Start Caring for Your Board (500+ Words)
In real kitchens, wooden cutting boards rarely fail overnight. They decline in a slow, dramatic arclike a reality TV character who keeps
ignoring obvious warning signs. First, everything is fine. Then one day you notice the surface looks dull. Then it feels rough. Then it starts
holding onto smells. And finally you’re standing there, sniffing a board that smells like garlic shrimp, wondering if you should apologize to it.
A common experience is the “new board honeymoon.” Someone buys a gorgeous maple or walnut board, uses it constantly, and rinses it quickly
after use. For the first few weeks, it still looks amazingbecause new boards often come pre-conditioned, and the wood hasn’t dried out yet.
Then the board starts looking pale in spots, especially near the sink side where it gets the most water. That’s usually the first sign the board
wants oil. People often think, “It’s clean, so it’s fine,” but dryness is what sets up future staining and deeper odor absorption.
Another familiar moment: the raw chicken incident. Someone chops chicken, washes the board with soap, and moves on. Later, they notice a faint
smellnothing obvious, just “Is that… chicken?” That’s when adding a sanitizing step becomes a game-changer. The experience many home cooks report
is that once they adopt a simple “wash, then sanitize when needed” rhythm, the board stops feeling like a risky mystery object and starts feeling
like a dependable tool again.
Odors are where people really get converted. Onion and garlic can cling like they’re paying rent. The first time someone tries the lemon-and-salt
scrub, the reaction is usually: “Wait, that’s it?” Because it’s fast, it doesn’t require special products, and it feels satisfying in a
low-drama way. It also creates a visible result: the board looks brighter, feels smoother, and smells fresher. That immediate payoff makes the habit
stick. (Also: scrubbing with a lemon half makes you feel like you’re in a rustic cooking show, even if you’re wearing sweatpants.)
Oiling is the most misunderstood partuntil someone sees what it does. People often expect oiling to be a rare ceremonial event. In practice,
it’s more like watering a plant: small, consistent care prevents bigger problems. A very typical experience is oiling a dry board for the first time
and watching the color deepen and even out within minutes. It’s the woodworking equivalent of “glow up.” That visual feedback teaches you what “dry”
looks like, so you get better at timing. Over time, many cooks notice their board becomes easier to wipe clean, less likely to stain, and more resistant
to that chalky, tired look.
Then there are the “board rescue” stories: someone inherits a board from a family member, finds one at a thrift store, or digs an old board out of
a cabinet. It looks roughgrayish, dry, scratched. The first instinct is to toss it. But a light sanding and a few rounds of mineral oil can bring
it back in a way that feels almost unfair. People often describe this as the moment they realize a wooden cutting board isn’t disposableit’s maintainable.
And once you see a board restored, you’re far more motivated to do the small upkeep that prevents it from getting rough in the first place.
The most consistent “experience” across kitchens is that the routine becomes automatic. You wash quickly, dry immediately, stand it up, and oil when it
looks thirsty. The board stays smooth, smells neutral, and looks like you own matching towels on purpose. In other words: a small habit that makes your
whole kitchen feel more put togetherwithout requiring you to become the type of person who labels spice jars.
Conclusion: Clean, Condition, Repeat (Your Board Will Thank You Quietly)
If you want a wooden cutting board that stays clean and keeps that “new” look, focus on the boring wins: wash with hot soapy water, dry immediately,
sanitize when needed, and oil regularly with the right product. That’s it. No complicated rituals. No anxiety. Just a simple routine that keeps your board
safe, good-looking, and ready for whatever you’re chopping nextwhether it’s herbs for dinner or a questionable amount of chocolate for “taste testing.”