Table of Contents >> Show >> Hide
- What You’re Actually Extracting (Gel vs. Latex)
- Before You Start: Tools and Setup
- The 7 Steps to Extract Aloe Vera Gel
- Step 1: Pick the right leaf (bigger, older, outer leaves win)
- Step 2: Harvest without hurting the plant
- Step 3: Drain the yellow latex (your irritation-avoidance step)
- Step 4: Wash and trim the leaf
- Step 5: Open the leaf (fillet or scoopchoose your adventure)
- Step 6: Rinse, then smooth the gel (optional but satisfying)
- Step 7: Store it safely (so it doesn’t turn into a weird-smelling science project)
- How to Use Fresh Aloe Gel (Without Regrets)
- Common Mistakes (and How to Fix Them)
- FAQ
- Real-World Notes and Common Experiences (An Extra of “Yep, That Happened”)
- Conclusion
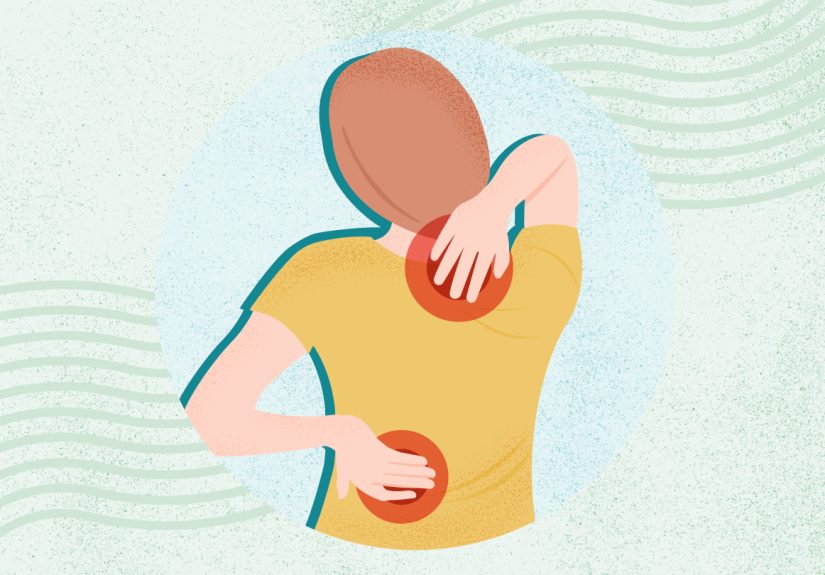
Aloe vera is basically the houseplant equivalent of a tiny first-aid kit. One minute it’s sitting there looking
innocent, the next you’re trying to get its gel for a sun-kissed shoulder, a dry patch of skin, or a DIY hair mask.
The good news: extracting aloe vera gel is simple. The “bad” news: the first time you do it, your kitchen may look
like a slippery science experiment.
This guide walks you through a clean, practical, and plant-friendly way to harvest aloe gel at homeplus how to
store it, avoid the yellow latex (the part most people regret meeting), and use it safely. We’ll keep it fun, but
also real: aloe is natural, and natural things can still be irritating if handled the wrong way.
What You’re Actually Extracting (Gel vs. Latex)
Inside an aloe leaf are two main “characters”:
- Clear inner gel: the cool, soothing stuff most people want for topical use.
-
Yellow latex (often called aloin): a bitter sap near the outer leaf that can irritate skin and,
if consumed, may cause stomach upset and other issues. In other words: not the star of today’s show.
When people say “extract aloe,” they usually mean collecting the inner gel while minimizing
the yellow latex. That’s why a good method includes draining, rinsing, and clean cutting.
Before You Start: Tools and Setup
You don’t need fancy equipment. You do need a little cleanliness and a little patiencebecause aloe gel is
slippery and will absolutely attempt to escape.
What you’ll need
- A healthy aloe vera plant (mature is best)
- Sharp knife or clean kitchen shears
- Cutting board
- Vegetable peeler (optional but helpful)
- Spoon (for scooping)
- Paper towels or a clean towel
- Bowl or container (to catch draining latex)
- Airtight storage container (glass is ideal)
- Optional: blender + fine strainer (for smoother gel)
Quick hygiene note
Wash your hands, wipe down your cutting area, and use clean tools. Fresh gel doesn’t come with preservatives,
so cleanliness directly affects how long it stays usable and how nice it feels on skin.
The 7 Steps to Extract Aloe Vera Gel
-
Step 1: Pick the right leaf (bigger, older, outer leaves win)
Choose a thick, mature leaf from the outer ring of the plantusually lower down and closer to the
base. These leaves tend to have more gel and can be removed without stressing the plant as much as taking
young center leaves.Skip leaves that look thin, badly damaged, or mushy. If your aloe leaf feels like a sad
water balloon, it’s not going to give you the satisfying gel payoff you want. -
Step 2: Harvest without hurting the plant
Using a sharp, clean knife (or shears), cut the leaf as close to the base as you canwithout slicing into
the plant’s central core. Aim for a clean cut rather than a torn, jagged one. A clean cut helps the plant
heal faster and reduces bruising.Example: If your aloe is in a pot and the leaf is hugging the soil, lift the leaf gently with one hand
and cut with the other so you don’t accidentally “redecorate” the plant’s center. -
Step 3: Drain the yellow latex (your irritation-avoidance step)
Place the freshly cut leaf upright in a bowl or in the sink with the cut end down. Let it drain for
about 10–15 minutes. You’ll see yellowish liquid drip outthis is the latex (often associated with aloin).This step is especially useful if you have sensitive skin or plan to use the gel on areas that are already irritated.
Think of it as letting the leaf “get the drama out” before you scoop the calm gel. -
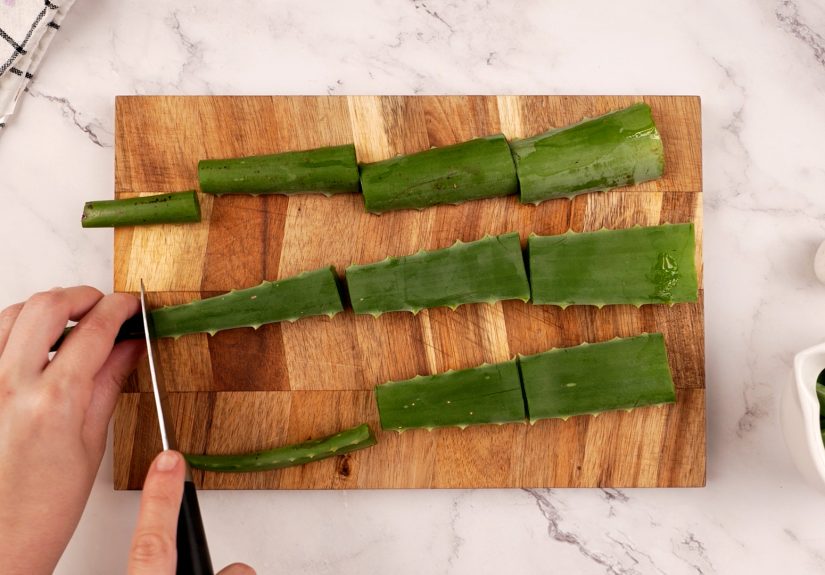
Step 4: Wash and trim the leaf
Rinse the leaf under cool running water to remove any remaining latex on the surface. Pat it dry.
Then trim off the spiky edges on both sides (a thin slice is enough).Now you’ve got a friendlier leaf that’s easier to handle, less pokey, and less likely to smear latex all over
the gel you’re trying to keep clean. -
Step 5: Open the leaf (fillet or scoopchoose your adventure)
You have two popular methods. Both work. One is neater, one is faster, and both are slightly slippery.
Option A: Fillet method (neater, more gel yield)
Lay the leaf flat. Slice it lengthwise to separate the green skin from the gel. Some people prefer to remove
the top skin first, then the bottom skin, leaving a clean “gel fillet” in the middle.Option B: Scoop method (fast and beginner-friendly)
Slice the leaf open lengthwise (like opening a book), then use a spoon to scoop out the clear gel.
Try to avoid scraping too close to the green skin where latex residue can linger. -
Step 6: Rinse, then smooth the gel (optional but satisfying)
If you see any yellow tint, give the gel a quick rinse and pat dry. Fresh gel can be a little chunky or stringy,
which is totally normal.For a smoother, “store-bought feel,” blend the gel for a few seconds. If you want it extra refined, pour it
through a fine strainer after blending.Pro tip: Blend gently. Over-blending can make the gel thinner and more watery, which is fine
just a different texture. -
Step 7: Store it safely (so it doesn’t turn into a weird-smelling science project)
Transfer your gel into a clean, airtight container. Keep it refrigerated if you’re not using it immediately.
Fresh homemade aloe gel is generally best used quickly.Storage options
- Refrigerator: Many DIY guides suggest using within about a week for best freshness.
- Freezer: Freeze in ice cube trays for single-use portions (great for quick soothing “gel cubes”).
- Optional stabilizers: Some home recipes add vitamins C or E to extend fridge life, but keep in mind
added ingredients can irritate sensitive skin.
Discard if: it smells sour or “off,” changes color dramatically, grows mold, or starts feeling unusually sticky.
When in doubt, toss italoe is not worth a rash.
How to Use Fresh Aloe Gel (Without Regrets)
Fresh aloe gel is most commonly used topically. If you’re using it on skin, keep it simple:
apply a thin layer, let it dry, and follow with moisturizer if you tend to feel tight or dry.
Patch test first (especially if you’re sensitive)
Try a small amount on the inside of your arm and wait 24 hours to see if you react. Most people tolerate aloe gel
well, but allergic or irritant reactions can happenparticularly if latex residue is present or the skin barrier is already irritated.
Be cautious with ingestion
This article is focused on extraction for home use, not making supplements. If you’re thinking about consuming aloe,
be aware that latex/whole-leaf components can be harsh and are associated with GI side effects and other concerns.
If you have health conditions, are pregnant, or take medications, talk with a qualified clinician first.
Keep it away from pets
Aloe plants can be toxic to pets if chewed or eaten. If your dog or cat treats houseplants like salad, place aloe out of reach.
Common Mistakes (and How to Fix Them)
Mistake: Your gel is yellowish
That’s likely latex contamination. Next time: drain the leaf upright longer, rinse the leaf well, and avoid scraping
right against the inner surface of the green skin.
Mistake: Your gel is watery
Totally normal sometimesespecially if the plant was recently watered, the leaf was smaller, or you blended the gel.
Watery gel still works fine for topical use; you can just apply more often or store it as cubes for convenience.
Mistake: The gel went bad fast
Homemade aloe gel has no preservatives. Use cleaner tools, store in an airtight container, keep it cold, and make smaller batches.
Freezing small portions can be the easiest “set it and forget it” solution.
FAQ
Can I extract aloe gel without cutting the whole leaf off?
You can slice a small section from the end of a leaf and use the gel immediately, but it’s usually messier and can stress the leaf.
For a batch extraction, removing one mature outer leaf is typically cleaner and more efficient.
Should I wash the gel itself?
If you drained and rinsed properly, you may not need to. But if you see a yellow tint or feel irritation, a quick rinse can help.
Pat dry after rinsing so you don’t dilute the gel too much.
How long does fresh aloe gel last?
Many home-prep guides recommend using plain fresh gel within about a week in the fridge for best quality.
Freezing in cubes can extend usability for longer-term storage.
Real-World Notes and Common Experiences (An Extra of “Yep, That Happened”)
If you’re extracting aloe vera for the first time, here’s the most common experience: you feel extremely prepared,
you do one cut, and suddenly your leaf is leaking slippery gel like it’s auditioning for a cartoon. That’s normal.
Aloe gel has a texture that’s somewhere between “soothing skincare” and “a bar of soap that got a law degree.”
The secret is not fighting itjust setting up your workspace so the mess is controlled.
A lot of people are surprised by the yellow latex step. They expect the leaf to open and reveal only crystal-clear gel,
but instead they see yellow droplets and assume something is wrong. It’s not wrong; it’s just aloe being aloe.
Draining the leaf upright for 10–15 minutes often makes a big difference in how “clean” the final gel feels.
People with sensitive skin often report that skipping the draining step is the fastest route to, “Why is my arm itchy?”
Another common moment: you scoop the gel and it looks perfect… then you blend it and it turns into a thinner,
bubbly liquid. That can feel disappointing if you expected a thick, spa-like gel. But blended aloe is still useful
it spreads easily, feels cooling, and mixes well into DIY routines. If you prefer a thicker feel, use unblended gel
straight from the leaf for spot applications (like a small dry patch), and use blended gel for larger areas (like arms or legs).
Storage is where people either become aloe geniuses or aloe archaeologists (“I found this in the back of the fridge,
and I’m scared”). Fresh gel is best made in smaller amounts. The most popular “I will actually keep using this”
trick is freezing gel in an ice cube tray. One cube is a perfect single-use portion, and it’s oddly satisfying to pop
one out and glide it over skinlike a tiny cooling roller that doesn’t require batteries or a charging cable.
If you’re using aloe after being outside, those cubes can feel amazing.
People also commonly learn that aloe gel doesn’t replace moisturizer for everyone. Aloe can feel hydrating at first,
but some folks notice their skin feels tight once it dries. If that happens, it doesn’t mean aloe “doesn’t work”
it just means your skin likes a little backup. A simple combo is aloe first, then a gentle moisturizer on top once it dries.
This approach is especially popular in drier climates or during winter when skin behaves like it’s personally offended
by indoor heating.
Finally, the most underrated “experience tip”: label your container. Aloe gel looks like a lot of other
fridge mysteries (some innocent, some deeply suspicious). Add the date, and you’ll never have to play
“Is this skincare… or last week’s smoothie experiment?” Your future self will thank you.
Conclusion
Extracting aloe vera gel at home is one of those rare DIY projects that’s both easy and genuinely useful.
Choose a mature outer leaf, drain the yellow latex, open the leaf cleanly, scoop the clear gel, and store it smartly.
Keep it clean, keep it cold, and patch test if your skin is sensitivebecause the goal is “soothing,” not “surprise rash.”