Table of Contents >> Show >> Hide
- What Are Eggs Used For in Minecraft?
- How to Get Eggs in Minecraft: 13 Steps
- Step 1: Find Chickens in the Overworld
- Step 2: Gather Seeds to Lure Chickens
- Step 3: Build a Basic Chicken Pen
- Step 4: Lead Chickens Into the Pen
- Step 5: Wait for Adult Chickens to Lay Eggs
- Step 6: Keep the Chunk Loaded
- Step 7: Breed Chickens for a Bigger Egg Supply
- Step 8: Throw Eggs to Hatch More Chickens
- Step 9: Collect Eggs Manually at First
- Step 10: Build a Simple Hopper Collection System
- Step 11: Use Water to Move Eggs in Larger Coops
- Step 12: Use Dispensers for Egg Hatching Automation
- Step 13: Store, Craft, and Expand Your Egg Farm
- How Egg Colors Work in Newer Minecraft Versions
- Best Beginner Egg Farm Design
- Common Mistakes When Trying to Get Eggs
- Advanced Tips for Getting More Eggs
- How Many Chickens Do You Need?
- Experience Section: What It Feels Like to Build an Egg Farm in Minecraft
- Conclusion
Eggs in Minecraft look simple, but they are surprisingly useful little ovals of possibility. One minute you are picking one up from the grass, and the next you are baking cake, crafting pumpkin pie, starting a chicken empire, or throwing eggs across your base like a chaotic breakfast wizard. If you are new to survival mode, learning how to get eggs in Minecraft is one of those small skills that quietly makes your world easier, funnier, and more productive.
The main way to get eggs in Minecraft is by keeping chickens. Adult chickens lay eggs naturally, and once you understand how to find, lure, breed, protect, and collect from them, you can create a steady egg supply without wandering around hoping the next feathered square drops breakfast. This guide walks you through the process in 13 clear steps, from finding your first chicken to building a beginner-friendly egg farm that works while you play nearby.
Whether you play Java Edition or Bedrock Edition, the basic strategy is the same: find chickens, keep them safe, let them lay eggs, collect the drops, and expand your flock. Recent Minecraft versions also include chicken variants and matching egg colors, so your poultry project can be practical and stylish. Because nothing says “survival expert” like color-coordinated chickens.
What Are Eggs Used For in Minecraft?
Before building a coop, it helps to know why eggs matter. In Minecraft, eggs are renewable items mostly produced by chickens. They can be thrown for a chance to hatch baby chickens, used in crafting recipes, or loaded into dispensers for automated systems. Eggs do not restore hunger by themselves, so you cannot eat them raw. Minecraft may let you carry lava in a bucket, but apparently it draws the line at drinking a raw egg.
Main Uses of Eggs
Eggs are used to craft cake and pumpkin pie, two classic food items. Cake is more of a placed food block, useful for decoration and group snacking, while pumpkin pie is portable and easy to carry. Eggs can also be thrown by hand or fired from a dispenser. When an egg is thrown, there is a chance it will spawn a baby chicken. This makes eggs one of the few items that can directly help create more of the mob that produced them.
In other words, eggs are both a resource and a way to grow your resource supply. That is why players often build chicken coops or automatic egg farms early in a survival world.
How to Get Eggs in Minecraft: 13 Steps
Step 1: Find Chickens in the Overworld
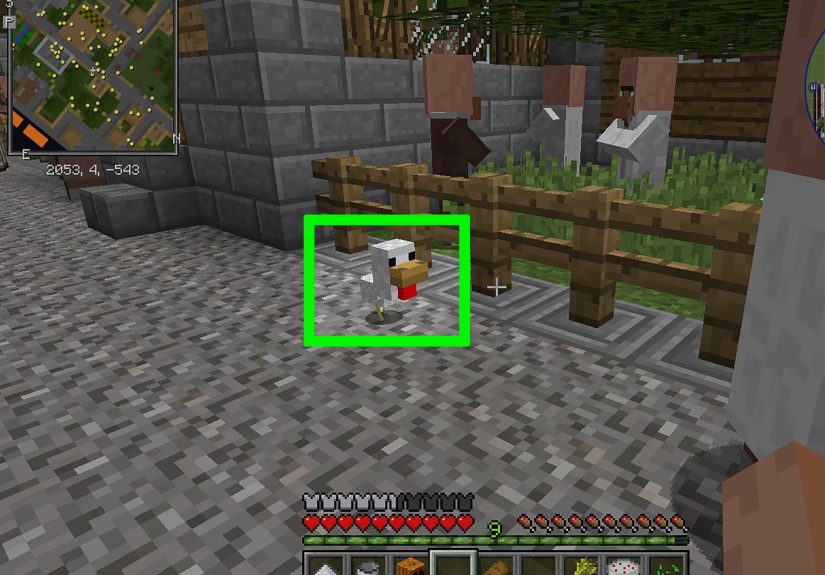
The first step is simple: find chickens. Chickens are passive mobs that spawn naturally in many Overworld areas. You will often see them wandering through grassy biomes, forests, plains, jungles, and village surroundings depending on your version and world generation. They are easy to recognize: small body, tiny wings, orange feet, square face, and the general expression of a creature that has never made a responsible decision.
When exploring, listen for clucking sounds and look around open ground. Chickens are small, so they can hide behind grass, trees, fences, and terrain bumps. If you are just starting a survival world, bring a few seeds with you before searching. Seeds are the secret to moving chickens where you want them.
Step 2: Gather Seeds to Lure Chickens
Chickens follow players who hold seeds. Wheat seeds are the easiest to get early because you can break tall grass and collect them almost immediately. Depending on your game version, chickens can also be attracted and bred with other seed types such as beetroot seeds, melon seeds, and pumpkin seeds.
Put seeds in your hand, walk near a chicken, and watch it turn into your tiny feathered shadow. Move slowly, because chickens can lose interest if you sprint too far ahead. If you are leading several chickens at once, stop every few blocks and let them catch up. Think of it as a very low-speed parade with fewer drums and more clucks.
Step 3: Build a Basic Chicken Pen
Before collecting eggs, you need a safe place to keep chickens. A beginner chicken pen can be made with fences, fence gates, walls, or solid blocks. A simple 5-by-5 fenced area is enough for a small starter flock. Add a gate so you can enter and leave without breaking blocks every time.
Build the pen near your base so the area stays loaded while you work nearby. Chickens lay eggs over time, but if you travel far away and the chunk unloads, production stops. Keeping your coop close to your storage, farm, or crafting area makes egg collecting much easier.
Step 4: Lead Chickens Into the Pen
Hold seeds and guide the chickens into the pen. Once they are inside, close the gate quickly. Chickens are not dangerous, but they are sneaky little escape artists. If you leave the gate open too long, one will absolutely waddle out like it has urgent business in the Nether.
If you are struggling to get chickens through a gate, make the entrance wider temporarily, lure them in, then replace the fence. You can also dig a shallow path or use blocks to guide them. Once you have two adult chickens safely enclosed, you can begin expanding your flock.
Step 5: Wait for Adult Chickens to Lay Eggs
Adult chickens lay eggs naturally. In standard Minecraft mechanics, an adult chicken drops one egg every 5 to 10 minutes while the area is active. Because the timer is random, do not panic if a chicken takes a while. It is not broken; it is just operating on poultry time.
Dropped eggs appear as item entities on the ground. Walk over them to collect them into your inventory. Eggs stack up to 16 per inventory slot, so they fill storage faster than many common items. If you plan to keep a large flock, build chests early.
Step 6: Keep the Chunk Loaded
One common reason players think their chickens are not laying eggs is distance. Chickens need to be in an active, loaded area for their egg timer to progress. If your coop is far away from your main base and you spend all day mining in another region, you may return to fewer eggs than expected.
For reliable egg collection, place your chicken pen near a busy part of your base: beside your crop farm, near your storage room, next to your enchanting setup, or close to your starter house. The more time you spend nearby, the more eggs you will collect naturally.
Step 7: Breed Chickens for a Bigger Egg Supply
Two chickens are enough to start, but more chickens mean more eggs. To breed chickens, hold seeds and use them on two adult chickens. Hearts will appear, and a baby chicken will spawn. After breeding, adult chickens need a cooldown before they can breed again.
Baby chickens do not lay eggs until they grow up. Normally, a baby chicken takes about 20 minutes to become an adult, but feeding it seeds speeds up growth. This is helpful when you want egg production quickly. Just avoid overfilling a tiny pen with too many chickens, because crowded animal farms can become noisy, messy, and inefficient.
Step 8: Throw Eggs to Hatch More Chickens
You can also increase your flock by throwing eggs. Equip an egg and use it like a projectile. When it hits a block or mob, it breaks and has a chance to spawn a baby chicken. The basic chance is 1 in 8, or 12.5 percent. If a chick does spawn, there is a rare chance the egg produces multiple chicks instead of one.
This means eggs are not guaranteed chicken-makers, but they are great for expanding a farm over time. If you throw a full stack and get nothing, do not accuse the game of personal betrayal. Random chance can be cruel. If you throw one egg and get four chicks, congratulations: the Minecraft poultry lottery has smiled upon you.
Step 9: Collect Eggs Manually at First
At the beginner stage, manual collection is fine. Walk into the pen, pick up the eggs, and store them in a chest. This method costs almost nothing and works well for small farms. The only risk is letting chickens escape when you open the gate.
To reduce escapes, build a double-gate entrance. Place one fenced area before the main coop, like a tiny airlock. Open the first gate, step in, close it, then open the second gate. This keeps chickens from sprint-waddling into freedom while you collect eggs.
Step 10: Build a Simple Hopper Collection System
Once you have iron, you can automate egg collection with hoppers. A hopper placed under chickens can pick up eggs and move them into a chest. The simplest design is a small chamber where chickens stand on top of hoppers connected to a storage chest.
To build it, place a chest, crouch-place a hopper feeding into the chest, then create a safe enclosure above the hopper. Put chickens inside, and their eggs will fall into the hopper automatically. This beginner egg farm is compact, cheap, and reliable. It is not glamorous, but neither is crawling through caves with half a heart and a wooden pickaxe. Survival is about results.
Step 11: Use Water to Move Eggs in Larger Coops
If you prefer a larger chicken coop, water can help push eggs toward a hopper. Place water at one end of the enclosure so dropped items flow toward a collection point. At the end of the stream, place a hopper connected to a chest.
This design lets chickens roam more naturally while still collecting eggs automatically. Make sure the water does not push chickens into corners where they get stuck. Also remember that chickens float and move strangely in water, so test your design before adding a huge flock. A chicken traffic jam is funny for about five seconds, then it becomes a clucking engineering problem.
Step 12: Use Dispensers for Egg Hatching Automation
For players who enjoy redstone, eggs can be loaded into dispensers. A dispenser can fire eggs, and those eggs can hatch chicks just like thrown eggs. This mechanic is often used in automatic chicken farms, where eggs are collected, moved into a dispenser, and fired into a hatching chamber.
A basic version uses hoppers to collect eggs, a dispenser to shoot them, and a redstone clock or observer setup to activate the dispenser. If you are new to redstone, start with manual egg collection first. Once you understand how chickens produce eggs, automation becomes much easier to troubleshoot.
Step 13: Store, Craft, and Expand Your Egg Farm
After your chickens produce consistently, decide what you want to do with the eggs. Keep some for crafting, throw some to hatch new chickens, and store extras in chests. Since eggs stack only to 16, a large farm can fill storage quickly. Label your chests if you like organized bases, or toss everything into one chaotic storage room and call it “temporary” for the next 200 in-game days.
Use eggs to make cake when you have wheat, sugar, and milk. Use eggs to make pumpkin pie when you have pumpkin and sugar. If you are building a food-focused base, a chicken coop pairs nicely with wheat farms, sugar cane farms, pumpkin farms, and cow pens. Together, these resources support several useful recipes and make your survival world feel more complete.
How Egg Colors Work in Newer Minecraft Versions
In newer Minecraft versions, chickens have variants connected to biome temperature. Temperate chickens lay the classic white egg. Warm chickens can lay brown eggs, and cold chickens can lay blue eggs. These eggs generally work like normal eggs, but they are connected to their matching chicken variant when hatching.
This gives builders and collectors a fun reason to explore different biomes. A snowy base with blue eggs feels different from a desert ranch with warm chickens and brown eggs. If your version includes these variants, you can use them to add personality to farms, villages, zoos, and themed builds.
Best Beginner Egg Farm Design
The best egg farm for beginners is a hopper-and-chest coop. It requires only a chest, at least one hopper, a few building blocks, and chickens. Place the chest at ground level, connect a hopper into it, and build a small enclosure over the hopper. Add chickens, close the top or fence it safely, and let time do the work.
This design is ideal because it does not require advanced redstone. It also prevents dropped eggs from despawning while you are busy farming, mining, building, or repeatedly falling off your roof because you refused to crouch. If you want more production, add more hoppers and more chickens, but keep the farm reasonable so it does not create lag or noise issues.
Common Mistakes When Trying to Get Eggs
Building the Coop Too Far Away
If your coop is far from your activity area, chickens may not produce eggs while you are gone. Keep the farm near your base for steady results.
Using Baby Chickens for Egg Production
Baby chickens are adorable, but they do not lay eggs. Wait until they grow into adults before expecting drops.
Forgetting Storage Space
Eggs stack to 16, so they can take up chest space quickly. Add extra chests if your farm grows.
Leaving the Gate Open
Chickens escape easily. Use double gates, trapdoors, or a fully enclosed coop to prevent feathered rebellion.
Expecting Every Thrown Egg to Hatch
Thrown eggs only have a chance to hatch chicks. Bring multiple stacks if you want reliable results.
Advanced Tips for Getting More Eggs
If you want more eggs without much effort, increase the number of adult chickens and spend more time near the farm. A larger flock produces more eggs over the same period, but there is a balance. Too many mobs in one place can make your base noisy and may affect performance on weaker devices or busy servers.
For a clean setup, separate your farm into zones. Keep one area for egg-laying adults, one area for newly hatched chicks, and one storage area for eggs. If you use dispensers, aim eggs into a safe chamber where baby chickens cannot escape. Glass is useful because you can see what is happening without opening the farm.
You can also decorate the farm. Add hay bales, barrels, lanterns, fences, trapdoors, and a little red barn if you enjoy building. Minecraft farms do not have to be ugly boxes. They can be ugly boxes with lanterns, which is basically architecture.
How Many Chickens Do You Need?
For a small survival base, two to six adult chickens are enough to start. They will produce eggs slowly but steadily. For baking and occasional hatching, 10 to 20 chickens is usually comfortable. For large automatic farms, players may use more, but bigger is not always better. Server rules, mob caps, sound, and performance all matter.
A good practical target is 12 adult chickens in a hopper-based coop. This produces enough eggs for regular use without turning your base into a cluck-powered alarm clock. If you need more, expand gradually instead of dumping 100 chickens into one block and wondering why your game sounds like a square poultry thunderstorm.
Experience Section: What It Feels Like to Build an Egg Farm in Minecraft
My first serious Minecraft egg farm started the same way many survival projects start: with optimism, poor planning, and one chicken that refused to walk through a gate. I had found it near a patch of trees while holding wheat seeds, and the chicken followed me perfectly for about ten blocks. Then I sprinted, it lost interest, and I had to walk back like a disappointed tour guide. Lesson one: chickens are loyal, but only at chicken speed.
Once I finally got two chickens into a fenced pen, I expected eggs immediately. I stood there staring at them like a manager waiting for productivity reports. Nothing happened. I checked the grass. I checked my inventory. I questioned whether these chickens understood the assignment. A few minutes later, one egg popped onto the ground with that tiny sound, and suddenly I felt like I had invented agriculture.
The next mistake was storage. I thought one chest would be enough. It was not. Eggs stack in 16s, so even a modest farm can clutter a chest faster than expected. I had feathers, seeds, spare fences, random dirt, and eggs all mixed together. Eventually, I made a dedicated “EGGS” chest, which felt dramatic but necessary. Organization is not required in Minecraft, but future you will silently thank present you for it.
Throwing eggs was the funniest part. I saved a stack, stood inside the pen, and launched them at the ground. Most broke with no chick. A few hatched. Then one egg produced several chicks, and the pen instantly looked like a tiny daycare with beaks. That was when I learned to keep more space available before hatching eggs. Baby chickens are small, fast, and excellent at hiding in corners.
Later, I upgraded the coop with hoppers. That changed everything. Instead of walking into the pen every few minutes and risking a jailbreak, the eggs dropped into a chest automatically. It felt like magic, even though it was just iron funnels doing their job. I added glass walls so I could watch the chickens from outside, then decorated the area with lanterns and hay bales. Did the chickens care? Absolutely not. Did I care? Very much.
The best part of building an egg farm is that it turns a tiny resource into a reliable system. You start with one or two chickens, a handful of seeds, and a fence. After a little patience, you have eggs for crafting, hatching, and expanding. It is not the flashiest farm in Minecraft, but it is one of the most satisfying early-game projects because it teaches the rhythm of survival: collect, protect, automate, improve, and occasionally laugh when a chicken escapes and walks into your bedroom.
Conclusion
Learning how to get eggs in Minecraft is easy once you understand the chicken cycle. Find chickens, lure them with seeds, build a safe pen, wait for adult chickens to lay eggs, and collect those eggs manually or with hoppers. From there, you can breed chickens, throw eggs to hatch chicks, craft cake and pumpkin pie, or build a fully automated egg farm with dispensers and redstone.
The humble egg is more than a small inventory item. It is the foundation of chicken farming, a food-crafting ingredient, a hatching tool, and a surprisingly fun projectile. With the 13 steps above, you can create a steady egg supply in any survival world and upgrade it as your base grows. Start small, keep your chickens close, add storage early, and never underestimate the power of one well-placed hopper.
Note: Minecraft mechanics can vary slightly by edition and version, especially with newer chicken variants and colored eggs. The core method remains the same: adult chickens are your best renewable source of eggs.