Table of Contents >> Show >> Hide
- Why Tree Branches Are Secret Garden Design Gold
- Step One: Choosing the Perfect Branch for Your Garden DIY
- Step Two: Preparing the Branch for Its Makeover
- Five Creative Ways to Give Your Tree Branch a Whole New Look
- A Hometalk-Style Step-by-Step Branch Makeover Project
- Styling Tips to Make Your Branch Look Intentionally Chic (Not Like Yard Trash)
- Safety and Maintenance for Branch Projects
- Real-Life Lessons from DIY Tree Branch Makeovers
- Conclusion: Your Next Favorite Garden Feature Is Already in Your Yard
Got a fallen tree branch lying in the yard, glaring at you like, “So… what now?”
Good news: that random limb is basically free rustic home décor for your garden just waiting for a makeover.
Instead of paying for mass-produced garden art, you can turn a simple branch into a trellis, sculpture, fence, or hanging display that looks like it walked out of a designer’s mood board.
Garden designers and DIY gardeners across the U.S. are increasingly reusing branches and twigs to create edging, trellises, fences, and sculptural pieces that add character while cutting waste.
From twig trellises and “dead hedges” to painted statement branches, this simple material packs serious style points and eco-friendly cred.
In true Hometalk spirit, this guide walks you through how to give a tree branch a whole new lookfrom choosing the right limb to turning it into a showstopping piece of garden art.
You’ll get step-by-step instructions, styling tips, and real-life “I tried this” lessons, plus plenty of ideas you can tweak to fit your own backyard.
Why Tree Branches Are Secret Garden Design Gold
Before you drag those branches to the curb, it helps to understand just how useful they really are.
Landscape pros and DIYers alike use branches and sticks for everything from edging and paths to trellises, privacy screens, and whimsical focal points.
1. Eco-friendly (and basically free)
Instead of buying lumber, plastic fencing, or metal décor, you’re repurposing what’s already in your yard.
That means:
- Less yard waste sent to the landfill
- Lower materials cost (hello, budget DIY)
- Lower carbon footprint compared to buying new products
2. Naturally beautiful and unique
No two branches are alike, which is exactly the point. Twisted limbs, knobby joints, and interesting bark textures add instant visual interest.
Designers often use dead or fallen trees as sculptural centerpieces or rustic walls because their organic shapes can’t really be replicated with manufactured materials.
3. Great for wildlife and garden health
When used thoughtfully, branches can:
- Provide habitat for beneficial insects and pollinators
- Create perches for birds
- Slow down wind or water, helping protect soil
- Slowly decompose over time, adding organic matter
Step One: Choosing the Perfect Branch for Your Garden DIY
Not every branch is destined to become garden décor. Some are better as mulch, some as firewood, and some are just… too weird, even for us.
Here’s what to look for when you’re hunting for “the one.”
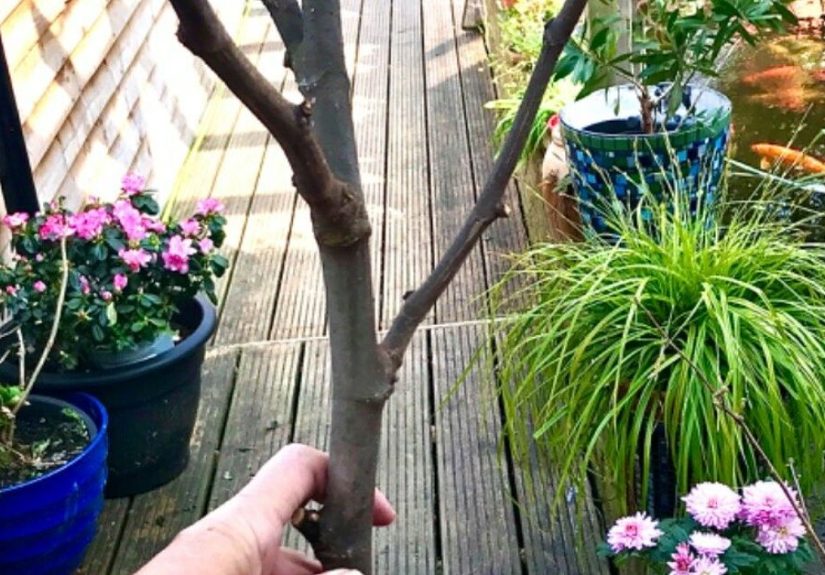
Check size and proportion
- For a feature piece: Choose a thick, sturdy branch 4–6 feet long (or taller) with a few interesting offshoots.
- For trellises or fencing: Gather multiple straight or gently curved branches that are roughly similar in diameter.
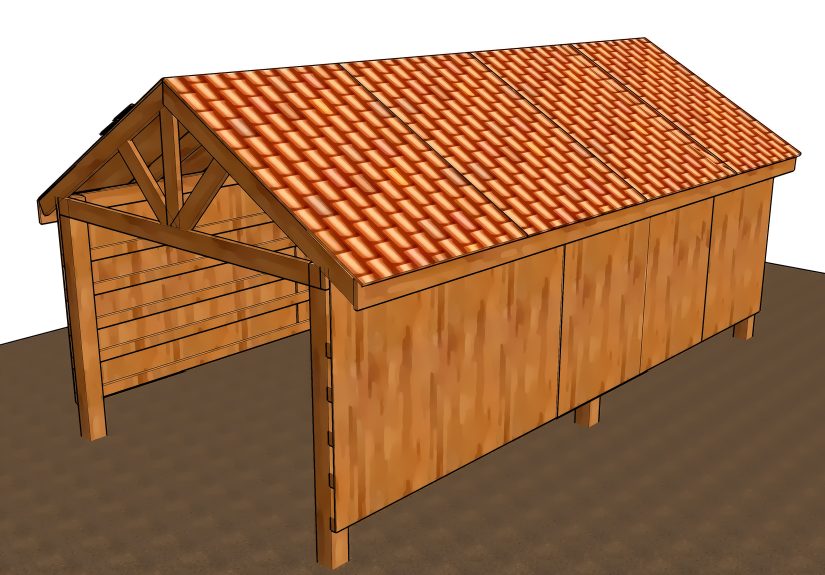
- For hanging décor: Opt for a lighter branch that’s not too heavy for hooks, pergolas, or porch beams.
Look for sound, solid wood
Avoid branches that are:
- Soft or crumbly
- Full of deep cracks and rot
- Swarming with insects or fungus
Slight weathering is fineeven desirablebut if the branch is falling apart in your hands, it won’t survive a season outside as décor.
Let green branches season (if needed)
Freshly cut (“green”) wood can warp and crack as it dries. For structural projects such as trellises or fences, many gardeners prefer branches that have dried for a while in a sheltered place.
Some projects intentionally mix older branches with flexible new saplings to create woven trellises and supports.
Step Two: Preparing the Branch for Its Makeover
Once you’ve picked your future garden star, prep is everything. Think of this as giving your branch a spa day before its big debut.
1. Clean and inspect
- Brush off loose dirt, cobwebs, and flaky bark with a stiff brush.
- Use pruning shears or a small saw to remove unsafe, spiky bits.
- Check for insects. If you see active pests, discard the branch or let it dry out in the sun for a while.
2. Strip or keep the bark
You have two main options:
- Leave the bark on for a rustic, woodland vibe.
- Strip the bark for a smoother, more sculptural look using a drawknife or sturdy utility knife (carefully!).
If you live in a very wet or humid climate, stripped branches may last longer because there’s less material to harbor moisture and fungi.
3. Sand and seal (optional but recommended)
Lightly sand any rough spots so they’re safe to touch and won’t snag clothing or garden gloves.
For projects you’ll handle regularly, or for branches displayed near seating areas, consider:
- A clear exterior sealant for a natural look
- Exterior paint or stain for color and extra weather protection
Many DIYers love to spray-paint branches in bold hues (white, black, or bright colors) to turn dead wood into statement “garden art.”
Five Creative Ways to Give Your Tree Branch a Whole New Look
Now for the fun part. Here are five Hometalk-worthy projects that transform a single branchor a small bundleinto something beautiful and practical.
Idea 1: Make a Sculptural Feature Branch
If you’ve got one especially striking branch, treat it like a sculpture.
- Secure the base: Set the branch into a large outdoor planter filled with sand, gravel, or concrete.
- Paint or stain: Try matte black for drama, white for minimal Scandinavian vibes, or a bright color that matches your flowers.
- Add accents: Wrap fairy lights around it, hang small metal or clay ornaments, or tuck air plants into natural crooks.
Garden designers often leave dead trees in place as art pieces, sometimes adding color or objects to highlight their structureyour branch sculpture is the mini DIY version of that idea.
Idea 2: Build a Rustic Branch Trellis
A classic branch makeover is a DIY trellis or tuteur (a pyramid-shaped support) for climbing plants like beans, sweet peas, or small roses.
Many gardeners build trellises from fallen limbs and flexible saplings, weaving the thinner pieces around thicker uprights.
- Gather materials: 3–5 sturdy branches for uprights and plenty of thinner branches or vines for crosspieces.
- Create the frame: Push the uprights into the soil in a teepee or fan shape.
- Weave the crosspieces: Attach thinner branches horizontally using garden twine or zip ties, working your way up.
- Plant climbers: Place your climbing plants or seeds at the base and gently guide them onto the trellis as they grow.
The result is a natural, zero-plastic support structure that blends seamlessly into your garden.
Idea 3: Create Branch Edging or a Mini Fence
Short, straight branches can be turned into edging for beds, raised borders, or even a low decorative fence.
Gardeners commonly line up branches to define paths or contain mulched areas, and magazines frequently feature twig fences as a charming, low-cost garden hack.
- Cut branches into similar lengths (for example, 12–18 inches).
- Sharpen one end of each branch to a point if you want to stake them into the ground.
- Hammer them into the soil side-by-side to form a rustic border.
- Optional: Tie horizontal twine across the tops for extra stability and style.
Idea 4: Turn a Branch into a Hanging Display
A strong, medium-sized branch can become a hanging bar for:
- Small potted plants in macramé hangers
- Solar lanterns or fairy lights
- Bird feeders or bee hotels
Outdoor DIY guides often suggest using reclaimed wood as a base for hanging planters or decor; a tree branch works the same way, just with more character.
- Attach sturdy eye screws to the branch.
- Hang the branch from hooks on a pergola, porch ceiling, or wall bracket using chain or heavy-duty rope.
- Clip or tie on your hanging pieces, balancing the weight evenly.
Idea 5: Build a “Dead Hedge” or Brush Wall
A dead hedge is a low, informal fence made by stacking branches between upright stakes.
It’s popular in wildlife-friendly gardens because it doubles as a habitat wall and visual barrier.
- Drive sturdy stakes into the ground in two parallel rows.
- Layer branches horizontally between the stakes, like a giant twig sandwich.
- Keep stacking until your hedge reaches the desired height.
Over time, the branches slowly break down and enrich the soil, and you can keep adding new trimmings to the top.
A Hometalk-Style Step-by-Step Branch Makeover Project
Let’s put it all together with a specific project: a painted feature branch with mini hanging plantersperfect for a patio corner or flower bed.
Materials
- 1 large, interesting branch (about 4–6 feet)
- Hand saw and pruning shears
- Sandpaper (medium and fine grits)
- Exterior spray paint or brush-on paint
- Clear exterior sealant (optional, if you want extra protection)
- Large outdoor planter, bucket, or deep pot
- Gravel, sand, or concrete mix to secure the base
- Small lightweight planters with hooks or twine hangers
- Potting mix and plants (trailing flowers, herbs, or succulents)
Step 1: Trim and prep the branch
Cut off any dangerously sharp twigs or awkward offshoots, but leave enough branching to hang décor from.
Sand rough areas and wipe away dust.
Step 2: Paint and seal
In a well-ventilated outdoor area, apply your chosen paint.
Two light coats are better than one heavy coat to avoid drips. Let each coat dry fully.
If your climate is harsh, add a coat of clear exterior sealant on top.
Step 3: Set the base
Place the branch upright in your planter or bucket, then fill around it with gravel or sand.
For a permanent installation, pour concrete and hold the branch in position until it sets.
Step 4: Plant and hang
Fill your small hanging containers with potting mix and plants.
Hang them from sturdy twigs or from small hooks screwed into the branch.
Trailing plants like ivy, sweet potato vine, or cascading petunias look especially good.
Step 5: Style in the garden
Place your new creation:
- Beside a seating nook as a living art piece
- Near the entrance to your garden to frame the view
- On a patio as a vertical accent instead of a standard plant stand
Adjust the hanging elements as the plants grow, and swap in seasonal décorpumpkins and twinkle lights in fall, pastel accents in spring, or small ornaments for the holidays.
Styling Tips to Make Your Branch Look Intentionally Chic (Not Like Yard Trash)
Choose a clear focal point
Decide whether your branch’s job is to:
- Frame a view
- Act as a vertical accent in a flower bed
- Draw attention to a path, bench, or doorway
Place it where it naturally leads the eye, rather than randomly sticking it in an empty patch of dirt.
Repeat colors and materials
Designers often repeat wood tones, paint colors, or shapes to make a garden feel cohesive.
If your branch is painted white, echo that color with a white bench, white pots, or white flowers.
If it’s natural wood, pair it with other rustic elements like log slices, twig wreaths, or a branch border.
Mix heights and textures
Surround the branch with:
- Low groundcovers or creeping plants at the base
- Medium-height perennials for softness
- Maybe one taller shrub or ornamental grass nearby for balance
This layered look helps your branch feel like part of the landscape, not a random prop.
Safety and Maintenance for Branch Projects
A quick reality check: branches are still wood. They weather, crack, and eventually break down. That’s part of their charmbut it does mean a little upkeep.
- Check stability each season: Make sure trellises, fences, or upright sculptures are still sturdy.
- Refresh finishes: Repaint or reseal every year or so if intense sun or rain fades the color.
- Watch for pests: If you see termites or other destructive insects, remove the affected wood and treat the area if needed.
- Retire gracefully: When a branch is too far gone, chop it up for mulch or compost and pick a new one to style.
Real-Life Lessons from DIY Tree Branch Makeovers
After you’ve worked with branches a few times, certain patterns emergelittle “aha” moments that make each new project easier and more fun.
Think of this section as your shortcut to those lessons without the extra mistakes.
1. Imperfection always wins
The first instinct many people have is to look for “perfectly straight” branches.
After a few projects, the favorites usually turn out to be the oddly curved, forked, or twisted ones.
Those quirky shapes catch the light differently, cast more interesting shadows, and make the branch look like a sculptural piece rather than a leftover yard cleanup.
When you’re sorting through a pile of limbs, try this: stand a few upright and step back.
The one that makes you think, “Okay, that’s cool,” is the one to keepeven if it’s not textbook straight.
2. Paint color completely changes the mood
One of the most surprising things about branch projects is how dramatically a simple color change shifts the vibe:
- White branches feel modern, coastal, and lightgreat against dark fences or greenery.
- Black branches look sculptural and chic, especially near gravel paths or minimalist plantings.
- Bright colors (turquoise, coral, lime) turn a branch into a playful accent in family gardens or kids’ spaces.
- Natural wood feels cozy, rustic, and timeless, especially in cottage-style or woodland gardens.
If you’re nervous about committing, start with a removable base (like a planter) so you can move the branch around before deciding on a final color.
3. Light makes branches magical at night
If there’s one “must-try” upgrade, it’s adding lights.
Even a simple strand of solar fairy lights wrapped loosely around a branch can transform an ordinary corner into a cozy nighttime hangout.
People often notice the effect most in transition spaces: near steps, around a patio, or beside a door.
Suddenly that formerly unused branch becomes the anchor for evening gatherings, impromptu chats, or “one more glass of something” on the deck.
4. Kids and guests love interactive elements
Branches are also fantastic conversation starters. Hang tiny chalkboard tags, miniature birdhouses, or little wind chimes, and watch how kids and visitors react.
They’ll walk over, touch, tap, read, or gently spin things.
The branch stops being “yard waste” and becomes a playful destination.
In family gardens, some people turn a branch into a “season tree,” swapping out ornaments for different holidays or school milestones.
In more sophisticated spaces, the interactive part might simply be a subtle chime or a softly lit lantern that sways in the breeze.
5. Branch projects evolve with the garden
One of the most satisfying parts of working with branches is how naturally they age along with the plants around them.
A freshly painted branch looks crisp and bold the first year, then gradually weathers into something softer and more blended.
Over time, vines may find their way up the branch, moss may settle in, and the piece becomes integrated into the landscape.
At some point, you get to decide: refresh it with new paint and décor, or let it slowly return to the soil and create something entirely new nearby.
6. The best projects start simple
The most common regret people share about these projects isn’t “I wish I hadn’t done it”it’s “I tried to do too much at once.”
Starting with a single idealike “a branch trellis” or “a painted hanging branch with lights”makes the project more doable and more likely to turn out beautifully.
Once you complete that first simple project, it’s much easier to experiment with more complex setups:
maybe a branch-and-log path, a dead hedge, or a whole series of branch sculptures that lead you through the garden.
Conclusion: Your Next Favorite Garden Feature Is Already in Your Yard
Transforming a tree branch into a showpiece for your garden DIY doesn’t require a big budget, advanced carpentry skills, or a truckload of materials.
With a bit of cleaning, some creative paint or stain, and a few smart styling choices, you can turn what used to be yard waste into a trellis, sculpture, border, or hanging display that looks custom-designed.
So next time you see branches scattered after a storm or a pruning session, think like a Hometalk DIY-er:
“Is this trash… or is this my next big project?”
Chances are, the answer is closer to “future garden star” than you’d expect.
SEO JSON