Table of Contents >> Show >> Hide
- Why Homeowners Are Switching to Heat Pump Water Heaters
- Before Installation: Make Sure Your Home Is a Good Match
- How a Professional Installation Usually Works
- Step 1: Evaluate the old setup
- Step 2: Pull permits and review local code requirements
- Step 3: Remove the old water heater
- Step 4: Prepare the new installation area
- Step 5: Set the water heater in place
- Step 6: Connect the plumbing
- Step 7: Route condensate drainage
- Step 8: Complete the electrical connection
- Step 9: Fill, test, and commission the system
- Best Installation Locations for an Electric Heat Pump Water Heater
- Common Mistakes to Avoid
- Should You Install One Yourself?
- What to Do After Installation
- Real-World Installation Experiences and Lessons Learned
- Final Thoughts
If your old water heater is wheezing like it just climbed a staircase, an electric heat pump water heater might be the smartest replacement you can make. These high-efficiency units deliver dependable hot water while using far less electricity than a standard electric tank. The catch? Installation is not a “watch one video, become a plumber by lunch” kind of project. Between condensate drainage, electrical service, clearances, and local code rules, this is usually a professional job.
That said, homeowners absolutely should understand how the process works. Knowing what goes into installing an electric heat pump water heater helps you choose the right location, budget correctly, avoid bad contractor shortcuts, and end up with a system that actually performs like the money-saving marvel it was advertised to be. In this guide, you’ll learn what a proper installation looks like, what can go wrong, and how to set up your home for success.
Why Homeowners Are Switching to Heat Pump Water Heaters
An electric heat pump water heater, often called a hybrid water heater, does not create heat the same way a traditional electric tank does. Instead, it pulls heat from the surrounding air and transfers that heat into the stored water. That is why it can slash operating costs while still giving you the familiar experience of a tank-style water heater.
For homeowners, the appeal is simple: lower utility bills, less wasted energy, and a cleaner all-electric upgrade. In many homes, it also pairs beautifully with broader electrification goals, solar panels, or utility rebate programs. In plain English: it is one of the few home upgrades that can be both boring and exciting. Boring because it is a water heater. Exciting because it may quietly save you money for years.
Before Installation: Make Sure Your Home Is a Good Match
1. Choose the right location
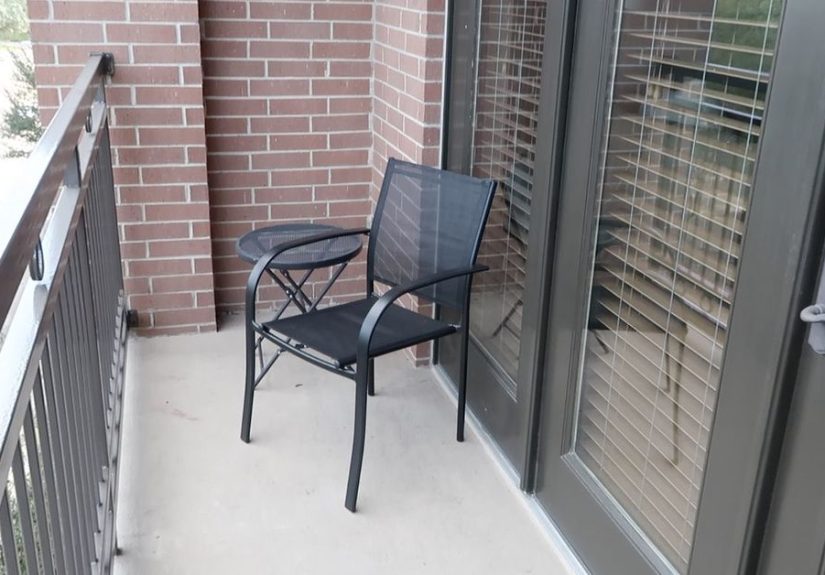
Location matters more with a heat pump water heater than with a standard electric tank. These units need enough surrounding air to work efficiently, and they also blow out cooler, drier air while operating. That makes unfinished basements, garages, and utility rooms popular installation spots. A cramped interior closet can still work in some cases, but it often requires louvers, transfer grilles, ducting, or other ventilation planning.
Noise matters too. Modern units are much quieter than the old rumor mill suggests, but they still use a fan and compressor. Installing one next to a bedroom wall is a great way to turn “energy efficiency” into “why is the mechanical closet humming at 6 a.m.?” A utility space is usually the better call.
2. Confirm there is enough room for airflow and service
Many models need substantial air volume around them for best performance. Some units can work in smaller spaces, but efficiency may drop unless the room is vented properly. The installer also needs room to service the air filter, condensate connection, controls, and plumbing fittings. A tight fit on moving day can become a maintenance nightmare later.
3. Check the floor, drain, and leak protection plan
A full water heater is heavy. The installation area should support the loaded weight of the tank and keep the unit level. A suitable drain pan is often recommended and commonly required by code, especially where leakage could damage finished floors or ceilings below. The plan should also account for the condensate water produced by the heat pump system. This is one of the biggest differences between a standard electric tank and a heat pump model.
4. Verify electrical requirements
Some heat pump water heaters use a conventional 240-volt setup, while newer models may use a 120-volt dedicated circuit. The required service depends on the specific model, not on vibes, optimism, or what your neighbor swears worked fine in 2019. The correct electrical setup should be confirmed before the unit arrives so the installation does not stall halfway through.
5. Think about your household’s hot water demand
Heat pump water heaters are efficient, but recovery time can feel different from gas models. Sizing matters. A larger family, frequent back-to-back showers, a soaking tub, or heavy laundry use may call for a larger tank or a model with stronger hybrid performance. Buying too small is the fast lane to household complaints, and nobody wants to be remembered as the person who “upgraded” the home into lukewarm chaos.
How a Professional Installation Usually Works
Step 1: Evaluate the old setup
The first step is not removing the old water heater. It is evaluating what is already there. A good installer looks at the existing fuel type, plumbing layout, drain options, electrical panel capacity, ceiling height, access path, and whether the replacement location makes sense for a heat pump model. Replacing an old electric tank is usually the easiest path. Replacing gas can be a bigger project because electrical work may be needed.
Step 2: Pull permits and review local code requirements
In many areas, a water heater replacement requires a permit and inspection. Local rules may govern earthquake strapping, drain pan piping, expansion control, relief-valve discharge piping, shutoff details, and placement in garages or finished spaces. This part may not be glamorous, but it is what separates a code-compliant installation from a future headache when you sell the house or file an insurance claim.
Step 3: Remove the old water heater
The old unit is shut down, isolated from the water supply, drained, disconnected, and removed. This step sounds simple until you remember you are dealing with a large tank, aging plumbing, and the possibility that the old setup was installed sometime during the reign of a previous homeowner with “creative confidence.” Removal is also when installers discover corroded valves, outdated piping, or limited access that can change the scope of work.
Step 4: Prepare the new installation area
Before the new unit is set in place, the area should be ready. That typically means a level surface, a proper drain pan where needed, enough clearance, and a condensate plan. If the location is a garage or another space with special code considerations, those details should be addressed now, not improvised later. In certain regions, bracing or anchoring rules may apply as well.
Step 5: Set the water heater in place
The new heat pump water heater is moved into position carefully so the pan, floor, and fittings are not damaged. The unit should be level and upright. This is also the point where installers confirm that access remains available for filter cleaning and future maintenance. A water heater that technically fits but blocks service access is not a win. It is a future invoice wearing a disguise.
Step 6: Connect the plumbing
The cold-water inlet and hot-water outlet are connected, shutoff valves are confirmed or added as needed, and the temperature-and-pressure relief valve is installed according to the manufacturer’s instructions. Depending on the home’s plumbing system and local rules, the job may also include an expansion tank, mixing valve, flexible connectors, heat traps, or pipe insulation. This is the stage where a careful installer protects both performance and safety.
Step 7: Route condensate drainage
Because a heat pump water heater removes moisture from the air, it creates condensate that must be drained away properly. If gravity drainage is available, the line can be routed to an appropriate drain. If not, a condensate pump may be required. The line should be installed so water can move correctly and be maintained over time. Dumping condensate into the wrong place is not a shortcut. It is a leak story waiting to happen.
Step 8: Complete the electrical connection
Electrical hookup should match the model’s exact requirements and should be handled by a qualified professional where required. The installer verifies the proper circuit, disconnects, wiring method, and safety protections. The tank must be filled completely before the system is energized. Powering on an empty or partially filled tank can damage components and turn a brand-new installation into a very expensive lesson.
Step 9: Fill, test, and commission the system
Once plumbing and electrical work are complete, the tank is filled fully, air is purged from the hot-water lines, and all fittings are checked for leaks. Then the installer powers up the unit, confirms operating mode, checks the condensate system, and verifies that the controls, fan, and heat pump function properly. A quality commissioning step often includes setting the preferred operating mode, reviewing vacation settings, and showing the homeowner how to clean the filter.
Best Installation Locations for an Electric Heat Pump Water Heater
Basement
A basement is often the easiest and most forgiving location. It usually offers more air volume, less concern about sound, and better access for plumbing changes. In many homes, a basement install feels like the heat pump water heater’s natural habitat.
Garage
A garage can also work well, especially in warmer climates. The key issues are ambient temperature, freeze risk, vehicle protection, and drain planning. In colder areas, the installer may need to consider how low temperatures affect performance and how exposed piping is protected.
Utility room
A utility room is often a strong choice if it has enough air volume and adequate service clearance. It also tends to keep sound away from living spaces. Just be sure the room is not so tiny that the unit spends its life gasping for airflow like a jogger in a broom closet.
Closet installation
Closets are possible in some homes, but they require more planning. Smaller spaces may need louvers, grilles, ducting, or a model designed to work in tighter conditions. Closet installations are where expert planning really earns its paycheck.
Common Mistakes to Avoid
Undersizing the tank: If your family uses a lot of hot water, a too-small unit can leave you unhappy even if the installation itself is flawless.
Ignoring airflow needs: A heat pump water heater that cannot breathe cannot perform well. Poor location choice is one of the fastest ways to reduce efficiency.
Forgetting about condensate: Standard electric tanks do not create condensate. Heat pump models do. Treating them the same is a rookie mistake.
Installing too close to living areas: Even modest sound can become annoying in the wrong location.
Skipping homeowner education: Owners should know where the filter is, what operating mode they are using, and what kind of maintenance the unit needs.
Assuming every model installs the same way: Manufacturer instructions matter. A 120-volt unit and a 240-volt hybrid may have very different requirements.
Should You Install One Yourself?
For most homeowners, the honest answer is no. An electric heat pump water heater installation blends plumbing, condensate management, appliance placement, and electrical work. It may also involve permit requirements and inspection rules. Even experienced DIY homeowners often hire a licensed plumber, an electrician, or both.
That does not make you less handy. It makes you realistic. There is a difference between painting a room and installing a large water-filled appliance that mixes electricity, pressure, and potential property damage. The smart move is often to be the informed decision-maker, not the person holding every wrench.
What to Do After Installation
Once the new unit is running, ask the installer to walk you through the controls and maintenance basics. Learn which mode is set, how to change the temperature, how vacation mode works, and how often the air filter should be checked. Keep the area around the unit clear enough for airflow and service. If your home has hard water, ask whether additional water treatment would help protect long-term performance.
You should also watch the system during the first week. Listen for unusual sounds, look for leaks, check that condensate is draining properly, and pay attention to whether your household has enough hot water at peak times. A good installation should feel boring in the best way possible: it just works.
Real-World Installation Experiences and Lessons Learned
In real homes, installing an electric heat pump water heater is rarely just about swapping one tank for another. The easiest projects are usually straight electric-to-electric replacements in a basement with a nearby drain and plenty of room. Those jobs tend to move smoothly because the location already supports the basics: air volume, access, and existing plumbing lines. Homeowners in those situations often report the same pleasant surprise after installation: the new unit sounds less dramatic than expected, the space feels slightly cooler and drier, and the electric bill starts behaving better after the first full cycle.
The trickier experiences usually happen in tighter homes. A small utility closet may look perfect on paper, but once the installer starts measuring, reality crashes the party. Suddenly there is a discussion about louvers, transfer grilles, or ducting. In some homes, the water heater technically fits, but the filter becomes difficult to access or the cool exhaust air would spill into a hallway people actually use. Those installations teach a valuable lesson: square footage is not the same thing as useful installation space. Good contractors think beyond “Can we get it in there?” and ask “Will it operate efficiently, be serviceable, and keep the homeowner happy?”
Garage installations create their own stories. In warmer regions, many homeowners love them because the garage offers space, isolation from living areas, and an easy path for condensate drainage. In cooler climates, though, exposed piping and winter temperatures become part of the conversation. A common experience is realizing that the water heater itself may be fine, but the surrounding setup needs improvement, such as better pipe insulation or a more thoughtful drain route. That is why a site assessment matters so much. The unit is only part of the system; the room around it matters too.
Another pattern shows up when homeowners switch from gas to a heat pump water heater. The energy savings can be compelling, but the install is often more involved than expected because new electrical service may be required. Some people go in thinking they are replacing a water heater and come out realizing they also upgraded part of the home’s electrical infrastructure. The best experiences happen when this is planned in advance. The worst happen when nobody checks the panel until installation day and the project turns into a schedule shuffle.
One of the most useful homeowner experiences is learning the controls after the install. People who understand heat pump mode, hybrid mode, vacation mode, and basic filter maintenance tend to be far happier long term. People who never get that five-minute tutorial sometimes assume the system is not working correctly when it is simply operating differently than their old tank. In other words, the installation is not fully finished until the homeowner understands how to live with the new equipment. A heat pump water heater is efficient, but like any smart appliance, it works best when the human in the house is not fighting it.
Final Thoughts
If you are planning to install an electric heat pump water heater, think of the project as an upgrade in both equipment and strategy. The tank matters, but so do the location, airflow, condensate drainage, electrical service, code compliance, and commissioning. Get those pieces right, and you will have a water heater that is efficient, reliable, and much cheaper to operate than an old-school electric tank.
The smartest path is usually simple: choose the right size, pick the right location, hire the right pros, and insist on a proper setup instead of the fastest possible one. Because when it comes to hot water, “close enough” is not actually close enough.