Table of Contents >> Show >> Hide
- Before You Touch a Paintbrush: Pick the Right Update Strategy
- Tools and Materials Checklist
- Step-by-Step: The DIY Chest of Drawers Update That Actually Lasts
- Step 1: Safety + setup (a boring step that prevents drama later)
- Step 2: Remove drawers and hardware (and label like a responsible adult)
- Step 3: Clean like you mean it
- Step 4: Repair dents, chips, and wobbles
- Step 5: Sand or degloss (your finish depends on this)
- Step 6: Prime with the right product
- Step 7: Paint (thin coats winevery time)
- Step 8: Upgrade the details (this is where the glow-up happens)
- Step 9: Seal and protect (optional, but smart)
- Step 10: Reassemble and adjust drawers
- Troubleshooting: Common Dresser Makeover Problems (and fixes)
- How to Make Your Updated Chest of Drawers Look Custom
- Conclusion
- Real-World Experiences: What DIYers Commonly Learn Updating a Chest of Drawers
- Experience #1: “I didn’t realize how dirty it was until I cleaned it.”
- Experience #2: “My first coat looked terrible… then it looked amazing.”
- Experience #3: “Laminate is a different animal.”
- Experience #4: “New hardware was the best money I spent.”
- Experience #5: “Cure time is real, and I used to ignore it.”
- Experience #6: “The best upgrades were the small ones.”
- SEO Tags
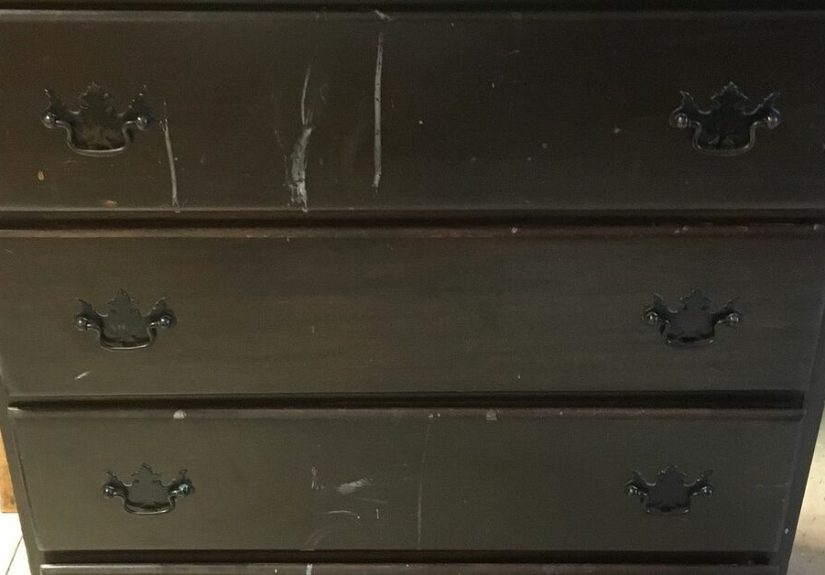
A chest of drawers is basically the unsung hero of your home: it holds socks, secrets, and that one random charging cable
nobody can identify. But if yours is looking a little… “college apartment chic” (read: scratched, stained, and spiritually exhausted),
a DIY update can turn it into a piece you’d actually brag about.
This guide walks you through a real-world, durable chest of drawers makeoverpaint, stain, hardware swaps, drawer fixes, and
a few upgrades that make people say, “Wait, you made that?” You don’t need a fancy workshop. You just need a plan,
a little patience, and the willingness to vacuum sanding dust out of places you didn’t know existed.
Before You Touch a Paintbrush: Pick the Right Update Strategy
The best DIY furniture updates start with one question: What is this dresser made of? Your prep steps and
products depend on the surface.
Common dresser materials (and what they mean for your makeover)
- Solid wood: Most forgiving. Can be sanded, stained, painted, repaired easily.
- Wood veneer: Real wood on top, but thin. Sand gently so you don’t burn through.
- Laminate / melamine: Slick, synthetic surface. Needs scuffing + the right primer to avoid peeling.
- MDF / particleboard: Very paintable with proper priming; edges can drink primer like it’s happy hour.
Choose your makeover “lane”
- Paint makeover: Best for covering stains, modernizing color, and hiding mismatched wood tones.
- Stain + clear coat refresh: Best when you love the wood grain and just want it cleaner/richer.
- Hybrid update: Paint the body, stain the top, swap hardware, add legsmaximum impact, still beginner-friendly.
Tools and Materials Checklist
You don’t need everything on this list for every dresser update, but this covers the most common (and most successful) routes.
Basics
- Drop cloth or rosin paper + painter’s tape
- Screwdriver (and a small bag for hardware)
- Cleaner/degreaser (dish soap + water works; a stronger cleaner helps on greasy pieces)
- Sandpaper or sanding sponge (multiple grits)
- Tack cloth or damp microfiber cloth
- Wood filler + putty knife (for dents, chips, old holes)
For painting
- Primer (bonding or stain-blocking depending on surface)
- Paint (cabinet/furniture enamel or durable interior paint)
- Brush for detail + foam roller for flat areas (or a sprayer if you’re fancy)
- Optional topcoat (water-based polycrylic/polyurethane or other protective finish)
For upgrades
- New knobs/pulls (and a measuring tape)
- Hardware template or scrap cardboard jig (to keep holes aligned)
- Optional: legs/feet, trim molding, cane webbing, drawer liner paper
Step-by-Step: The DIY Chest of Drawers Update That Actually Lasts
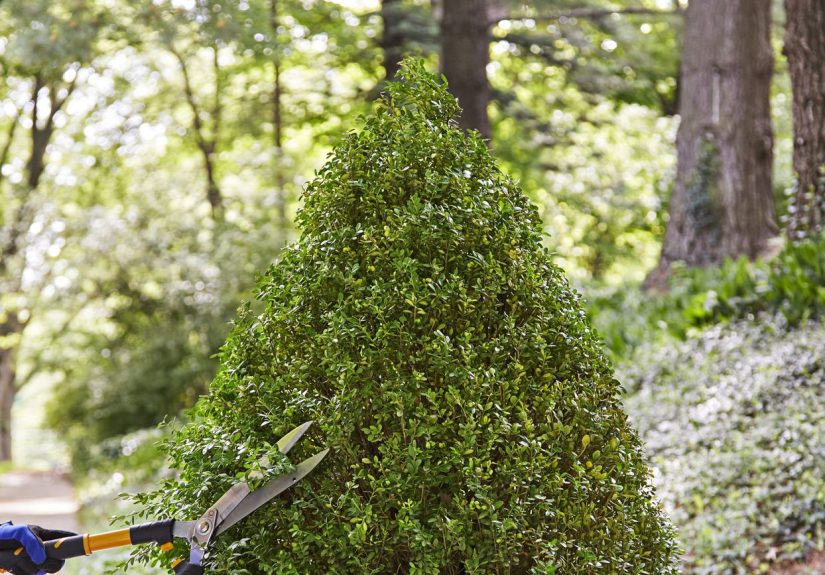
Step 1: Safety + setup (a boring step that prevents drama later)
Work in a ventilated area and protect your floor. If sanding or spraying, wear a properly fitting mask/respirator and eye protection.
If your piece is older and has unknown paint layers, assume it could contain lead-based paint and take extra precautions.
(Lead dust is not the “sparkle” you want in your life.)
Step 2: Remove drawers and hardware (and label like a responsible adult)
- Pull out all drawers and set them aside.
- Remove knobs/pulls and hinges (if any).
- Label drawers with painter’s tape (“Top Left,” “Bottom Right,” etc.) so everything goes back where it fits best.
Step 3: Clean like you mean it
Paint hates grease. So does primer. So does your future self when the finish chips because you “totally cleaned it.”
Wash the piece thoroughly, especially around handles and drawer fronts where hands have left invisible grime.
Let it dry completely before moving on.
Step 4: Repair dents, chips, and wobbles
- Small dents/scratches: Fill with wood filler, let dry, then sand smooth.
- Loose joints: Tighten screws. If the frame wiggles, add wood glue to joints and clamp if possible.
- Drawer bottoms sagging: Re-glue the groove, or add a thin support strip underneath.
- Old hardware holes you won’t reuse: Fill, sand, and plan to drill new holes after paint cures.
Step 5: Sand or degloss (your finish depends on this)
You’re not sanding to punish yourself. You’re sanding to create a surface paint can grip. The goal is a clean, dull finishnot raw wood
unless the old finish is failing or you’re staining.
If you’re painting solid wood or an already-finished dresser
- Start with a medium grit to scuff (then move finer to smooth).
- Focus on shiny areas and edges where hands rub most.
If you’re painting laminate/melamine
Laminate is slick, so lightly scuff sand until the sheen dulls. Be gentledon’t gouge the surface. Wipe off dust thoroughly.
(If you skip this step, you’re basically asking your paint to peel.)
If you’re painting veneer
Veneer is thin. Sand lightly and evenly. If you see the color change suddenly, stopyou’re getting too close to sanding through.
Clean the dust (yes, again)
Vacuum first, then wipe with a damp microfiber or tack cloth. Dust left behind becomes texture, and texture becomes regret.
Step 6: Prime with the right product
Primer is the bridge between “random old dresser” and “durable, smooth finish.” Choose it based on what you’re covering:
- Bonding primer: Great for slick surfaces like laminate.
- Stain-blocking primer: Best if you see water rings, smoke odor, tannin bleed (common in some woods), or mystery stains.
- Shellac-based primer: A go-to for stubborn stains/odors and bleed-through issues when you need serious blocking power.
Apply primer in thin coats. Let it dry fully. If it feels rough, lightly sand and wipe clean before paint.
Step 7: Paint (thin coats winevery time)
For dressers, a durable enamel or cabinet/furniture paint is a smart pick because it cures harder than standard wall paint.
Apply paint in thin, even coats:
- Brush detailed areas (molding, corners).
- Roll flat areas with a foam roller for a smoother finish.
- Let each coat dry fully before adding the next.
- Lightly sand between coats if needed for a silky finish, then wipe away dust.
Pro-level smooth finish tips (without a pro-level budget)
- Don’t overwork the paint. Lay it on and leave it alonefussing creates texture.
- Keep coats thin. Thick coats drip, stay tacky, and show roller edges.
- Respect dry time. “Dry to touch” is not the same as “ready for the next coat.”
Step 8: Upgrade the details (this is where the glow-up happens)
Paint changes the color. Details change the vibe. Pick one or two upgrades so it looks intentional, not like a craft store exploded.
Easy upgrades with high payoff
- Swap hardware: New pulls can make a $30 thrift dresser look custom. Use a template so holes line up.
- Add legs: Furniture legs instantly modernize the silhouette and make cleaning underneath easier.
- Two-tone finish: Paint the body and stain the top for contrast.
- Drawer liners: Patterned paper inside drawers is a small surprise that feels fancy.
Medium effort, designer results
- Picture-frame trim: Add thin molding to drawer fronts for dimension.
- Fluted texture: Apply evenly spaced half-round dowels for a modern fluted look.
- Cane/webbing inserts: Replace solid drawer fronts with cane for a breezy, coastal feel (measure carefully and reinforce the back).
Step 9: Seal and protect (optional, but smart)
Some furniture paints are formulated to be durable without a topcoat, while others benefit from oneespecially on tops and drawer fronts.
If you add a clear coat, use thin layers and let it cure properly. This is the step that helps your dresser survive real life:
keys tossed on top, sticky fingers, and the occasional mug ring.
Step 10: Reassemble and adjust drawers
Once everything is fully dry, reattach hardware and slide drawers back in. If drawers stick after painting, lightly sand the
friction points (sides and runners) and consider a little wax on wood runners for smoother sliding.
Troubleshooting: Common Dresser Makeover Problems (and fixes)
“My paint is peeling.”
Usually caused by skipping cleaning, skipping sanding, or using the wrong primer on laminate. The fix: sand back the failing areas,
use a bonding primer, and repaint with thin coats.
“Yellow/brown stains are bleeding through.”
That’s bleed-through from tannins, water stains, or old finish. Use a stain-blocking primer (often shellac- or oil-based) and repaint.
“The finish feels rough.”
Dust happens. Sand lightly with a fine grit between coats, wipe clean, and keep airflow gentle (fans can blow dust onto wet paint).
“My drawers are sticking now.”
Paint adds thickness. Sand contact areas lightly and avoid heavy paint buildup on drawer edges and runners.
How to Make Your Updated Chest of Drawers Look Custom
Want that “boutique furniture” look? Use one of these simple formulas:
- Modern: Flat-front drawers + matte hardware + simple legs + one solid color.
- Coastal: Soft color + cane inserts + light wood top + warm brass pulls.
- Vintage: Muted color + slightly distressed edges + classic knobs.
- Bold: Deep paint color + unexpected hardware + wallpaper-lined drawers.
Conclusion
A chest of drawers update DIY isn’t just about paintit’s about prep, smart product choices, and finishing details that make the piece
look intentional. Clean thoroughly, scuff sand properly, prime for your surface, and build your finish with thin coats. Then add one or two
upgrades (hardware, legs, trim, liners) to make it feel custom.
And remember: the real secret to a long-lasting dresser makeover is patience. Let it dry. Let it cure. Let it become the upgraded, glow-up version
of itselfkind of like all of us after a good weekend and a snack.
Real-World Experiences: What DIYers Commonly Learn Updating a Chest of Drawers
DIY dresser makeovers are one of the most popular furniture flips for a reason: they’re approachable, affordable, and wildly satisfying. But if you
ask people who’ve done more than one chest of drawers update, you’ll hear a consistent themethe “experience” is 70% prep and 30% resisting
the urge to rush. Here are some common experiences and lessons DIYers report after transforming a dresser, plus how to use them to make your
project smoother.
Experience #1: “I didn’t realize how dirty it was until I cleaned it.”
A lot of people start their DIY chest of drawers update thinking sanding is the main prep step. Then they clean the piece and discover an entire
universe of grime around the drawer pulls. This is especially true for thrifted pieces or dressers used in kids’ rooms. The surprising lesson:
cleaning can take longer than paintingand it’s worth it. Once DIYers adopt the “clean first, sand second” rule, they notice fewer issues like fish-eye,
peeling, or uneven sheen. Many also learn that a quick wipe-down isn’t enough; you need a true degreasing clean and then a full dry before primer.
Experience #2: “My first coat looked terrible… then it looked amazing.”
First coats are liars. They make you question your life choices. DIYers often describe that moment when the initial primer or paint coat looks streaky,
blotchy, or thinespecially over patchy wood filler areas or darker stains. The experience teaches a valuable skill: trust the process and build
the finish in layers. Thin coats level better, cure harder, and look smoother. People who fight the urge to apply a thick “one-and-done” coat
usually get the best result by coat two or three. In other words, the glow-up happens gradually, like good habits or learning to fold a fitted sheet.
Experience #3: “Laminate is a different animal.”
DIYers who paint their first laminate dresser sometimes learn the hard way that glossy surfaces don’t play nicely with random paint. The common experience
is peeling at corners and edgesexactly where hands grab drawer fronts. After that, they become devoted fans of scuff sanding and bonding primer. They
also learn to handle corners gently: no thick paint buildup, no slamming drawers during cure time, and no “I’ll just put everything back tonight” energy.
Once people adjust their expectations and treat laminate like the slick surface it is, they end up with finishes that hold up surprisingly well.
Experience #4: “New hardware was the best money I spent.”
Ask anyone who’s updated a chest of drawers and they’ll tell you: swapping hardware is the quickest way to make the piece look intentional. DIYers often
say the paint helped, but the hardware made it look expensive. The learning curve is usually measurement. People discover that “close enough” is not a
strategy when drilling holesespecially if you’re using modern bar pulls that show alignment issues. The hack that experienced DIYers swear by is making
a simple template (even cardboard works) so each drawer front gets holes in exactly the same spot. They also learn to fill old holes properly when
switching from knobs to pulls, and to wait for the finish to cure before tightening hardware aggressively (to avoid dents).
Experience #5: “Cure time is real, and I used to ignore it.”
One of the most common post-project regrets is reassembling too soon. DIYers describe putting drawers back after the paint feels dry, only to discover
sticking drawers, scuffed edges, or imprints where the drawer front touched the frame. The lesson: dry time and cure time aren’t the same.
Even when a surface feels dry, the paint may still be soft underneath. People who wait longerespecially before heavy usereport dramatically fewer chips.
Experienced DIYers often plan a “no-pressure window” where the dresser can sit and harden. It’s not exciting, but it’s the difference between “Pinterest
perfect” and “why does my drawer look like it fought a raccoon?”
Experience #6: “The best upgrades were the small ones.”
Many DIYers begin with big ideasbold colors, fancy trim, maybe even cane insertsthen realize small upgrades deliver major impact without adding chaos.
Lining drawers with paper, painting the inside lip of the frame, adding felt pads, or smoothing drawer runners can make a dresser feel “new” in daily use.
People also learn that one statement upgrade is often enough: either fluted trim or bold hardware or a two-tone finish. When they try
everything at once, the result can look busy. When they pick one hero feature and keep the rest simple, the dresser looks custom.
The big takeaway from these experiences is encouraging: most dresser makeover mistakes are fixable, and most success comes from a few repeatable habits
thorough cleaning, proper scuff sanding, primer matched to the surface, thin coats, and patient curing. If you treat your chest of drawers update DIY
like a short series of smart steps (not a speedrun), you’ll end up with furniture that looks better, lasts longer, and feels genuinely rewarding every time
you open a drawer.