Table of Contents >> Show >> Hide
- What You Need Before You Start
- How to Make a Fake Lip Ring: 8 Steps
- Step 1: Choose a skin-friendly wire or ring base
- Step 2: Measure the size you want
- Step 3: Cut a short piece of wire
- Step 4: Shape the wire into a ring
- Step 5: Smooth the ends thoroughly
- Step 6: Adjust the opening for a gentle fit
- Step 7: Clean the ring before wearing it
- Step 8: Place it on your lower lip and test the comfort
- Tips to Make Your Fake Lip Ring Look More Realistic
- Common Mistakes to Avoid
- Is a Fake Lip Ring Safer Than a Real Lip Piercing?
- How to Clean and Store Your DIY Fake Lip Ring
- Final Thoughts
- Experience Notes: What It’s Really Like to Wear a Fake Lip Ring
- SEO Tags
Want the edgy look of a lip ring without the commitment, the needle, or the dramatic “Mom, it’s just self-expression” speech? Good news: a fake lip ring can give you the vibe without the piercing. Even better, you can make one at home with a few basic jewelry supplies and a little patience.
This guide walks you through how to make a fake lip ring in 8 steps, with a focus on comfort, safety, and style. The goal is simple: create a small ring that hugs your lip lightly, looks convincing from a normal distance, and does not turn your face into a science experiment. That means no stabbing, no gluing metal to your skin, and no grabbing a random rusty paper clip from the bottom of your backpack. We are going for fashion, not tetanus.
If you are trying a faux piercing for a costume, a photo shoot, a night out, or just because you want to test-drive the look, this tutorial will help you do it in a smarter way. You will also learn which materials are best, what mistakes to avoid, and how to wear a fake lip ring comfortably.
What You Need Before You Start
Before you make a fake lip ring, gather the right materials. The biggest difference between a cute DIY accessory and an annoying one is the metal you choose. Since the ring will sit near your mouth and touch sensitive skin, avoid mystery metals and anything sharp.
Recommended materials
- Jewelry-making wire labeled nickel-free, stainless steel, titanium-colored craft wire, or other skin-friendly metal
- Round-nose pliers for bending smooth curves
- Wire cutters
- A pen, marker, or makeup brush handle to shape the ring evenly
- Fine nail file or jewelry file to smooth rough ends
- Soap and water or gentle jewelry cleaner for cleaning
- Optional small bead or charm if you want a decorative look
What to avoid
- Paper clips, staples, safety pins, or random hardware wire
- Cheap metal that flakes, tarnishes quickly, or turns your skin green
- Super glue, lash glue, nail glue, or craft glue anywhere near your lip
- Magnets in or around your mouth
- Sharp edges that can scratch the skin
If your skin is sensitive, choosing a hypoallergenic metal matters. The lip area is not the place to gamble with itchy, irritating metal just because it was “only a dollar.”
How to Make a Fake Lip Ring: 8 Steps
Step 1: Choose a skin-friendly wire or ring base
The best fake lip ring starts with the right material. Pick a thin piece of jewelry wire that is flexible enough to bend but sturdy enough to keep its shape. A small jump ring or a piece of nickel-free craft wire works well. Aim for a thickness that looks realistic but does not pinch too hard. If the wire feels rough, stiff, or suspiciously aggressive, put it down and choose something better.
A good fake lip ring should feel light and smooth. It is not supposed to dig into your lip like it is collecting rent.
Step 2: Measure the size you want
Most fake lip rings look best when they are fairly small and sit on one side of the lower lip. Use a pen barrel, makeup brush handle, or another round object to help shape the ring. You want a diameter that looks natural on your face. Too tiny, and it will pinch like a crab. Too wide, and it will hang there like a tiny metal hula hoop.
If you already own a hoop earring or nose ring that fits the look, use it as a visual reference for size. The goal is a subtle curve that hugs the lip without squeezing it flat.
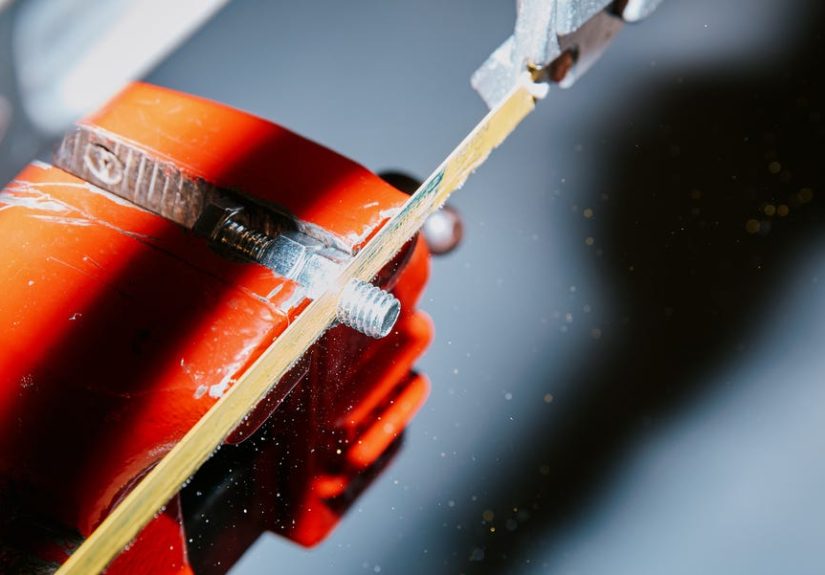
Step 3: Cut a short piece of wire
Using wire cutters, snip a piece of wire that is slightly longer than you think you need. It is much easier to trim extra metal than it is to magically grow more. Start with a small piece, especially if this is your first try. You are making jewelry, not fencing.
Work slowly and carefully. After cutting, inspect both ends. Freshly cut wire can be sharp, and your lip is not interested in being your test subject.
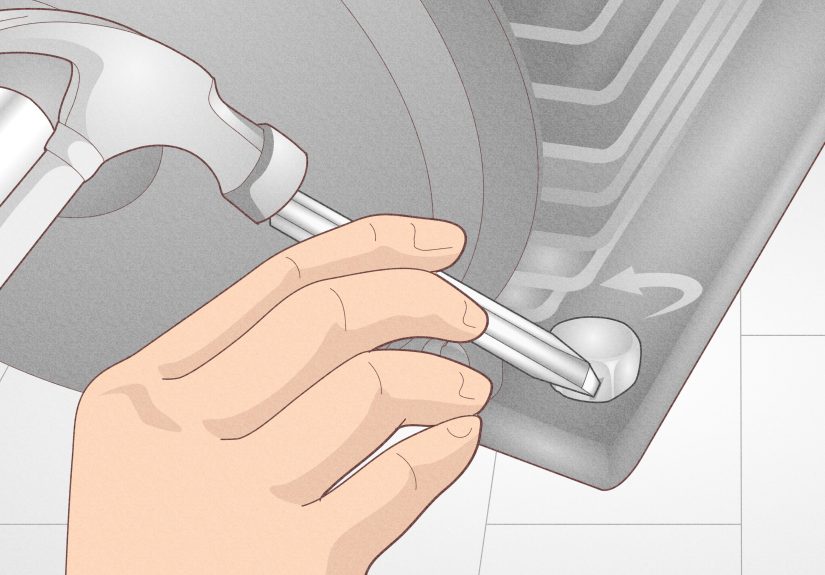
Step 4: Shape the wire into a ring
Wrap the wire gently around your round object or use round-nose pliers to form a smooth circle or horseshoe shape. Do not worry about making it perfect on the first attempt. Tiny adjustments are part of the process. A fake lip ring usually looks best when it is close to a circle with a small opening, almost like a mini clip-on cuff.
If you want a more polished look, make the curve as even as possible. Lopsided can be charming in cookies. In facial jewelry, less so.
Step 5: Smooth the ends thoroughly
This is one of the most important steps. Use a fine nail file or jewelry file to smooth both ends of the wire. Run your fingertip over the edges to make sure there are no burrs, points, or rough spots. If it scratches your finger, it should not go anywhere near your lip.
A smooth fake lip ring is more comfortable, more wearable, and much less likely to irritate the skin. This step is not glamorous, but it is the difference between “cute accessory” and “why is my face mad at me?”
Step 6: Adjust the opening for a gentle fit
Once the ring shape is ready, leave a slight gap in the circle. That opening lets the fake ring clip lightly onto the lower lip. Use pliers to adjust it little by little. The fit should be snug enough to stay in place but gentle enough that you can forget about it for short periods.
Do not force the metal closed too tightly. A fake lip ring should rest on the lip, not audition for the role of medieval torture device.
Step 7: Clean the ring before wearing it
Wash the finished ring with mild soap and water, then dry it completely. Even if the metal looks clean, it has been handled, bent, cut, and filed. Giving it a quick cleaning helps remove residue and makes the accessory more skin-friendly.
You should also clean your hands and make sure the skin around your mouth is dry. Lip balm, gloss, and heavy makeup can make the ring slide around more than expected.
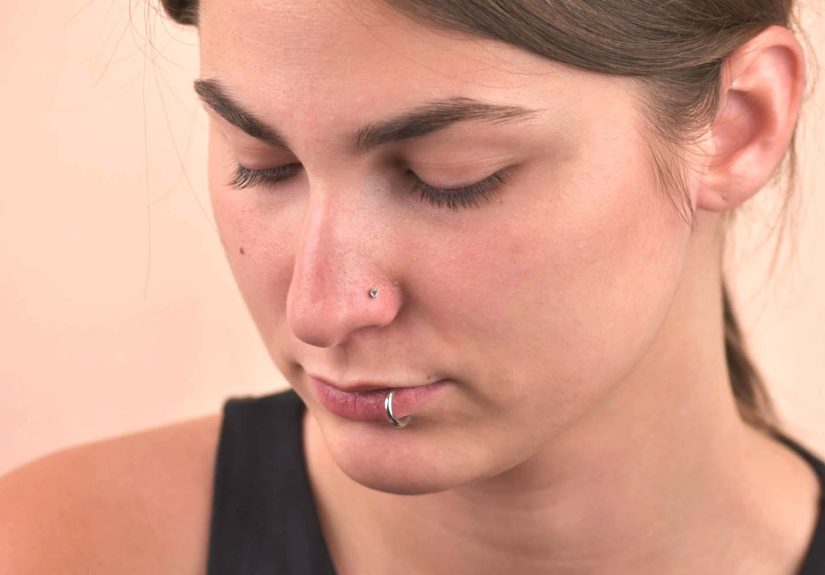
Step 8: Place it on your lower lip and test the comfort
Position the fake lip ring on one side of your lower lip and check the fit in the mirror. Smile, talk a little, and move your mouth naturally. If it feels too loose, adjust the opening slightly. If it pinches, reshape it gently. The ring should stay put for casual wear, photos, or short outings without making you count the minutes until you can take it off.
Take it off right away if you notice pinching, redness, itching, a metallic taste, or irritation. A fake lip ring should be fun, not a personal feud between your skin and your jewelry.
Tips to Make Your Fake Lip Ring Look More Realistic
If you want your faux lip piercing to pass the quick-glance test, details matter. A realistic fake lip ring usually has a simple design and a clean finish. Matte black, silver-tone, and gold-tone styles tend to look the most believable. Oversized charms, giant beads, and glitter explosions can be fun for costumes, but they do not usually mimic a standard lip piercing.
Try placing the ring slightly off-center on your lower lip for the most natural look. That placement is popular because it frames the mouth without overwhelming the face. You can also match the metal tone to your other jewelry so the accessory looks intentional rather than random.
For photos, less is more. Pair the fake lip ring with simple makeup or a bold eye look and let the jewelry do its thing. If the goal is “cool and effortless,” the ring should look like it belongs there, not like it arrived with fireworks.
Common Mistakes to Avoid
Using the wrong metal
One of the biggest DIY mistakes is using whatever metal happens to be nearby. Cheap alloys can irritate the skin, discolor quickly, or leave your lip area itchy and red. Choose jewelry-making supplies that are meant for skin contact whenever possible.
Making the ring too tight
A fake lip ring does not need to clamp down hard to stay put. If it leaves a deep mark, hurts when you speak, or makes you look permanently annoyed, loosen it.
Skipping the filing step
Rough ends are a fast way to ruin the experience. The ring may look fine in the mirror but still scratch your skin. Always smooth the edges thoroughly.
Wearing it for too long
Even a well-made fake lip ring can get uncomfortable if you wear it for hours. This is especially true in hot weather, during meals, or while talking nonstop. Give your skin breaks.
Trying to eat with it on
Can you? Maybe. Should you? Usually not. Fake lip rings can shift, pinch, or fall off during eating. Remove it before meals unless you enjoy surprise metal with your sandwich.
Is a Fake Lip Ring Safer Than a Real Lip Piercing?
In many ways, yes. A fake lip ring avoids puncturing the skin, so you skip the aftercare routine, healing period, and many of the risks that come with a real oral piercing. You also get freedom: wear it today, skip it tomorrow, change the style next week.
That said, “fake” does not automatically mean “risk-free.” The lip area is sensitive, and poor-quality metal or a bad fit can still cause irritation. That is why the safest approach is to make a clip-style accessory from skin-friendly materials and wear it for short periods rather than trying risky shortcuts.
If you know you have metal allergies, eczema, or very reactive skin, be extra cautious. Test the material briefly on less sensitive skin first, and stop immediately if it causes discomfort.
How to Clean and Store Your DIY Fake Lip Ring
After wearing your fake lip ring, wipe it down and wash it with mild soap and water if needed. Dry it well before storing it. Moisture can encourage tarnish, and nobody wants their stylish little hoop to age like a forgotten penny.
Store it in a small jewelry box, pill case, or zip pouch so it keeps its shape and does not get bent out of place. If you make several versions, label them by size or color. That saves time later and makes you look like the organized main character you deserve to be.
Final Thoughts
Learning how to make a fake lip ring is really about combining style with common sense. You do not need a piercing to test the look, and you definitely do not need risky materials to pull it off. A simple piece of skin-friendly wire, a careful fit, and a little patience can create a fake lip ring that looks cool, feels comfortable, and lets you experiment without commitment.
The smartest DIY version is the one that respects your skin. Keep the design simple, smooth the edges, wear it for short periods, and skip anything sharp, sticky, or sketchy. Fashion should be fun. Your lower lip should not have to file a complaint.
Experience Notes: What It’s Really Like to Wear a Fake Lip Ring
Trying a fake lip ring for the first time is a weirdly entertaining mix of confidence boost, mild confusion, and repeated mirror checks. At first, most people expect it to feel dramatic, almost like putting on a costume. In reality, a well-made fake lip ring feels surprisingly subtle. You notice it for the first few minutes because your brain keeps saying, “Hello, new object on face,” but once the fit is right, it becomes just another accessory.
One of the most common experiences is realizing how much tiny details matter. A ring that looks almost identical to another one can feel completely different depending on the metal, the curve, and the tension. If it is even a little too tight, you will think about it nonstop. If it is slightly too loose, you will spend the whole day wondering if it is about to launch itself into another dimension. That is why the adjustment stage matters so much. Most of the success happens in those little tweaks.
Another funny part of the fake lip ring experience is how people react. Some friends will notice immediately and ask whether you actually got pierced. Others will stare at your face for ten minutes and somehow miss the new shiny thing entirely. A fake lip ring often works best as one of those small style details that changes your whole vibe without screaming for attention. It can make a simple outfit feel cooler, a makeup look feel sharper, or a photo feel more styled.
There is also the practical side. Talking is usually fine once you get used to it, but eating with a fake lip ring is often where the romance ends. It may shift, press awkwardly, or make you suddenly aware of every bite you take. Most people who wear DIY fake lip rings eventually adopt the same strategy: put it on after the meal and keep the sandwich drama to a minimum.
Comfort also changes depending on the day. Dry skin, chapped lips, heavy lip balm, hot weather, and lots of talking can all make a fake ring feel more noticeable. On a calm day, it can sit perfectly for a casual outing or a batch of photos. On a chaotic day with snacks, coffee, and nonstop conversation, it may start to feel like a tiny coworker who will not stop asking questions.
People who experiment with fake lip rings often say the biggest benefit is freedom. You get the edgy, trendy look without committing to a permanent hole or healing process. That makes it ideal for anyone who is curious about a lip piercing but not ready for the real thing. It is also great for themed outfits, concerts, social media content, or simply trying a different version of your style.
The overall experience tends to be best when expectations are realistic. A DIY fake lip ring is not magic. It may need occasional adjustment, and it is not something you forget about forever. But when it is made carefully, it can absolutely look convincing and feel comfortable enough to enjoy. The trick is respecting the fact that the lip area is sensitive and that “close enough” is not the same as “comfortable enough.”
In the end, wearing a fake lip ring is less about pretending and more about experimenting. It lets you play with your style in a low-pressure way. Some people try it once for fun and move on. Others discover they love the look and use it as a regular accessory. Either way, it is a small project with a big payoff: a little confidence, a little edge, and zero need to explain an impulsive piercing decision at family dinner.