Table of Contents >> Show >> Hide
- Rice Vinegar 101 (What You’re Actually Making)
- Ingredients and Tools
- How to Make Rice Vinegar: 15 Steps
- Timing Guide (So You Don’t Stare at a Jar for 47 Straight Hours)
- Troubleshooting (Because Fermentation Has Opinions)
- Food-Safety Notes (Read This if You Ever Want to Pickle Something for the Pantry)
- How to Use Homemade Rice Vinegar (Real-Life Wins)
- Conclusion
- Experiences: What It’s Like to Make Rice Vinegar at Home (The Good, the Weird, the “Is It Supposed to Wiggle?”)
Rice vinegar is that quietly heroic bottle in the pantry: mild, a little sweet, and basically incapable of starting drama.
It brightens sushi rice, wakes up salad dressings, and makes quick pickles taste like you actually planned your life.
The best part? You can make rice vinegar at home with a simple two-stage fermentationfirst you make alcohol from rice,
then friendly vinegar bacteria turn that alcohol into acetic acid (a.k.a. vinegar’s signature tang).
This guide gives you a clear 15-step process, plus practical troubleshooting and safety notesbecause “artisan” is great,
but “mystery mold science fair project” is not. Expect a timeline of weeks, not hours. Vinegar is patient. It’s basically
the tortoise of condiments.
Rice Vinegar 101 (What You’re Actually Making)
Rice vinegar (sometimes labeled “rice wine vinegar”) is traditionally made by fermenting rice with a mold culture (koji)
to unlock sugars, then yeast to produce alcohol (like a rice wine), and finally acetic acid bacteria to convert that alcohol
into vinegar. The end result is typically lighter and softer than distilled white vinegargreat for Asian-inspired dishes,
marinades, and dressings.
Two quick notes that save headaches later:
-
Seasoned rice vinegar is rice vinegar plus sugar and salt. It’s convenient for sushi rice and quick pickles,
but it’s not the same thing as plain rice vinegar. -
Homemade vinegar is not automatically “canning-safe.” Shelf-stable pickling/canning recipes often rely on
a specific, known acidity level. Your homemade batch may be delicious but still not meet the acidity needed for safe pantry canning.
Ingredients and Tools
Ingredients (Choose a Path)
-
Option A: Start from rice (more traditional, more time).
You’ll need cooked white rice (short- or medium-grain is easiest), koji rice (or koji starter), water, and a yeast intended
for brewing (wine/sake yeast works well). -
Option B: Start from sake or dry rice wine (faster, simpler).
You’ll use sake/rice wine + water (often diluted) and jump straight to the vinegar stage. -
Starter for vinegar stage: unpasteurized vinegar with live cultures and/or a “mother of vinegar.”
(If you can get a mother, your vinegar tends to start faster and more reliably.)
Tools
- Wide-mouth glass jar (or food-safe crock); avoid reactive metals like aluminum or copper
- Cheesecloth (or a clean, tightly woven cloth) + rubber band
- Fine mesh strainer + coffee filters (for clarifying)
- Sanitizer (or very hot, soapy water + thorough air-drying)
- Thermometer (helpful for temperature control and optional pasteurization)
-
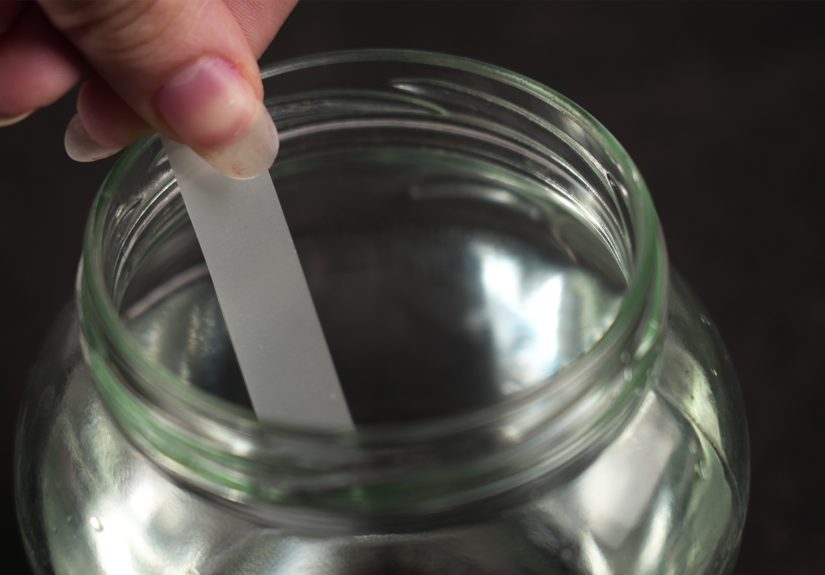
Optional but smart: pH strips and/or an acidity test kit if you want extra confidence about acidityespecially if you’re tempted
to use it for preservation projects (more on that later).
How to Make Rice Vinegar: 15 Steps
-
Pick your method and set expectations.
If you want the full “from rice to vinegar” experience, plan for about 4–10 weeks depending on temperature and activity.
If you start with sake or rice wine, you may be in the vinegar zone in as little as 3–6 weeks. -
Clean and sanitize everything that will touch your vinegar.
Vinegar is a fermentation, not a free-for-all. Wash jars, strainers, spoons, and funnels thoroughly. Let them air-dry.
Clean gear dramatically lowers the chance that your batch turns into a funk museum. -
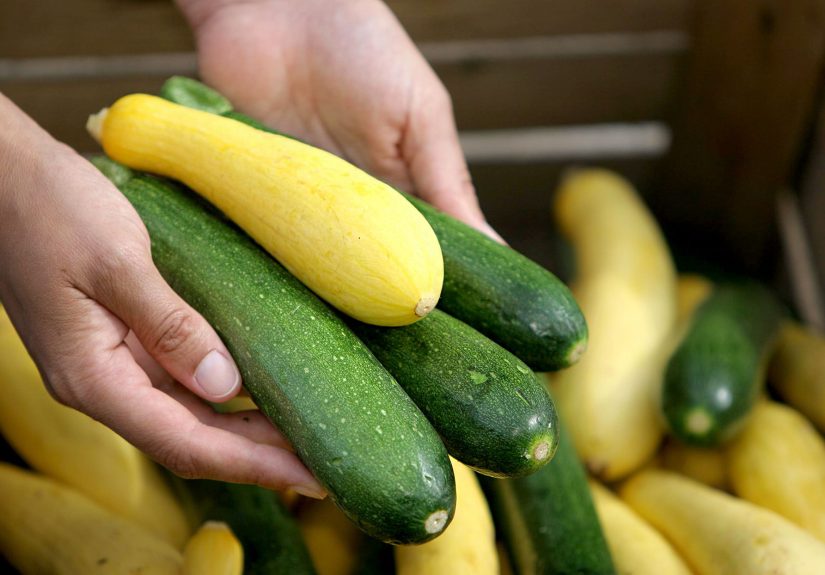
Cook the rice (Option A) and cool it properly.
Cook plain white rice without oil. Aim for fully cooked grainssoft, but not a watery soup. Spread it out to cool until it’s
warm (not hot). High heat can damage cultures you’ll add next. -
Inoculate with koji to unlock fermentable sugars (Option A).
Mix the cooled rice with koji rice (or follow your koji starter instructions). Add non-chlorinated water to form a loose mash.
Koji’s job is to convert rice starches into sugars so yeast can make alcohol. -
Add yeast and begin alcoholic fermentation (Option A).
Stir in brewing yeast (avoid relying on random wild yeast if you want consistent results). Keep the mash in a sanitized container.
During the first stage, you want less oxygen than the vinegar stagethink “yeast party,” not “vinegar aerobics.” -
Ferment until it smells boozy and tastes lightly alcoholic.
Keep it in a warm-ish, steady spot (many home fermenters aim around room temperature). Stir daily or as your method recommends.
Depending on your culture and temperature, this stage may take roughly 1–2+ weeks. When it’s ready, you’ll notice alcohol aroma,
less sweetness, and active bubbling early on. -
Strain the rice wine (Option A) or measure your sake (Option B).
For Option A, strain through a fine mesh strainer, then through cheesecloth. Press gently to extract liquid. You now have a rice wine base.
For Option B, pour your sake/rice wine into a sanitized container. -
Adjust alcohol level (helps the vinegar bacteria thrive).
Acetic acid bacteria need oxygen and generally do better with moderate alcohol rather than something extremely high-proof.
If your base is strong, dilute with non-chlorinated water. (If you’re using sake, many home methods dilute it before acetification.)
You’re aiming for a base that still tastes like alcohol, but not like a shot. -
Optional: gently heat the liquid to reduce yeast activity, then cool completely.
Some methods briefly warm the strained alcoholic liquid to knock back yeast, then cool it and inoculate with vinegar starter.
If you do this, don’t add your mother until the liquid is fully cooledheat can harm the culture. -
Add your vinegar starter (mother and/or unpasteurized vinegar).
Pour your base into a wide-mouth jar (often best filled about two-thirds full). Add a starter portion of unpasteurized vinegar
and/or a mother of vinegar. This “seeds” the batch with acetic acid bacteria and makes the conversion faster and safer. -
Cover with cloth, not a lid.
Secure cheesecloth over the jar with a rubber band. You want airflow (oxygen is essential for vinegar bacteria), but you do not
want fruit flies hosting a rave on your vinegar. -
Keep it in a warm, dark-ish place with good air circulation.
A steady room-temperature spot out of direct sun is ideal. Sunlight can heat the jar unevenly and stress the culture.
Air circulation helps acetification along. -
Encourage oxygen contactgently.
Swirl the jar once a day (or stir gently beneath the surface if your mother forms on top and you don’t want to tear it).
A healthy mother may look like a translucent film or gelatinous disk. It can be weirdly beautiful, like kombucha’s cousin who wears linen. -
Taste and test over time until it’s pleasantly acidic.
Over the next several weeks, the aroma shifts from boozy to bright and sharp. Start tasting once it smells distinctly vinegary.
If you want additional certainty, use pH strips (vinegar is typically quite acidic) and/or an acidity test kit.
Keep fermenting until the flavor tastes balancedtangy but not harsh. -
Strain, bottle, and decide: “live” vinegar or shelf-stable vinegar.
When you like the acidity, strain out sediment. Save the mother and a little finished vinegar to start your next batch.
For a “live” vinegar (with active culture), store it in the fridge and expect some cloudiness over time.
For a more shelf-stable vinegar, you can pasteurize gently (see the safety notes below), then bottle in clean containers.
Timing Guide (So You Don’t Stare at a Jar for 47 Straight Hours)
- Days 1–7: Alcoholic fermentation activity is strongest (Option A). Bubbling and yeasty aromas are common.
- Weeks 2–3: Alcohol stage finishes; you strain. Vinegar stage begins after starter is added.
- Weeks 3–6: The vinegar aroma appears; mother may form; flavor sharpens steadily.
- Weeks 6–10: Mellowing and refinement. Many vinegars taste smoother after resting and clarifying.
Troubleshooting (Because Fermentation Has Opinions)
“Is this mold?”
A vinegar mother is usually smooth and pale/amber, like a film or jelly layer. Fuzzy growth (especially green, blue, pink, or black)
is a red flag. When in doubt, throw it out. If your batch smells rotten, cheesy (in a bad way), or putrid, don’t try to “power through.”
White film on top
A thin white film can sometimes be harmless surface yeast. It may affect flavor, but it’s not automatically dangerous.
Skim it off, increase airflow, and make sure you started with enough live vinegar culture. If you see fuzz or color, treat it as mold and discard.
It smells like nail polish remover
Sharp solvent-like notes can happen when fermentation is stressed or too hot, or when oxygen exposure is unbalanced. Move the jar to a steadier
temperature, avoid direct sun, and make sure your starter culture is strong. Time and gentle aging can mellow a young vinegar.
No vinegar smell after weeks
Common culprits: too cold, not enough oxygen, too little starter, or an alcohol base that’s out of range. Warm it slightly, improve airflow, and add
more unpasteurized vinegar or a fresh mother if needed.
Food-Safety Notes (Read This if You Ever Want to Pickle Something for the Pantry)
Homemade rice vinegar can be fantastic for cooking, dressings, sauces, and refrigerator pickles. But for
water-bath canning or shelf-stable pickling, recipes often rely on vinegar with a known acidity (commonly 5%).
Your homemade batch may not reliably hit that target without proper testing. If you’re canning, use a vinegar labeled with the acidity required
by a research-tested recipe, and don’t swap in homemade vinegar unless you can verify its acidity with appropriate testing.
Also: keep everything clean, use non-reactive containers, and keep your jar covered with cloth to prevent insect contamination.
How to Use Homemade Rice Vinegar (Real-Life Wins)
- Sushi rice: Use plain rice vinegar and season it yourself so you control the sweet-salty balance.
- Quick pickles: Cucumbers, red onions, carrotsespecially for fridge pickles you’ll eat within days or weeks.
- Salad dressings: Rice vinegar + sesame oil + soy sauce + grated ginger = instant “I meal-prep” energy.
- Dipping sauces: Dumplings love rice vinegar with chili crisp or a splash of soy.
- Brightening soups: A teaspoon at the end can wake up brothy dishes.
Conclusion
Making rice vinegar at home is mostly about three things: clean tools, patience, and letting oxygen do its job at the right time.
Once you’ve nailed your first batch, the process gets easier because you can reuse a mother and a bit of finished vinegar as starter.
The reward is a mellow, fragrant homemade rice vinegar that’s tailor-made for your kitchenand a fun fermentation skill you can brag about
at parties (or at least at the group chat).
Experiences: What It’s Like to Make Rice Vinegar at Home (The Good, the Weird, the “Is It Supposed to Wiggle?”)
People expect homemade rice vinegar to feel like baking cookies: mix things, wait a bit, enjoy. In reality, it feels more like keeping a tiny
ecosystem as a roommate. It doesn’t ask for rent, but it does have needssteady temperature, decent airflow, and the dignity of not being shaken
like a maraca every time you walk by. The first “experience milestone” most home fermenters mention is the smell shift: one day your jar is politely
boozy, and thenalmost overnightit develops that unmistakable vinegar brightness that makes your nose go, “Oh. We’re doing the thing.”
The second milestone is psychological: learning to stop obsessing. It’s tempting to lift the cloth cover every few hours, poke at the surface, and
narrate your jar’s progress like a nature documentary. (If you’ve ever whispered, “Come on, little bacteria, you can do it,” you’re not alone.)
But vinegar rewards “calm curiosity,” not constant disturbance. A healthy mother can form as a delicate film, and while it’s hardy enough to exist,
it’s not thrilled about being torn up daily. Many successful batches come from a routine that’s boring on purpose: swirl gently, sniff, walk away,
repeat tomorrow.
Then comes the weird-but-normal stage: the mother. First-timers often describe it as “a jelly pancake,” “a translucent UFO,” or “the least appetizing
proof that science works.” The best mental model is to treat it as a sign that your acetic acid bacteria are active. It’s not a garnish. You don’t
need to name it. (But if you do, keep it classy. “Vinnie the Vinegar” has been taken by approximately everyone.)
Flavor-wise, homemade rice vinegar often starts sharper than expected. Young vinegar can have a punchy edge, and some batches carry a faint yeasty note
if the transition between alcohol and acetification wasn’t smooth. This is where experience helps: time is an ingredient. Letting the vinegar rest,
clarifying it, and keeping it away from oxygen once it tastes right can soften harsh notes. Many cooks find that a batch they thought was “too intense”
becomes pleasantly rounded a few weeks laterlike it grew up, got a job, and started saying “my pleasure” unironically.
The most practical experience lesson is about expectations for use. Homemade rice vinegar shines in dressings, sauces, sushi seasoning, and refrigerator
picklesplaces where flavor is the goal and you’re not relying on a strict, standardized acidity for shelf-stable preservation. Home fermenters who try
to use their vinegar for pantry canning often learn (sometimes the hard way) that “tastes sour” and “meets a tested acidity standard” are two different
things. The smarter experience is to treat homemade vinegar like a premium cooking ingredient: use it where you’ll notice its softness and aroma, and
use labeled, standardized vinegar when you’re preserving foods for long-term storage.
Finally, there’s the hidden joy: once you make rice vinegar successfully, you start seeing your kitchen differently. Leftover sake becomes “potential
vinegar.” A mother becomes “a starter for the next batch.” You get comfortable with slow processes that improve with care rather than force. And the next
time a recipe calls for rice vinegar, you’ll pour yours in and think, with quiet satisfaction, “This didn’t come from aisle seven. This came from me…
and also from a thriving community of microscopic overachievers.”