Table of Contents >> Show >> Hide
- What You’ll Need (and What You Can Skip)
- Choose the Right Paint for a Bathroom Wall
- Before You Paint: Prep the “Splash Zone” Like a Pro
- Measure the Gap: Pick the Best Method for Your Toilet
- Method 1: The Mini Roller Technique (Fastest + Most Even)
- Method 2: The Paint Pad / Edger (Best for Ultra-Tight Gaps)
- Method 3: The “DIY Extender” Trick (When Your Hand Won’t Fit Back There)
- Cut In First or Roll First?
- Humidity, Dry Time, and the “Why Are There Streaks?” Problem
- Lead Paint Safety (Especially for Older Homes)
- Common Mistakes (So You Don’t Have to Learn the Hard Way)
- Quick Checklist: The “One-Trip” Plan
- FAQ: Painting Behind a Toilet Tank
- Conclusion: Yes, You Can Beat the Toilet Tank
- Real-World Experiences (The Stuff People Don’t Tell You Until After)
- SEO Tags
Painting a bathroom should be satisfying: fresh color, clean lines, that “wow” moment when you step back and admire your work. And then there it isthe toilet. Specifically, the awkward slice of wall behind the tank that seems designed by someone who hates DIYers. The good news: you can absolutely paint behind a toilet without removing the tank, without turning your bathroom into a plumbing reality show, and without accepting a sad, unpainted rectangle as your forever fate.
This guide walks you through smart prep, the right tools for tight spaces, and three proven painting methods (mini roller, paint pad, and “DIY extension” tricks) so you can get professional-looking coverageminus the bolt loosening and wax-ring drama.
What You’ll Need (and What You Can Skip)
Must-haves
- Mini roller (4-inch is the sweet spot) and a couple of covers (foam or 3/8″ nap for light texture)
- Angled sash brush (2″ is great for cutting in)
- Painter’s tape (optional, but helpful if you’re not a “steady-hand legend”)
- Plastic bag or plastic wrap + a little tape (to protect the tank and parts)
- Drop cloth (canvas is ideal; plastic is fine if that’s what you’ve got)
- Cleaning supplies (mild detergent; mildew remover if needed)
- Spackle + putty knife (for dings), plus light sandpaper or a sanding sponge
- Bathroom-friendly paint (more on that in a minute)
Nice-to-haves (these make it easier)
- Mini roller frame with an extension (even a short handle helps)
- Edging tool / paint pad (great when the gap is tiny)
- Small artist brush (for the final “I refuse to be defeated” touch-ups)
- Flashlight or phone light (so you can actually see what you’re doing back there)
What you can skip
- Removing the tank (the whole point!)
- Overloading the roller (it feels productive; it’s actually drip city)
- Painting in a steamy bathroom (paint hates spa conditions)
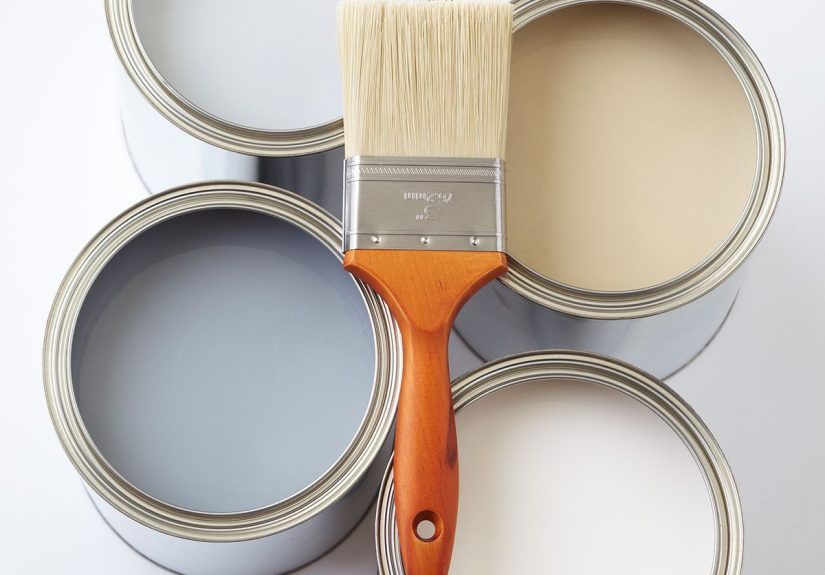
Choose the Right Paint for a Bathroom Wall
Bathrooms are moisture-heavy, splash-prone, and occasionally host to fog banks after hot showers. Your paint choice matters. For most bathroom walls, a satin or semi-gloss finish holds up well because it’s easier to clean and more moisture resistant than flat finishes. If your bathroom is poorly ventilated or frequently humid, consider a mildew-resistant interior paint designed for high-moisture spaces.
Satin vs. semi-gloss (quick decision)
- Satin: Durable, washable, and less shinygreat for most bathroom walls.
- Semi-gloss: More moisture resistant and more washable, but it highlights wall imperfections more.
If you’re repainting over stains or patched areas, don’t rely on “paint-and-primer” marketing magic alone. A dedicated primer can help seal repairs and block water staining so your finish coat looks uniform.
Before You Paint: Prep the “Splash Zone” Like a Pro
Step 1: Ventilate and de-steam the room
Run the exhaust fan and open a window if possible. Paint dries better with airflow and normal humidity. If your bathroom feels like a rainforest, wait until it doesn’t.
Step 2: Protect everything you don’t want painted (including your pride)
- Lay a drop cloth around the toilet base.
- Slip a plastic bag over the tank (lid off is even easier) and tape it lightly in place.
- Cover the flush handle, supply line, shutoff valve, and any nearby trim hardware.
Step 3: Clean the wall behind the tank
Bathrooms collect invisible grimehair spray mist, dust, and general life residue. Wash the wall with mild detergent and water, then let it dry completely.
Step 4: Handle mildew the safe way (if you see spots)
If you see mildew, clean it before painting or it can bleed through and come back to haunt you. Use an appropriate mildew cleaner. If you use a bleach-water solution, wear gloves and eye protection, ventilate well, and never mix bleach with ammonia-based cleaners. Rinse thoroughly and let the wall dry.
Step 5: Patch and smooth (without creating a dust disaster)
Fill nail holes and dents. When dry, lightly sand to smooth the repair. If your home was built before 1978 and you’re sanding or scraping older paint, use lead-safe precautions. (More on lead safety below.)
Step 6: Tape (optional, but helpful)
Tape baseboards, adjacent trim, and the wall edges you want crisp. Behind the tank, tape is often more aspirational than practicaldo what you can, and plan for careful brushwork where tape won’t reach.
Measure the Gap: Pick the Best Method for Your Toilet
The distance between your tank and the wall decides your strategy. Grab a ruler, a paint stir stick, or even a butter knife (washed, please) and see what fits back there.
If you have about 1 inch or more
You’re living the dream. Use a mini roller and a brush for edges.
If you have about 1/2 inch to 1 inch
Still very doable. Use a slim mini roller or a foam roller, and keep paint loads light.
If you have less than 1/2 inch
Welcome to hard mode. You’ll likely need a paint pad/edger, a foam brush, or a DIY extender trick. You can still get solid coverageyou just need patience and thinner tools.
Method 1: The Mini Roller Technique (Fastest + Most Even)
This is the go-to method because a mini roller mimics the wall texture better than a brush alone and gives smoother, more consistent coverage.
Step-by-step
- Remove the tank lid and set it somewhere safe (preferably not where it can swan-dive onto tile).
- Dry-fit the roller behind the tank before it’s loaded with paint. Try sliding it in from the side or angling from the top.
- Load the roller lightly. Roll off excess paint in the tray. Your goal is “evenly coated,” not “paint piñata.”
- Roll in short strokes. Start near the middle behind the tank, then work outward. Use gentle pressurepushing hard just splatters paint onto the tank cover.
- Feather the edges where the roller meets the open wall area so you don’t get a hard line.
- Let it dry per the can instructions, then repeat for a second coat if needed.
Pro tips for a cleaner finish
- Use a flashlight angled from the side so you can see missed patches.
- Keep the roller damp, not drippingthin layers reduce drips and give better adhesion.
- Mind the “wet edge” where possible; overlap while the paint is still wet to avoid lap marks.
Method 2: The Paint Pad / Edger (Best for Ultra-Tight Gaps)
When the gap is too tight for a roller, a paint pad (or the pad from an edging tool) can slide behind the tank and spread paint. The finish may not match roller texture perfectly, but behind a toilet tank, perfection is rarely on display.
Step-by-step
- Load the pad sparingly. Too much paint = blobs and ridges.
- Slide the pad down behind the tank from the top (or in from the side if that’s easier).
- Work in controlled passes, side to side, then up and down to even it out.
- Blend outward into the open wall area with a roller or brush so the transition looks natural.
Method 3: The “DIY Extender” Trick (When Your Hand Won’t Fit Back There)
If you can’t comfortably get your hand behind the tank, don’t force it. You’ll only end up repainting your knuckles. Instead, extend your tools.
Two easy extender options
- Brush extender: Tape an angled sash brush to a paint stir stick or ruler so the bristles can reach behind the tank. Keep tape away from the bristles and ferrule so you don’t shed sticky fuzz into wet paint.
- Pad extender: Secure a small foam brush or edging pad to a stir stick for precision coverage in tight spaces.
Use slow, steady strokes, and reload lightly. The extender is about reach and control, not speed.
Cut In First or Roll First?
For most bathrooms, it’s easiest to cut in first (around edges, corners, and tight trim lines), then roll. Behind the tank, cutting in may be limited by access, so many DIYers do a hybrid: cut what you can reach, then roll behind the tank, then tidy edges with a small brush.
Humidity, Dry Time, and the “Why Are There Streaks?” Problem
Bathrooms can cause paint to dry slowlyespecially in cool, damp conditionsand that can contribute to problems like streaking or surfactant leaching (those drippy-looking marks that show up after steamy showers). The fix is mostly prevention: paint when the room is dry, keep ventilation going, and give paint proper dry time between coats.
Lead Paint Safety (Especially for Older Homes)
If your home was built before 1978, assume old paint layers might contain lead until proven otherwise. Painting over intact paint is generally less risky than sanding or scrapingbut prep work can disturb painted surfaces.
- Avoid dry sanding and aggressive scraping on older paint.
- Use wet methods and clean up thoroughly.
- Keep kids and pets out of the work area.
- If you suspect lead and the paint is deteriorating, consider professional guidance and lead-safe practices.
Common Mistakes (So You Don’t Have to Learn the Hard Way)
- Overloading the roller: Drips behind the tank are annoying to fix and easy to miss.
- Skipping cleaning: Soap residue and aerosols can cause adhesion problems.
- Painting over mildew: It can bleed through and return.
- Painting while the bathroom is humid: Slow drying can lead to streaks and soft paint film.
- Forgetting the second coat: Bathrooms are high-contrast spaces; thin coverage shows.
Quick Checklist: The “One-Trip” Plan
- Drop cloth down
- Tank lid off
- Tank wrapped and taped
- Wall cleaned and dry
- Patches primed (if needed)
- Mini roller dry-fit test
- Light paint loads, two thin coats
- Ventilation on until dry
FAQ: Painting Behind a Toilet Tank
Do I have to turn off the water to paint behind the toilet?
Not usually. You’re not disconnecting plumbing, just painting the wall. If you want extra peace of mind (or you’re worried about accidental bumps causing a tiny leak), you can turn the shutoff valve clockwise to close it, but it’s optional.
What if the gap is so small I can’t fit anything back there?
Use the paint pad method or a foam brush taped to a stir stick. If the wall is genuinely unreachable, paint what’s visible and feather the edges; once the tank is back in place, the hidden area won’t be noticeable unless someone is doing an inspection with a mirror.
Should I use bathroom-specific paint?
If your bathroom gets steamy or has limited ventilation, a mildew-resistant interior paint made for high-humidity spaces can be worth it. For well-ventilated bathrooms, a quality interior acrylic latex in satin or semi-gloss usually performs well.
How long until I can shower again?
Ideally, wait until the paint is dry to the touch and has had proper time before being hit with heavy steam. If you can wait a full day before a hot shower, even better. Full curing can take longer than drying, so be gentle with cleaning for a couple of weeks.
Conclusion: Yes, You Can Beat the Toilet Tank
Painting behind a toilet without removing the tank is mostly a game of access and patience. Once you protect the tank, clean the wall, and choose the right tool for your gap, the process is straightforward: thin coats, good ventilation, and a little strategic touch-up work. The reward is a bathroom that looks finished from every angle you (and your guests) actually seewithout inviting plumbing problems into your weekend.
Real-World Experiences (The Stuff People Don’t Tell You Until After)
Most DIYers start this project feeling confidentright up until the mini roller bonks the tank and leaves a polite little paint kiss on the plastic. The lesson comes fast: behind-the-toilet painting rewards light paint loads. People who load the roller like they’re frosting a cake usually discover two surprises: (1) drips slide down the wall in the one place you can’t easily see, and (2) cleaning wet latex paint off a shutoff valve is a strange hobby nobody asked for. The fix is simple: roll the excess off in the tray until the roller looks evenly damp rather than glossy.
Another common experience: the “I’ll just tape it” phase. Taping trim and baseboards is great, but behind the tank, tape often refuses to behave. The space is tight, your fingers don’t bend like that, and the tape keeps sticking to itself like it has abandonment issues. Many people end up using tape on what they can reach (baseboard edges, side corners), then rely on a small angled brush for the rest. A small artist brushsomething you’d normally use to paint a birdhousebecomes the secret weapon for those last tiny slivers.
If your bathroom has been humid for years, you might run into the “mystery grime” problem. Folks wipe the wall, the rag comes away clean-ish, and they assume it’s finethen the first coat looks patchy or beads in odd spots. That’s usually leftover residue (hair products, cleaning sprays, or soap film drifting through the air). People who get the best results tend to do a real wash (not just a quick wipe), then let the wall dry completely before painting. A bonus tip that comes up a lot: using a flashlight while painting behind the tank feels silly, but it reveals missed spots immediatelyespecially if your new color is close to the old one.
Texture matching is another “experience” moment. A mini roller gives a finish that blends well with the rest of the wall, but if you switch to a pad in a super-tight gap, the texture can look slightly different when you shine light across it. The good news is that behind a toilet tank, almost no one views the wall at a dramatic angle with museum lighting. People who worry about it often do a hybrid approach: pad behind the tightest section, then mini-roll outward and feather the transition so the eye sees one continuous finish.
And then there’s the humidity plot twist: someone paints in the morning after a shower, the bathroom is still damp, and the paint takes forever to dry. Later, they notice faint streaks or dull markssometimes from moisture interacting with fresh latex paint. DIYers who avoid this problem usually paint when the room is dry, keep the fan running, and resist the urge to “check if it’s dry” by touching the wall every 11 minutes. (We’ve all done it. The wall always wins.)
Finally, a surprisingly satisfying experience: removing the tank wrap at the end. People expect to find at least one accidental drip, but with careful coverage, the plastic peels away clean and the toilet looks untouchedlike it politely stepped aside while you upgraded the room. That’s the moment when this whole project stops feeling fussy and starts feeling like a victory. Because yes, you painted behind the toilet tank. And no, you didn’t have to remove it. Respect.