Table of Contents >> Show >> Hide
- Know Your Bed Frame Type Before You Start
- Tools and Supplies You’ll Actually Use
- Unbox Like a Pro, Not Like a Raccoon in a Pantry
- Parts You’ll See on Most Frames
- How to Put a Bed Frame Together: 14 Steps
- Step 1: Read the Manual (Yes, Actually)
- Step 2: Clear Space and Protect the Floor
- Step 3: Inventory Everything (Before You’re Missing Everything)
- Step 4: Sort Hardware by Size
- Step 5: Identify Left/Right Rails and “Headboard” Direction
- Step 6: Attach Brackets or Corner Hardware (If Separate)
- Step 7: Connect the Side Rails to the Headboard
- Step 8: Add the Footboard (Now You Have a Rectangle)
- Step 9: Square the Frame Before You Tighten Anything
- Step 10: Install the Center Support Rail
- Step 11: Add Center Legs and Leveling Feet
- Step 12: Install Slats or the Platform Deck
- Step 13: Tighten EverythingIn a Smart Sequence
- Step 14: Final Checks, Mattress Setup, and the “Test Sit”
- Troubleshooting: Common Problems and Quick Fixes
- Small Safety Notes That Prevent Big Regrets
- Pro Tips for a Faster, Quieter Bed Frame Assembly
- Real-World Assembly Experiences and Final Takeaway (Bonus ~)
Building a bed frame sounds like it should be relaxinguntil you’re knee-deep in mystery bolts, the “spare” parts are multiplying, and the Allen wrench
is slowly imprinting a new personality into your palm. The good news: most bed frames (metal, wood, platform, or traditional with a box spring) follow
the same basic logic. You’re basically making a sturdy rectangle, adding support, and tightening everything like you’re trying to keep the bed from
learning to tap dance at 2 a.m.
This guide walks you through a practical, no-drama process that works for the majority of modern framesespecially the common “headboard + footboard +
side rails + center support + slats” setup. We’ll keep it clear, we’ll keep it funny, and we’ll keep your toes safe from runaway hardware.
Know Your Bed Frame Type Before You Start
Before you assemble anything, take 60 seconds to confirm what kind of support your mattress needs. A platform bed usually supports a
mattress directly with slats or a solid deck. A traditional frame often expects a box spring or
foundation on top. If you’re not sure, check the product manual and your mattress warranty requirementsusing the wrong support can lead to sagging or
warranty headaches later.
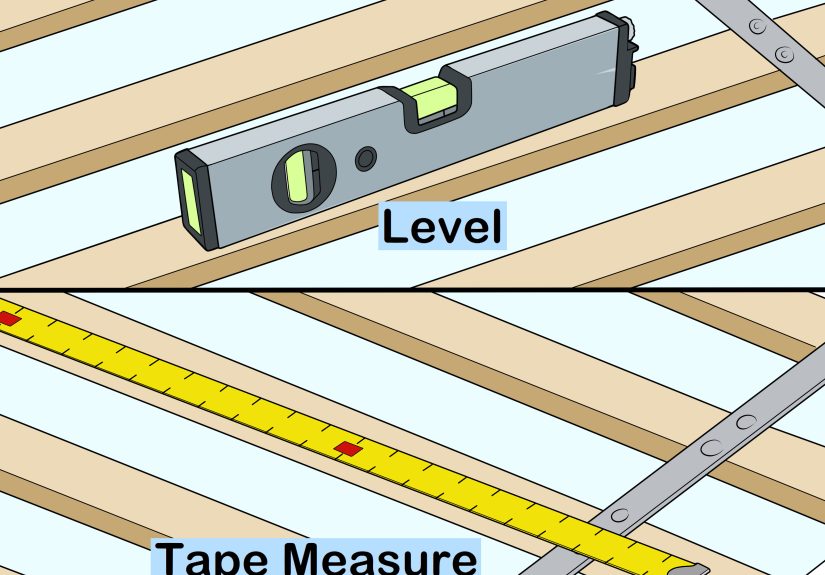
Tools and Supplies You’ll Actually Use
- Allen wrench / hex key (often included, often tiny, always determined to escape)
- Phillips screwdriver (or a bit driver)
- Adjustable wrench or socket set (helpful for nuts/bolts on some frames)
- Rubber mallet (optional, for snug jointsno, a shoe is not a mallet… but it has been)
- Tape measure (optional, for quick checks and centering)
- Furniture pads or a blanket (to protect floors while assembling)
- A helper (strongly recommendedsome steps are a two-person comedy otherwise)
Unbox Like a Pro, Not Like a Raccoon in a Pantry
Open the boxes carefully and keep the packaging nearby until you’re done. Many sets ship in multiple cartons, and some parts are wrapped together. Lay
a blanket or the flattened cardboard on the floor as your assembly “work mat” to prevent scratching and to keep small parts from rolling into another
dimension under your dresser.
Parts You’ll See on Most Frames
Don’t worry if your frame doesn’t have every piece listed herethis is the “most common cast of characters”:
- Headboard and footboard (or end panels)
- Side rails (left/right)
- Center support rail (especially for full/queen/king)
- Center legs (often 1–3, depending on size)
- Slats (wood or metal), sometimes in a roll with straps/Velcro
- Brackets, bolts, washers, dowels (the tiny “important confetti”)
How to Put a Bed Frame Together: 14 Steps
Step 1: Read the Manual (Yes, Actually)
Skim the instructions front to back before touching a bolt. You’re not studying for a testyou’re spotting “gotchas,” like which side faces the
headboard, or a warning that says “do not fully tighten until the frame is complete.” That line is the difference between “solid bed” and “modern art.”
Step 2: Clear Space and Protect the Floor
Make room to assemble the frame flat on the floor. Ideally, you want a few feet of clearance around all sides. Put down cardboard, a rug, or a blanket
so you don’t scratch wood floors or gouge laminate. Your future self (and your security deposit) will thank you.
Step 3: Inventory Everything (Before You’re Missing Everything)
Separate parts into piles: rails, boards, slats, legs, and hardware. Count bolts and washers. If something is missing, it’s easier to solve now than
after you’ve built 80% of the bed and discovered you’re short exactly one “critical mystery bolt.”
Step 4: Sort Hardware by Size
Many kits include bolts that look identical until you hold them side-by-side. Line them up by length. Keep washers and spring washers paired with the
correct bolt type. A muffin tin, small cups, or even labeled piles on cardboard can keep things organized.
Step 5: Identify Left/Right Rails and “Headboard” Direction
Side rails often have pre-drilled holes or brackets that only align one way. Look for stickers, arrows, or labels. If the instructions mention
“inside/outside,” find the finished side versus the hidden side nowyour frame will look better and assemble faster.
Step 6: Attach Brackets or Corner Hardware (If Separate)
Some frames require you to bolt metal brackets onto the headboard/footboard or side rails first. If your kit includes corner plates, hinges, or clamp
brackets, install them loosely so you have wiggle room when aligning the big pieces.
Step 7: Connect the Side Rails to the Headboard
Stand the headboard upright (with a helper) or lay it carefully on its face on a blanket. Slide or bolt the left and right side rails into the
headboard brackets. Start all bolts by hand and tighten only a few turns. Your goal here is “attached,” not “locked for eternity.”
Step 8: Add the Footboard (Now You Have a Rectangle)
Bring the footboard into position and connect both side rails. Again: thread bolts by hand first to avoid cross-threading. If something doesn’t align,
don’t force itdouble-check rail orientation and bracket placement. Forcing parts is how you create “decorative” stripped screws.
Step 9: Square the Frame Before You Tighten Anything
With the four sides connected, gently shift the frame until it looks square. If you want to be extra precise, measure diagonally from corner to corner:
the two diagonal measurements should be close to equal. This is why you kept everything slightly loosealignment is easier now than later.
Step 10: Install the Center Support Rail
For full, queen, king, and many platform beds, the center support is non-negotiable. It reduces sagging and wobble. Attach the center rail to the
headboard and footboard (or to designated brackets on the side rails), following your manual’s order.
Step 11: Add Center Legs and Leveling Feet
Screw in the center support legs (often 1–3) and any adjustable leveling feet. If your floor isn’t perfectly level, adjustable feet can help prevent
rocking. Make sure each leg contacts the floor firmlyno floating “almost legs.”
Step 12: Install Slats or the Platform Deck
Lay slats evenly across the frame, following spacing guidance in your manual. Some slats come connected by fabric straps; others install one-by-one and
may need screws. If you have an all-foam mattress, pay close attention to slat spacing recommendations from the bed or mattress manufacturer to avoid
premature wear.
Step 13: Tighten EverythingIn a Smart Sequence
Now do your final tightening. Work around the bed in a consistent pattern (headboard corner → footboard corner → opposite side → center support).
Tighten firmly, but don’t over-tighten to the point of stripping threads. If your kit uses washers, make sure they’re seated flat. This step is where
wobble and squeaks go to die.
Step 14: Final Checks, Mattress Setup, and the “Test Sit”
Put furniture pads under legs if needed, confirm the frame is level, and make sure the headboard has a little clearance from the wall (so it doesn’t
knock every time you roll over). Add your foundation/box spring if required, then place the mattress. Sit on each edge and gently shift your weight. If
you hear squeaks, find the source nowtighten or pad the contact point. Re-check bolt tightness again after about a week of sleep, because new frames
can settle slightly.
Troubleshooting: Common Problems and Quick Fixes
If the holes don’t line up
- Loosen nearby bolts to create play, align the joint, then re-tighten.
- Check that you didn’t swap left/right rails or flip a panel inside-out.
- Confirm you’re using the correct bolt lengthwrong bolts can “bottom out” early.
If the bed wobbles
- Confirm center legs are installed and contacting the floor.
- Level the feet (if adjustable) or add a thin furniture shim under a low leg.
- Make sure the frame is square before final tightening.
If it squeaks
- Tighten all bolts, especially at corners and center support connections.
- Add felt pads, rubber washers, or a thin barrier where metal meets metal/wood meets wood.
- Check slats: secure loose ones and stop them from rubbing against the rails.
If slats slide around
- Look for included straps, Velcro, or clipssome frames hide them in the packaging.
- If permitted by the manufacturer, add non-slip pads or secure slats with the recommended screws.
- Ensure the center rail is installed; it often supports the slats’ midpoint.
Small Safety Notes That Prevent Big Regrets
- Lift smart: bend at the knees, keep your back straight, and don’t twist while carrying the headboard.
- Keep small parts away from kids and pets: hardware is a choking hazard and also strangely irresistible to dogs.
- Don’t let children climb on the frame: it’s not a jungle gym, and the laws of gravity are undefeated.
- Respect weight limits: if the listing includes a maximum capacity, treat it like a speed limit with consequences.
Pro Tips for a Faster, Quieter Bed Frame Assembly
- Start every bolt by hand to avoid cross-threading.
- Don’t fully tighten until the frame is complete unless the instructions explicitly say otherwise.
- Keep the included Allen key taped inside the frame or in a labeled bagfuture you will be grateful.
- Use pads at contact points (headboard-to-wall bumpers, felt under legs, thin washers at noisy joints).
- Re-tighten after a week of usesettling is normal, squeaking doesn’t have to be.
Real-World Assembly Experiences and Final Takeaway (Bonus ~)
If you’ve never assembled a bed frame before, here’s what “real life” often looks likebecause manuals are optimistic, and reality is… expressive.
One common experience is the Two-Bolt Mirage: you’re convinced the kit forgot parts because you have two bolts left at the end. Then,
you realize those are “spares,” which is the furniture industry’s way of saying, “We know what happens to bolts on carpet.” Keep them in a labeled bag
taped under the center rail. They’ll be priceless the next time you move.
Another classic is the Backwards Rail Episode. Everything seems to connect, but the slats don’t sit right, or a bracket faces the wrong
direction. This usually happens because the left and right rails are subtly differentlike identical twins who only disagree about hole placement.
The fix is almost always the same: loosen, flip, align, then tighten. It feels like a setback, but it’s faster than brute-forcing bolts and inventing
new swear words.
Then there’s the Center Support Surprise. People sometimes skip it because it feels optional, like a garnish. But on larger sizes, the
center rail and legs are what stop the mattress from sagging in the middle over time. If you’ve ever slept on a bed that slowly turns into a taco,
you’ve met the consequences of missing support. Installing the center rail properly is one of the biggest “sturdy bed” upgrades you can make in a
single step.
Squeaks have their own story arc. The most common “experience” is tightening everything, hearing silence, celebrating, then hearing a tiny creak two
nights later. That doesn’t mean you failedit usually means the frame settled as weight and movement compressed joints. A quick re-tighten after a few
days often solves it. If it doesn’t, adding a thin felt pad or rubber washer at the noisy joint can change friction points and quiet things down.
You’re not just building a bed; you’re negotiating peace between materials.
Finally, there’s the Helper Myth. Many frames can be assembled solo, but it’s dramatically easier with a second personespecially when
holding the headboard upright while you start bolts, or when rotating the assembled frame without scraping floors. If you don’t have a helper, you can
fake one with pillows, a wall, and patiencebut the pillow won’t laugh at your jokes, and it’s very bad at handing you the right bolt.
Final takeaway: a solid bed frame assembly is mostly about patience and sequenceorganize hardware, keep bolts loose until aligned, add
center support, then tighten in a consistent pattern. Do that, and you’ll end up with a bed that feels sturdy, stays quiet, and doesn’t wobble every
time you roll over like you’re auditioning for a ship-at-sea documentary.