Table of Contents >> Show >> Hide
- First: Mold vs. Mold Stains (Yes, They’re Different)
- Safety Checklist (Do This Before You Clean)
- Step 1: Stop the Moisture (Or You’re Just Rearranging Mold)
- Step 2: Identify Your Floor Finish (Because the Finish Changes Everything)
- Step 3: Remove Active Mold Safely (Gentle First)
- Step 4: If the Mold Is Gone but the Stain Remains
- Should You Use Bleach on Moldy Wood Floors?
- When It’s Time to Call a Pro (No Shame in This)
- What NOT to Do (Unless You Like Refinishing Projects You Didn’t Plan)
- Preventing Mold Stains from Coming Back
- Quick Troubleshooting: Common Scenarios
- Real-World Experiences: What People Learn the Hard Way (About )
Mold stains on wood floors are the home-improvement equivalent of finding a mystery
sock behind the dryer: confusing, mildly alarming, and somehow always darker than you remember.
The good news: many mold stains can be lightened or removed. The trick is knowing whether you’re
dealing with (1) active mold growth, (2) a leftover stain after the mold is gone, or (3) a “not-mold”
dark mark (like iron/tannin staining from wet metal, plant pots, or pet bowls).
This guide walks you through safe cleanup, stain removal options (including oxalic acid “wood bleach”),
and when it’s time to call a pro. We’ll keep it practical, finish-friendly, and only slightly sarcastic.
First: Mold vs. Mold Stains (Yes, They’re Different)
Active mold may look fuzzy, dusty, or smudgy and can wipe onto a cloth. It often comes with a musty smell
and shows up after moisture issues (leaks, floods, humid basements, wet mats).
Mold stains are discoloration left behind after growth has stopped or been cleanedthink “souvenir mark.”
If the area is still damp, smells musty, or keeps returning, you have a moisture problem first and a cleaning problem second.
Fixing the moisture is how you keep mold from coming back for an encore performance.
Safety Checklist (Do This Before You Clean)
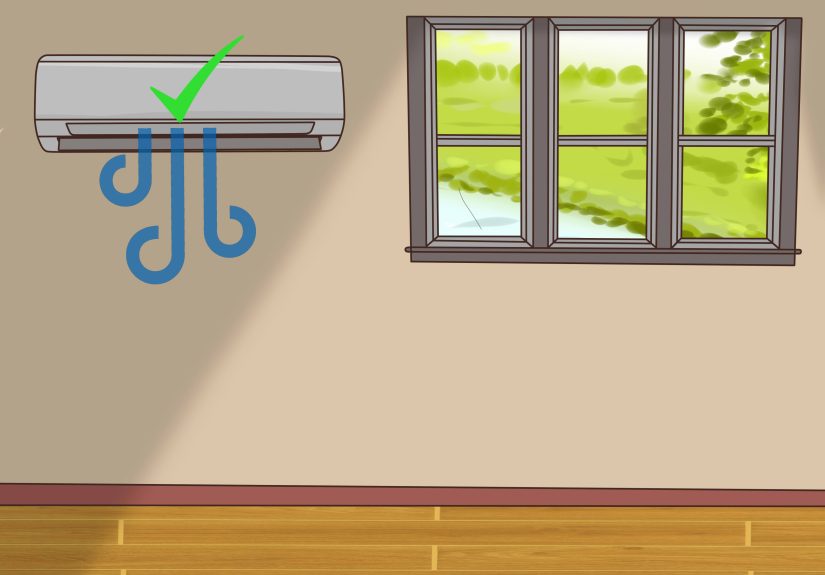
- Ventilate: open windows/doors and use fans if safe.
- Protect yourself: wear gloves and eye protection; consider a well-fitting mask if you’re sensitive or the area is dusty.
- Keep kids and pets out until everything is dry.
- Never mix cleaners: especially bleach with ammonia or other products.
Step 1: Stop the Moisture (Or You’re Just Rearranging Mold)
Mold prevention starts with speed. If you can dry wet materials within a day or two, you dramatically reduce the chance
of mold getting established. That means:
- Fix leaks (plumbing, appliances, windows, roof).
- Run a dehumidifier in damp spaces and aim for comfortable indoor humidity.
- Pull up wet rugs/mats and dry the floor underneath immediately.
- Use fans to move air across the floor (not blasting water deeper into seams).
Step 2: Identify Your Floor Finish (Because the Finish Changes Everything)
The safest method depends on whether your floor is sealed with polyurethane, finished with wax, or unfinished/penetrating oil.
Here are quick clues:
- Beading test: Put a drop of water in an inconspicuous spot. If it beads, the finish is likely sealed. If it soaks in, it may be worn or unfinished.
- Wax floors: can develop white water marks and don’t play nicely with many modern cleaners.
- Unknown finish? Choose the gentlest option first and avoid strong chemicals until you know.
Step 3: Remove Active Mold Safely (Gentle First)
For most small, surface-level mold on sealed wood floors, start with physical removal and mild cleaning. You’re aiming to
remove the mold and residue without soaking the wood.
What you’ll need
- Vacuum with a HEPA filter (best) or a vacuum with a clean, well-sealed bag/canister
- Microfiber cloths
- Mild dish soap or a pH-neutral hardwood floor cleaner
- Bucket of warm water
- Dry towels
How to clean
- Dry remove first: vacuum the area to pick up loose debris/spores (use a soft floor attachment, no beater bar).
- Damp wipe (not wet mop): mix a few drops of dish soap in warm water, dip a cloth, wring it nearly dry, and wipe.
- Rinse lightly: wipe once with a clean cloth dampened with plain water, then dry immediately.
- Dry completely: towels first, then airflow (fan) to ensure no lingering moisture.
Important: avoid soaking seams between boards. Wood is not a submarine, even when it’s wearing a polyurethane raincoat.
Step 4: If the Mold Is Gone but the Stain Remains
Once the surface is clean and fully dry, you can decide whether the discoloration is (a) superficial and cleanable, or (b) deeper
staining that likely needs refinishing steps (spot sanding, bleaching, or full sanding).
Option A: Try a Finish-Safe Approach (Best for Sealed Floors)
- Use a manufacturer-recommended hardwood cleaner (or a quality pH-neutral cleaner).
- Buff gently with a microfiber cloth.
- Repeat over a few days rather than escalating to harsh chemistry in one afternoon.
If your floor has a wax finish, stain handling is different. Some guidance for wax floors involves very gentle abrasion and mineral spirits
for certain marksthen rewaxing the area. If you suspect wax, proceed cautiously or consult a wood-floor professional, because the wrong product can create a bigger mess than the original stain.
Option B: Oxalic Acid (Wood Bleach) for Dark/Black Stains on Bare Wood
If the stain has penetrated and you’re willing to do refinishing-level work, oxalic acid is a classic method for
blackening and certain dark stains in wood. This is typically used on bare wood, meaning you’ll need to remove the finish over the stained area first (usually by sanding).
When oxalic acid makes sense
- Dark rings or black patches from long-term moisture
- Stains related to metal + water (iron/tannin reactions)
- Localized discoloration you plan to refinish afterward
How it’s commonly used (high-level, finish-friendly steps)
- Prep: sand the stained area to bare wood (spot-sanding) and remove dust.
- Apply: apply an oxalic-acid solution evenly with a brush or cloth to the stained wood.
- Wait: let it sit (often at least 10 minutes; reapply if needed).
- Rinse thoroughly: wipe/rinse with clean water to remove residue (don’t flood seams).
- Dry fully: allow at least 24 hours of drying before refinishing.
- Refinish: lightly sand if needed, then stain (if applicable) and seal to match surrounding boards.
Pro tip: Spot-bleaching can create a “reverse polka-dot” effect if surrounding wood doesn’t match.
If the floor has strong stain color variation, you may need to feather-sand a larger area and blend with stain before sealing.
Option C: Hydrogen Peroxide (Use Carefully, Usually During Refinishing)
Hydrogen peroxide is often mentioned for dark stainsbut it can also discolor or damage wood finishes if misused.
If you go this route, it’s typically a controlled spot treatment on bare wood during refinishing, followed by thorough drying and refinishing.
Always patch-test and assume it may lighten surrounding wood, not just the stain.
Should You Use Bleach on Moldy Wood Floors?
This is where the internet likes to argue with itself. Here’s the practical takeaway:
- Bleach is not recommended as a routine mold-cleanup step in many home situations.
- For small cleanup jobs, soap/detergent + water and thorough drying is often the first line.
- If you do use a bleach solution, use proper ventilation, never mix chemicals, and follow conservative dilution guidance.
- On wood, bleach can discolor finishes and may not address deeper contamination if moisture has penetrated.
When It’s Time to Call a Pro (No Shame in This)
Consider professional help if:
- The affected area is larger than a small patch.
- The floor feels soft, cups/warps, or boards are separating.
- You suspect mold is under the boards, in the subfloor, or in insulation/walls nearby.
- The staining returns quickly (ongoing moisture).
- You have health concerns that make exposure riskier.
Professionals can evaluate whether material is restorable, whether aggressive cleaning (like HEPA-assisted sanding) is needed,
and whether parts of the floor/subfloor should be removed and replaced.
What NOT to Do (Unless You Like Refinishing Projects You Didn’t Plan)
- Don’t steam clean hardwood. Steam forces moisture into seams and can damage both finish and wood.
- Don’t wet-mop. Too much water invites swelling, warping, andyesmore mold risk.
- Don’t reach for ammonia or harsh “all-purpose” cleaners. They can strip finishes and create dull spots.
- Don’t rely on oil soaps. They can leave residue and may complicate recoating later.
- Don’t ignore humidity. Mold loves a damp home the way toddlers love permanent markers.
Preventing Mold Stains from Coming Back
- Control humidity: keep indoor levels in a comfortable range (especially in basements).
- Use mats wisely: breathable mats, and lift/dry underneath regularly.
- Wipe spills immediately: pet bowls, plant pots, wet bootsyour floor sees it all.
- Clean correctly: dry dust-mop often; use minimal moisture and wood-appropriate cleaners.
- Maintain the finish: a healthy finish is your floor’s rain jacket. A worn finish is a soggy hoodie.
Quick Troubleshooting: Common Scenarios
1) Black ring under a plant pot
Often a moisture + tannin/metal reaction or trapped dampness. Clean and dry first. If the ring remains,
plan for spot sanding and oxalic acid treatment, then refinish/blend.
2) Spots near the pet water bowl
Repeated splashes can sneak through seams. Improve the mat setup (waterproof tray with airflow),
wipe daily, and check the finish. If boards are cupping, investigate moisture underneath.
3) Basement musty smell with scattered stains
This is usually a humidity/control issue. Run a dehumidifier, improve ventilation, and look for seepage.
Treat the stains after the space is consistently dryotherwise they’ll keep reappearing.
Real-World Experiences: What People Learn the Hard Way (About )
When homeowners talk about removing mold stains from wood floors, the stories sound differentbut the lessons repeat.
One common scenario starts with a “tiny” leak. Maybe it’s a fridge line that drips once in a while, or a window that
only leaks during sideways rain. The floor looks fine… until it doesn’t. People often notice the stain after the moisture
problem has been quietly auditioning for months. The moment someone sees a dark patch, the first instinct is to scrub harder.
That’s when the finish gets cloudy, the boards get too wet, and the stain seems to growbecause the moisture finally got a boost.
Another frequent experience: the vinegar experiment. Someone read a “natural cleaning hack” and mixed a strong vinegar solution,
then mopped enthusiastically. It might make certain surfaces look cleaner short-term, but on many wood floors it can dull the finish
or leave the area looking uneven. The homeowner then tries to “fix” the dull spot with a second product (maybe a shiny polish),
and suddenly they’re dealing with residue buildup that attracts dirt like it’s being paid per speck. The big takeaway people share:
wood floors are picky. They don’t want a chemistry set; they want the right cleaner, minimal moisture, and a quick dry.
The most successful stories usually involve patience and restraint. People who get the best outcomes tend to do three things:
(1) they stop the moisture source first, (2) they clean gently and dry thoroughly, and (3) they accept that deep black stains are often
a refinishing issue, not a “scrub it one more time” issue. For example, a homeowner might clean a stained area, see that discoloration
remains, and then choose a controlled spot-refinish: sanding to bare wood, applying an oxalic-acid treatment, letting it dry fully,
and then resealing. It’s not instant gratification, but it’s the difference between “pretty good” and “why is there a ghost square on my floor?”
Pros also mention a reality check that surprises people: sometimes the stain is the least important problem. If mold has gotten under
the boards or into the subfloor, removing the surface stain without addressing what’s underneath can feel like repainting a wall while the
pipe behind it is still leaking. In those cases, the “win” is not a perfect cosmetic fixit’s a dry structure, stable boards, and a floor that
won’t keep producing new stains every humid week. The happiest endings tend to be boring: leak fixed, humidity controlled, finish maintained,
and the floor returning to its job of being walked onnot starring in a mold mystery.