Table of Contents >> Show >> Hide
- Before You Start: A Quick Reality Check
- Step 1: Diagnose the Lean (This Saves Time and Swearing)
- Step 2: Gather Tools and Materials
- Step 3: Straighten the Post (Choose the Right Method)
- Method A: Re-Pack and Brace (Best for Slight Lean in Dirt/Gravel)
- Method B: Reset and Stabilize (Best for Wobbly Posts)
- Method C: Wedge a Post That’s Loose Inside a Concrete Footing (Quick Fix)
- Method D: Reinforce a Damaged Post (When Replacement Isn’t Practical)
- Method E: Replace the Post (Best for Rot or Major Lean)
- Special Cases That Trip People Up
- How to Keep Fence Posts From Leaning Again
- When to Call a Pro (No Shame in It)
- Conclusion
- Field Notes: of Real-World Fence-Post Experience
A leaning fence post is the outdoor version of a wobbly restaurant table: it’s mildly annoying until it suddenly becomes
your problem. One day your fence looks fine. The next day it’s doing a dramatic “Tower of Pisa” impression and
silently daring the next windstorm to finish the job.
The good news: you can straighten a leaning fence post without rebuilding your entire fence (or calling in a construction
crew with matching polos). The “secret” is figuring out why it’s leaningbecause the right fix for a loose post
is totally different from the right fix for a rotted post or a failed concrete footing.
Before You Start: A Quick Reality Check
Straightening a fence post is usually DIY-friendly if the post is still structurally sound. But if the wood is rotting at ground
level, the post isn’t “leaning”it’s retiring. In that case, forcing it upright is like taping a banana peel to a shoe
and calling it a repair: it might stand for a minute, but it’s not a plan.
Call 811 Before You Dig
Anytime you plan to dig around postsespecially near property lines where utilities love to hidecontact your local 811
service first. It’s free, and it’s the easiest way to avoid turning a fence repair into an emergency story you tell forever.
Step 1: Diagnose the Lean (This Saves Time and Swearing)
Your goal is to figure out which of these three situations you’re dealing with:
| What You See | What It Usually Means | Best Fix |
|---|---|---|
| Post leans but feels solid (no wobble) | Soil shifted, frost heave, erosion, or load from gate/wind | Dig, plumb, and re-pack with gravel/soil; add bracing |
| Post wobbles at base | Backfill loosened, footing cracked, or the hole “grew” over time | Excavate, re-set, and stabilize (gravel + concrete or compacted gravel) |
| Wood is soft/splintery near ground line | Rot (often from trapped moisture) | Reinforce with a repair bracket or replace the post |
The 60-Second “Wiggle + Probe” Test
- Wiggle test: Grab the post and push/pull. If the post moves at the base, you need stabilizationnot just straightening.
- Probe test: Use a screwdriver or awl at ground level. If it sinks into the wood easily or pulls out wet, crumbly fibers, you’re looking at rot.
- Follow the force: If it’s a gate post, watch the gate. A sagging gate can “pull” a post out of plumb over time.
Step 2: Gather Tools and Materials
You won’t need a garage full of tools, but you do need a few basics to make the fix solid (and not “solid-ish”).
Tools
- Post hole digger and/or digging bar (rock bar)
- Shovel and hand trowel
- 4-foot level (or a post level)
- Drill/driver and exterior screws (if removing/reinstalling rails)
- Scrap 2x4s + stakes for temporary bracing
- Hammer/mallet for wedges or hardware
- Gloves and eye protection (concrete dust is not a fun accessory)
Materials (Pick What Matches Your Fix)
- Crushed gravel (great for drainage and compaction)
- Fast-setting concrete or post mix (if using concrete stabilization)
- Wood stakes or temporary braces
- Fence post repair bracket/spur (helpful when the post is damaged but not fully gone)
- Replacement post (pressure-treated wood or appropriate metal post) if the old one is failing
Step 3: Straighten the Post (Choose the Right Method)
Method A: Re-Pack and Brace (Best for Slight Lean in Dirt/Gravel)
Use this when the post is leaning but not rotten, and the base isn’t flopping around like a loose tooth.
- Clear the area: Remove plants, mulch, and debris around the post so you can see what’s happening.
- Dig a “work pocket” on the leaning side: Dig a hole on the side the post is leaning toward. You’re creating space so the post can move back.
- Plumb the post: Push the post upright while checking with a level on two adjacent sides. Take your timethis is where “close enough” becomes “still looks crooked forever.”
- Brace it: Screw a 2×4 from the post down to a stake in the ground to hold it plumb while you pack the hole.
- Backfill in layers: Add 3–4 inches of crushed gravel (or stable soil), then tamp hard. Repeat until full. Compaction matters more than muscle.
- Shape the top for drainage: Slightly mound the surface so water runs away from the post instead of pooling around it.
Method B: Reset and Stabilize (Best for Wobbly Posts)
If the post wobbles at the base, “pushing it straight” is temporary theater. You need to tighten the whole system.
Option 1: Gravel-Compaction Reset (No Concrete)
This works well in many yards and is especially appealing if you ever want to replace the post later without excavating a mini boulder.
- Excavate around the post: Dig down until you have enough room to re-align it and add backfill (often 8–12 inches down, sometimes more).
- Plumb and brace: Level the post in two directions and brace it with 2x4s.
- Add crushed gravel in lifts: Fill around the post in small layers, tamping thoroughly each time. Proper tamping is what creates stability.
- Finish for drainage: Keep the top slightly crowned so water sheds away.
Option 2: Gravel + Concrete Reset (Common for Gate/Corner Posts)
If your post takes serious load (gate, corner tension, high-wind exposure), concrete can make senseespecially when paired with drainage.
- Dig to expose the loosened area: If the post is set in concrete, you may need to dig until you can see the top of the footing.
- Add gravel base: Put a few inches of gravel at the bottom of the hole to support drainage and create a stable base.
- Set plumb and brace: Use a level and brace the post so it cannot move while you work.
- Pour concrete: Add concrete per the bag instructions. Don’t bury the post in a water-trapping “bathtub.” Shape the top of the concrete so it slopes away from the post.
- Let it cure: Follow cure times on the mix. “It feels hard” is not the same as “it’s cured.”
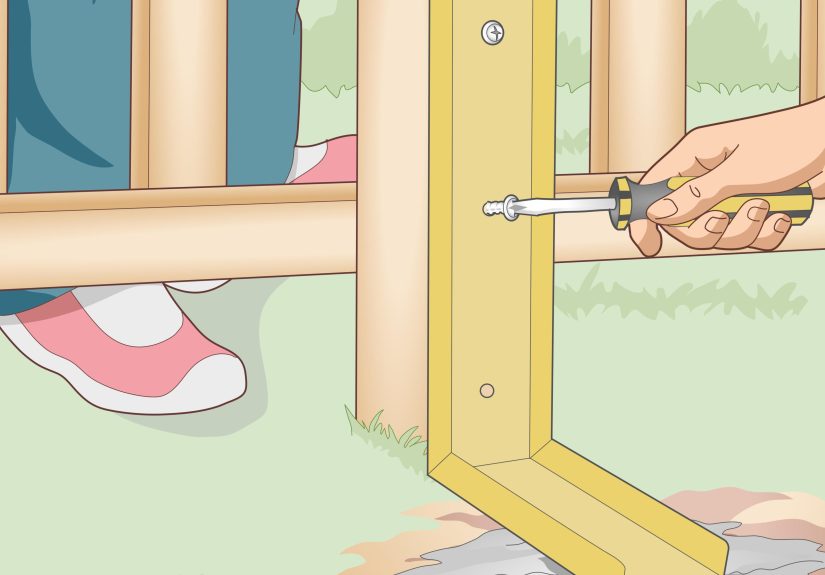
Method C: Wedge a Post That’s Loose Inside a Concrete Footing (Quick Fix)
Sometimes the concrete footing is fine, but the post has loosened within it. In that case, wedges can tighten the gaplike shimming a door, but outdoors and less polite.
- Dig down a bit around the post to expose the top of the concrete footing.
- Plumb the post and temporarily brace it.
- Drive a steel wedge (or appropriate shim system) between the post and the concrete on the side that needs tightening.
- Re-check for plumb, adjust as needed, and backfill/compact the soil when done.
Method D: Reinforce a Damaged Post (When Replacement Isn’t Practical)
If the post is damaged near the base but still mostly intact, a steel repair bracket/spur can reinforce itespecially when the rest of the fence is in good shape and you’d rather not pull panels apart.
- Expose the base: Remove dirt and debris around the post so the bracket can sit flush.
- Install the repair bracket: Drive or position it according to the manufacturer’s instructions, typically on opposing sides for stability.
- Fasten securely: Use exterior-rated fasteners rated for treated wood (and corrosion resistance).
- Stabilize the surrounding area: Many systems work best when paired with concrete or tightly compacted fill around the post base.
Method E: Replace the Post (Best for Rot or Major Lean)
If your screwdriver test says “mush,” don’t negotiate with the rot. Replace the post, or you’ll be repeating this project like a bad sequel.
- Detach panels/rails: Unscrew or pry off rails and pickets from the bad post (save what’s reusable).
- Remove the post: Wiggle and pull it free. If it’s set in concrete, you may need to break up the footing or dig it out.
- Prep the hole: Remove debris and old wood. Improve drainage with gravel at the bottom.
- Set the new post plumb: Brace it carefully and confirm it’s aligned with the rest of the fence line.
- Backfill and stabilize: Use compacted gravel or concrete (depending on your design and loads).
- Reattach fence components: Once stable/cured, reinstall rails/pickets and confirm the fence line is straight.
Special Cases That Trip People Up
If It’s a Gate Post
Gate posts work harder than regular line posts. If the gate is sagging, the post gets “pulled” out of plumb over time.
Before you blame the post, check hinges, fasteners, and whether the gate needs an anti-sag adjustment. Often you’ll fix the lean,
but the gate will keep trying to drag it back out of alignment unless you address the gate hardware.
If You Have Clay Soil or Freeze-Thaw Winters
Clay soil holds water and moves with seasonal moisture changes. Freeze-thaw cycles can also push posts around when water in the soil freezes, expands, and then settles unevenly. In these conditions, drainage and proper compaction become extra importantsometimes more important than throwing “more concrete” at the problem.
How to Keep Fence Posts From Leaning Again
- Control water: Make sure sprinklers aren’t soaking the base daily, and slope soil away from posts.
- Use crushed gravel for drainage: Gravel around the base can help water move away instead of sitting against wood.
- Don’t bury wood in mulch: Mulch holds moisture. Keep the base exposed so it can dry.
- Brace wisely: Corner and gate posts often need stronger bracing or deeper setting than line posts.
- Keep pickets off the ground: Ground contact accelerates rot and can push panels out of alignment as soil heaves.
When to Call a Pro (No Shame in It)
Call in help if your fence is part of a retaining wall, if multiple posts are failing in a long run (suggesting a bigger installation issue),
if you’re dealing with significant concrete removal, or if you’re near anything you really don’t want to hit (gas, electric, water, fiber).
Sometimes the smartest DIY move is knowing when the job is bigger than a weekend and a playlist.
Conclusion
Straightening a leaning fence post is less about brute force and more about diagnosis. If the post is sound, you can usually plumb it,
brace it, and lock it in place with properly compacted backfill (often gravel) or a well-shaped concrete pour that sheds water.
If the post is rotted, replacementor a properly installed reinforcement systemis the long-term win.
Do it once, do it right, and your fence will stop auditioning for European landmarks.
Field Notes: of Real-World Fence-Post Experience
The first leaning fence post I ever “fixed” taught me an important lesson: you can’t out-stubborn physics. I did the classic rookie thing
I shoved the post upright, packed a little dirt around it with the heel of my boot (very scientific), admired my work, and walked away like a hero.
Two weeks later, after one solid rain, the post leaned again… but this time it leaned with confidence. It wasn’t just crooked; it was committed.
The second attempt was when I learned to respect compaction. Dirt that falls back into a hole is not “support.” It’s just dirt that’s waiting
for water to show up and rearrange the whole situation. Once I switched to crushed gravel in small layerstamping each lift like I was trying to
make the ground regret its choicesthe post finally stopped wobbling. The funny part is that the “hard” work wasn’t the digging. It was the patience:
add a few inches, tamp, recheck plumb, repeat. It’s not glamorous, but it’s the difference between a fix and a future chore.
My next fence adventure involved a gate post, which is basically a regular post that signed up for a second job. The gate looked fine at first,
but over time it started sagging and closing with that dramatic scrape that sounds like a dinosaur sharpening its claws. I kept blaming the post
until I realized the gate hardware was slowly pulling the post out of alignment. After I corrected the gate (tightened hinges, adjusted alignment,
and made sure the gate wasn’t fighting gravity), the post stopped being “mysteriously” crooked. That’s when it clicked: sometimes the post isn’t
the villainit’s just the victim of a gate that’s living recklessly.
I’ve also learned that water is sneaky. You can have a perfectly straight post on a Saturday, and a hidden sprinkler overspray can turn the base
into soup by Thursday. Now I automatically check for downspout discharge, low spots where water pools, and whether mulch is piled up like a wet
blanket against the wood. Keeping the base able to dry out is not just “nice”it’s fence survival.
Finally, the most underrated skill in fence repair is knowing when the post is done. If your probe test pulls out soft, wet wood that looks like
it belongs in compost, you’re not “straightening.” You’re postponing. The moment I stopped trying to negotiate with rot was the moment my repairs
started lasting more than one season. Replace what’s failing, reinforce what’s worth saving, and your future self will send you a thank-you note
(probably written on the back of a receipt from the hardware store).