Table of Contents >> Show >> Hide
- Before You Buy Anything: Know Your Basement’s “Reality Settings”
- The Must-Have Basement Storage Shelf Types
- 1) Heavy-Duty Steel Storage Racks (the “bin boss”)
- 2) Epoxy-Coated Wire Shelving (the “damp basement MVP”)
- 3) Resin/Plastic Utility Shelves (the “no-rust, no-drama” option)
- 4) Wall-Mounted Track Shelving (the “floor saver”)
- 5) Overhead/Ceiling Storage Racks (the “seasonal stuff penthouse”)
- 6) Corner Shelves and Under-Stair Shelving (the “space whisperers”)
- 7) Rolling Utility Shelves (the “grab-and-go cart that doesn’t quit”)
- How to Choose the Right Shelves (Without Overthinking It Into Next Week)
- Installation Tips That Keep Your Basement Shelves Safe and Solid
- Build a Basement Storage System (Not Just a Row of Shelves)
- Real-World Shelf Setups That Work
- Maintenance: The 10-Minute Habit That Protects Your Investment
- Field Notes: of Basement Shelving Experience (So You Don’t Learn the Hard Way)
- Conclusion
Basements have a special talent: they turn “I’ll deal with it later” into a full-time roommate.
Holiday decorations multiply, sports gear migrates, and somehow you end up with three half-empty paint cans
and exactly zero clue where the spare lightbulbs went.
The fastest way to make a basement feel bigger, cleaner, and easier to live with is simple:
stop stacking and start shelving. The right basement storage shelves don’t just hold stuff
they create walking room, protect belongings from moisture, and make your space feel like it’s on purpose,
not on pause.
This guide breaks down the must-have shelf types for basements, how to choose the right ones for your
layout and your “stuff profile,” and how to install them so you’re not starring in a slapstick comedy where
a tote avalanche takes you out mid-laundry.
Before You Buy Anything: Know Your Basement’s “Reality Settings”
Basements are not neutral territory. They’re often cooler, sometimes damp, occasionally uneven, and
usually full of obstacles (pipes, posts, HVAC, that one mysterious outlet that only works when it feels like it).
Choosing shelves that match your basement’s conditions is the difference between “organized for years”
and “why is this rack rusting in month two?”
1) Moisture happensplan like it will
Even “dry” basements can get humidity spikes in summer, condensation on pipes, or a surprise puddle during
a heavy storm. If your basement is prone to dampness, prioritize shelves made from moisture-tolerant materials
(like resin/plastic) or metal shelving with protective coatings. Also: keep storage off the floor.
A couple inches of lift can save your bins (and your sanity).
2) Floors aren’t always level (and shelves care)
Many basements have slight slopes toward a drain or low spots from settling. That’s normalbut it means you’ll
want shelves with adjustable feet, sturdy bracing, or easy shimming options. Wobbly shelves turn organizing into
a trust exercise you did not consent to.
3) Measure the space you actually havenot the space you wish you had
Do a quick “tape-measure tour”: ceiling height (watch for ductwork), clear widths around posts,
and where doors swing. Then pick shelf depths that won’t block pathways. A basement that’s “organized”
but requires sideways crab-walking is not a win.
The Must-Have Basement Storage Shelf Types
The best basement setups usually mix two or three shelf styles. Different items want different homes:
heavy bins want steel, damp corners want coated wire or plastic, and tight spaces need wall-mounted solutions.
Here are the shelf types that earn their keep.
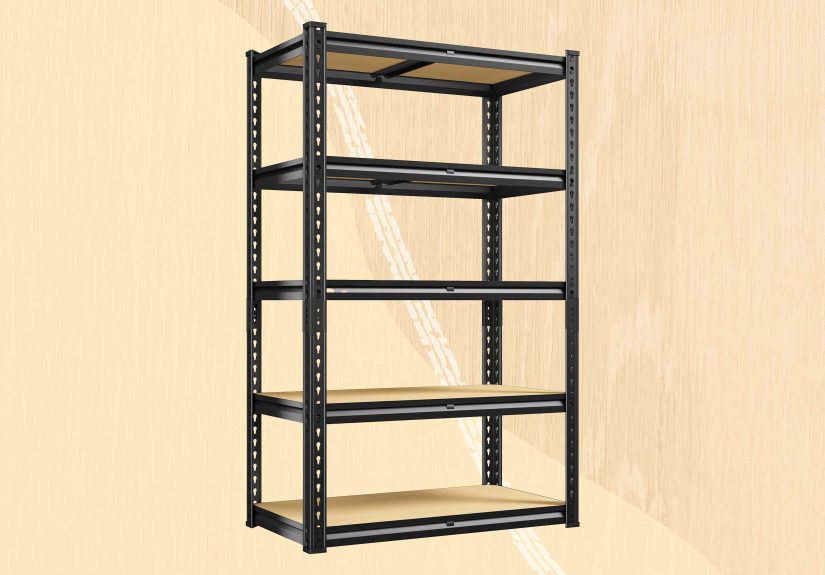
1) Heavy-Duty Steel Storage Racks (the “bin boss”)
If your basement stores bulky totes, tool cases, pantry overflow, or paint-and-hardware supplies, you want
heavy-duty steel shelving (often called “boltless” racks). These are the workhorses: tall,
wide, and designed for serious weight when loads are evenly distributed.
- Best for: large storage bins, coolers, small appliances, bulk paper products, sports gear
- Why it’s a must-have: maxes out vertical space; holds heavy items without bowing
- Look for: adjustable shelf heights, sturdy uprights, cross-bracing or a rigid frame
Pro tip: choose racks with shelves deep enough for your largest binsbut not so deep you lose items in the back
like they’re exploring uncharted territory.
2) Epoxy-Coated Wire Shelving (the “damp basement MVP”)
Wire shelving is popular for a reason: it’s adjustable, ventilated, and easy to clean. In basements,
the best version is epoxy-coated wire shelving, which adds corrosion resistance and holds up better
in humid or “occasionally wet” conditions.
- Best for: laundry supplies, pantry backup, cleaning products, hobby storage, small bins
- Why it’s a must-have: airflow helps reduce “musty box smell”; easy to see what you own
- Look for: epoxy coating, adjustable shelves, optional casters if you want mobility
3) Resin/Plastic Utility Shelves (the “no-rust, no-drama” option)
If your basement has moisture riskor you just want lightweight shelves that assemble fastresin/plastic shelving
is a great addition. It won’t rust, and many options include raised feet or ventilated shelves.
- Best for: lighter totes, seasonal décor, garden supplies, kids’ stuff, overflow storage
- Why it’s a must-have: moisture-friendly; quick setup; easy to move
- Look for: solid shelf posts, good stability, and realistic weight ratings
Honest warning: plastic shelves can be fantastic, but they’re not all built for “I store dumbbells and engine parts.”
If it’s genuinely heavy, go steel.
4) Wall-Mounted Track Shelving (the “floor saver”)
When floor space is limitedor you want to keep storage above potential waterwall-mounted track shelving
is a smart upgrade. Vertical tracks mount into studs, and adjustable brackets let you change shelf heights
as your storage needs evolve (because your needs will evolve… mostly in the direction of “more stuff”).
- Best for: smaller bins, paint supplies, craft materials, pantry overflow, light tools
- Why it’s a must-have: keeps items off the floor; customizable layout; cleaner look
- Look for: strong standards/rails, sturdy brackets, and proper stud attachment
5) Overhead/Ceiling Storage Racks (the “seasonal stuff penthouse”)
If you have good ceiling height, overhead racks can store big, light-ish items you only use a few times a year:
holiday decorations, camping gear, inflatable pool toysaka the stuff that clogs prime real estate.
- Best for: seasonal items, long-term storage, bulky-but-not-super-heavy gear
- Why it’s a must-have: frees floor space; keeps rarely used items out of the way
- Look for: secure mounting, clear headroom, and a plan for how you’ll access it safely
6) Corner Shelves and Under-Stair Shelving (the “space whisperers”)
Corners and under-stair zones are often wasted because they’re awkward. The right corner unit or
custom-fit under-stair shelves can turn dead space into a highly functional storage nook.
- Best for: small bins, emergency supplies, craft items, pet supplies, paper goods
- Why it’s a must-have: uses space other shelves can’t; makes the room feel intentional
- Look for: stable footprint, appropriate depth, and a layout that doesn’t block access
7) Rolling Utility Shelves (the “grab-and-go cart that doesn’t quit”)
Rolling shelves shine in basements with laundry areas, workshops, or hobby stations. You can park a cart where you
need it, then roll it out of the way when you want open floor space.
- Best for: laundry, crafts, tools, wrapping supplies, kids’ activities
- Why it’s a must-have: flexible; quick to reorganize; great for “zones”
- Look for: locking casters, stable frame, and shelves that won’t sag
How to Choose the Right Shelves (Without Overthinking It Into Next Week)
Step 1: Match shelf strength to item weight
Weight ratings can be confusing because there’s often a per-shelf capacity and a total unit capacity.
Focus on what you’ll store on each level. A shelf loaded with books, paint, or tools needs much more strength than
one holding holiday linens and gift wrap.
Quick mental math examples:
- A “small” tote can still weigh 25–40 pounds when it’s full of cables, books, or holiday décor.
- Cases of bottled water or canned goods add up fast (and they’re dense).
- Power tools and hardware boxes concentrate weight in a small areasteel shelves handle this better.
Step 2: Choose the right material for basement conditions
- Damp or humid: epoxy-coated wire shelving or resin/plastic shelves
- Dry, heavy storage: steel racks with sturdy bracing
- Finished basement aesthetics: wall-mounted track shelving + matching bins for a clean look
Step 3: Prioritize adjustability
Adjustable shelves let you store tall items (like vacuum cleaners, coolers, or holiday trees) without wasting space.
If you buy fixed shelves, you’ll eventually end up playing “storage Jenga,” and nobody wins storage Jenga.
Step 4: Pick a depth that fits your traffic flow
Deep shelves hold moreuntil they block your path or encourage “stuff hiding.” If your basement walkway is tight,
choose narrower shelves and go taller. Vertical space is your friend.
Installation Tips That Keep Your Basement Shelves Safe and Solid
Level first, then load
Assemble shelves on the flattest spot you can. Use a level and adjust feet or add shims to eliminate wobble.
A stable shelf is safer and helps shelves carry weight the way they’re designed to.
Anchor tall shelves when appropriate
Any tall storage unit can tip if it’s overloaded, bumped, or if heavy items are stored up high.
Anchoring into wall studs (with appropriate hardware) is a smart safety moveespecially for shelves that are tall,
narrow, or placed in high-traffic areas.
Store heavy items low (your back will also thank you)
Put the heaviest items on the lowest shelves. This improves stability, reduces tip risk, and makes lifting safer.
Save upper shelves for lighter items like linens, decorations, or empty bins.
Keep items off the flooreven if you “trust” your basement
Basements can flood from small issues (a clogged drain, a sump pump hiccup, a surprise seep). Shelves with raised feet,
or any shelf set a few inches above the ground, help protect storage bins and boxes.
Add “fall prevention” for loose items
If you live in an area prone to shaking (or if you have kids, pets, or an energetic laundry day),
consider adding bins, shelf lips, or edge rails to reduce the chance of items sliding off.
Build a Basement Storage System (Not Just a Row of Shelves)
Shelves are the structure. The system is what makes it feel effortless.
Use these upgrades to make your shelves work harder:
- Standardize your bins: fewer bin sizes = easier stacking and better use of shelf space.
- Label like a normal person with a busy life: big, readable labels on the front and side.
- Create zones: holiday, tools, sports, pantry, laundry, keepsakeseach gets a shelf neighborhood.
- Leave breathing room: don’t pack shelves to the ceiling. A little space makes finding things easier.
- Use clear bins for “frequently hunted” items: cords, batteries, gift wrap, small tools.
Real-World Shelf Setups That Work
Scenario A: Unfinished basement with humidity concerns
Combine epoxy-coated wire shelving for airflow with resin shelves for the dampest corners.
Store items in lidded bins and keep anything paper-based (photos, documents, books) in sealed containers.
Add a simple humidity meter so you’re not guessing.
Scenario B: Finished basement that doubles as living space
Use wall-mounted track shelving or cabinets to keep storage tidy and off the floor.
Choose matching bins or baskets so the area looks cohesive instead of “temporary.”
Keep a slim rolling cart for activities (games, crafts, movie-night supplies) that can move as needed.
Scenario C: Workshop / DIY corner
Put heavy-duty steel racks near the workbench for tools and hardware.
Use labeled bins for parts and a small wire shelf for frequently used supplies (gloves, tape, fasteners).
Keep the bottom shelves for power tools and the top shelves for lighter items like safety gear.
Maintenance: The 10-Minute Habit That Protects Your Investment
Twice a year (or when you do seasonal swaps), do a quick shelf check:
- Tighten any loose bolts or connectors.
- Check for wobble and re-shim if needed.
- Look for rust spots and address them early.
- Scan for moisture issues: condensation, musty smells, or damp corners.
A basement storage setup isn’t “set it and forget it”but it can be “set it and barely think about it,” which is
the real dream.
Field Notes: of Basement Shelving Experience (So You Don’t Learn the Hard Way)
The first time I “organized” a basement, I made a classic mistake: I bought shelves for the stuff I owned
today, not the stuff I was guaranteed to own later. I measured one wall, confidently ordered a shelf
unit, and then discovered a support post living exactly where my plan wanted open air. That’s how I learned the
Basement Rule: the basement always has at least one surprise structural element, and it’s never in a convenient place.
Attempt #2 was bettermostly because I used painter’s tape on the floor to outline shelf footprints before buying
anything. It looked ridiculous (like I was mapping a crime scene for missing holiday décor), but it immediately showed
me which shelves were too deep and where I needed walking space. If you can’t comfortably carry a laundry basket past
the shelves, your “organized” basement will slowly turn into a storage maze. And storage mazes are fun in video games,
not when you’re trying to find a Phillips-head screwdriver.
I also learned that “evenly distributed weight” is not a personality trait most of us have. In real life, we toss the
heaviest bins wherever they fit, usually at chest height because bending down is inconvenient. Then the shelf starts to
complainquietly at firstthrough a subtle wobble and a slight sag. The fix was simple: put the heavy bins on the bottom,
keep the middle shelves for everyday items, and reserve the top shelf for light, bulky things (gift wrap, empty bins,
extra blankets). Suddenly everything felt sturdier, and my back stopped filing formal complaints.
The most painful lesson came from a tiny water incident. Not a dramatic floodjust enough seepage to remind me that
cardboard boxes and basements are not a love story. I had a few “temporary” boxes on the floor (last words), and they
turned into damp, warped regret. After that, I committed to a simple policy: nothing important sits directly on the
basement floor. Shelves with raised feet, a couple inches of clearance, and lidded bins changed everything. Even if you
never get water, you’ll still appreciate how much easier it is to vacuum, sweep, or spot problems early.
Finally, there’s the visibility factor. When I switched some storage to wire shelving and used clear bins for “small
stuff,” I stopped rebuying duplicates. I found three tape measures in one afternoon, which was both hilarious and
mildly insulting. Labels helped, but the real win was creating zones: one shelf for holidays, one for tools, one for
pantry overflow, one for keepsakes. Once each category had a home, I spent less time “searching” and more time actually
using the basement for something other than storage guilt.
If you take nothing else from this: buy shelves that match your basement’s moisture level, anchor and level them like
you mean it, store heavy stuff low, and leave enough walkway space for a human body to function. Your future self will
walk downstairs, find what they need in 30 seconds, and feel like an unstoppable adult. Which is honestly the real
basement glow-up.
Conclusion
Upgrading your basement isn’t about buying fancy containers or turning it into a showroom. It’s about building a storage
setup that’s safe, moisture-aware, easy to maintain, and designed around how you actually live. Start with a solid
combinationheavy-duty steel racks for bins, coated wire shelves for airflow, plastic shelves for damp zones, and
wall-mounted shelving where floor space matters. Then add labels, zones, and a little breathing room. The result:
a basement that feels bigger, works harder, and stops eating your time.