Table of Contents >> Show >> Hide
- First, Identify What Is Actually on Your Nails
- Your Main Gel Nail Polish Removal Options
- What You Need for Safe At-Home Removal
- How to Remove Gel Nail Polish Step by Step
- Popular Gel Removal Hacks That Are Best Avoided
- Aftercare for Dry or Weak Nails
- When to Contact a Dermatologist
- Experiences and Practical Lessons From Gel Polish Removal
- Conclusion
Gel nail polish is wonderful right up until removal day. For two or three weeks, it survives showers, keyboards, cooking experiments, suitcase zippers, and all the other tiny disasters that make regular polish surrender by lunchtime. Then one corner lifts, temptation arrives, and suddenly peeling it off feels like a perfectly reasonable life choice.
Unfortunately, pulling, biting, or scraping away a gel manicure can remove layers of the natural nail plate along with the color. That may leave nails thin, rough, brittle, or covered in white patches and grooves. The safest strategy is less exciting but far more effective: soften the product properly, remove only what releases easily, and give stubborn areas more time.
This guide explains how to remove gel nail polish at home, when professional removal is the smarter option, which popular shortcuts can damage your nails, and how to help your hands recover afterward.
First, Identify What Is Actually on Your Nails
Not every shiny, long-wearing manicure is the same. Knowing which product you have determines whether acetone will remove it successfully.
Soak-off gel polish
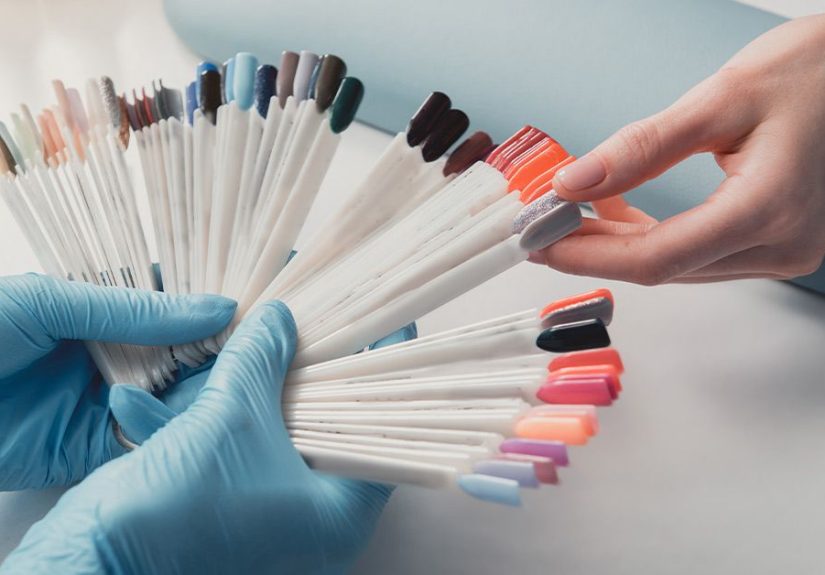
Traditional soak-off gel polish is applied in thin layers and cured under a UV or LED lamp. Most salon gel manicures fall into this category. After the glossy topcoat is lightly filed, the product usually softens in acetone and begins flaking away within approximately 10 to 20 minutes.
Gel-like regular polish
Some bottles use words such as “gel effect,” “gel-like,” or “longwear” even though the polish air-dries and does not require a curing lamp. These formulas generally come off with ordinary nail polish remover. Wrapping every finger in pure acetone for an air-dried product would be unnecessary overkillthe manicure equivalent of renting a bulldozer to move a houseplant.
Hard gel, builder gel, and extensions
Hard gel, structured builder gel, and certain enhancement products may not dissolve in acetone. They often need to be carefully filed down, preferably by a trained nail technician. If your manicure created extra length, a thick apex, or a rigid structure, do not assume it is ordinary soak-off polish. Contact the salon or check the product instructions before beginning. Excessive filing can thin the natural nail, while prying can separate it from the nail bed.
Your Main Gel Nail Polish Removal Options
Option 1: Professional salon removal
Professional removal is the safest choice when you have hard gel, extensions, unfamiliar products, severely damaged nails, or a manicure that refuses to soften. A technician can identify the coating, reduce bulk without reaching the natural nail, and use the removal method designed for that particular system.
A salon visit is also worth considering when the skin around your nails is cracked, inflamed, blistered, or painful. Continuing a home removal experiment when your fingers are already irritated is rarely the heroic finale it appears to be.
Option 2: The acetone-and-wrap method
For genuine soak-off gel, wrapping each nail with acetone-soaked cotton is usually the most controlled and effective home method. It concentrates the remover on the polish while limiting how much surrounding skin sits in acetone.
Aluminum foil is commonly used, but plastic food wrap can create a tight seal and is less likely to loosen while you wait. Precut removal wraps and reusable manicure clips work on the same basic principle: hold saturated cotton firmly against the nail.
Option 3: Soaking fingertips in a bowl
You can place your fingertips in a small bowl of acetone, but this exposes more skin to the solvent and can increase dryness and irritation. It also uses considerably more product. The method may be useful for very stubborn soak-off coatings, but targeted cotton wraps are generally cleaner and more comfortable.
Never heat acetone directly, microwave it, place it near a candle, or set it on an electric warmer. Acetone is highly flammable. Work in a ventilated area, close the bottle when it is not being used, and keep it away from flames, cigarettes, sparks, and hot tools.
Option 4: Acetone-free remover
Acetone-free remover may be suitable for regular polish marketed as gel-like, but it is usually slow or ineffective on professional lamp-cured gel. Some soak-off systems may eventually respond to a product-specific non-acetone remover, so follow the manicure manufacturer’s instructions rather than relying on the word “gel” alone.
For sensitive or very dry skin, an acetone-free formula sounds appealing. However, rubbing unsuccessfully for an hour and then scraping the remaining polish is not necessarily gentler. When acetone is required, brief and controlled exposure followed by thorough moisturizing may be preferable to prolonged friction.
Option 5: Filing the product off
Manual filing can remove gel, but it is difficult for an inexperienced person to tell exactly where the coating ends and the natural nail begins. Electric nail drills increase that risk. Filing-only removal is best reserved for trained professionals, especially with hard gel or builder products.
If you must reduce a soak-off manicure before wrapping it, file only enough to remove the glossy seal. Do not chase every patch of color with the file.
What You Need for Safe At-Home Removal
Gather everything before opening the acetone. Trying to cut foil with ten slippery cotton hats attached to your fingers is a comedy sketch, not a manicure plan.
- Pure acetone or a remover specified for your gel system
- Cotton balls or cotton pads cut to fit each nail
- Small foil squares, plastic food wrap, removal clips, or prepared wraps
- A medium or fine nail file
- A soft nail buffer
- Petroleum jelly or cuticle oil
- An orangewood stick or gentle cuticle pusher
- An old towel to protect the work surface
- Hand cream and cuticle oil for aftercare
How to Remove Gel Nail Polish Step by Step
1. Protect your table and ventilate the room
Acetone can damage painted, varnished, plastic, or finished surfaces. Cover the table with an old towel and an acetone-resistant tray. Open a window or work in a well-ventilated room, away from heat and open flames.
2. Wash and dry your hands
Clean hands make it easier to examine the nails and reduce the chance of trapping debris against irritated skin. Dry them completely before filing.
3. Break the topcoat seal
Use a nail file to gently remove the shine from the surface. Move carefully and stop once the glossy finish has become matte. You are opening the top layer so acetone can penetratenot sanding a deck before winter.
Pay attention to the free edge and sides, where the topcoat may have sealed the color. Avoid filing the surrounding skin.
4. Protect the skin around each nail
Apply a thin layer of petroleum jelly or cuticle oil around the nail folds and cuticles. Do not coat the polished surface, because an oily barrier between the acetone and gel may slow removal.
Acetone is effective, but it can strip oils from the skin and contribute to dryness, irritation, and brittle-feeling nails. Keeping exposure targeted and moisturizing afterward can reduce these effects.
5. Saturate the cotton
Soak a piece of cotton with enough acetone to remain wet throughout the waiting period. Place it directly over the entire polished nail. Cotton cut close to the size of the nail limits unnecessary skin contact.
6. Wrap each fingertip securely
Seal the cotton against the nail using foil or plastic food wrap. The wrap should be snug without cutting off circulation. Many people find it easier to complete one hand at a time so the second hand remains available for wrapping and unwrapping.
7. Wait patiently
Leave the wraps in place for the time recommended by the gel manufacturer. Ten to 20 minutes is common, although thick layers, dark colors, glitter, reinforced bases, and certain brands may need longer.
Avoid repeatedly opening the wraps to check. Each inspection lets acetone evaporate and cools the process. Set a timer, play a podcast, and temporarily surrender your ability to text with dignity.
8. Test one nail
Remove one wrap. Properly softened gel should look wrinkled, cracked, lifted, or flaky. Gently press and slide the cotton toward the tip. Use an orangewood stick to nudge away only the product that releases with minimal pressure.
If the coating remains smooth and firmly attached, reapply fresh acetone and wrap the nail for another five minutes. Different fingers may soften at different speeds.
9. Never force stubborn patches
Do not dig, scrape aggressively, or pry under the coating. Rewrapping is slower, but rebuilding a damaged nail plate takes much longer. A small trace of base coat can be gently buffed after the nail is dry; a firmly attached patch should be softened again or assessed by a professional.
10. Wash, inspect, and moisturize
Wash your hands with mild soap, dry them, and apply cuticle oil followed by a rich hand cream. Massage the products into the nail folds and the surface of each nail.
Popular Gel Removal Hacks That Are Best Avoided
Peeling the gel off
Peeling may feel satisfying because the polish sometimes lifts in one impressive sheet. Unfortunately, surface layers of the natural nail may travel with it. Repeated peeling can cause thinning, splitting, roughness, and weak adhesion during the next manicure.
Using dental floss under lifted polish
Sliding floss beneath gel or extensions can tear attached layers from the nail plate and place pressure on the nail bed. A viral video may last 30 seconds; the resulting damage can remain until the nail grows out.
Scraping with metal tools
Metal pushers can be useful in trained hands, but forceful scraping at home may gouge softened nails. An orangewood stick is less aggressive, although even a wooden tool should not be used to force resistant gel.
Mixing household chemicals
Do not combine acetone with cleaners, alcohol mixtures, hydrogen peroxide, bleach, or mystery products promoted online. Use a remover intended for nail cosmetics and follow its label.
Relying on warm water, oil, and dish soap
Warm water and oil may help loosen some press-on nails or adhesive tabs, but they do not reliably dissolve cured gel polish. Long soaking may soften the natural nail, making it more vulnerable when someone inevitably decides to “help” the process by scraping.
Aftercare for Dry or Weak Nails
Temporary dryness after gel removal is common, particularly when manicures and acetone soaks are frequent. For the next several days, apply cuticle oil at least once daily and use hand cream after washing. Wear gloves when cleaning, washing dishes, or handling detergents.
Keep nails relatively short while damaged areas grow out. File snags gently in one direction instead of tearing them. Avoid using your nails to pry open cans, scrape labels, or perform other tasks better assigned to actual tools.
You do not necessarily need a lengthy break after every gel manicure, but bare time can be useful when nails feel thin, peel easily, or show surface damage. A week or two without another coating allows you to moisturize the nail plate and observe whether discoloration or separation is improving. More significant damage may take several months to grow out completely.
When to Contact a Dermatologist
Stop using gel products and seek medical advice if you develop persistent redness, swelling, itching, burning, blistering, pain, or skin cracking around the nails. Gel products contain reactive ingredients that may cause allergic contact dermatitis in sensitized individuals. Reactions can also appear on areas touched by the hands, including the eyelids, face, and neck.
You should also obtain professional advice if a nail becomes green, yellow, unusually thick, foul-smelling, detached from the nail bed, or increasingly painful. Covering a suspicious nail with another manicure may hide a problem without solving it.
Experiences and Practical Lessons From Gel Polish Removal
The following composite experiences reflect common problems people encounter when removing gel nail polish. They are useful because the difference between a healthy result and a damaged one often comes down to a few ordinary decisions.
The person who started peeling “just one corner”
A manicure begins lifting near the cuticle, and the wearer promises to remove only the loose section. Ten minutes later, every nail has been peeled. The hands initially look clean, but once washed and dried, several nails appear chalky and rough. Polish applied the following day emphasizes every ridge.
The lesson is simple: a lifted edge does not mean the entire coating has separated safely. Trimming or smoothing the snag can prevent further picking until there is enough time for proper removal. When peeling has already happened, gentle moisturizing and a temporary break are more helpful than immediately covering the damage with another thick manicure.
The first-time remover whose gel would not move
Another common experience begins with ten carefully wrapped fingers and ends with completely unchanged polish. Usually, the glossy topcoat was never filed, the cotton was not wet enough, or the wraps were loose. Sometimes the manicure is builder gel rather than soak-off gel.
The best response is not stronger scraping. Check the product type, lightly remove the shine, use fresh saturated cotton, and improve the seal. Test one nail after the recommended time. When there is still no wrinkling or flaking, professional identification can prevent accidental over-filing.
The rushed removal before an event
Removing gel 20 minutes before leaving home is an excellent way to make every poor decision at once. The wraps come off early, the gel remains firm, and a metal tool suddenly looks irresistibly efficient. The result may be ten partially polished nails plus fresh scratches.
A better plan is to allow approximately 45 minutes, especially when working one hand at a time. If the clock wins, smooth any sharp lifted edges and postpone full removal. Half-finished gel is cosmetically inconvenient; a thinned nail plate is inconvenient for months.
The sensitive-skin experience
Some people notice tight, white, or irritated skin after soaking their fingertips directly in acetone. Switching to nail-sized cotton pieces, protecting the surrounding skin with petroleum jelly, and wrapping only the nail reduces unnecessary exposure. Washing promptly and applying cream afterward also makes a noticeable difference.
Burning, swelling, blisters, or ongoing itching should not be treated as normal dryness. Those symptoms warrant stopping the process and obtaining medical advice, especially when they recur after gel manicures.
The successful slow-and-steady removal
The most successful experience is wonderfully uneventful. The topcoat is lightly filed, cotton remains wet beneath secure wraps, and one test nail flakes after 15 minutes. Two stubborn fingers receive an extra five-minute soak instead of a battle. The hands are washed, moisturized, and left bare overnight.
That process may not produce dramatic social-media footage, but it protects the natural nail. In gel removal, patience is not merely a personality virtue. It is the most useful tool in the kit.
Conclusion
The best way to remove gel nail polish depends on the product. Air-dried gel-like polish usually needs ordinary remover, soak-off gel responds to acetone wraps, and hard gel or structured enhancements may require professional filing.
For at-home soak-off removal, lightly break the topcoat seal, protect the surrounding skin, keep acetone-soaked cotton firmly against each nail, and wait until the coating releases easily. Never peel, pry, or aggressively scrape. When gel remains attached, give it more time rather than more force.
Finish with cuticle oil, moisturizer, and a little kindness toward your hands. Your nails have already survived the manicure, the removal, and your brief consideration of using a kitchen utensil as a cuticle tool. They deserve a quiet evening.
Note: This educational guide synthesizes recommendations from U.S. dermatology organizations, medical institutions, beauty publications, and professional nail-care manufacturers. Product formulas differ, so always follow the instructions supplied with the specific gel system.