Table of Contents >> Show >> Hide
- Why Glass Gets Streaky in the First Place
- The Core Formula: Simple Solutions That Actually Work
- Tools of the Trade: What You Really Need (and What You Don’t)
- Step-by-Step Routine for Streak-Free Glass
- Hacks for Tricky Glass Situations
- Common Glass-Cleaning Mistakes to Avoid
- Eco-Friendly and Budget-Friendly Glass Cleaning Tips
- Real-World Glass Cleaning Experiences: What Actually Works
If you’ve ever spent 20 minutes scrubbing a window only to step back and see… a crime scene of streaks and smudges, this guide is for you. Getting glass truly clear can feel like wizardry, but it’s really just a combo of good tools, the right solution, and a few non-obvious rules (like “do not clean in full sun unless you enjoy emotional pain”).
Whether you’re dealing with bathroom mirrors, giant living-room windows, shower doors, or glass stovetops, these glass cleaning hacks will help you get a streak-free shine with less effort, fewer harsh chemicals, and way fewer muttered curses.
Why Glass Gets Streaky in the First Place
Before we fix the problem, it helps to know what you’re up against. Streaks usually show up for a handful of reasons:
- Residue from cleaners: Many glass sprays contain soaps, dyes, fragrances, or waxes. They smell nice but leave microscopic film behind, which your cloth simply smears around.
- Hard water minerals: If you’re using tap water in your DIY spray and your water is hard, those minerals can dry on the surface and create hazy streaks and spots.
- Dirty tools: A grimy rag or already-wet paper towel is just moving dirt from one part of the glass to another.
- Cleaning in direct sun or on hot glass: The solution dries before you can wipe it off, baking streaks into place.
- Too much product: Drenching the glass feels satisfying but gives you way more liquid than your cloth or squeegee can pick up cleanly.
Once you understand that streaks are mostly leftover stuffproduct, minerals, lint, or dirtthe hacks below make a lot more sense. The whole game is minimizing residue and removing what’s left as efficiently as possible.
The Core Formula: Simple Solutions That Actually Work
1. The Classic Vinegar + Distilled Water Hack
When in doubt, go old-school. A 1:1 mix of white distilled vinegar and distilled water is the workhorse of streak-free glass cleaning.
Basic recipe:
- 1 cup distilled water
- 1 cup white distilled vinegar
- Optional: 1–2 drops of dish soap for greasy kitchen glass
Pour everything into a spray bottle and gently swirl to combine (no vigorous shaking needed; you’re making cleaner, not a cocktail).
Why it works: The vinegar breaks down grease and mineral deposits, while distilled water prevents hard water spots. No dyes, no perfume, no built-in streaks. If you’re sensitive to the smell, it fades quickly as the glass dries, and you can crack a window while you work.
Where to use it: Interior windows, shower doors, most non-tinted glass, glass tables, and many mirrors. Avoid unsealed stone nearbyvinegar is acidic and can etch marble or certain tilesso spray onto your cloth, not directly toward a stone countertop.
2. Dish Soap + Water for Seriously Dirty Windows
If the glass hasn’t been cleaned since the last presidential administration, or if you’re dealing with pollen, bug splatters, or city grime, go in with gentle dish soap first.
How to do it:
- Fill a bucket or large bowl with warm water.
- Add a few drops (literally a few) of dish soap and swishno huge bubbles needed.
- Use a soft sponge or microfiber pad to wash the glass, working top to bottom.
- Squeegee or wipe off the soapy water, then finish with a vinegar + water or plain glass cleaner for the final streak-free pass.
This two-step method strips away the heavy grime so your final polish isn’t fighting through a film of dirt.
3. Store-Bought Glass Cleaners: What Actually Matters
If you prefer store-bought cleaners, look for formulas labeled “ammonia-free” or “dye- and fragrance-free.” The simpler the ingredient list, the less residue you’ll battle. Foaming glass cleaners can be useful on vertical surfaces since they cling instead of runningand they’re often excellent at minimizing streaks when wiped with microfiber.
Skip anything labeled “multi-surface polish” or products with obvious waxes or conditionersthey’re designed to leave a sheen on furniture, not clear glass.
4. When to Skip Vinegar Entirely
Vinegar is a hero… except when it’s not. You should avoid vinegar on:
- Delicate mirrors with damaged backing: Excess liquid around the edges can creep behind the glass and worsen black spots.
- Stone window sills and counters: Marble, limestone, and some tiles can etch from acid.
- Some specialty coatings: Tinted auto glass or anti-glare coated screens may have manufacturer warnings. When in doubt, use a plain damp microfiber with a tiny bit of mild soap.
When you can’t use vinegar, warm distilled water plus a drop of dish soap (or a gentle dedicated glass cleaner) is usually safe and effective.
Tools of the Trade: What You Really Need (and What You Don’t)
1. Microfiber Cloths: Your MVP
If you only upgrade one thing, make it your cloth. A high-quality, lint-free microfiber cloth grabs dirt instead of pushing it around, and it leaves far fewer streaks than paper towels.
Pro tip: Use the two-cloth method:
- One slightly damp cloth to apply and move the cleaner.
- One completely dry cloth to buff and finish.
Launder microfiber separately from cotton and avoid fabric softener, which can clog the fibers and reduce their cleaning power.
2. The Humble Squeegee
For large windows, nothing is more satisfying than a good squeegee. Use it after your cleaning solution to physically pull liquid and dirt down and off the glass.
Basic technique:
- Start at the top corner.
- Pull the squeegee straight down or in overlapping horizontal passes.
- Wipe the blade with a clean cloth between passes to avoid dragging dirty water back up.
A worn, nicked rubber blade can actually create streaks, so replace the blade when it looks tired.
3. Why We’re Breaking Up with Paper Towels and Newspaper
Paper towels are convenient but notorious for leaving lint and fibers behind. Newspaper used to be a popular hack, but modern inks and thinner paper can lead to smearing and subtle scratches, especially on delicate or coated glass.
If you love reusables, stick with microfiber or very smooth, lint-free cotton (think old T-shirts that have seen things).
Step-by-Step Routine for Streak-Free Glass
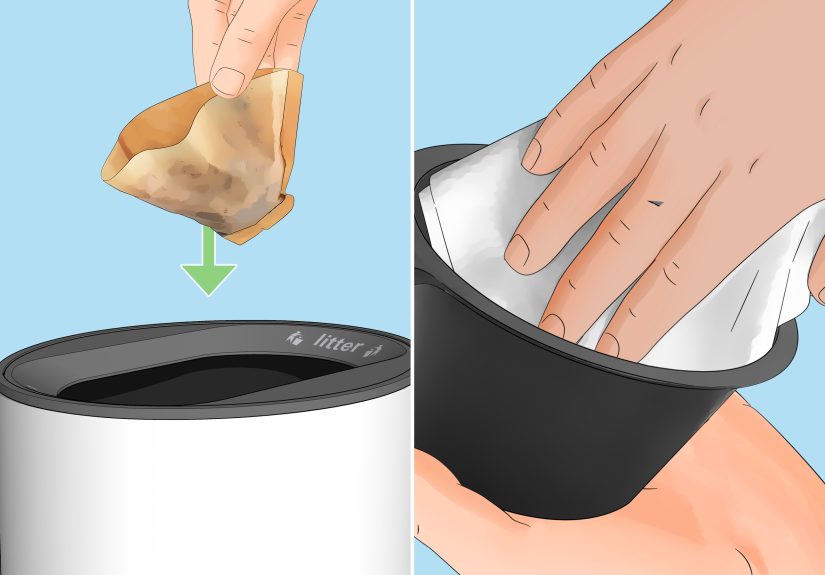
Step 1: Dust Before You Spray
Always remove loose dust, hair, and cobwebs first. Otherwise, you’re making mud.
- Use a dry microfiber cloth, duster, or the brush attachment on your vacuum.
- Hit the frames, sills, and tracks as well as the glass itself.
This single step reduces streaking and prevents grit from scratching the surface as you wipe.
Step 2: Apply a Light Mist (Not a Shower)
Spritz the glass with a light mist of cleanerenough to cover the area, but not so much that it’s dripping. For mirrors and frames that are sensitive to moisture, spray onto the cloth instead of directly on the glass.
Step 3: Wipe in a Pattern You Can Actually Track
Instead of random circles, use a consistent pattern:
- For small areas: Wipe in overlapping “S” shapes from top to bottom.
- For windows: Try vertical strokes inside and horizontal strokes outside (or vice versa). That way, if you see a streak, you instantly know which side it’s on.
Use gentle pressure. Pressing too hard just drags dirty solution around.
Step 4: Dry and Buff Immediately
Follow with your dry cloth (or squeegee) right away. The longer the cleaner sits, the more likely it is to leave marks as it evaporates.
Finish with a quick buff along the edges and cornersthese are streak hot spots where excess liquid tends to collect.
Step 5: Inspect from Different Angles
Step to the side, squat down, or look at the glass from an angle toward the light. Streaks that are invisible straight-on often show up as faint lines when you move.
Spot a streak? Hit it with a barely damp corner of your cloth, then buff dry.
Hacks for Tricky Glass Situations
Hard Water Stains on Glass
Those cloudy spots that never seem to budge? That’s often mineral buildup.
Try this:
- Spray your vinegar + distilled water solution generously on the stains.
- Let it sit for a few minutes to dissolve mineral deposits.
- Gently scrub with a non-scratch sponge or soft cloth.
- For stubborn spots, make a paste of baking soda and water, dab it on, let sit briefly, then rinse and finish with glass cleaner.
Always test baking soda paste in a corner first to make sure it doesn’t scratch your particular glass or coating.
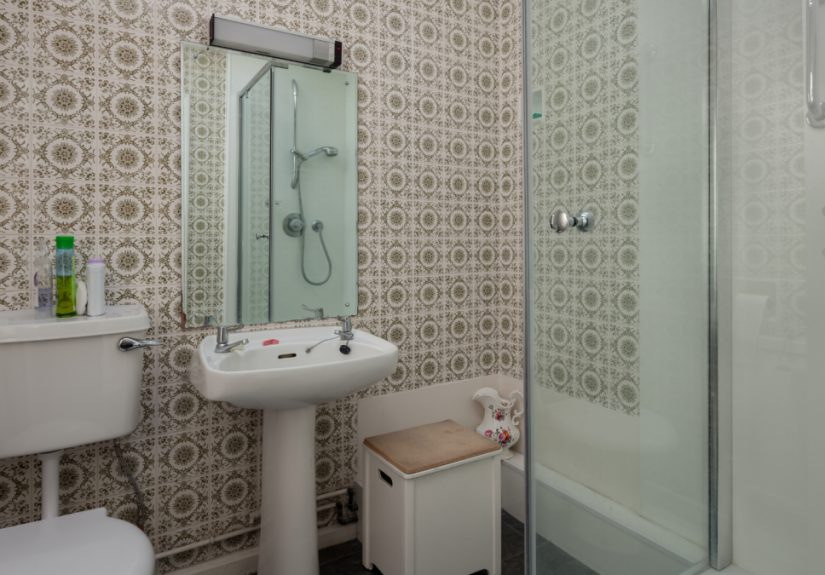
Shower Doors That Never Look Clean
Shower glass is under constant attack from soap scum, minerals, and humidity. For a deep clean:
- Apply a bathroom-safe soap scum remover or a vinegar + dish soap mixture.
- Let it dwell (following label instructions if you’re using a commercial product).
- Scrub with a non-scratch pad.
- Rinse thoroughly with warm water.
- Finish with your normal glass cleaner and microfiber for a streak-free polish.
To keep it nice, use a small squeegee after every shower. Ten seconds of effort saves you an hour of scrubbing later.
Car Windows and Windshields
For car glass, especially inside the windshield where you get that mysterious film, use an automotive-safe glass cleaner or diluted vinegar solution.
- Spray cleaner onto your cloth, not directly on the glass (you don’t want overspray on the dash electronics).
- Use straight strokes from one side across to the other so you can see where you’ve been.
- For the inside of the windshield, try holding the cloth with the back of your hand against the glass to reach tight corners more comfortably.
Glasses and Screens
Eyeglasses and screens are their own beastthin coatings, sensitive materials, and a talent for scratching.
General rule: Use the manufacturer-recommended cleaner or a tiny drop of mild soap with water, plus a clean microfiber. Skip vinegar or ammonia on coated lenses or electronic screens unless the manufacturer explicitly allows it.
Common Glass-Cleaning Mistakes to Avoid
- Cleaning in direct sunlight or on hot glass: The cleaner evaporates before you can wipe it off, locking streaks in place.
- Using the same dirty cloth everywhere: Once your cloth is damp and gray, you’re basically painting dirt.
- Going overboard with product: More cleaner doesn’t mean cleaner glass; it just means more liquid to smear.
- Ignoring frames, tracks, and sills: Dust and grime from these areas can wash back onto your freshly cleaned glass.
- Mixing products that shouldn’t mix: Don’t mix vinegar with ammonia-based cleaners or bleach with anything. If you want to switch cleaners, rinse or wipe the glass with plain water first.
Eco-Friendly and Budget-Friendly Glass Cleaning Tips
Good news: the most effective glass cleaning routine is already pretty cheap and eco-friendly.
- Use reusable microfiber instead of paper towels: Less waste, less lint, and better performance.
- Make your own cleaner: Vinegar + distilled water costs pennies per bottle and cuts down on single-use plastics.
- Decant into a good spray bottle: A solid spray mechanism gives you a fine, even mist, which means less product and more control.
- Clean little and often: Quick monthly wipes are easier than once-a-year “shock and awe” sessions.
Glass doesn’t need expensive magic potions; it just needs consistency and a little technique.
Real-World Glass Cleaning Experiences: What Actually Works
Let’s talk about how this plays out in real life, outside of the serene world of cleaning tutorials where no one has kids, pets, or roommates who apparently touch every surface with marinara-covered hands.
Experiment #1: Paper Towels vs. Microfiber
Picture this: one Saturday afternoon, you decide to finally tackle the living room windows. On the left window, you go old-schoolstandard glass cleaner and paper towels. On the right, you use a DIY vinegar + distilled water mix and a pair of microfiber cloths.
At first glance, both windows look okay. But then the sun hits, and the difference becomes obvious. The paper towel side has faint swirls and little lint fuzzies catching the light. The microfiber side? You mostly see the outside world (and the neighbor’s questionable lawn ornaments). That one simple changeswapping paper towels for microfiberoften does more for streak-free shine than changing the cleaner itself.
Experiment #2: Cleaning in the Wrong Weather
Another day, it’s blazing hot and sunny, and you think, “Perfect time to clean the windows!” (It’s not.) You spray the glass, start wiping, and instantly notice the cleaner drying faster than you can move your hand. You chase the streaks, add more spray, and by the end you’re left with glass that somehow looks worse.
Now rewind the scenario. This time, you clean in the evening or on a cloudy day. Same cleaner, same cloths, same windowsbut now the solution stays wet just long enough for you to wipe it clean. No rush, no baked-on streaks. It feels almost unfair how big a difference timing makes, but that’s the reality: temperature and direct sun can make or break your results.
Experiment #3: The “One Big Clean” vs. “Quick Reset” Approach
Many of us treat glass cleaning like a once-a-year detox: we ignore it until the situation is so bad we can write our name in the dust, then we set aside a whole afternoon to scrub. The problem is that heavily built-up grime needs multiple passes and stronger solutionsand it’s exhausting.
Compare that to a “quick reset” habit: every few weeks, you give high-touch glass a 2-minute wipe. Bathroom mirror? Quick microfiber pass after your evening routine. Sliding doors with dog nose art? Fast spritz and squeegee while your coffee brews. By keeping glass in “maintenance mode,” you rarely have to break out the heavy-duty scrubbing. Your future self will be unreasonably grateful.
Experiment #4: Kids, Pets, and Strategic Lower-Zone Cleaning
If you have small humans or animals in the house, you know the bottom half of your windows lives a whole different life than the top. There are nose prints, fingerprints, paw smears, and mystery streaks that honestly might be jelly.
One smart strategy is to clean “in zones.” Instead of doing the entire window every time, you focus on the highly trafficked lower section more frequently. Use a kid- and pet-safe cleaner (or simple vinegar solution), keep a small spray bottle and cloth handy, and accept that the bottom three feet of glass will always be a work in progress. The top half can be done less often, since gravity and short arms keep it cleaner.
Experiment #5: The Minimalist Caddy
Through trial and error, most people end up with a bunch of half-used bottles under the sink. Eventually you realize you’re really just using a few things over and over: a reliable spray bottle of simple cleaner, two or three microfiber cloths, and maybe a squeegee.
Creating a tiny “glass caddy” with just those essentials has a big psychological effect. When cleaning doesn’t involve digging through a chaotic cabinet, you’re much more likely to actually do it. That’s the Lifehacker angle in a nutshell: reduce friction, keep the setup simple, and your windows will quietly stay cleaner year-round.
The Bottom Line: The best glass cleaning hacks aren’t about exotic ingredients or viral gimmicks. They’re about understanding why streaks happen, choosing simple tools that don’t add to the problem, and building small, realistic habits that fit into your actual lifenot the Pinterest version.