Table of Contents >> Show >> Hide
- What Is a Preserving Crock (and What Is It Not)?
- How a Crock Preserves Food: The “Friendly Microbes” Explanation
- Types of Preserving Crocks
- Food Safety Rules That Matter (No Drama, Just Results)
- How to Use a Preserving Crock: Step-by-Step
- Example #1: Classic Crock Sauerkraut (Tested-Style Method)
- Example #2: Traditional Fermented Dill Pickles in a Crock
- Choosing a Preserving Crock: A Buyer’s Checklist
- Cleaning and Caring for Your Crock
- Common Problems (and the Fix That Usually Works)
- Why a Preserving Crock Is Worth It
- Conclusion
- of Real-Life Preserving Crock Experience (What You Actually Learn)
A preserving crock is basically a time machine you can eat from. You pack it with vegetables, salt, and patience, and it gives you back crunchy, tangy food
that tastes like it has a personality. If you’ve ever wondered why your grandma’s pantry had a mysterious stoneware jar the size of a small comet, odds are
it was doing the quiet, heroic work of food preservation.
Today, preserving crocks are having a glow-uppartly because fermented foods are delicious, partly because people love hobbies that bubble, and partly because
nothing says “I have my life together” like a crock of sauerkraut quietly burping on your counter.
What Is a Preserving Crock (and What Is It Not)?
A preserving crock is a heavy containerusually stoneware or ceramicused to preserve foods through fermentation (like sauerkraut
or traditional brined pickles) or sometimes through salt curing and cold storage. In modern kitchens, “preserving crock” is most
commonly used to mean a fermentation crock: a vessel designed to keep vegetables submerged under brine while beneficial microbes transform them.
Quick clarification so nobody ends up with a confused appliance situation:
- Preserving crock / fermentation crock: For lacto-fermentation and brined pickles (countertop, room temp).
- Slow cooker (“crock pot”): For chili, pulled pork, and forgetting dinner until it’s magically ready.
- Canning jars: For shelf-stable preservation via heat processing (water bath or pressure canning).
A preserving crock shines when you want the old-school method: vegetables + salt + time = complex flavor and satisfying crunch. And if you choose to can the
finished product afterward, you get shelf stability too (with a texture trade-offheat can soften fermented foods).
How a Crock Preserves Food: The “Friendly Microbes” Explanation
Most crock-preserved vegetables rely on lacto-fermentation. Here’s the simple science:
- Salt draws water out of vegetables and creates brine.
- Brine + submersion limits oxygen, discouraging many spoilage microbes.
- Lactic acid bacteria (already present on produce) thrive in the salty, low-oxygen environment.
- They produce lactic acid, which lowers pH and helps preserve the food while building flavor.
In other words: you’re not “making food rot.” You’re managing an environment where the right microbes win. Think of it as reality TV for bacteriaonly the
contestants are invisible and the prize is sauerkraut.
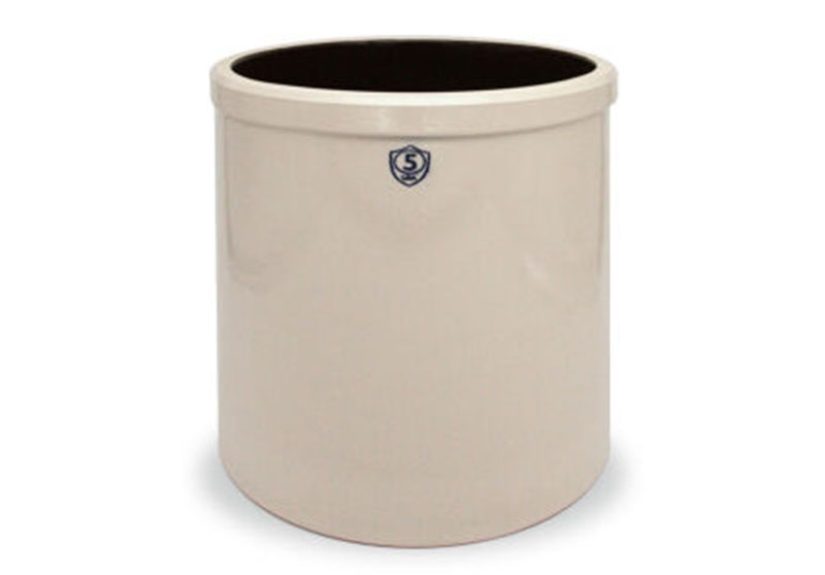
Types of Preserving Crocks
1) Open Crocks (Traditional Style)
Open crocks are the classic straight-sided stoneware containers. You pack your vegetables, place a plate or follower on top, add weights, and cover with a
clean cloth. Because the top is open, you’ll typically check it periodically and remove any harmless surface film (like yeast scum) that appears.
2) Water-Seal Crocks (Moat-and-Lid Style)
Water-seal crocks have a groove around the top that you fill with water. The lid sits in this “moat,” creating a simple airlock: gases can escape, but
outside air has a harder time getting in. It’s a low-tech trick that makes fermentation feel almost too easylike cheating, but the wholesome kind.
3) Materials That Make Sense
- Stoneware/ceramic (food-safe): Great temperature stability and light protection.
- Glass: Easy to monitor, but you’ll want to keep it away from direct light and handle carefully.
- Food-grade plastic: Practical for large batches, but it can scratch and hold odors over time.
Capacity tip that saves heartbreak: a 1-gallon container is typically suited for about 5 pounds of vegetables (like cabbage), while a
5-gallon crock can handle roughly 25 pounds. That’s the difference between “cute weekend project” and “my kitchen is now a fermentation lab.”
Food Safety Rules That Matter (No Drama, Just Results)
Crock preserving is straightforward, but it’s not freestyle jazz. The safety basics are non-negotiable:
Use the Right Container
- Avoid containers made of reactive metals (like copper, iron, brass, galvanized metal) because salt and acid can cause reactions and off-flavors.
- Don’t use crocks that are cracked, chipped, or questionablethose imperfections can harbor spoilage microbes and make cleaning harder.
- Be cautious with old or unknown crocks. Some vintage pottery may have glazes that can leach lead. If you can’t verify food safety, don’t use it for fermentation.
Keep Vegetables Submerged
The #1 practical rule: everything stays under the brine. Exposed bits are where mold likes to audition. Use a follower (plate/insert) plus weights to keep the
produce 1–2 inches under brine.
Don’t “Improve” Salt Levels in Fermented Recipes
In quick pickles made with vinegar, salt can often be reduced safely (quality may change). But in fermented products like traditional sauerkraut and brined
pickles, salt proportions are part of what keeps the process predictable and safe. Translation: this is not the moment for “I’ll just eyeball it.”
Watch Temperature Like It’s a Pet
Many classic vegetable ferments do best around 70–75°F. In that range, sauerkraut commonly ferments in about 3–4 weeks. Cooler temps slow things
down; hotter temps can soften the final texture. If your home runs warm, choose a cooler corner, pantry, or basement area.
Know What’s Normal vs. What’s Not
- Normal: bubbling, cloudy brine, sour smell, harmless surface yeast film that can be removed.
- Not normal: rotten odor, slimy texture, pink/orange fuzziness, or vegetables turning mushy early. When in doubt, throw it outvegetables are cheaper than regret.
How to Use a Preserving Crock: Step-by-Step
- Clean the crock and tools with hot, soapy water; rinse well; air dry.
- Prep produce: remove damaged spots, rinse, and cut/shred as your recipe directs.
- Add salt (or salt brine) in the correct proportion for your tested recipe.
- Pack firmly to push out air pockets and encourage brine formation.
- Submerge using a follower and weights.
- Cover (cloth for open crock) or seal (water-seal crock: fill the moat).
- Ferment at the right temperature; check periodically; remove any surface film promptly.
- Taste and stop when it’s pleasantly sour and crunchy. Move to cold storage (refrigerator) or process using a tested canning method if you want shelf stability.
Example #1: Classic Crock Sauerkraut (Tested-Style Method)
Sauerkraut is the gateway crock. It’s forgiving, reliable, and makes you feel like you should own a wooden spoon the size of a canoe paddle.
Ingredients
- Fresh cabbage (firm heads)
- Pickling/canning salt
A practical, proven ratio
Work in 5-pound batches of cabbage and mix in 3 tablespoons of pickling/canning salt per 5 pounds. Pack firmly until brine covers the cabbage.
Method
- Remove outer leaves; rinse; quarter; remove core; shred.
- In a large bowl, toss ~5 pounds shredded cabbage with 3 tablespoons salt.
- Pack into the crock firmly until liquid rises above the cabbage.
- Repeat until full, leaving several inches of headspace.
- If brine doesn’t cover the cabbage, top off with a brine made from 1½ tablespoons salt per quart of water (boiled and cooled).
- Add follower + weights; cover.
- Ferment at 70–75°F for roughly 3–4 weeks (cooler temps can take longer).
When it tastes pleasantly sour and the bubbling calms down, transfer to jars and refrigerate. If you want it shelf-stable, use a tested canning process for
sauerkraut (expect a softer texture compared to refrigerated kraut).
Example #2: Traditional Fermented Dill Pickles in a Crock
Fermented pickles are the crisp, salty, tangy cousins of vinegar quick pickles. They take longerbut the flavor is deeper, and the brine tastes like summer
learned how to sing.
Per 1-gallon container (a classic small-batch format)
- About 4 pounds small pickling cucumbers (~4 inches)
- Dill (seed or heads)
- 1/2 cup salt
- 1/4 cup 5% vinegar
- 8 cups water
- Optional: garlic, dried red peppers, mixed pickling spice
Method
- Wash cucumbers; cut a thin slice off the blossom end; leave a bit of stem.
- Layer dill/spices in the crock; add cucumbers; top with more dill/spices.
- Dissolve salt in vinegar + water; pour over cucumbers.
- Submerge with follower + weights.
- Ferment around 70–75°F for about 3–4 weeks. Check several times per week and remove surface scum promptly.
If pickles become soft, slimy, or develop an unpleasant odor, discard them. Once fully fermented, keep them refrigerated or preserve with a tested canning method.
Choosing a Preserving Crock: A Buyer’s Checklist
You don’t need the fanciest crock on earth, but you do need one that’s safe and practical. Look for:
- Food-safe, lead-free materials (especially important if buying vintage or imported pottery).
- Fermentation weights or a follower that fits the opening well.
- Size that matches your habits: 1 gallon for learning; 2+ gallons for garden-season enthusiasm.
- Design you’ll actually use: open crock (hands-on) vs. water-seal (lower maintenance).
- Ease of cleaning and a storage plan (these are not “tuck in a drawer” items).
Cleaning and Caring for Your Crock
Good news: you don’t need a lab-grade sanitation ritual. You do need consistency.
- Wash with hot, soapy water, rinse well, and let it air dry fully.
- Avoid harsh antibacterial cleaners that can leave residues and weird odors.
- Don’t shock the crock with extreme temperature changes (stoneware can crack).
- Store dry with the lid off or loosely placed so moisture doesn’t get trapped.
Common Problems (and the Fix That Usually Works)
“There’s white stuff on topam I doomed?”
Not necessarily. A white or pale film can be yeast growth on the surface. Remove it promptly, make sure everything underneath is submerged, and keep fermenting
if the smell and texture are normal.
“My brine level dropped.”
Vegetables can absorb liquid or release it unevenly. If your recipe allows, top off with the correct salt brine so the vegetables stay submerged. Also make sure
weights are heavy enough.
“My pickles are soft.”
Softness can come from overly warm fermentation temperatures, cucumbers that weren’t very fresh, or insufficient salinity. Use fresh cucumbers, follow tested salt
proportions, and keep the crock in an appropriate temperature range.
“It tastes too salty.”
Fermented foods are saltyby design. When serving, you can rinse lightly or pair with unsalted foods (potatoes, eggs, rice bowls). For future batches, don’t reduce salt
in a fermented recipe without switching to a tested method designed for that change.
Why a Preserving Crock Is Worth It
A preserving crock is one of those tools that pays you back in three currencies: flavor, confidence, and a fridge that looks like you run a tiny artisanal deli.
It’s also quietly practicalespecially if you garden, buy produce in bulk, or just want food that lasts longer and tastes better with time.
Start with sauerkraut or fermented dill pickles, master submersion and temperature, and then branch out into carrots, green beans, cauliflower, or spicy blends.
The crock doesn’t care about your creative directionjust keep everything under brine and follow safe proportions.
Conclusion
Preserving crocks turn simple vegetables into something bigger than the sum of their partscrunchy, tangy, complex, and surprisingly addictive. Choose a food-safe
crock, use tested ratios, keep vegetables submerged, and ferment in a sensible temperature range. Do that, and you’ll get consistently great resultsplus the
smug satisfaction of saying, “Oh, that? It’s just my crock fermenting,” like it’s the most normal thing in the world.
of Real-Life Preserving Crock Experience (What You Actually Learn)
The first time most people use a preserving crock, they expect a magical “set it and forget it” situation. Then day two arrives and the crock starts bubbling
like it’s trying to communicate in Morse code. That’s usually the moment you realize fermentation is less like baking (precise, controlled) and more like
gardening (you create conditions, then nature does nature things).
One of the biggest “aha” moments is learning the difference between normal fermentation funk and something’s-off funk. Normal smells
are sour, cabbage-y, pleasantly sharplike a deli that makes good decisions. Off smells are unmistakably gross: rotten, putrid, or slimy. If you’ve ever
opened a container and your face makes the same expression as stepping on a Lego, trust that reaction. Tossing a failed batch feels sad for about five minutes,
but it’s also how you earn your fermentation confidence.
The second lesson is that weights are not optional. People try creative solutionssmall plates, random jars, a rock wrapped in plasticand sometimes
it works. But the more you ferment, the more you appreciate purpose-built weights. When vegetables float up, they drag little bits above the brine line. Those
exposed bits dry out, and that’s where mold likes to set up a tiny studio apartment. The easiest way to prevent problems is boring: use a follower that fits,
use enough weight, and keep everything submerged. Boring is beautiful when it tastes like crunchy pickles.
Temperature is the third “experience-based” teacher. A warm kitchen can speed fermentation, but it can also soften textureespecially with pickles. Many people
end up scouting their home like real estate agents: “This pantry corner is cool, dark, and has good airflowsold.” In summer, a basement shelf becomes the VIP
lounge for crocks. In winter, you learn that too-cold rooms can slow fermentation so much you start wondering if your cabbage has filed for retirement.
Another very real experience: you will become someone who owns extra bowls and trays. Crocs can bubble over. Brine can creep up and spill during
active fermentation. Putting the crock on a rimmed tray is one of those tiny habits that makes you feel extremely competent, like wearing safety goggles to chop onions.
Finally, the best part is how a crock changes your cooking rhythm. You stop thinking of sauerkraut as a once-a-year project and start treating it like a pantry
staple. A scoop goes on sandwiches, grain bowls, scrambled eggs, and roasted sausages. A splash of brine becomes a secret weapon for salad dressings and marinades.
And somewhere along the way you notice your fridge contains jars of things you made with your handsthings that taste aliveand you realize the crock wasn’t just
preserving vegetables. It was preserving a skill.