Table of Contents >> Show >> Hide
- What “Reconditioning” a CRT Tube Actually Means
- Before You Touch Anything: CRT Safety Is Not Optional
- What You Need to Recondition a Vintage CRT Tube
- Signs a CRT Might Need Reconditioning
- How to Recondition a Vintage CRT Tube
- Step 1: Inspect the Tube and Set
- Step 2: Verify the Correct Tube Setup
- Step 3: Run Basic Tests First (No Rejuvenation Yet)
- Step 4: Address Shorts (If Your Tester Supports It)
- Step 5: Try the Least Aggressive Restoration Mode First
- Step 6: Retest After Reconditioning
- Step 7: Reinstall and Evaluate in the Real Chassis
- What Reconditioning Can and Can’t Fix
- When Reconditioning Is Worth It
- A Quick Word on Full CRT Rebuilding
- Disposal and Recycling: Don’t Toss a CRT in the Trash
- Common Mistakes to Avoid
- Final Thoughts
- Workshop Notes: Real-World Experiences Restorers Commonly Report (500+ Words)
- SEO Tags
If you’ve ever powered up an old TV or arcade monitor and watched the picture crawl onto the screen like a sleepy cat, you already know the magic of a CRT. You also know the heartbreak: dim image, washed-out colors, weird color haze, intermittent arcing, or a tube that looks like it’s trying to retire early. That’s where reconditioning comes in.
Reconditioning a vintage CRT tube is part science, part patience, and part “please-don’t-zap-me” respect for high voltage. It can sometimes restore brightness, improve balance, and buy more usable life from a tired tube. But it is not a miracle cure, and it is definitely not the same thing as a full CRT rebuild. In this guide, we’ll break down what reconditioning really means, when it works, when it doesn’t, and how to approach it safely and intelligently.
Whether you’re restoring a classic television, reviving an arcade cabinet, or trying to save a beloved monitor, this guide will help you make better decisionsand avoid turning a rare tube into an expensive glass paperweight.
What “Reconditioning” a CRT Tube Actually Means
Let’s clear up the terminology first, because vintage electronics loves confusing names almost as much as it loves obsolete connectors.
Reconditioning vs. Rejuvenation vs. Rebuilding
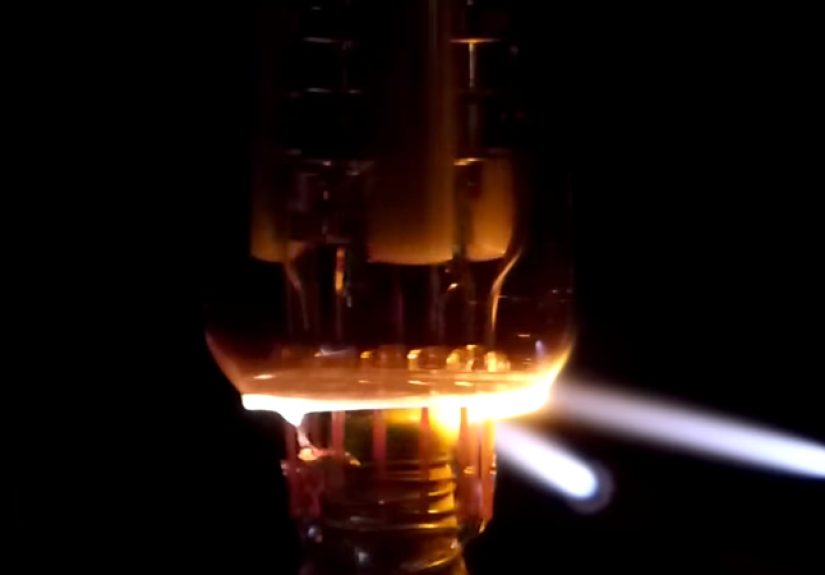
In hobby circles, “reconditioning” usually means using a CRT tester/analyzer (often called a rejuvenator) to diagnose and sometimes improve a weak tube. These tools test things like shorts, emission strength, and life, and many include a “clean and balance” or “rejuvenate” function to restore cathode performance.
That is very different from rebuilding a CRT. Rebuilding is an industrial process that historically involved cutting the tube neck, replacing or rebuilding the electron gun, evacuating the tube, heating it, flashing the getter, activating the cathode, and retesting it. In other words: a factory-grade operation, not a weekend project on a folding table next to your soldering iron.
So if you’re “reconditioning a vintage CRT,” what you’re usually doing is:
- Testing the tube’s condition
- Checking for shorts and basic function issues
- Evaluating emission and remaining life
- Applying a gentle restoration/rejuvenation process (if appropriate)
- Reinstalling and re-evaluating the image in the actual chassis
Before You Touch Anything: CRT Safety Is Not Optional
Vintage CRT restoration is fun. Emergency room visits are less fun. CRTs and their circuits can store dangerous high voltage, and the tube itself is an evacuated glass vessel that can be physically hazardous if mishandled.
Top Safety Risks
- High voltage: CRT systems operate at thousands of volts. Even when powered off, stored charge can remain in the set and associated components.
- Stored energy in capacitors: Capacitors can retain charge and must be handled properly.
- Implosion risk: CRT glass is under vacuum and can break violently if struck or stressed.
- X-radiation concerns: Historically a design issue in some older sets if operated improperly or out of spec. Modern standards greatly reduced this risk, but proper adjustment still matters.
- Leaded glass disposal: CRT funnel glass contains lead, so disposal/recycling has legal and environmental requirements.
Non-Negotiable Rules
- Do not work on a live chassis unless you are trained and equipped to do so.
- Discharge and verifynever assume a circuit is safe because it’s unplugged.
- Use one hand when probing energized equipment (advanced work only) to reduce shock path risk.
- Wear eye protection when handling or moving CRTs.
- Support the tube properlynever by the neck.
- If you are unsure, stop. There’s no shame in taking the chassis or tube to a specialist.
And yes, that warning tone is intentional. CRT work rewards confidence, but punishes overconfidence.
What You Need to Recondition a Vintage CRT Tube
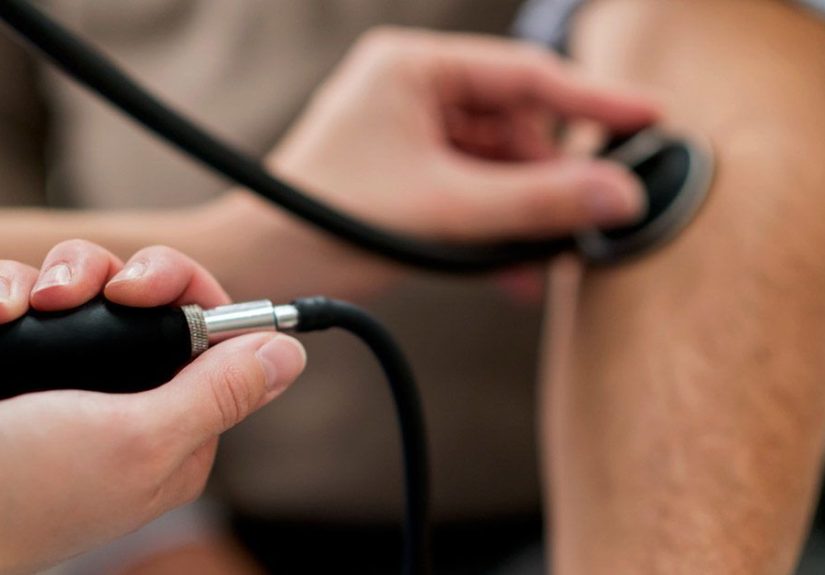
1) A CRT Tester / Analyzer / Rejuvenator
The classic names in this space include B&K, Sencore, and others. A good tester can evaluate tube health and may offer multiple restoration modes, from gentle “clean and balance” functions to more aggressive rejuvenation settings. In many cases, the gentler options are preferred because they carry less risk of damaging a fragile cathode.
Important: the tester is only as useful as your ability to connect it correctly. That means you need the right adapter or a properly built universal adapter. Wrong pinout = bad day.
2) Tube Setup Data (Chart or Service Info)
CRT testers rely on tube setup charts to match heater voltage, socket pinout, and test parameters. If you don’t have the correct setup data, emissions readings may be meaninglessor worse, you can damage the tube by applying the wrong heater voltage.
Think of this step like reading the recipe before preheating the oven. You can skip it, but your results will be educational in all the wrong ways.
3) Basic Restoration Bench Tools
- Multimeter
- Insulated tools
- Good lighting
- Notebook or test log (highly recommended)
- Camera/phone for documenting wire positions and tube labels
- Protective glasses and gloves (for handling, not live probing)
4) A Healthy Chassis (or at Least a Reasonable One)
A dim picture is not always a bad CRT. Weak capacitors, incorrect high-voltage regulation, bias faults, flyback issues, poor neck board components, and cold solder joints can all imitate “bad tube” symptoms. Reconditioning should happen in the context of chassis diagnosisnot as a substitute for it.
Signs a CRT Might Need Reconditioning
Here are common symptoms that may point to a tired or compromised CRT:
- Low brightness even with controls turned up
- Poor black level or crushed shadows
- Weak color in one channel (red/green/blue imbalance)
- Visible haze or intermittent color bloom
- Arcing/popping sounds near the neck
- Image takes a long time to “wake up”
- Tube tests weak on emission or life test
That said, don’t skip the obvious checks: dirty controls, bad caps, wrong screen voltage, failing transistors, or cracked solder joints. A CRT tester is a diagnostic tool, not a Ouija board.
How to Recondition a Vintage CRT Tube
This section gives a practical, safe workflow at a high level. Exact switch positions and steps vary by tester model, so always use the manual for your specific unit.
Step 1: Inspect the Tube and Set
Before testing, inspect the CRT physically:
- Check the neck for cracks or chips
- Inspect the socket pins for corrosion
- Look for obvious arcing marks on the neck board
- Verify the tube label/model number
- Confirm the tube is mechanically secure in the cabinet
If the tube has obvious physical damage, stop. Reconditioning won’t fix structural issues.
Step 2: Verify the Correct Tube Setup
Use the setup chart or service documentation to configure your tester. The most critical setting is the heater/filament voltage. Many CRTs use 6.3V, but not all do. Incorrect heater voltage can skew readings or permanently damage the filament.
Also verify the socket pinout. If you’re using a universal adapter, triple-check connections before powering the tester. “Pretty sure” is not a valid electrical standard.
Step 3: Run Basic Tests First (No Rejuvenation Yet)
Always test before trying to “fix.” A proper diagnostic sequence usually includes:
- Shorts test: Checks for grid/cathode or heater/cathode shorts
- Cutoff / balance checks: Evaluates black-level and gun behavior
- Emission test: Measures how strongly the cathode can emit electrons
- Life test: Often done by reducing heater voltage and observing emission drop
The life test is especially useful because a tube can look “good enough” on basic emission but fall apart under reduced heater voltage. That’s your clue the tube may be living on borrowed time.
Step 4: Address Shorts (If Your Tester Supports It)
Some CRT testers can clear certain shorts (especially grid-related shorts). If your tester indicates a clearable short and the manual provides a safe procedure, you can attempt it. But go slowly and conservatively.
Not all shorts are recoverable. Heater-to-cathode issues, for example, are often more complicated and may require chassis-level isolation strategies rather than a tester “fix.” If you’re not deeply comfortable with the circuit, this is the point where many wise restorers say, “Cool, that’s enough adventure for today.”
Step 5: Try the Least Aggressive Restoration Mode First
This is the big one. Most experienced restorers prefer the gentlest reconditioning option firstoften labeled something like:
- Clean & Balance
- Restore
- Reactivate
- Rejuvenate (light mode)
Why start gently? Because aggressive rejuvenation can improve brightness quickly, but it can also strip more cathode material and shorten remaining tube life. Sometimes you get a nice recovery. Sometimes you get a brief victory lap followed by a rapid decline.
In short: reconditioning is a trade-off. You are trying to restore usable performance, not force a miracle.
Step 6: Retest After Reconditioning
After any restoration cycle, rerun the emission and life tests. Compare the readings with your “before” notes. You’re looking for:
- Improved emission
- Better channel balance (on color tubes)
- Stable results (not wildly fluctuating)
- A life test result that suggests the improvement is meaningful
If the tube barely improvesor improves and immediately drops back downthat usually means the cathode is heavily worn. You may still get some extra life, but expectations should stay realistic.
Step 7: Reinstall and Evaluate in the Real Chassis
Bench numbers matter, but the picture on screen is the final judge. Reinstall the CRT and evaluate:
- Brightness and contrast range
- Black level
- Color tracking and white balance
- Focus stability
- Warm-up behavior
- Any return of arcing or haze
You may need chassis adjustments afterward (screen, bias, drive, focus, etc.), but keep everything within the set’s service specs. Cranking voltages to “make it brighter” can create new problems and may push the set outside safe operating conditions.
What Reconditioning Can and Can’t Fix
What It Can Sometimes Improve
- Weak emission (moderate cases)
- Color imbalance caused by uneven gun wear
- Certain grid-related short issues (tester-dependent)
- Low brightness caused by cathode contamination
What It Usually Won’t Fix
- A broken filament (dead heater)
- Cracked neck or damaged glass envelope
- Severe vacuum loss (“gassy” tube behavior beyond recovery)
- Burned phosphor (screen burn-in)
- Chassis faults pretending to be a tube problem
Also worth noting: if a CRT has severe burn-in, reconditioning the cathode won’t erase it. That ship sailed sometime during the machine’s life as a Pac-Man marathon host.
When Reconditioning Is Worth It
Reconditioning makes the most sense when:
- The tube is original, rare, or difficult to replace
- The set has historical or sentimental value
- The tube is weak but not dead
- You want to preserve functionality while planning a longer-term solution
For common CRTs, replacement may be simpler if you have a known-good donor. For rare vintage tubes, however, careful reconditioning can be the difference between “display piece” and “working machine.”
A Quick Word on Full CRT Rebuilding
If you’ve gone down the rabbit hole and found old factory photos or museum documentation, you’ve probably seen the full CRT rebuilding process. It’s fascinatingand wildly specialized. Historically, shops rebuilt tubes by physically reworking the neck and gun assembly, re-evacuating the tube, flashing the getter, and reactivating the cathode. That work required dedicated equipment, training, and process control.
In the 1950s and 1960s, tube rebuilding was common because CRTs failed more often and replacing them was expensive. Today, only a small number of specialists do anything close to that work. For most restorers, “reconditioning” means tester-based diagnosis and rejuvenation, not full rebuild.
Disposal and Recycling: Don’t Toss a CRT in the Trash
If a tube is beyond recovery, handle disposal responsibly. CRTs contain leaded glass, and in the U.S. they’re regulated differently depending on whether they are being discarded, reused, or recycled under specific conditions.
Practical rules:
- Prefer reuse or repair when possible
- Use a legitimate e-waste recycler for non-repairable tubes
- Do not break the CRT intentionally
- If handling broken CRT glass, follow applicable storage/labeling rules and local/state requirements
In other words, treat a dead CRT like hazardous electronics, not like yesterday’s cereal box.
Common Mistakes to Avoid
- Skipping chassis diagnosis and blaming the tube first
- Using the wrong filament voltage on the tester
- Jumping straight to aggressive rejuvenation
- Ignoring life test results
- Working without documentation
- Handling the CRT by the neck
- Disposing of CRTs improperly
Final Thoughts
Reconditioning a vintage CRT tube is one of those old-school skills that feels equal parts electronics, archaeology, and luck. Done carefully, it can transform a dim, tired display into something surprisingly lively. Done recklessly, it can shorten the life of an already fragile tubeor put you in danger.
The best restorers approach CRT work like detectives: test first, document everything, make small changes, and respect the hardware. Start gentle, retest often, and let the tube tell you what it can still do. Sometimes you’ll get a dramatic comeback. Sometimes you’ll get a modest improvement. And sometimes the tube is simply done.
That’s part of the charm of vintage restoration. You’re not just fixing a screenyou’re negotiating with history.
Workshop Notes: Real-World Experiences Restorers Commonly Report (500+ Words)
One of the most interesting parts of CRT reconditioning is how often the meter and the screen tell slightly different stories. A restorer may run an emissions test and see a tube sitting in the “borderline” range, assume the picture will be terrible, then reinstall it and discover the image is perfectly watchable after basic chassis adjustments. The opposite happens too: a tube can test decent on emissions, but once it’s back in the set, the image blooms, drifts, or loses black level after warm-up. That’s why experienced hobbyists treat the tester as a guide, not a final verdict.
Another common experience is the “small win” that feels huge. For example, a vintage color set might come in with a weak red gun, making every face look like it spent winter in a cave. After a gentle clean-and-balance cycle, the red channel recovers just enough to restore believable color. It’s not showroom-perfect, but the set suddenly looks alive again. That kind of result is often the sweet spot: not a miracle, just a meaningful improvement that preserves the original tube.
Restorers also talk about the emotional side of the process, especially with family heirloom TVs or rare arcade monitors. There’s a strange thrill in watching a tube brighten after reconditioning because you know you’re not just improving a displayyou’re extending the life of a specific, original component that has survived decades. In preservation work, originality matters. A reconditioned original tube often feels more satisfying than a donor swap, even if the donor tube would be slightly brighter.
Then there are the humbling moments. Many people new to CRT work assume every dim set has a worn tube, only to discover the real culprit is a weak capacitor, a bad resistor on the neck board, or a drifted voltage in the video section. Veterans often mention how many “bad CRTs” magically improve after a proper chassis rebuild. That experience teaches an important lesson: reconditioning works best when it’s part of a full restoration workflow, not a shortcut around one.
A lot of restorers also describe learning restraint the hard way. The first time a tube responds well to an aggressive rejuvenation mode, it’s tempting to think, “Greatlet’s do that again and make it even better.” Sometimes that second pass is where things go wrong. Emission may jump, then collapse. A gun that was weak becomes unstable. The screen looks brighter for a day, then starts fading quickly. Over time, many hobbyists become more conservative and prefer the least aggressive method that produces a stable, usable result.
There’s also a practical bench habit that comes up again and again: keeping notes. The restorers who get the best long-term outcomes tend to log everythingtube type, tester settings, pre-test results, post-test results, visual symptoms, and follow-up performance after a few hours of use. Those notes become incredibly valuable, especially if you work on multiple sets. They help you spot patterns, avoid repeating mistakes, and build confidence with different tester models.
Finally, almost everyone who sticks with CRT restoration develops a deep respect for the physical object itself. These tubes are heavy, fragile, and electrically demanding, but they’re also beautifully engineered. The neck assembly, the phosphor screen, the vacuum envelope, the way an image is painted line by lineit all feels mechanical and magical at the same time. Reconditioning a CRT doesn’t just revive a display. It reconnects you with a style of technology that was built to be understood, serviced, and, with enough patience, brought back to life.