Table of Contents >> Show >> Hide
- Why Cleaning Mortar Off Brick Takes Some Strategy
- Before You Start: A Quick Reality Check
- Way 1: Clean Off Fresh or Light Mortar With Water, a Brush, and Gentle Scraping
- Way 2: Remove Dried Mortar With Hand Tools and Controlled Taps
- Way 3: Use a Brick-Safe Mortar Dissolver or Masonry Cleaner for Stubborn Smears
- Which Method Should You Choose?
- Common Mistakes That Can Ruin the Brick
- When to Call a Mason Instead of Fighting With the Wall
- Final Thoughts
- Hands-On Experiences: What This Job Feels Like in Real Life
- SEO Tags
Mortar has a funny way of acting innocent when it’s wet and turning into a stubborn little landlord once it dries. One minute, your brick project looks charming and handcrafted. The next, you’re staring at gray smears, crusty blobs, and a wall that seems to be mocking your confidence. The good news is that cleaning mortar off bricks is absolutely doable. The less cheerful news is that there isn’t one universal magic trick.
The right approach depends on whether the mortar is fresh or fully cured, whether the brick is smooth or heavily textured, and whether you’re dealing with a fireplace, garden wall, patio edging, or an older historic surface that deserves a gentler touch. In most cases, the smartest plan is simple: start mild, get more aggressive only when needed, and protect the brick while you remove the mess.
In this guide, we’ll walk through three practical ways to clean mortar off bricks, when each method makes sense, what tools to use, what mistakes to avoid, and how to keep your brick looking crisp instead of accidentally “distressed.” Because there’s a difference between rustic charm and “oops, I scratched the whole wall.”
Why Cleaning Mortar Off Brick Takes Some Strategy
Brick is durable, but it isn’t indestructible. Mortar is alkaline, brick is porous, and some brick faces are much softer or more textured than others. That means the method that works beautifully on one surface can leave another scratched, etched, faded, or streaky. If you’ve ever wondered why one person swears by a scrub brush while another reaches for a masonry cleaner, that’s why.
Fresh mortar is usually the easiest to remove because it hasn’t fully bonded or hardened. Dried mortar blobs can often be chipped away with hand tools if you work slowly. Thin smears and haze are trickier, because they cling to the face of the brick and settle into pores and texture. On especially rough brick, the residue can hang on like it pays rent.
That’s also why a “stronger” method isn’t automatically better. In brick cleaning, brute force is often how people trade a mortar problem for a brick problem.
Before You Start: A Quick Reality Check
Before picking a method, ask these questions:
- Is the mortar still fresh, partly cured, or rock hard?
- Are the bricks smooth-faced, textured, glazed, painted, sealed, or older and fragile?
- Are you removing thick chunks, light smears, or a chalky haze?
- Is this an interior wall, exterior brick, fireplace, walkway, or decorative veneer?
You’ll also want basic safety gear: gloves, eye protection, old clothes, and patience. Yes, patience counts. Mortar removal is one of those jobs where rushing creates a dramatic before-and-after, but not the good kind.
Helpful tools to keep nearby
- Bucket of clean water
- Spray bottle or hose with gentle spray
- Stiff nylon or natural-bristle brush
- Masonry sponge or clean rag
- Plastic putty knife or wood scraper
- Masonry chisel and hammer
- Brick-safe mortar dissolver or masonry cleaner
- Plastic sheeting to protect nearby surfaces
Way 1: Clean Off Fresh or Light Mortar With Water, a Brush, and Gentle Scraping
Best for
Fresh mortar smears, thin residue, or small accidental smudges that haven’t had time to become permanent roommates.
Why it works
This method relies on the oldest home-improvement wisdom in the book: if you catch mortar early, you can usually remove a lot of it before it fully cures. Water softens the mess, a bristle brush loosens it, and a plastic or wooden scraper helps lift thicker bits without grinding metal into the brick face.
How to do it
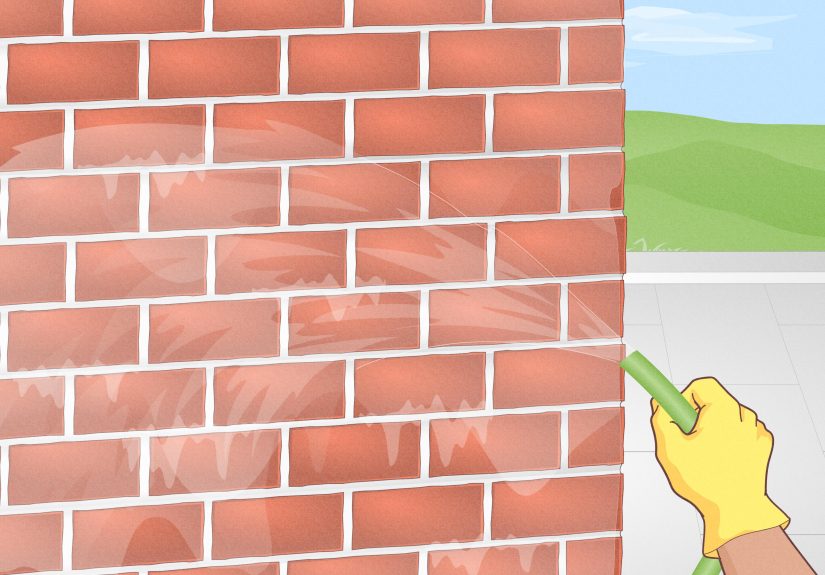
- Wet the brick first. Don’t scrub a dry brick face. Dampen it with clean water so the surface doesn’t immediately absorb what you’re using to clean it.
- Brush off loose material. Use a nylon or natural-bristle brush and work gently. Focus on the mortar on top of the brick face, not the joints you want to keep.
- Lift thicker smears carefully. Use a plastic putty knife, wood scraper, or similar non-metal scraper to nudge off raised mortar spots.
- Wipe and rinse. Use a sponge or rag with warm water to remove loosened material.
- Repeat if needed. A second or third light pass is safer than one heroic attack.
Pro tip
Work from the top of a small section downward if you’re indoors and from the bottom up when managing runoff outdoors. Either way, keep the surface evenly damp so you don’t create streaks that make the wall look like it cried during the project.
What to avoid
- Wire brushes on delicate brick faces
- Harsh scraping on corners and edges
- Letting rinse water dry with loosened mortar still on the surface
- Assuming fresh mortar equals no risk; even soft smears can smear farther if you overwork them
This first method is the best place to start because it’s low-risk and often surprisingly effective. If the residue comes off here, congratulations: you get to skip the dramatic tools and chemistry set.
Way 2: Remove Dried Mortar With Hand Tools and Controlled Taps
Best for
Dried blobs, ridges, and thick mortar spots that sit on top of the brick rather than soaking in as haze.
Why it works
Once mortar hardens, brushing alone often won’t cut it. The goal here is not to hack away like you’re mining for treasure. It’s to break the bond between the dried mortar and the brick face with light, controlled force.
How to do it
- Inspect the blob. Look for a raised edge where the mortar stands proud of the brick face.
- Hold the chisel low. Keep a masonry chisel nearly parallel to the brick rather than pointing it straight into the surface.
- Tap lightly. Use short, careful taps with a hammer. Let the tool do the work. If you start swinging like you’re in an action movie, the brick usually loses.
- Chip in layers. Remove the bulk first, then stop and reassess.
- Follow with brushing. Once the heavy spots are gone, scrub with water and a stiff bristle brush to remove loose residue.
When this method shines
This is especially useful on exterior walls, patio projects, salvaged brick, or DIY brick repairs where you ended up with random mortar boogers on the face of otherwise good-looking brick. It’s also a strong middle-ground option when the residue is too hard for plain scrubbing but not widespread enough to justify a chemical cleaner.
Common mistakes
- Driving the chisel into the brick instead of under the mortar
- Using aggressive power tools on decorative or older brick
- Trying to remove everything in one pass
- Ignoring dust and eye protection
If the brick starts chipping, flaking, or scratching, stop immediately. That’s your wall politely telling you that the method is too aggressive. Some people hear that message. Others create a bigger weekend project.
Way 3: Use a Brick-Safe Mortar Dissolver or Masonry Cleaner for Stubborn Smears
Best for
Thin mortar film, stubborn smear marks, light haze, or residue left behind after scraping and brushing.
Why it works
At some point, mechanical removal reaches its limit. That’s when a specialty mortar remover for brick or masonry cleaner can help dissolve or loosen remaining residue. This is the most powerful method of the three, but it also demands the most caution.
Here’s the important nuance: not every cleaner belongs on every brick. Straight muriatic acid has long been used in masonry cleaning, but many brick and masonry professionals now recommend extra caution or prefer proprietary, brick-safe products instead, especially on new, colored, textured, or delicate brick. Translation: just because something is strong doesn’t mean it’s smart.
How to do it safely
- Read the label first. Confirm the cleaner is compatible with your brick and mortar type.
- Protect nearby surfaces. Cover metal, wood, plants, glass, and trim.
- Pre-wet the brick thoroughly. This is crucial. Saturating the brick helps keep the cleaner on the surface instead of letting it soak into the pores.
- Test a hidden spot. Use the least aggressive strength or dilution recommended by the manufacturer.
- Apply to a small section. Don’t coat the entire wall and then go searching for your brush like it’s a treasure hunt.
- Scrub gently. Use a masonry brush, not a panic attack.
- Rinse completely. Residue left behind can stain, etch, or keep reacting.
What this method is not for
- Historic brick without expert advice
- Painted or sealed brick unless the product specifically allows it
- Large-scale cleaning without a test patch
- DIY experimentation with random acids and ratios from the internet’s darker corners
If you’re tempted to skip straight to the strongest cleaner, remember this: many brick cleaning disasters happen because the surface wasn’t pre-wet, the product was too strong, the brick type wasn’t compatible, or the cleaner wasn’t rinsed fully. The label is not decoration.
Which Method Should You Choose?
| Situation | Best Method | Why |
|---|---|---|
| Fresh smears and light mess | Water + brush + plastic scraper | Safest starting point and often enough for recent mortar |
| Dried chunks sitting on the surface | Hand tools + gentle brushing | Removes bulk material without soaking the whole wall in cleaner |
| Thin film, haze, or stubborn residue | Brick-safe dissolver or masonry cleaner | Helps break down what mechanical cleaning leaves behind |
Common Mistakes That Can Ruin the Brick
Using too much force too early
If the first tool you reach for sounds like it belongs on a demolition crew, take a breath. Brick cleaning rewards patience far more than bravado.
Cleaning dry brick with chemicals
Dry brick absorbs fast. When cleaner sinks into the pores, discoloration and surface damage become much more likely.
Ignoring brick texture and age
Smooth brick is usually easier to clean than rough or heavily textured brick. Older brick can be softer and more fragile than modern brick, so it often needs a gentler approach.
Using high pressure on weak mortar
A little rinse pressure may be fine on sound masonry and compatible cleaning systems, but blasting old joints or weathered brick can strip out mortar and create a repair job you definitely did not invite to the party.
When to Call a Mason Instead of Fighting With the Wall
Sometimes the smartest DIY move is knowing when to stop. Call a pro if:
- The brick is historic, handmade, soft, or already spalling
- The mortar smears cover a large exterior wall
- You’re seeing staining, etching, or color changes after testing
- The problem involves structural joints, loose brick, or crumbling mortar
- You suspect the wall needs repointing, not just cleaning
There’s no shame in handing tricky masonry work to a professional. Sometimes that’s not “giving up.” It’s just refusing to turn a cleaning job into a four-figure apology.
Final Thoughts
If you want the short version, here it is: the best way to clean mortar off bricks is to match the method to the mess. Start with water, brushing, and gentle scraping for fresh or light residue. Move to careful hand-tool removal for dried blobs. Bring in a brick-safe mortar dissolver or masonry cleaner only when smears and haze refuse to leave politely.
The goal is not just to remove mortar. It’s to remove mortar without damaging the brick. That’s the whole game. Go slow, test first, protect the surface, and don’t let impatience hold the hammer.
Hands-On Experiences: What This Job Feels Like in Real Life
Anyone who has cleaned mortar off bricks more than once learns the same lesson: the wall always looks easier from six feet away. Up close, every blob has personality. Some pop right off with a scraper and a little confidence. Others cling to the brick face like they signed a lease and changed the locks.
One of the most common experiences happens on a small DIY garden wall or backyard edging project. You finish laying the brick, step back proudly, and only later notice the dried mortar smears catching the afternoon light. At that point, many people make the same mistake: they grab the harshest tool they own and start scraping like they’re removing old paint from a pirate ship. That usually ends with scratched brick, busted corners, and a sudden appreciation for the phrase “gentle pressure.” The better experience is slower. Wet the brick, soften what you can, remove raised spots first, and keep reminding yourself that the brick is the finish surface, not a practice board.
Fireplaces create a different kind of challenge. Indoor brick shows everything. A little haze that might disappear visually outdoors can stand out like a neon sign inside, especially on red brick near white trim. A lot of homeowners find that a mild cleaning pass helps more than they expected. What looks like a giant stain sometimes turns out to be a thin film that just needed moisture, a bristle brush, and a couple of patient rounds. Other times, the fireplace teaches a humbling lesson: old brick does not enjoy being bullied. That’s when spot testing stops being a boring recommendation and starts feeling like excellent life advice.
Then there’s the classic “salvaged brick” experience. Reused brick can be gorgeous, but it often comes with old mortar still attached. Cleaning it can feel oddly satisfying, like restoring something with character. It can also feel like a part-time job you accidentally assigned yourself. The best results usually come from treating each brick as its own tiny project: chip off the heavy stuff, brush away debris, then decide whether the remaining film is worth chasing. Not every mark needs to disappear completely. Sometimes a little wear adds charm. Sometimes it just looks dirty. Knowing the difference is part of the craft.
What most people remember afterward is not the exact cleaner or brush they used. It’s the moment they realized that brick rewards restraint. Slow work looks better. Small test patches save headaches. A mild method used twice often beats an aggressive method used once. And by the end of the project, you stop seeing “just a wall” and start seeing texture, color, finish, absorption, edges, and all the tiny details that separate a clean masonry surface from one that looks roughed up.
In other words, cleaning mortar off bricks is part repair job, part patience test, and part personality quiz. If you finish with clean brick and your dignity mostly intact, you’ve done very well.