Table of Contents >> Show >> Hide
- Why Kids Love This Clothes Pin Sun Craft
- Materials You Need
- How to Make a Clothes Pin Sun Craft
- What Kids Learn From This Easy Sun Craft
- Safety Tips for Parents and Teachers
- Best Age Groups for This Craft
- Fun Variations to Try
- Tips to Make the Craft Time Smoother
- Why This Craft Works So Well for Families
- Experiences With Clothes Pin Sun Craft: Real Moments, Big Smiles, and Tiny Hands at Work
- Conclusion
Note: This web-ready article is written in standard American English, cleaned for publication, and free of stray citation artifacts or placeholder markup.
Some crafts are beautiful. Some crafts are easy. And some crafts are so delightfully simple that they make adults wonder why they ever bought an expensive activity kit in the first place. The clothes pin sun craft belongs in that last category. It is bright, cheerful, inexpensive, and wonderfully kid-friendly. Better yet, it turns ordinary supplies like paper, markers, glue, and clothespins into a sunny little masterpiece that feels equal parts art project and mini celebration of summer.
If you are looking for a kids’ craft that is low-stress, high-fun, and not secretly designed to destroy your dining table, this one checks a lot of boxes. A clothes pin sun craft can work at home, in preschool, in kindergarten, at camp, during a weather unit, or on one of those long afternoons when children have energy to burn and opinions about everything. It is also flexible. You can make it with a cardstock circle, a paper plate, painted mini clothespins, or full-size clothespins for little hands that are still mastering the art of pinch-and-clip.
The best part is that this simple sun craft is more than just cute. It can help kids practice fine motor skills, hand-eye coordination, creativity, and early problem-solving. In other words, while children are busy making a smiling sun with wild rays sticking out in every direction, they are also learning. Sneaky? Maybe. Effective? Absolutely.
Why Kids Love This Clothes Pin Sun Craft
There is something deeply satisfying about clipping clothespins around a circle. It feels mechanical, artistic, and just a little dramatic, like the sun is getting dressed for a school play. Kids enjoy the bright colors, the friendly face, and the hands-on action of opening and attaching each clothespin ray. That pinching motion may seem tiny to grown-ups, but for children it is meaningful practice.
This project also works because it leaves room for imagination. One child may create a classic yellow smiling sun. Another may produce a rainbow sun with purple rays and giant googly eyes. A third may insist the sun needs sunglasses because “it is too sunny for the sun.” Honestly, that is hard to argue with.
Unlike rigid, product-focused crafts that make every child’s art look exactly the same, this one can be adapted to encourage open-ended creativity. That makes it a strong choice for parents and teachers who want children to explore materials rather than just copy a sample.
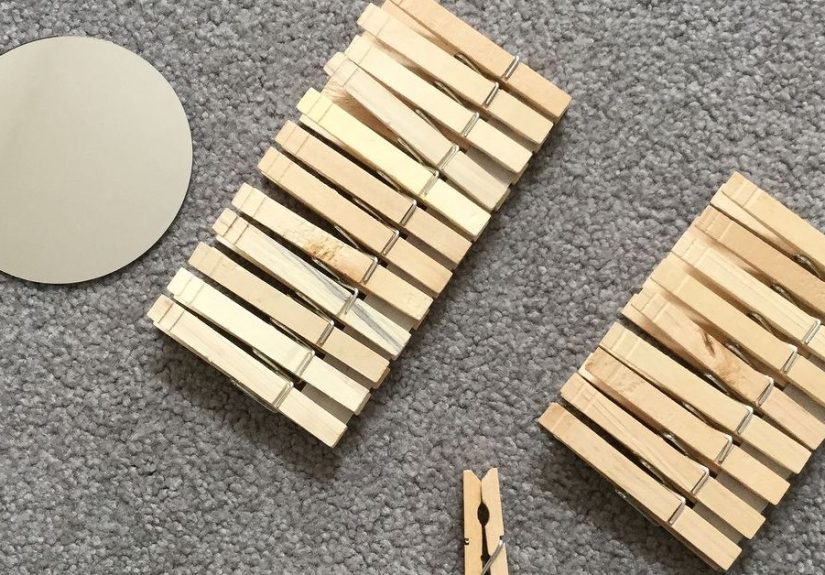
Materials You Need
The beauty of a clothes pin sun craft is that the supply list is short and forgiving. You probably have half of it already hiding in a drawer that also contains three mystery batteries and a broken birthday candle.
Basic Supplies
- Yellow cardstock, construction paper, or a small paper plate
- Clothespins or mini clothespins
- Yellow paint or washable yellow markers
- Googly eyes, eye stickers, or a black marker
- Black marker or colored pencils for the face
- Glue, if you want to add extra decorations
- Scissors, if you are cutting the sun base from paper
Optional Extras
- Orange or gold paint for two-tone rays
- Glitter glue for sparkle
- Tissue paper for collage details
- Ribbon or string for hanging
- Stickers, sequins, or pom-poms
If you do not have yellow paper plates, white ones work just fine. Kids can color or paint them. If mini clothespins feel too small for your group, regular clothespins are often easier for preschoolers to grip and safer for younger children under close supervision.
How to Make a Clothes Pin Sun Craft
Here comes the easy part. This is one of those crafts where the setup is simple, the instructions are clear, and the final result looks much fancier than the effort required. Parents everywhere love that kind of math.
Step 1: Prepare the Sun Base
Start by making the center of the sun. You can trace a circle on yellow cardstock, cut one from construction paper, or use a small paper plate. If you want a sturdier base, cardstock is a great option. If you want the fastest route to the finish line, the paper plate wins.
Invite kids to decorate the center. They can add eyes, draw a smile, make rosy cheeks, or give the sun some unexpected personality. A wink works. Freckles work. Giant cartoon teeth are a bold choice, but this is a judgment-free craft zone.
Step 2: Color the Clothespins
Paint or color the clothespins yellow, orange, or a mix of warm sun-inspired shades. Washable markers are convenient and less messy. Paint gives richer coverage, but it also means you will be waiting for things to dry while a child asks, every ninety seconds, whether it is dry yet.
Lay the clothespins on a protected surface like newspaper, a paper towel, or a craft mat. Let children color them individually. This part of the activity is excellent for ownership because every clothespin becomes one more little decision they made themselves.
Step 3: Attach the Rays
Once the sun center and clothespins are ready, clip the clothespins around the edge of the paper circle or plate. Just like that, the craft suddenly looks like a sun. It is one of those satisfying moments in children’s crafting when the project “clicks,” literally and figuratively.
Children can space the rays evenly or place them however they like. If you are using the project to practice counting or patterns, this is a great time to talk about alternating colors, making groups of five, or noticing symmetry.
Step 4: Add Final Details
Now comes the fun bonus round. Add cheeks, a bow, eyelashes, sunglasses, tissue paper accents, or a loop of string on the back for hanging. Some kids will want their sun to look realistic. Others will want it to look like it just came back from vacation in Florida. Both are valid artistic directions.
What Kids Learn From This Easy Sun Craft
This project is not just a cute decoration for the fridge. It also supports several early learning skills in a natural, playful way.
Fine Motor Practice
Opening and closing clothespins strengthens the small muscles in the hands and fingers. That matters because those same muscles help children develop control for later tasks like writing, buttoning, cutting, and using classroom tools.
Hand-Eye Coordination
Children must line up each clothespin with the edge of the paper and attach it with intention. That combination of seeing, aiming, and controlling movement supports hand-eye coordination without feeling like a lesson.
Creativity and Self-Expression
When kids choose colors, faces, and decorations, they are not just making something pretty. They are practicing artistic decision-making. Open-ended craft experiences also encourage imagination and confidence because there is no single “right” version of a sun.
Language and Conversation
This craft naturally invites discussion. Adults can ask simple, open-ended questions like, “What is your sun feeling today?” or “Why did you choose orange rays?” Those conversations help build vocabulary and give children a chance to describe their ideas.
Early STEAM Connections
A sun craft is also a terrific doorway into science. You can talk about weather, warmth, light, shadows, seasons, and how the sun helps plants grow. Pair this project with a simple sun print, shadow observation, or weather chart, and suddenly the craft table becomes a mini STEAM station.
Safety Tips for Parents and Teachers
Even the happiest craft needs a little practical wisdom. Choose washable, non-toxic supplies whenever possible. If you are using paint, make sure the area is ventilated and easy to clean. Younger children should always be supervised, especially if you are using mini clothespins, googly eyes, sequins, or any other small parts.
If your group is very young, swap mini clothespins for larger ones. Full-size clothespins are easier to handle and reduce the risk that small pieces become a choking concern. Child-safe scissors and simple white glue or washable school glue are your friends here. This is a sunshine craft, not an obstacle course.
Best Age Groups for This Craft
The clothes pin sun craft works well for preschoolers, kindergartners, and early elementary children, though you can adjust it easily by age.
For Toddlers
Use bigger clothespins, pre-cut circles, and minimal accessories. Focus on clipping, coloring, and talking about the sun.
For Preschoolers
Let them help color the clothespins, choose the face, and attach rays. This age group often loves the repetition of adding each clothespin one by one.
For Elementary Kids
Add patterns, counting games, weather vocabulary, or science tie-ins. Older children can also turn the craft into a movable puppet, wall decoration, or part of a larger seasonal display.
Fun Variations to Try
Once you make one clothes pin sun craft, it is very easy to fall down the rabbit hole of “What else can we clip onto paper circles?” Here are a few smart variations:
Paper Plate Sun
Use a yellow paper plate for a stronger base. This version is especially handy in classrooms and group settings.
Rainbow Sun
Color each clothespin a different shade. It still counts as a sun, even if it looks like it has excellent taste in color palettes.
Sun and Weather Set
Make matching weather crafts like a cloud, rainbow, raindrop, or snowflake. This is perfect for a weather theme unit.
Sun Mosaic Center
Decorate the center of the sun with torn tissue paper pieces. This adds texture and gives children extra gluing practice.
Learning Game Version
Write letters, numbers, or sight words on the clothespins. Then have children clip them on in the correct order. Suddenly your adorable sun has a second job in education.
Tips to Make the Craft Time Smoother
Prep matters. Sort supplies before calling the kids over. Put clothespins in cups, pre-trace circles if needed, and keep wipes nearby for marker-covered fingers. If using paint, consider coloring the clothespins earlier in the day so children can assemble the craft after drying time.
It also helps to model just enough without taking over. Show children how to clip a clothespin if they need help, but do not aim for perfection. A slightly lopsided sun made by a child is more meaningful than a flawless sun quietly fixed by an adult with control issues.
Praise effort, creativity, and problem-solving rather than focusing only on appearance. Comments like “You worked really hard on those rays” or “I noticed you made a pattern with your colors” support confidence better than turning every craft review into an art competition.
Why This Craft Works So Well for Families
Parents often want crafts that are affordable, doable, and not wildly complicated. This one succeeds because it uses common supplies, offers flexible directions, and creates a finished project kids are genuinely proud of. It also gives adults a chance to spend quality time with children without needing glitter cannons, advanced engineering degrees, or a dedicated craft room.
For busy families, that matters. A meaningful project does not have to be elaborate. Sometimes all it takes is paper, clothespins, a smiley face, and twenty calm minutes at the kitchen table. That combination can create both a cute decoration and a happy memory.
Experiences With Clothes Pin Sun Craft: Real Moments, Big Smiles, and Tiny Hands at Work
One reason the clothes pin sun craft keeps showing up in homes, classrooms, and camp tables is that the experience around it feels just as valuable as the finished project. You can see it the moment the supplies hit the table. Children notice the bright yellow paper first, then the clothespins, and then the questions begin. “Are these the sun’s arms?” “Can mine have rainbow rays?” “What if my sun looks sleepy?” That curiosity is part of the magic.
In a home setting, the craft often starts as a simple way to fill an afternoon and somehow turns into a whole event. A parent sets out paper plates and washable markers, expecting maybe fifteen quiet minutes. Instead, the child becomes deeply invested in whether the sun should have eyelashes, blush, or both. A sibling joins in. Someone decides the sun needs a tiny smile. Someone else insists it needs giant sunglasses because “the sun sees too much.” Before long, the kitchen table looks like a cheerful weather station.
In classrooms, the experience is a little different but equally charming. Teachers often like this craft because it is easy to organize and simple to adapt. Some children jump right into clipping rays around the circle, while others take their time studying how the clothespin works. That small squeezing motion can be challenging at first, but it also creates one of those satisfying little breakthroughs. The moment a child finally gets the clothespin open and clipped onto the edge, their whole face can light up like they personally invented the sunrise.
There is also something wonderfully social about this craft. Kids compare colors, trade ideas, and notice each other’s designs. One child makes a traditional yellow sun. Another creates a wild orange-and-pink version with zigzag eyebrows. A third wants every ray to be a different color because “this sun is in a party mood.” None of those choices are wrong, and that freedom helps children relax into the process.
Adults usually appreciate the rhythm of the activity too. It feels structured without being rigid. There is enough guidance to keep the project moving, but enough freedom for children to make it their own. That balance matters. It means the craft does not turn into a stressful quest for identical results. Instead, it becomes a shared experience built around conversation, experimentation, and little moments of independence.
Many families also find that this project is easy to repeat. Once children make one sun, they often want another. They want to improve it, personalize it, or create a whole sky full of weather friends. A sun becomes a cloud. A cloud becomes a rainbow. Suddenly you are no longer doing one simple afternoon craft. You are running a tiny art studio with surprisingly strong opinions about facial expressions on paper plates.
That repeatability is part of what makes the clothes pin sun craft memorable. It is easy enough for beginners, flexible enough for older kids, and joyful enough that children remember the feeling of making it. Not every craft needs to become a keepsake, but this one often does. It ends up taped to the refrigerator, hanging in a window, or displayed on a classroom wall like a tiny victory lap in yellow and orange.
And honestly, that is the real experience people remember. Not whether every clothespin matched. Not whether the circle was perfectly cut. What sticks is the laughter, the concentration, the little hands working hard, and the proud moment when a child holds up a finished sun and says, “Look what I made.”
Conclusion
The clothes pin sun craft is easy, fun, affordable, and packed with possibilities for kids. It gives children a chance to create something bright and playful while practicing motor skills, exploring color, and making their own artistic choices. It can fit into a weather lesson, a summer activity lineup, a preschool art center, or a rainy-day rescue plan at home.
Best of all, it proves that a great kids’ craft does not need fancy materials or complicated steps. Sometimes the simplest projects shine the brightest. A paper circle, a handful of clothespins, and a child with imagination are more than enough to make something sunny.