Table of Contents >> Show >> Hide
Fall decorating has a funny way of escalating. You begin with one innocent pumpkin festival with excellent lighting. Fortunately, making cute DIY fall pumpkin decor does not require an art degree, a workshop full of tools, or the patience of someone assembling furniture without reading the instructions.
This beginner-friendly project transforms real or faux pumpkins into charming autumn decorations using paint, ribbon, twine, felt leaves, and a few simple embellishments. The design is intentionally no-carve, which means less mess, fewer sharp tools, and a pumpkin that can remain attractive well beyond Halloween. Painted, decoupaged, wrapped, and embellished pumpkins are widely recommended as easy alternatives to traditional carving, especially for family craft sessions. a No-Carve Pumpkin?
A carved jack-o’-lantern has personality, but it also starts a countdown the moment the first cut is made. A no-carve pumpkin stays intact, creates less mess, and can move smoothly from Halloween to Thanksgiving. Use a real pumpkin for natural color or a faux craft pumpkin for a lightweight decoration you can store and reuse next year.
Materials You Will Need
- One medium real pumpkin or faux craft pumpkin
- Mild dish soap, water, and a soft cloth
- Acrylic craft paint in cream, muted orange, sage green, brown, or another fall palette
- A foam brush and one small detail brush
- Painter’s tape or removable vinyl shapes
- Jute twine, narrow ribbon, or both
- Felt, cardstock, faux leaves, or small artificial flowers
- Craft glue or a low-temperature hot glue gun for faux pumpkins
- Scissors
- A paint marker for lettering or small details
- Optional clear craft sealer
- Newspaper, kraft paper, or a reusable craft mat
You do not need every item. The basic formula is pumpkin, paint, texture, and one focal detail. Too many embellishments can make the poor pumpkin look as though it lost a fight inside a craft-store clearance bin.
Step 1: Choose the Right Pumpkin
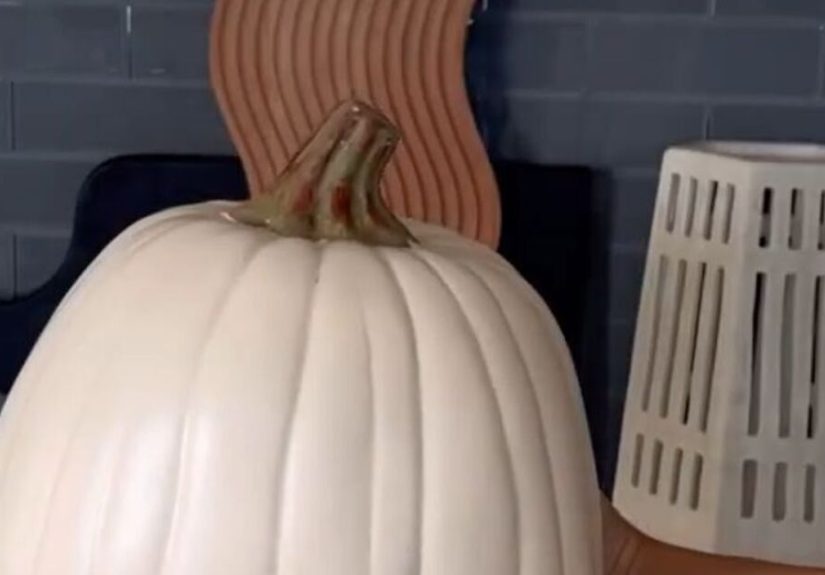
For a real pumpkin, look for firm skin, an intact stem, and no soft spots, cracks, punctures, or damp areas. A flat or stable base makes the pumpkin easier to paint and prevents it from rolling away at the exact moment you are adding a perfect little leaf.
Do not carry a pumpkin by its stem. A broken stem exposes tissue and may shorten its useful display life. University extension guidance similarly recommends choosing firm, unblemished pumpkins and treating the stem as part of the pumpkin rather than as a handle. tabletop display, a pumpkin about 6 to 9 inches wide is easy to handle. Mini pumpkins work well for place settings and tiered trays. White pumpkins create an elegant neutral base, while classic orange pumpkins deliver an instantly cozy harvest look. Utah State University Extension notes that smooth, light-colored varieties such as Lumina are particularly suitable for painting. ean and Dry the Surface
Wipe the pumpkin with a soft cloth dampened with warm water and a tiny amount of mild dish soap. Remove soil, dust, and sticky residue, then wipe it again with clean water. Let the pumpkin dry completely before painting. Moisture and dirt interfere with adhesion, so this unglamorous step has a large effect on the final result.
Do not soak a real pumpkin. Avoid scraping or sanding its skin. The goal is to clean the natural surface without damaging the protective rind. Place the dry pumpkin on kraft paper or a craft mat with the stem pointing up.
Step 3: Pick a Simple Fall Color Palette
Limit the design to two or three main colors so the finished DIY pumpkin decor looks coordinated. Warm white, tan, muted orange, and jute create a farmhouse look. Cream, charcoal, and copper feel modern, while sage, rust, brown, and ivory suit a woodland style.
Acrylic craft paint is practical because it dries quickly, cleans up easily, and comes in many colors. Better Homes & Gardens recommends acrylic paint for pumpkins and suggests starting with a clean, dry surface; primer and a compatible sealer can improve durability. int the Pumpkin
Apply the Base Coat
Use a foam brush to apply a thin coat from the stem toward the bottom, following the pumpkin’s natural ribs. Thin coats dry more evenly than one heavy layer, which tends to drip into the grooves and form tiny paint puddles with big ambitions.
Let the first coat dry completely, then add a second coat if needed. Leave the stem natural for a rustic appearance, or paint it metallic gold for a more polished finish.
Add an Easy Pattern
For color blocking, apply painter’s tape vertically, diagonally, or around the center of the pumpkin. Paint the exposed area and remove the tape after the paint is dry to the touch. A simple cream-and-copper design can look surprisingly stylish without requiring advanced brush skills.
For polka dots, use a foam dauber, pencil eraser, or cotton swab. You can also trace small leaves and paint simple vines, branches, or acorns with a detail brush. Fall foliage designs remain appropriate after Halloween has passed, allowing the same pumpkin to stay on display through Thanksgiving. d Texture With Twine or Ribbon
Once the paint is fully dry, cut a piece of ribbon long enough to run from the stem, down the side, under the pumpkin, and back to the stem. Secure it at the top and bottom with small dots of craft glue. Add another strip in the opposite direction to divide the pumpkin into four decorated sections.
For a rustic version, wrap jute twine around the stem several times and tie a small bow. You can also create a loose twine loop and tuck a felt leaf underneath it. Ribbon bands and wrapped twine add texture without carving and can make a basic painted pumpkin look intentionally designed. perature hot glue only when appropriate for your material and workspace. It is generally better suited to faux pumpkins. For real pumpkins, removable glue dots or tacky craft glue may be easier to control. Adults should handle hot glue equipment when children are participating.
Step 6: Make a Cute Leaf Cluster
Cut two or three leaf shapes from felt or heavyweight cardstock. Vary the sizes slightly so the cluster looks layered. Fold each leaf gently down the center to create dimension, then glue the leaves near the base of the stem.
Add one small faux flower, berry sprig, wooden bead, cinnamon stick, or miniature pine cone. Keep the cluster compact. One well-placed detail usually looks more charming than an entire artificial forest balanced on top of the pumpkin.
Floral craft pumpkins and natural embellishments help soften the hard, round shape and allow the pumpkin to coordinate with wreaths, garlands, centerpieces, and other autumn decorations. d a Word or Tiny Face
Use a paint marker to write a short seasonal word such as “cozy,” “gather,” “hello fall,” or “thankful.” Lightly sketch the lettering with chalk or a washable pencil first. Short words are easier to center on a curved surface.
For a child-friendly version, draw two closed eyes with eyelashes and add rosy cheeks. Felt ears can turn the pumpkin into a fox, cat, owl, or bear. No-carve animal pumpkins are especially effective with mini pumpkins because their proportions already feel cartoonish. In other words, nature has completed half the character design for you. al and Let Everything Cure
If you plan to use a clear craft sealer, confirm that it is compatible with the paint and pumpkin material. Apply it in a well-ventilated area according to the manufacturer’s instructions. A sealer is optional for an indoor real pumpkin but useful for many reusable faux pumpkin projects.
Allow the finished pumpkin to sit undisturbed until the paint and adhesive are completely dry. “Dry to the touch” is not always the same as fully cured. Moving it too soon can leave fingerprints, flattened ribbon, or a mysterious smudge that everyone will politely call “rustic.”
Easy Variations for Different Decorating Styles
Decoupage Leaf Pumpkin
Brush decoupage medium onto a small section, press on a thin paper leaf or decorative napkin piece, and smooth it from the center outward. Add another thin coat over the paper and continue in small sections to reduce wrinkles. Leaf decoupage offers color and detail without cutting into the pumpkin. in Place Cards
Paint mini pumpkins cream or leave them natural. Tie ribbon around each stem and attach a cardstock name tag. Place one at every dinner setting. Guests receive a place card, a tiny decoration, and something to admire while waiting for the mashed potatoes.
Stacked Pumpkin Topiary
Stack three graduated faux pumpkins in a sturdy planter and add faux leaves between the layers. Secure the arrangement so it cannot tip. Pumpkin topiaries add height beside a doorway or fireplace and can be reused each fall. play Your Finished Fall Pumpkin
Indoors, place the pumpkin on a wood slice, cake stand, shallow basket, or folded plaid napkin. Pair it with candles, dried leaves, pine cones, books, or a small vase of mums. Varying the height of nearby objects creates a more interesting arrangement than lining everything up like pumpkins waiting at the Department of Motor Vehicles.
On a covered porch, group pumpkins in odd numbers and mix different sizes. Add a lantern, basket, hay bale, or pot of fall flowers. Keep real pumpkins away from direct heat, standing water, and damaged produce.
Properly selected intact pumpkins can remain usable for months under cool, controlled storage conditions, although their outdoor display life varies considerably with weather, moisture, temperature, and physical damage. Pumpkin Decorating Mistakes
- Painting a damp pumpkin: Moisture causes uneven coverage and poor adhesion.
- Applying one thick coat: Heavy paint collects in the grooves and dries slowly.
- Ignoring soft spots: Paint cannot rescue a pumpkin that is already deteriorating.
- Using too many focal points: Choose lettering, a face, a ribbon pattern, or a floral cluster.
- Lifting by the stem: Support a real pumpkin from the bottom.
- Displaying near heat or flame: Use a cool location and battery-operated lights.
Experience-Based Lessons From a Typical Pumpkin Craft Session
The first experience many people have with painted pumpkin decor is discovering that the pumpkin is round in every direction. A design that looks perfectly centered from the front may wander toward the side as the pumpkin turns. The practical solution is to choose the “front” before painting. Set the pumpkin down, rotate it until the shape looks balanced, and mark the back lightly with removable tape. That one decision prevents repeated turning, squinting, and asking another person, “Does this leaf look crooked, or have I been staring at it too long?”
Another common lesson is that preparation feels slower than decorating but saves more time than it consumes. Cleaning the surface, arranging materials, testing colors on scrap paper, and letting each coat dry can seem overly cautious. Yet rushed projects usually create extra work. Wet paint lifts under tape, glue slides down the ribs, and ribbon picks up fingerprints. A calm sequenceclean, dry, paint, wait, embellishproduces a neater pumpkin with less frustration.
Color also behaves differently on a pumpkin than it does on a flat paint swatch. Deep grooves create shadows, orange skin can warm up pale paint, and a matte cream may need two coats for full coverage. Testing a small patch near the bottom is useful, especially on real pumpkins. When the first coat looks streaky, it is tempting to keep brushing. That often makes matters worse. Letting it dry and applying a second thin coat usually fixes the problem.
Working with children changes the experience in a good way, provided the design is simplified. Give each child a mini pumpkin, child-appropriate craft supplies, a few paint colors, and a limited selection of decorations. Stamps, dots, fingerprints, stickers, and felt shapes are easier than detailed lettering. Adults can manage cutting and hot glue. The finished pumpkins may not match the original mood board, but they will contain far more personalityand possibly a purple dinosaur wearing six googly eyes.
Real and faux pumpkins also create different expectations. A real pumpkin feels seasonal and special precisely because it will not last forever. Small imperfections add character, and the project is best treated as temporary decor. A faux pumpkin rewards slower, more detailed work because it can return every year. It is worth writing the year on the bottom, especially when the pumpkin becomes part of a family tradition.
The final lesson is knowing when to stop. DIY fall pumpkin decor often looks best when the main idea is easy to recognize from several feet away. Once the painted pattern, twine bow, and leaf cluster feel balanced, step back before adding anything else. A project does not become more handmade simply because every square inch has been assigned a craft supply. Sometimes the cutest pumpkin is the one that still looks like a pumpkin.
Conclusion
Making cute DIY fall pumpkin decor is an easy way to bring warmth, color, and personality into your home without creating a carving-table disaster zone. Start with a firm pumpkin, prepare the surface, apply thin coats of acrylic paint, and add one or two simple textures such as ribbon, twine, felt leaves, or faux flowers.
The project can be rustic, modern, playful, elegant, or delightfully strangefall is generous that way. Whether you decorate one mini pumpkin or create an entire faux pumpkin collection, keeping the design simple will make the process more enjoyable and the final display more attractive.
Note: This original tutorial synthesizes practical pumpkin-selection, painting, no-carve decorating, decoupage, ribbon, floral, and display guidance from reputable U.S. home, craft, retail, lifestyle, and university-extension resources. ss=”language-json”>