Table of Contents >> Show >> Hide
- Why a Party Pumpkin Bowl Is Such a Good Idea
- What You Need
- How to Choose the Best Pumpkin
- Step-by-Step: How to Make a Party Pumpkin Bowl
- Best Foods and Fillers for a Pumpkin Bowl
- How to Keep It Safe and Fresh During the Party
- Easy Ways to Make It Look More Expensive Than It Is
- Mistakes to Avoid
- Creative Variations to Try
- Final Thoughts
- Experience Section: What Making a $10 Party Pumpkin Bowl Is Really Like
If fall parties had an unofficial mascot, it would probably be the pumpkin. It sits on porches, stars in lattes, sneaks into desserts, and generally acts like it owns the season. So why not make it work a little harder? A party pumpkin bowl is one of the easiest ways to turn a basic gathering into something festive, photo-friendly, and charmingly low-budget. It looks impressive, costs very little, and makes guests think you are the kind of person who casually invents cute seasonal décor before breakfast.
The good news is that you do not need elite crafting skills, a glue gun arsenal, or a suspiciously expensive trip to the craft store. You just need a pumpkin, a few simple supplies, and about 20 minutes of effort. Whether you are hosting a Halloween party, a Thanksgiving appetizer table, a game-day snack spread, or a cozy fall get-together, this DIY pumpkin bowl brings serious autumn energy without draining your wallet.
In this guide, you will learn exactly how to make a party pumpkin bowl for $10, what to put inside it, how to make it look polished, and how to keep the whole thing practical instead of becoming a soggy seasonal science experiment. Let us carve smarter, not harder.
Why a Party Pumpkin Bowl Is Such a Good Idea
A DIY pumpkin bowl checks all the right boxes. First, it is inexpensive. Second, it doubles as party décor and serveware, which means one item is doing the work of two. Third, it instantly gives your table a fall centerpiece without much styling. Even a plain snack table starts looking intentional when there is a pumpkin involved. That is just basic autumn math.
It is also flexible. You can use a pumpkin bowl for wrapped candy, chips, popcorn, trail mix, pretzels, mini apples, or individually portioned treats. Add a liner and it can also hold ice for canned drinks or cold dips in small containers. In other words, this is not one of those DIY projects that looks cute online and then becomes useless in real life. It is genuinely functional.
Another bonus is that it works for several party styles. Want something playful? Use it as a Halloween candy bowl. Want something more elegant? Pair a white pumpkin with greenery and use it for crackers or mini pears. Want a rustic fall centerpiece? Put the bowl on a wooden board, scatter a few mini gourds around it, and suddenly your table looks like it belongs in a magazine spread titled Farmhouse Chic But Make It Affordable.
What You Need
Here is a simple supply list for a budget-friendly party pumpkin bowl:
- 1 medium pumpkin with a flat base
- 1 small plastic bowl or food-safe liner
- 1 sharp knife
- 1 large spoon or ice cream scoop
- Paper towels or a clean kitchen towel
- Optional: parchment paper, plastic wrap, mini gourds, faux leaves, ribbon, or battery tea lights
Example $10 Budget
- Pumpkin: $4 to $6
- Plastic liner or dollar-store bowl: about $1 to $2
- Paper towels or parchment: about $1
- Optional extras from a discount store or from home: $1 to $2
If you already have a bowl that fits inside the pumpkin, you can get the total even lower. That is the beauty of this project: it rewards resourcefulness. Fancy hosts call it styling. The rest of us call it “using what was already in the kitchen drawer.”
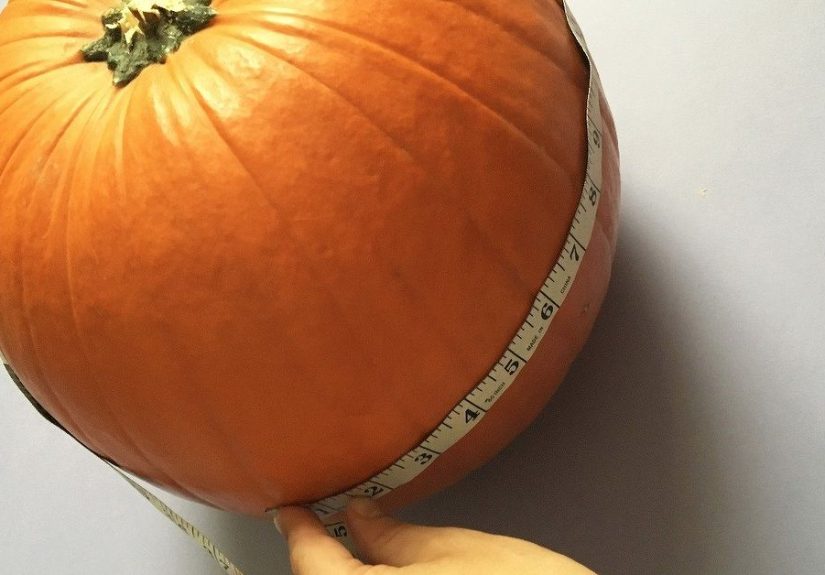
How to Choose the Best Pumpkin
Not every pumpkin is destined for party greatness. The best pumpkin for a party bowl is medium-sized, round, sturdy, and stable on the bottom. A pumpkin that wobbles like it is trying to escape the table is not the one. Look for one with a wide opening area, an attractive stem, and firm skin without soft spots, cracks, or signs of early spoilage.
If you want a classic look, go with an orange carving pumpkin. If you want something a little more refined, white pumpkins look beautiful on neutral tablescapes. If your party leans rustic, slightly imperfect pumpkins with character can actually look better than the perfectly round supermarket superstar.
Try to match the pumpkin to the purpose. A larger pumpkin works well for drinks on ice, bagged snacks, or lots of candy. A smaller one is perfect for nuts, wrapped treats, or a small dip container. If you are making several bowls, mini pumpkins can become individual serving bowls or place-setting decorations.
Step-by-Step: How to Make a Party Pumpkin Bowl
Step 1: Wash and Dry the Pumpkin
Before you cut anything, rinse the pumpkin and dry it well. This is especially important if your pumpkin came from a patch, farm stand, or outdoor display. Dirt on the outside has no business joining the party on the inside.
Step 2: Cut Off the Top
Use a sharp knife to cut a circle around the stem, just like you would for a jack-o’-lantern. Angle the knife slightly inward so the lid has a better chance of sitting neatly if you want to reuse it for decoration. Remove the top and set it aside.
Step 3: Scoop Out the Inside
Use a large spoon or scoop to remove the seeds and stringy pulp. Scrape the inside until it is fairly smooth. It does not need to be perfect. You are making a bowl, not auditioning for a pumpkin surgery show. Still, take a little extra time here, because a cleaner interior looks better and helps the liner sit properly.
Step 4: Add a Food-Safe Liner
This is the move that makes the whole project easier, cleaner, and smarter. Place a small plastic bowl, food-safe container, or neatly fitted parchment-lined insert inside the hollowed pumpkin. The liner helps protect the pumpkin from moisture, keeps food more contained, and makes cleanup much faster.
If you are serving dry snacks like wrapped candy, popcorn in treat bags, or crackers in sleeves, the liner can be very simple. If you are using ice or chilled items, a sturdier bowl insert is the better choice.
Step 5: Dry the Inside
Blot the interior with paper towels. Less moisture means a neater bowl and a longer-lasting display. This is a tiny step that pays off in a big way, especially if your party is more than an hour away.
Step 6: Fill It
Now for the fun part. Fill the liner with your chosen snacks or party items. Great options include:
- Wrapped candy
- Pretzels or popcorn in paper cups
- Mini chip bags
- Apples or clementines
- Crackers in bundles
- Small containers of dip nestled in ice
- Canned drinks on ice
Try not to add foods that are super messy, hot, or likely to leak. A pumpkin bowl is festive, but it should not become a cleanup challenge with a stem.
Step 7: Style the Bowl Like You Know What You Are Doing
Place the finished pumpkin bowl on a tray, wood board, cake stand, or platter to make it feel more intentional. Then add one or two simple accents around it: a few mini gourds, faux leaves, a ribbon around the stem, cinnamon sticks, or battery-powered tea lights. Do not overdo it. The pumpkin is already the star. It does not need backup dancers.
Best Foods and Fillers for a Pumpkin Bowl
The smartest way to use a pumpkin party bowl is to treat it as a beautiful serving vessel for low-mess or well-contained items. Here are some winning ideas:
For Halloween Parties
- Wrapped chocolate bars
- Candy corn or caramel corn in paper liners
- Glow sticks for kids
- Mini juice boxes or drink pouches on ice
For Fall Dinner Parties
- Dinner rolls wrapped in a cloth napkin
- Packets of crackers or breadsticks
- Fresh fruit
- Cheese cubes in cups
For Thanksgiving Appetizers
- Wrapped utensils or napkins
- Mini snack bags
- A chilled dip container with vegetables around it
- Spiced nuts in small cups
If you want the look of a pumpkin punch bowl, keep the punch in a separate food-safe insert and chill it thoroughly before serving. That way, the pumpkin functions as the gorgeous outer shell, not as the risky part of the beverage equation.
How to Keep It Safe and Fresh During the Party
A pumpkin bowl is cute, but food safety is cuter. Because pumpkin is fresh produce, it is best treated as a short-term party piece rather than an all-day buffet champion. Keep the bowl cool before serving, use a liner whenever possible, and choose foods that can be refreshed easily.
If you are using cold foods, set the lined container into ice or keep the filled bowl refrigerated until right before party time. For longer gatherings, restock in smaller batches instead of leaving everything out at once. Dry snacks, wrapped candy, and individually portioned items are usually the easiest choices for a pumpkin serving bowl because they stay neat and require less temperature babysitting.
Also, once the pumpkin starts looking soft, weepy, or tired, retire it with dignity. Every seasonal icon deserves to leave the stage before becoming alarming.
Easy Ways to Make It Look More Expensive Than It Is
You do not need a bigger budget. You need better staging. Here are simple tricks that elevate the look instantly:
- Use height: Put the pumpkin bowl on a cake stand or inverted mixing bowl hidden under a cloth.
- Add texture: Pair it with wood, linen, or woven materials.
- Stick to one color story: Orange and black for Halloween, cream and sage for an elegant fall dinner, or orange and deep burgundy for Thanksgiving.
- Cluster smartly: Three mini pumpkins around the main bowl look intentional; fifteen look like the produce section exploded.
- Use lighting: Battery tea lights nearby make the setup warmer and more inviting.
In short, the secret to stylish seasonal décor is not spending more. It is editing better.
Mistakes to Avoid
Using a Pumpkin That Wobbles
If it rocks on the table, it is not bowl material. Stability matters.
Skipping the Liner
Yes, you can place some dry items directly inside. No, it is usually not the best idea. Liners make everything easier, safer, and cleaner.
Overfilling It
When snacks spill over the edge, the bowl goes from charming to chaotic. Leave a little breathing room.
Making It Too Early
A fresh pumpkin bowl looks best the day you use it. You can prep the pumpkin a bit ahead, but the final fill should be close to party time.
Choosing Messy Foods
Hot soup, saucy dips without inserts, and anything drippy can turn your cute centerpiece into a moist regret. Keep it simple.
Creative Variations to Try
Once you make one party pumpkin bowl, it becomes dangerously easy to start making pumpkin everything. Here are a few variations:
- Mini Pumpkin Place Bowls: Use small pumpkins for individual snacks or wrapped candy at each place setting.
- White Pumpkin Dessert Bowl: Fill with wrapped cookies or meringues for a softer, elegant table look.
- Pumpkin Drink Chiller: Use a larger pumpkin with a deep insert and crushed ice for cans or mini bottles.
- Rustic Centerpiece Bowl: Fill the pumpkin with faux leaves, pinecones, and string lights instead of food.
- Kid-Friendly Snack Bowl: Use it for popcorn bags, fruit snacks, or small non-food party favors.
Final Thoughts
If you want a cheap fall DIY that actually looks special, a party pumpkin bowl is one of the best tricks in the book. It is fast, festive, practical, and flexible enough for everything from spooky Halloween snacks to polished Thanksgiving appetizers. Best of all, it delivers the kind of seasonal charm that makes guests smile before they even grab a snack.
The real magic is that it does not require perfection. Your pumpkin does not need to be flawless. Your styling does not need to look professionally art-directed. You just need a decent pumpkin, a good liner, a few party snacks, and the confidence to let autumn do most of the decorating for you. For around $10, that is a pretty solid return on investment.
So the next time you are staring at a pumpkin and wondering whether it should become porch décor, pie, or something in between, let it become the life of the party. Frankly, it has earned the promotion.
Experience Section: What Making a $10 Party Pumpkin Bowl Is Really Like
The first thing most people notice when making a party pumpkin bowl is how much bigger the pumpkin feels once it is sitting on the kitchen counter staring back at them. In the store, it looked manageable. At home, it suddenly seems like a produce-based commitment. But once you get started, the project is surprisingly easy, and that is part of what makes it so satisfying. You do not need to measure fifteen things or follow a complicated tutorial. You just cut, scoop, wipe, line, and fill.
There is also something weirdly fun about turning a basic grocery-store pumpkin into serveware. It feels slightly ridiculous in the best possible way, like you are winning at fall without trying too hard. The moment the top comes off and the inside is cleaned out, the pumpkin stops looking like a decoration and starts looking like a plan. Add a simple liner, and suddenly it becomes one of those party details that guests assume took much more effort than it actually did.
One of the most helpful lessons people learn from this project is that the pumpkin does not have to do all the work alone. The liner is the hero. Without it, you are depending on a hollow vegetable to behave like a serving bowl, which is optimistic at best. With a liner, the whole project becomes cleaner, sturdier, and less stressful. That means you spend less time worrying about moisture and more time arranging snacks in a way that makes you look suspiciously organized.
Another common experience is realizing that styling matters more than complexity. Even if the pumpkin bowl itself is very simple, putting it on a tray and adding two or three little accents makes it look finished. A couple of mini pumpkins, a cloth napkin, and a few faux leaves can transform the setup from “I hollowed out a pumpkin” to “welcome to my charming autumn gathering.” That is a very satisfying leap for about ten dollars.
Hosts also tend to discover that the pumpkin bowl becomes a conversation piece almost immediately. Guests comment on it. Kids poke at it. Someone always says, “Wait, you made that?” in a tone that suggests you may now be the crafty cousin in the family. Even people who are not usually impressed by décor will usually notice a pumpkin full of snacks sitting proudly in the middle of the table. It has presence. Seasonal, affordable presence.
Perhaps the best part of the experience is that it is forgiving. If the cut edge is a little uneven, it still looks rustic. If the pumpkin is slightly lopsided, it still looks charming. If you only have ten spare minutes and a handful of grocery-store snacks, it still works. This is not the kind of project that punishes you for being a normal human with a normal schedule. It meets you where you are, preferably with a spoon and a paper towel.
By the end of the party, most people decide the same thing: they would absolutely make one again. It is cheap, useful, memorable, and much easier than it looks. And in a world full of expensive party ideas that require online orders, specialty tools, or the emotional stamina of a wedding planner, that is reason enough to love a humble party pumpkin bowl.