Table of Contents >> Show >> Hide
- Before You Start: Know What You Are Removing
- Tools and Supplies You May Need
- How to Remove a Kitchen Countertop Step by Step
- 1. Clear the Work Area Completely
- 2. Shut Off Utilities
- 3. Remove the Sink, Faucet Connections, and Disposal
- 4. Unfasten the Dishwasher From the Countertop
- 5. Cut Through Caulk at the Wall, Backsplash, and Sink Edge
- 6. Remove Any Separate Backsplash Pieces
- 7. Find and Remove Screws Under the Countertop
- 8. Break the Adhesive Bond
- 9. Lift Off the Countertop
- 10. Remove Leftover Adhesive and Clean the Cabinets
- Material-Specific Tips for Easier Countertop Removal
- Common Mistakes to Avoid
- When to Call a Professional
- How to Dispose of an Old Countertop the Smart Way
- Final Thoughts
- Real-World Experiences: What Homeowners Often Learn the Hard Way
- SEO Tags
Note: The HTML below is body-only, publication-ready content based on a synthesis of current U.S. guidance covering utility shutoff, sink and dishwasher prep, caulk and adhesive separation, screw removal, safe lifting, stone-top caution, and reuse/recycling options.
Angi
+4
Lowe’s
+4
HGTV
+4
If your kitchen countertop has seen better days, you are not alone. Maybe the laminate is peeling, the tile grout looks like it fought the law and lost, or the old surface simply no longer fits your kitchen plans. The good news is that removing a kitchen countertop is a very doable project for many homeowners. The even better news? You do not need superhero strength, just solid prep, the right tools, and a healthy respect for anything connected to water, electricity, or gas.
In most kitchens, countertop removal follows a similar pattern: disconnect what is attached, cut through caulk and adhesive, remove fasteners from below, and then lift the countertop off in sections. The trick is not brute force. The trick is patience. Countertops rarely come off because you glared at them hard enough. They come off because you work methodically and refuse to turn demolition day into cabinet-damage day.
This guide walks you through how to remove a kitchen countertop safely, when to call a pro, what tools help the most, and the smartest ways to keep your cabinets, walls, and nerves in one piece.
Before You Start: Know What You Are Removing
Not all countertops behave the same way on the way out. Some are DIY-friendly. Some are drama queens. Here is the quick breakdown:
Laminate Countertops
These are usually the easiest to remove. They are often screwed to the cabinet base or lightly adhered. If you are new to kitchen demo, laminate is the friendly beginner-level boss.
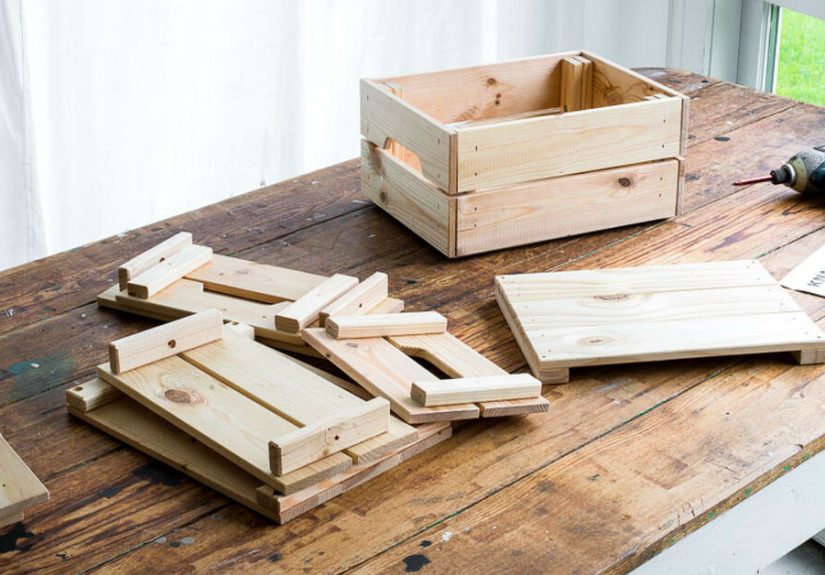
Butcher Block Countertops
Wood counters are often fastened from below with screws and brackets. They can be heavy, but they are usually manageable with care and an extra set of hands.
Tile Countertops
Tile is messier. You may need to break up tile, remove mortar or backer material, and deal with more dust and shards. This is less “gentle lifting” and more “controlled chaos.”
Solid Surface Countertops
These may be attached with adhesive and can come off in sections, but seams and sink attachments can make removal trickier than expected.
Granite, Quartz, and Marble Countertops
Stone countertops are where many DIYers should pump the brakes. They are extremely heavy, can crack if lifted unevenly, and often require pros if you hope to save the slab for reuse. If your countertop is stone and especially if it is large, seamed, or paired with an undermount sink, professional removal is often the smarter move.
Tools and Supplies You May Need
- Safety glasses
- Work gloves
- Long sleeves and closed-toe shoes
- Utility knife
- Putty knife or stiff scraper
- Pry bar
- Screwdriver or drill/driver
- Bucket and towels
- Painter’s tape
- Hammer or rubber mallet
- Drop cloths or cardboard
- Shop vacuum
- Helper for lifting
If you are working around tile or stubborn adhesive, a heat gun, oscillating multi-tool, or reciprocating saw may help. That said, power tools are assistants, not magicians. Start simple before bringing in the louder cast members.
How to Remove a Kitchen Countertop Step by Step
1. Clear the Work Area Completely
Start by removing everything from the countertop, sink base, and nearby cabinets. Remove drawers if they get in the way. Lay down drop cloths or cardboard to protect the floor. If you want your cabinets to survive this project without looking like they lost a bar fight, prep matters.
Take a few photos before you begin. They help more than most people expect, especially when reconnecting plumbing or reinstalling hardware later.
2. Shut Off Utilities
Turn off the water supply to the sink. If you have a garbage disposal, switch off the circuit at the breaker before touching anything electrical. If a cooktop is installed in the countertop, cut power or gas as needed. A countertop removal project gets a lot less fun when it includes a surprise leak or a spark.
If your kitchen includes a gas cooktop and you are not fully confident disconnecting it, hire a licensed pro for that part. There is no award for “most committed DIY spirit” when gas lines are involved.
3. Remove the Sink, Faucet Connections, and Disposal
Place a bucket and towels below the sink plumbing. Disconnect the drain lines and water supply lines. If there is a garbage disposal, disconnect it according to the manufacturer’s instructions and set it aside carefully.
For a drop-in sink, loosen clips or screws underneath and cut any caulk around the rim before lifting it out. For an undermount sink, expect more effort. It may be clipped and sealed tightly to the underside of the countertop. In some kitchens, it is safest to support the sink from below before loosening fasteners so it does not drop unexpectedly.
4. Unfasten the Dishwasher From the Countertop
Many dishwashers are attached to the underside of the countertop with mounting brackets. Remove those screws so the countertop can lift free later. In many cases, the dishwasher itself can stay in place; it just needs to stop clinging to the countertop like a nervous child on the first day of school.
5. Cut Through Caulk at the Wall, Backsplash, and Sink Edge
Run painter’s tape above the caulk line if you want extra protection for the wall or backsplash. Then use a sharp utility knife to cut through silicone or adhesive where the countertop meets the wall, side splashes, tile, sink rim, or cabinet edges.
Do not rush this part. A clean cut now can save drywall, paint, and backsplash tile later. It may take several passes to slice fully through old caulk, especially if it has been there long enough to vote.
6. Remove Any Separate Backsplash Pieces
Some countertops have separate backsplash sections attached to the wall with adhesive. If yours does, work a putty knife or pry bar gently behind the piece and loosen it in small sections. Pry carefully, especially near studs if you can identify them.
Be realistic here: even a careful removal can nick drywall or pull away some paper facing. Minor wall repair after countertop removal is common, not a personal insult from your kitchen.
7. Find and Remove Screws Under the Countertop
Open the base cabinets and look up underneath the countertop. Many tops are secured through corner braces, wood strips, or support blocks. Remove every screw you can find. Then look again. Then look once more because the missing screw you forgot is usually the one still laughing at you during the prying stage.
If the countertop was caulked or lightly glued to the cabinet tops, cut through that bond with a utility knife, putty knife, or oscillating tool.
8. Break the Adhesive Bond
Once the screws are out, slide a putty knife or stiff scraper between the countertop and cabinet. Work slowly around the perimeter to separate the adhesive. Follow with a pry bar and apply gentle, even pressure.
The key word is gentle. This is countertop removal, not cabinet destruction. Use small lifts, move to another section, and keep working the bond until the countertop loosens. If you yank one area too hard, you can crack the top, split a cabinet frame, or chew up the wall.
9. Lift Off the Countertop
With the bond broken, lift the countertop with a helper. Even laminate can be awkward, especially in long runs or L-shaped layouts. Lift straight up where possible and walk it out carefully.
If the countertop is too bulky to remove in one piece and you are not trying to salvage it, you can cut it into smaller sections. This can make disposal easier and reduce the chance of smashing cabinet faces on the way out.
10. Remove Leftover Adhesive and Clean the Cabinets
After the top is off, scrape away remaining adhesive, caulk, and debris from the cabinet tops. Check for damage, loose braces, or uneven surfaces. A new countertop needs a flat, clean base. This is not glamorous work, but it is what keeps the next installation from becoming a future complaint.
Use a shop vacuum to remove dust and small debris, then wipe everything down. If you are installing a new top soon, now is the time to make minor repairs to the wall or cabinet structure.
Material-Specific Tips for Easier Countertop Removal
Laminate
Laminate counters are often fastened with screws from below and sealed with caulk. Once you remove the sink, dishwasher screws, and fasteners, the top may pry up with minimal fuss. If it resists, check for hidden adhesive or extra screws in corner blocks.
Butcher Block
Wood tops can be heavy but are often straightforward to remove. If you plan to reuse the slab, keep prying to a minimum and focus on removing fasteners cleanly. Label sections if you are dealing with more than one run.
Tile
Tile countertop removal usually begins at the edges. Expect broken grout, shards, and a base layer that may still need to be detached after the tile comes off. Wear eye protection, gloves, and long sleeves. This is the version of countertop removal that fights back with confetti made of ceramic.
Stone
If you are removing granite, quartz, or marble, think carefully before going DIY. The slab can crack under uneven stress, seams can separate, and undermount sinks add risk. If your goal is reuse, hire a pro. If your goal is simply removal, still consider professional help unless the piece is small and you have proper lifting support.
Common Mistakes to Avoid
- Skipping utility shutoff: Water, electricity, and gas should never be part of your “let us see what happens” strategy.
- Forgetting hidden screws: Always inspect every cabinet box carefully before prying.
- Not cutting caulk first: This is how backsplashes, drywall, and paint get damaged fast.
- Working alone on heavy sections: Countertops are awkward, and stone tops are especially dangerous to lift solo.
- Using too much force too early: Slow separation is safer for both cabinets and walls.
- Ignoring wall repairs: Small patches now make new countertop installation cleaner and easier.
When to Call a Professional
DIY countertop removal is often practical, but there are times when hiring help makes perfect sense:
- The countertop is granite, quartz, marble, or another heavy stone
- You want to save and reuse the slab
- The countertop includes a gas cooktop
- The sink is a large undermount unit attached to stone
- You suspect older hazardous materials or your home is much older and may need extra testing
- You are also removing cabinets and need to control the order of demo carefully
Calling a pro is not cheating. It is budgeting for fewer headaches.
How to Dispose of an Old Countertop the Smart Way
Do not assume the only ending for an old countertop is the landfill. Depending on the material and condition, you may have better options.
Reuse or Donate
If the countertop, sink, cabinets, or related materials are still in decent shape, check local reuse centers or building-material donation programs. This is especially worth doing for solid wood pieces, usable sinks, and cabinet components.
Recycle Where Possible
Some renovation materials can be salvaged or recycled through local construction-and-demolition waste programs. Rules vary by location, so check with your municipality, waste hauler, or local recycler before hauling everything away.
Bag Debris Properly
If the countertop breaks into sharp pieces, use contractor bags for smaller debris and protect your vehicle when transporting larger sections. Tile shards and jagged laminate edges do not care about your weekend plans.
Final Thoughts
Removing a kitchen countertop is one of those projects that looks intimidating until you understand the sequence. Disconnect what is attached. Cut the caulk. Remove the screws. Break the adhesive bond. Lift carefully. Clean up what is left behind. That is the whole story, just with more kneeling and slightly more muttering.
If your countertop is laminate, butcher block, or another light material, this can be a satisfying DIY job that sets up the rest of your kitchen refresh beautifully. If it is stone, attached to an undermount sink, or tied into gas and specialty appliances, it may be smarter to bring in help. Either way, going slowly and protecting the surrounding kitchen will save you time, money, and a truly impressive number of unnecessary repairs.
In short: a countertop should leave the kitchen with dignity, not take half the drywall with it.
Real-World Experiences: What Homeowners Often Learn the Hard Way
One of the most common experiences people report after removing a kitchen countertop is surprise. Not the fun kind, either. More like, “Why are there six screws in this cabinet and eleven in the next one?” or “Who used enough caulk here to waterproof a submarine?” Countertop removal tends to reveal the personality of the last installer, and that personality is not always polite.
A lot of first-time DIYers go into the project expecting the countertop to lift off right after the sink is out. In reality, the biggest lesson is that countertop removal is often a detective job. You find one fastener, then another hidden behind a brace, then another buried under old adhesive. The homeowners who have the best experience are usually the ones who stop treating the project like demolition and start treating it like problem-solving.
Another very common experience is realizing that the countertop itself is not the hardest part. The awkward lifting is. Even a relatively light laminate top can be clumsy in a tight kitchen, especially if you have to twist around an island, doorway, or refrigerator. Many people say the smartest move they made was having a helper there at the exact moment the top was ready to come off. Not twenty minutes later. Not “on the way.” Right there.
Wall damage is another area where expectations shift fast. Plenty of homeowners begin with the noble dream of preserving every inch of drywall and every backsplash tile. Then the old adhesive reminds them that kitchens are not built on dreams. Minor scuffs, torn drywall paper, and patching needs are very normal. The better mindset is not “I must leave zero marks.” It is “I want to avoid major damage and keep repairs manageable.”
People also learn quickly that older kitchens love surprises. A countertop may hide uneven cabinet tops, water damage under the sink, moldy caulk, or old repairs that looked fine from above but not so fine underneath. That sounds discouraging, but it is actually useful. Once the old top is off, you have the chance to fix those issues before a new countertop goes in. Many homeowners later say this was the moment the kitchen project stopped feeling cosmetic and started feeling worthwhile.
There is also a strong emotional component to the project that people do not talk about enough. Removing a countertop changes the kitchen fast. One minute the room looks tired but functional. The next minute it looks like a film set for “Weekend Renovation: Panic Edition.” That temporary mess can be unsettling. But it is also the point where progress becomes visible. If you are mentally prepared for a short period of chaos, the process feels a lot less overwhelming.
And finally, many homeowners come away from the experience saying the same thing: the project was easier once they slowed down. The people who rush are the ones who crack backsplashes, dent cabinet frames, or forget to shut off something important. The people who take their time usually finish tired, a little dusty, and very proud. So if you are about to remove your kitchen countertop, remember this: patience is not just helpful here. It is basically a tool.
SEO Tags
“`