Table of Contents >> Show >> Hide
- What “Increase Clip Speed” Means on Instagram Reels
- How to Increase Clip Speed on Instagram Reels on Android
- How to Increase Clip Speed on Instagram Reels on iPhone
- What Happens When You Speed Up a Clip?
- Why the Speed Button Might Be Missing
- How to Make Fast Reels Look Better
- Can You Change Speed After Posting a Reel?
- When to Use Instagram’s Edits App Instead
- Common Mistakes to Avoid
- Real-World Experiences With Faster Instagram Reels on Android and iOS
- Conclusion
- SEO Tags
Instagram Reels rewards movement, momentum, and the kind of pacing that makes people forget they were only planning to “scroll for one minute.” If your video feels a little sleepy, speeding up a clip can instantly make it look more dynamic, more polished, and way more watchable. That is true whether you are filming a cooking demo, a mini vlog, a GRWM, a craft tutorial, or your dog doing something suspiciously human.
The good news is that increasing clip speed on Instagram Reels is usually straightforward on both Android and iPhone. The slightly less good news is that Instagram loves changing buttons, moving menus, and testing different layouts like it is getting paid by the surprise. So, while the process is similar on Android and iOS, the exact button placement may look a little different depending on your app version, account type, and region.
Still, the core idea stays the same: open the Reels editor, select your clip, use the speed tool, preview the result, and post only after you make sure your video does not look like it drank six espressos. In this guide, you will learn how to speed up clips on Instagram Reels, what the feature actually changes, why the option sometimes disappears, and how to make faster reels look clean instead of chaotic.
What “Increase Clip Speed” Means on Instagram Reels
When you increase clip speed on a Reel, Instagram makes that section play faster than normal. In practical terms, a five-second clip might shrink into two or three seconds, depending on the speed you choose. This can make transitions feel snappier, reduce dead air, and help your video hit the beat of a song more naturally.
It is also important to know that speeding up a clip usually changes both the video and the audio of that clip inside Instagram’s editor. So if you are talking on camera, your voice may sound like you are trying to explain taxes while riding a roller coaster. That is not always the vibe. If you want fast visuals but normal voice audio, you may need to mute the original clip and add music, voiceover, or text afterward.
Depending on the version of the app, common speed presets may include options such as 0.3x, 0.5x, 1x, 2x, and 3x. Some users see a slightly different set of choices, but the main concept is the same: anything above 1x speeds things up, and anything below 1x slows it down.
How to Increase Clip Speed on Instagram Reels on Android
Speed up a new Reel while recording
- Open Instagram on your Android phone.
- Tap the plus button or swipe into the camera, then choose Reel.
- Look for the Speed control in the editor tools.
- Select a faster setting such as 2x or 3x.
- Record your clip.
- Preview the footage and decide whether it looks energetic or mildly possessed.
- Add music, text, effects, or captions, then continue to publish.
This method is useful when you already know you want a sped-up effect before filming. It is especially handy for time-lapse-style content, outfit changes, room transformations, desk setups, or anything repetitive that looks better with a little extra hustle.
Speed up a video from your gallery
- Open Instagram and start a new Reel.
- Upload a video from your camera roll.
- Tap Edit Video if that option appears.
- Select the clip you want to change.
- Tap the Speed tool and choose a faster playback rate.
- Preview the edited clip.
- Trim, split, replace, or rearrange clips if needed, then post.
If your video is made of several segments, you can often speed up only one clip instead of the whole Reel. That gives you more control and keeps the final edit from feeling like every frame is in a hurry.
How to Increase Clip Speed on Instagram Reels on iPhone
On iPhone, the process is largely the same. Instagram’s iOS editor and Android editor are very similar, though menu names and placements may shift slightly between updates.
Speed up a new Reel on iPhone
- Launch Instagram on your iPhone.
- Tap the plus icon or open the camera and select Reel.
- Choose the Speed control.
- Set your preferred speed, such as 2x.
- Record the clip.
- Preview the result and adjust before moving forward.
- Finish editing and publish the Reel.
Speed up an imported clip on iPhone
- Create a new Reel.
- Import your video from Photos.
- Open Edit Video if available.
- Tap the specific clip you want to modify.
- Select Speed and increase the playback rate.
- Preview the clip to check timing, readability, and audio.
- Complete the rest of your edits and post.
One smart move on iPhone is to preview your Reel with sound both on and off. With sound on, you can catch weird audio glitches. With sound off, you can tell whether the visual pacing alone still makes sense. If viewers need a decoder ring to understand your tutorial, the speed is probably too high.
What Happens When You Speed Up a Clip?
Increasing speed is not just a cosmetic change. It affects several things at once:
- The clip becomes shorter. Faster playback means less screen time for that segment.
- The original audio changes too. Voices, ambient sound, and in-clip music may all speed up.
- Your pacing changes. Fast clips can create energy, but too many can make the video feel frantic.
- Text timing matters more. On-screen words may become hard to read if you rush the clip underneath them.
- Transitions become more important. Faster clips feel smoother when they are paired with good cuts and clean visual flow.
In other words, speed is powerful, but it is not a magic wand. It works best when you combine it with trimming, music, captions, and an actual point.
Why the Speed Button Might Be Missing
If you cannot find the speed option, do not panic. Instagram is famous for moving features around like a caffeinated interior designer. Here are the most common reasons:
Your app needs an update
Outdated versions of Instagram can hide or break editing tools. Updating the app is the first thing to try on both Android and iPhone.
You are in the wrong editing screen
Sometimes the speed option appears before recording, and other times it appears after you tap Edit Video and select a clip. If you do not see it in one place, check the other.
The app is glitching
Force close Instagram and reopen it. On Android, you can also clear the app cache. On iPhone, a quick restart or reinstall often helps when tools vanish for no obvious reason.
Data saver or battery restrictions are interfering
Instagram performance can suffer if your phone is aggressively restricting background activity or media quality. On Android, set Instagram battery usage to Unrestricted if your phone offers that option. On iPhone, turning off Low Power Mode can also help during editing or uploading.
Your account has a different feature rollout
Instagram frequently rolls out tools gradually. That means two people with the same phone may see slightly different menus. Annoying? Yes. Rare? Not at all.
How to Make Fast Reels Look Better
Use Instagram’s camera when possible
Imported videos can work perfectly well, but recording inside Instagram often reduces friction. The app is built around its own capture and edit tools, so native recording can sometimes behave more predictably than uploading from your gallery.
Turn on highest quality uploads
If your Reel looks soft, muddy, or like it was filmed through a sandwich bag, compression may be part of the problem. Go to Settings and privacy, then Data usage and media quality, and turn on Upload at highest quality. If Data Saver is enabled, turn it off before publishing a video you care about.
Do not rely on speed to fix boring footage
Faster is not automatically better. If the lighting is bad, the framing is weak, or the point of the Reel is unclear, speeding it up just creates a faster version of the same problem. Brutal, but true.
Mix normal and fast clips
The best Reels often alternate pacing. Use normal-speed clips for reaction shots, key explanations, or emotional beats. Use fast clips for setup, process shots, repetitive tasks, or scene changes. That contrast keeps the edit interesting.
Add captions
Fast videos are easier to follow when viewers can read along. Captions help with comprehension, accessibility, and silent viewing. They also stop your audience from bouncing when the pacing gets quick.
Can You Change Speed After Posting a Reel?
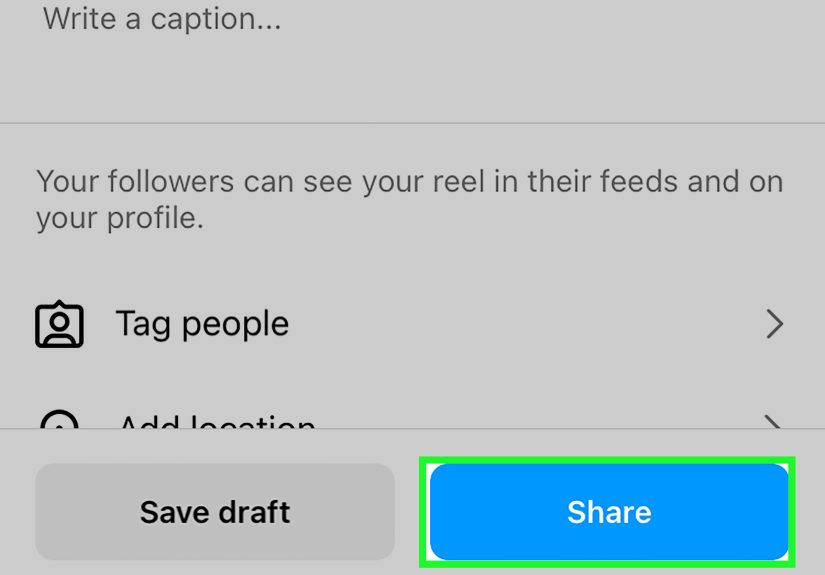
Usually, no. Once a Reel is published, Instagram generally lets you edit things like the caption, tags, or location, but not the actual playback speed of the video itself. If the pacing is wrong after posting, the usual fix is to delete the Reel, re-edit the original clip or draft, and upload a corrected version.
That is why previewing matters so much. A ten-second check before posting can save you from the digital equivalent of realizing your shirt is inside out after leaving the house.
When to Use Instagram’s Edits App Instead
If the in-app Reel editor feels cramped, Instagram’s separate Edits app may be a better fit. It is designed for more detailed mobile video editing and includes clip-level adjustments such as speed changes, trimming, splitting, and timeline control.
This is especially helpful when you want more precision than the main Instagram app gives you. For example, if you are making a tutorial with multiple clips, layered text, careful timing, and several speed changes, editing in Edits first and then exporting for Instagram can be a smoother workflow.
Think of the regular Reels editor as the quick snack version and Edits as the full meal. Sometimes you just need a granola bar. Sometimes you need the whole buffet.
Common Mistakes to Avoid
- Using 3x on everything. Your audience should feel excited, not seasick.
- Forgetting about audio. Fast visuals plus squeaky chipmunk voice is not always a winning combination.
- Ignoring readability. If text flies by too quickly, viewers will not stick around to decode it.
- Posting without previewing. Always watch the final Reel once before publishing.
- Overediting simple content. Sometimes a clean 2x clip does more than a hyperactive edit with twelve cuts in five seconds.
Real-World Experiences With Faster Instagram Reels on Android and iOS
One of the most common experiences people have when they first speed up a Reel is pure optimism. They tap 2x, preview the clip, and think, “Wow, this looks so much more professional.” And often, that reaction is correct. Faster clips can make a simple task look cleaner and more intentional. A room-cleaning video becomes satisfying instead of slow. A makeup routine turns from “hold on, we are still blending” into a polished transformation. A cooking demo stops feeling like a 14-step documentary about onions.
But after that first success, many creators run into the next lesson: speed is incredibly useful, but it exposes every weak point in your video. Bad lighting becomes more obvious because the viewer has less time to adjust. Shaky camera movement becomes more distracting because the motion is amplified. Messy composition becomes harder to ignore. In other words, speeding up a clip does not just improve rhythm. It also magnifies chaos.
On Android, users often talk about how the editing process can feel slightly different depending on the phone brand and software skin. One person sees the tool right away, while another needs to tap into a deeper editing screen first. That can be frustrating, but once the speed control is found, the creative payoff is usually worth the hunt. Many Android creators also notice that turning off restrictive battery settings helps the app behave more consistently during heavier editing sessions.
On iPhone, the experience is often smoother in terms of animation and previewing, but that does not mean it is foolproof. A lot of users discover that low power mode, background app limits, or upload compression can make a Reel feel less crisp than it looked in the editing screen. That is why people who post often tend to develop a routine: edit, preview, check quality settings, and only then publish. It sounds simple, but it saves a lot of regret.
There is also a creative learning curve. Many people start by using speed for the whole Reel, then later realize the better approach is selective speed. Maybe the setup clip is 2x, the main talking point is 1x, and the cleanup montage is 3x. That contrast creates a much more watchable video. Experienced creators usually stop asking, “How fast can I make this?” and start asking, “Which part should feel fast?” That is a smarter question.
Another very real experience is discovering that viewers love momentum but still need clarity. A sped-up before-and-after video can be great, but if you are teaching something, your audience may need a pause for context. That is where captions, freeze frames, or a brief normal-speed segment make a huge difference. The strongest Reels are rarely fast from start to finish. They feel fast because they remove wasted seconds, not because they sprint nonstop.
Perhaps the biggest takeaway from creators who regularly use the speed feature is this: the tool is most effective when it supports the idea of the Reel, not when it becomes the whole idea. Speed works beautifully for cleaning, organizing, art, fitness setup, packing, styling, food prep, and process-based videos. It is less effective when you use it as camouflage for weak storytelling. Viewers can absolutely sense the difference.
So the real experience of increasing clip speed on Instagram Reels, whether on Android or iPhone, is a blend of convenience, experimentation, a few moments of button-hunting, and eventually a much better instinct for pacing. Once you get the hang of it, it becomes one of those tools you use constantly. Not because it is flashy, but because it quietly makes your content tighter, smarter, and easier to watch.
Conclusion
If you want your Instagram Reels to feel sharper and more engaging, increasing clip speed is one of the easiest upgrades you can make. On both Android and iPhone, the process is usually simple: open the Reel editor, choose your clip, tap the speed option, and preview the result before posting. The trick is not just knowing where the button is. The trick is knowing when a faster pace improves the story and when it just turns your video into a blur with ambitions.
Used well, speed makes Reels feel modern, polished, and satisfying. Used badly, it makes your content look like it is trying to escape the screen. Aim for energy, not panic, and your edits will thank you.