Table of Contents >> Show >> Hide
- What Is an Ombre Painted Bistro Set?
- Why Ombre Works So Well on Outdoor Furniture
- Best Materials for an Ombre Bistro Set Makeover
- Choosing the Right Ombre Color Palette
- Tools and Supplies You’ll Need
- How to Paint an Ombre Bistro Set Step by Step
- Step 1: Clean the Set Thoroughly
- Step 2: Remove Rust, Flaking Paint, and Gloss
- Step 3: Prime the Surface
- Step 4: Plan the Gradient
- Step 5: Apply the Lightest Color First
- Step 6: Add the Medium Shade
- Step 7: Deepen the Bottom or Edges
- Step 8: Blend the Transitions
- Step 9: Let the Paint Cure
- Step 10: Seal for Outdoor Durability
- Design Ideas for an Ombre Painted Bistro Set
- Common Mistakes to Avoid
- How to Style Your Finished Bistro Set
- Maintenance Tips for a Long-Lasting Finish
- Budget Breakdown: Is This DIY Worth It?
- Personal Experience and Practical Lessons From Ombre Bistro Set Projects
- Conclusion
There is something wonderfully dramatic about a tiny bistro set. It is small enough to fit on a balcony, patio, porch, or sunny kitchen nook, yet it somehow announces, “Yes, I do sip coffee like I’m in a charming side street café, even if I’m wearing flip-flops and arguing with a garden hose.” Now add an ombre paint effect, and that little table-and-chair combo becomes a full personality.
An ombre painted bistro set is a budget-friendly DIY furniture makeover that blends two or more colors from light to dark, creating a soft gradient across the table, chair backs, legs, or seats. It works beautifully on metal, wood, wicker, and some plastic furniture when the surface is prepared correctly and the right paint is used. The result can be coastal, modern, playful, romantic, boho, or “I found this at a thrift store and now it looks like a boutique patio set that drinks sparkling water.”
This guide walks through how to choose colors, prep the furniture, paint a smooth gradient, seal the finish, and keep your bistro set looking fresh outdoors. Whether your set is rusty, faded, scratched, boring, or simply suffering from beige fatigue, ombre paint can give it a second life with style.
What Is an Ombre Painted Bistro Set?
An ombre bistro set is a small table and chair set painted with a gradual color transition. The word “ombre” means shaded, and in design it usually describes a fade from one shade to another. Think pale sky blue melting into deep navy, blush pink becoming coral, sage green fading into forest green, or sunny yellow sliding into tangerine. It is the paint version of a sunset, minus the mosquitoes.
Bistro sets are ideal for this treatment because they have manageable surfaces. A two-chair patio set does not require a week of sanding, three gallons of paint, and emotional support snacks. You can usually complete the project over a weekend, especially if you use spray paint or a small paint sprayer.
Why Ombre Works So Well on Outdoor Furniture
Outdoor furniture often needs personality because patios and balconies are full of hard surfaces: concrete, brick, decking, metal railings, and neutral cushions. A gradient finish adds movement and color without overwhelming the space. Unlike a solid neon chair that screams across the yard, an ombre effect feels intentional and layered.
Ombre also hides minor imperfections better than a flat, single-color finish. On a vintage metal chair with curves, scrollwork, and a few battle scars, the blended color distracts the eye. On wood, it can highlight grain and shape. On a round bistro table, the gradient can create a beautiful “center glow” effect, with a light shade in the middle and deeper color around the edge.
Best Materials for an Ombre Bistro Set Makeover
Before you start painting, identify what your bistro set is made of. Paint is not magic. It is talented, but it still likes clean, dry, properly prepared surfaces.
Metal Bistro Sets
Metal is one of the most popular materials for bistro sets. Wrought iron, steel, and aluminum can all be painted, but rust must be handled first. Remove loose paint, scrub away rust with a wire brush, sand rough spots, and use a rust-inhibiting primer or exterior-rated metal paint. For intricate metalwork, spray paint is often easier than brushing because it reaches curves and decorative details without leaving thick globs.
Wood Bistro Sets
Wood offers a warm, classic look and takes paint well when properly sanded. Remove peeling finish, dull glossy surfaces, clean away dust, and use an exterior primer if the set will live outdoors. Wood expands and contracts with moisture, so flexible exterior paint and a durable clear coat can help the finish last longer.
Plastic or Resin Bistro Sets
Plastic can be tricky because ordinary paint may peel like a bad sunburn. Use spray paint designed to bond with plastic or resin. Clean the surface thoroughly, lightly scuff it if the product instructions allow, and avoid thick coats. Plastic furniture is usually lightweight, so place it on a drop cloth and secure it before spraying unless you enjoy chasing chairs across the driveway.
Wicker or Rattan Bistro Sets
Natural wicker and resin wicker both have texture, which makes spray paint useful. The key is to clean all the little crevices and apply light coats from different angles. A subtle ombre effect can look especially charming on wicker chairs, particularly with coastal shades like white, aqua, teal, and deep blue.
Choosing the Right Ombre Color Palette
The easiest way to create a polished ombre painted bistro set is to choose colors from the same paint strip or color family. A light, medium, and dark version of the same hue will blend more naturally than three random colors that met five minutes ago in the paint aisle.
For a calm look, try pale blue, sky blue, and navy. For a garden-inspired set, use mint, sage, and deep olive. For a cheerful balcony, blend butter yellow into coral or peach. For a modern look, fade from warm white to gray to charcoal. If your patio has lots of plants, green-based gradients look natural. If your cushions are neutral, a brighter ombre can become the star of the space.
One practical rule: choose the darkest color for areas that get the most visual grounding, such as chair legs or the lower half of the table base. Lighter colors often work best on chair backs, tabletops, or the upper third of the furniture. This creates a balanced fade rather than making the set look like it accidentally sat in a puddle of paint.
Tools and Supplies You’ll Need
Gather everything before you begin. Nothing ruins creative momentum like discovering you need painter’s tape while one chair is half turquoise and your dog is considering becoming part of the project.
- Drop cloths or plastic sheeting
- Painter’s tape
- Gloves, safety glasses, and a respirator or mask
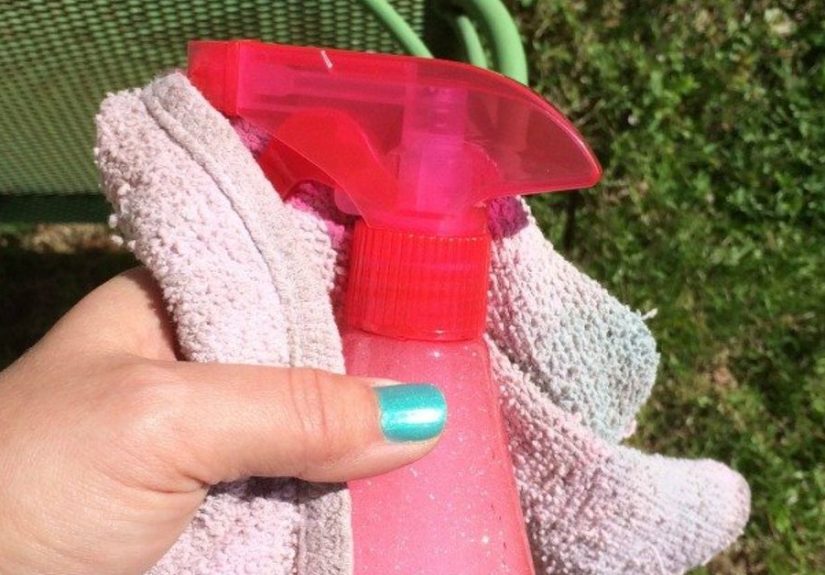
- Degreasing cleaner or mild detergent
- Wire brush for metal rust
- Sandpaper or sanding sponge in medium and fine grits
- Tack cloth or microfiber cloth
- Exterior primer suited to metal, wood, plastic, or wicker
- Exterior spray paint or outdoor-rated paint in two to four colors
- Clear exterior sealer, if compatible with your paint
- Cardboard or scrap wood for spray testing
How to Paint an Ombre Bistro Set Step by Step
Step 1: Clean the Set Thoroughly
Start with a deep clean. Outdoor furniture collects dust, pollen, grease, mildew, bird commentary, and mysterious sticky spots. Wash the table and chairs with a cleaner appropriate for the material, rinse well, and let everything dry completely. Paint over grime and you are not refinishing furniture; you are preserving dirt for future generations.
Step 2: Remove Rust, Flaking Paint, and Gloss
For metal, use a wire brush to remove rust and loose paint. For wood, sand peeling or shiny areas until smooth and dull. For plastic, clean carefully and lightly scuff only if recommended by the paint manufacturer. The goal is to give the paint something to grip. A glossy surface can reject paint the way a toddler rejects vegetables: dramatically and with consequences.
Step 3: Prime the Surface
Primer improves adhesion, helps block old colors, and adds durability. Use rust-inhibiting primer for metal, exterior wood primer for wood, bonding primer for difficult surfaces, or a paint-and-primer product if it is suitable for your furniture material. Apply thin, even coats and let the primer dry according to the product directions.
Step 4: Plan the Gradient
Decide where each color will go before spraying. For chairs, you might start with the lightest shade at the top of the backrest, use the medium tone around the seat, and apply the darkest shade near the legs. For a round table, try a light center, medium middle ring, and darker outer edge. For a rectangular tabletop, fade from one side to the other like a sunrise crossing the patio.
Step 5: Apply the Lightest Color First
Apply the lightest color as the base coat. Spray or brush in thin layers rather than trying to cover everything in one heroic pass. Multiple light coats create a smoother, stronger finish. If you are using spray paint, keep the can moving and begin spraying slightly before the furniture edge, then continue past the edge. This avoids heavy spots at the start and stop points.
Step 6: Add the Medium Shade
Once the base is dry enough for recoating, apply the medium shade over the transition zone. Hold the spray can a little farther away as you approach the light section so the color lands softly. If brushing, use a dry-brush technique with minimal paint and feather the edge while it is still workable.
Step 7: Deepen the Bottom or Edges
Add the darkest shade last. This creates depth and makes the gradient feel intentional. On chairs, concentrate the darkest color on the lower legs and underside of the seat. On the table, add it to the base, feet, or outside rim. Keep the coats light. Heavy paint can drip, and drips are just gravity signing your furniture without permission.
Step 8: Blend the Transitions
For spray paint, blending happens by overlapping colors while using distance and light passes. Mist the lighter color slightly into the medium area, then mist the medium into the darker area. For brush painting, blend with a clean, slightly damp brush or a separate dry brush. Work in small sections so the paint does not dry before you soften the edges.
Step 9: Let the Paint Cure
Dry time and cure time are not the same. Paint may feel dry within hours, but it can take several days to fully harden. Avoid stacking chairs, setting coffee mugs on the table, or letting enthusiastic guests test the finish too soon. Give the set at least a few days before heavy use, and longer if the weather is humid.
Step 10: Seal for Outdoor Durability
If your paint product recommends or allows a clear exterior sealer, apply it after the paint has dried properly. Choose a finish that matches your desired look: matte for soft and modern, satin for subtle sheen, or gloss for a bold café-style finish. Make sure the sealer is compatible with the paint, especially with spray paint, because incompatible products can wrinkle or cloud the finish.
Design Ideas for an Ombre Painted Bistro Set
Coastal Blue Ombre
Use white, pale aqua, turquoise, and navy for a breezy beach-inspired set. This palette pairs well with striped cushions, rope accents, terra-cotta pots, and anything that makes you believe you are five minutes from the ocean, even if you are actually five minutes from a grocery store parking lot.
Sunset Patio Ombre
Blend soft yellow, peach, coral, and warm pink for a cheerful outdoor dining spot. This works especially well on a balcony or small courtyard where the furniture acts as a focal point.
Garden Green Ombre
Try cream, mint, sage, and deep green for a set that blends naturally into plants and herbs. Add linen cushions and a small potted basil plant on the table for instant “I casually grow things” energy.
Modern Monochrome Ombre
Fade from white to dove gray to charcoal for a sleek, minimalist look. This palette is ideal for urban patios, black railings, concrete floors, and modern planters.
Bold Two-Tone Ombre
For a more dramatic finish, choose two neighboring colors such as teal and emerald, berry and plum, or orange and red. Keep the blend smooth and repeat the same color direction on each piece so the set looks coordinated.
Common Mistakes to Avoid
The first mistake is skipping surface prep. Paint needs a clean, dull surface to bond well. The second mistake is painting too thickly. Heavy coats are more likely to drip, bubble, or peel. The third mistake is painting in bad weather. Extreme heat, cold, humidity, or wind can affect drying and finish quality. A calm, dry, mild day is your friend.
Another common mistake is forgetting the underside. Outdoor furniture gets moisture from below, especially on patios, decks, and lawns. Paint and seal chair legs, table feet, and underside edges so the whole set is protected. Finally, do not mix random products without checking compatibility. Primer, paint, and clear coat should work as a team, not a reality show cast.
How to Style Your Finished Bistro Set
Once your ombre painted bistro set is fully cured, style it like the little star it is. Add weather-resistant cushions in a solid color so they do not compete with the gradient. Use a small outdoor rug to define the seating area. Place a lantern, plant, or compact umbrella nearby. If the set is on a balcony, add vertical planters or string lights to make the space feel cozy.
For a breakfast nook, pair the set with neutral walls and simple dishes. For a porch, use woven baskets, potted flowers, and a tray for drinks. For a garden corner, surround it with herbs, climbing plants, or a small fountain. A painted bistro set does not need much; it already brought its own outfit.
Maintenance Tips for a Long-Lasting Finish
Clean your bistro set regularly with mild soap and water. Avoid harsh scrubbing pads that can scratch the finish. Wipe spills quickly, especially acidic drinks like lemonade or wine. Use furniture covers during heavy rain or snow, and store the set indoors during harsh winter weather if possible.
Inspect the legs and joints every season. If you spot chips, touch them up before moisture sneaks underneath the paint. For metal furniture, address rust immediately. A tiny rust spot is manageable; ignored rust is basically a villain origin story.
Budget Breakdown: Is This DIY Worth It?
An ombre bistro set makeover is usually much cheaper than buying a new outdoor set. A secondhand bistro set can often be refreshed with cleaner, sandpaper, primer, paint, and sealer. The biggest cost is quality paint, and that is not where you want to cut corners. Outdoor furniture faces sun, rain, humidity, temperature changes, and daily use, so durable products matter.
If you already own the furniture, this project can transform a tired set for a fraction of replacement cost. If you are buying used, look for sturdy construction first. Paint can fix ugly. Paint cannot fix a chair that wobbles like it knows your secrets.
Personal Experience and Practical Lessons From Ombre Bistro Set Projects
The first lesson from painting a bistro set is that prep takes longer than painting, and that is completely normal. Cleaning, sanding, taping, and priming may feel like the boring opening act, but they decide whether the final finish lasts. On one small metal bistro set, the actual color application took less than an afternoon, while removing old flaky paint and rust took most of the morning. It was not glamorous, but it made the difference between “custom patio furniture” and “craft project that panicked halfway through.”
Another useful experience is to test the color fade on cardboard before touching the furniture. Ombre painting is partly technique and partly confidence. When you practice the spray distance, overlap, and transition zone on scrap material, your hand learns the rhythm. A good ombre fade usually comes from several whisper-light passes, not one dramatic blast of color. If the spray can sounds like it is trying to power-wash the chair, you are probably too close.
It also helps to paint all matching parts at the same time. For example, spray the top third of both chair backs in the lightest shade before moving to the medium shade. Then paint both seats, both lower frames, and the table base in sequence. This keeps the gradient consistent across the set. If you finish one chair completely before starting the next, the second chair may end up looking like a cousin rather than a sibling.
One of the best design decisions is choosing a gradient that fits the setting. A blue ombre set looks peaceful near a pool, balcony railing, or gray deck. A green ombre set feels at home near plants. A coral sunset fade looks fantastic in a small courtyard where everything else is neutral. The bistro set is small, so it can handle color without overwhelming the space.
Patience matters after painting. It is tempting to place the set outside immediately, sit down, and take triumphant photos with iced coffee. Resist. Letting the finish cure properly helps prevent dents, sticky spots, and scratches. The furniture may look done, but the paint is still toughening up. Think of it as the furniture equivalent of letting cookies cool before eating them, except with fewer chocolate chips and more long-term durability.
A final lesson: perfection is overrated. Outdoor furniture lives outside. It will meet pollen, dust, shoes, elbows, rain, and the occasional bird with poor manners. The goal is not a museum finish; the goal is a beautiful, durable, personal piece that makes you enjoy your outdoor space more. An ombre painted bistro set brings color, charm, and creativity to a small area without requiring a major renovation. It is approachable, affordable, and genuinely satisfying. Plus, every time someone asks where you bought it, you get to say, “Oh, this old thing? I painted it,” which is one of the finest sentences in the DIY language.
Conclusion
An ombre painted bistro set is one of the most rewarding small furniture makeovers you can tackle. It combines practical refinishing with creative color, turning a worn patio set into a custom outdoor feature. The key is simple: clean well, sand or scuff properly, choose exterior-rated products, use primer when needed, apply thin coats, blend patiently, and allow plenty of curing time.
Whether you prefer coastal blues, garden greens, sunset pinks, or modern grays, an ombre finish can make a small table and chair set feel fresh, stylish, and personal. It is a project with a high “wow” factor and a manageable workload, which is exactly the kind of DIY we like: impressive enough for compliments, simple enough to survive a Saturday.
Note: This original, publish-ready article synthesizes practical guidance from reputable U.S. paint brands, home improvement retailers, and DIY home design resources, with source links intentionally omitted for clean web publication.