Table of Contents >> Show >> Hide
- Why a Simple Beaded Star Ornament Works So Well
- What Is a Simple Beaded Star Ornament, Exactly?
- Supplies You’ll Want Before You Start
- How to Make a Simple Beaded Star Ornament
- Design Ideas to Make It Look More Special
- Common Mistakes to Avoid
- Why This Ornament Is Great for Families, Gifts, and Holiday Memories
- Frequently Asked Questions
- Extra Notes From the Craft Table: Real-Life Experiences With a Simple Beaded Star Ornament
- Final Thoughts
If your holiday decorating style falls somewhere between “cozy handmade charm” and “I refuse to spend $19.99 on a tiny ornament I could make myself in pajamas,” a simple beaded star ornament is your kind of project. It’s festive, easy to personalize, and just fancy enough to make people assume you are wildly organized and possibly own a label maker.
The beauty of a simple beaded star ornament is that it looks special without demanding a full craft-room meltdown. You do not need to be a jewelry designer. You do not need a degree in geometry. You mostly need beads, string or wire, a little patience, and the emotional strength to ignore the one bead that rolls dramatically off the table and under the couch.
This project has become a favorite in holiday DIY circles for good reason: it is affordable, beginner-friendly, and endlessly adaptable. You can make it rustic with unfinished wood beads, glamorous with metallic accents, playful with bright colors, or minimal with neutral tones that whisper, “Yes, I do own linen napkins.” Whether you want a handmade Christmas ornament, a gift topper, a window hanging, or a sweet seasonal keepsake, this little star pulls its weight.
Why a Simple Beaded Star Ornament Works So Well
Not every holiday craft earns repeat status. Some are fun once and then quietly retire to the “never again” pile, right next to glitter glue disasters and cinnamon dough experiments that smelled better in theory. But a beaded star ornament has staying power because it checks all the right boxes.
First, it looks more complicated than it is. That is the dream, frankly. A simple beaded star ornament uses repetition to create structure, so once you understand the pattern, the project becomes relaxing instead of stressful. Second, the materials are easy to find. Wooden beads, baker’s twine, embroidery thread, ribbon, or craft wire are all common supplies, which means you can usually make one without launching an expedition across three counties.
Third, the design fits almost any holiday decorating style. A natural wood version feels Scandinavian and clean. A red-and-green version looks classic and cheerful. Gold, silver, or pearl-like beads give the ornament a more polished, elegant vibe. The same star shape can swing from farmhouse cozy to tree-trimming glam with just a change of materials.
And finally, this ornament is actually useful. Hang it on the tree. Tie it onto a wrapped present. Use several to make a garland. Suspend one in a kitchen window. Add one to a wreath. Tiny craft, big holiday energy.
What Is a Simple Beaded Star Ornament, Exactly?
At its core, a simple beaded star ornament is a five-pointed star made by arranging beads into a structured pattern. There are two popular approaches. The first uses thread, ribbon, or twine to string beads into a center ring and then build outer rows until the star points appear. The second uses flexible craft wire to shape the star and hold the beads in place.
Both methods work, but if you are a beginner, the threaded version tends to feel more forgiving. It is soft, lightweight, and great for wooden beads. The wire version gives you a little more structure and can look especially crisp with glass, acrylic, or metallic beads. For a truly simple beaded star ornament, though, many crafters start with medium-size wood beads and a strong thread or ribbon because it is easy to handle and delivers that charming handmade look.
In other words, you are not making some mysterious heirloom-level craft that requires a torch and a magnifying visor. You are creating a star from repeated bead placement. That is the magic: simple technique, lovely result.
Supplies You’ll Want Before You Start
One reason this ornament is so beginner-friendly is that the supply list is refreshingly short. You can keep it basic or dress it up depending on your style.
Basic supply list
- Wooden beads, acrylic beads, or glass beads
- Embroidery thread, baker’s twine, ribbon, or thin craft wire
- A needle if you are using thread or ribbon
- Scissors
- Optional: pliers, hot glue, paint, stain, metallic wax, ribbon for hanging
For a warm, simple holiday look, unfinished wood beads are hard to beat. They feel classic, lightweight, and easy to pair with neutral Christmas décor. If you want sparkle, reach for faceted beads or a mix of small accent beads. If you want the ornament to feel more substantial and architectural, thin craft wire can help the points stay crisp.
The smartest beginner move is to choose beads that are large enough to handle comfortably. Tiny seed beads are beautiful, but they can turn a relaxing holiday craft into a muttered conversation with yourself. Start bigger. Your future self will thank you.
How to Make a Simple Beaded Star Ornament
There are many variations, but this version keeps things straightforward while still looking polished. Think of it as the no-fuss, no-drama, very-cute method.
Step 1: Choose your bead palette
Before you thread anything, decide on the look. All-natural wood creates a rustic or Scandinavian star ornament. Alternating painted and unpainted beads adds dimension. Metallic or pearlized beads feel more formal. Keep the palette simple at first so the shape stands out.
Step 2: Make the center ring
String enough beads to form a small circle, then tie or secure the ends. This ring becomes the foundation of the ornament. The key here is tension. Too loose, and the star looks floppy. Too tight, and you may struggle to shape the outer rows. Aim for secure but flexible.
Step 3: Build the second row
Now add pairs of beads around the outside of the center ring. This is where the star starts to reveal itself. The pattern is often simple: add beads, skip a base bead, and secure into the next one. Repeat around the circle. At this stage, it may still look more like a festive science experiment than a star. Stay calm. The glow-up is coming.
Step 4: Form the points
Add one bead at each section to create the five points. This is the moment when the project suddenly makes sense and your ornament starts looking intentional instead of suspicious. Pull gently as you go so the lines stay neat. If you are using wire, shape each point with your fingers or pliers for a crisp outline. If you are using thread, make sure each point is anchored firmly before moving on.
Step 5: Secure everything
Once the shape looks balanced, tie off the thread or twist and tuck the wire ends neatly. You do not want a rogue tail sticking out like the ornament has bedhead. If needed, add a tiny dab of glue to the knot for insurance, especially if the ornament will be handled by kids or packed away with enthusiasm instead of care.
Step 6: Add the hanger
Thread a loop of ribbon, twine, or cord through the top point. Keep it simple, or tie a small bow if you want a more dressed-up finish. Congratulations: you now have a handmade beaded star ornament that looks boutique enough to pass for something from a curated holiday market.
Design Ideas to Make It Look More Special
Once you’ve made one simple beaded star ornament, you will immediately start thinking, “Okay, but what if I make six more and pretend this was always the plan?” Excellent instinct. Here are a few ways to vary the design.
Go rustic
Use unfinished wood beads, jute twine, and a soft neutral ribbon. This version feels warm, simple, and at home in a tree filled with natural textures.
Go classic Christmas
Alternate red and white beads, or mix green, gold, and natural wood. This style feels cheerful without being over-the-top candy cane chaos.
Go modern
Stick to black, white, or all-metallic beads. A modern beaded star ornament looks especially striking against a minimalist tree or window display.
Go personalized
Add an initial charm, a year tag, or a mini bell. Suddenly your ornament becomes a keepsake instead of just décor.
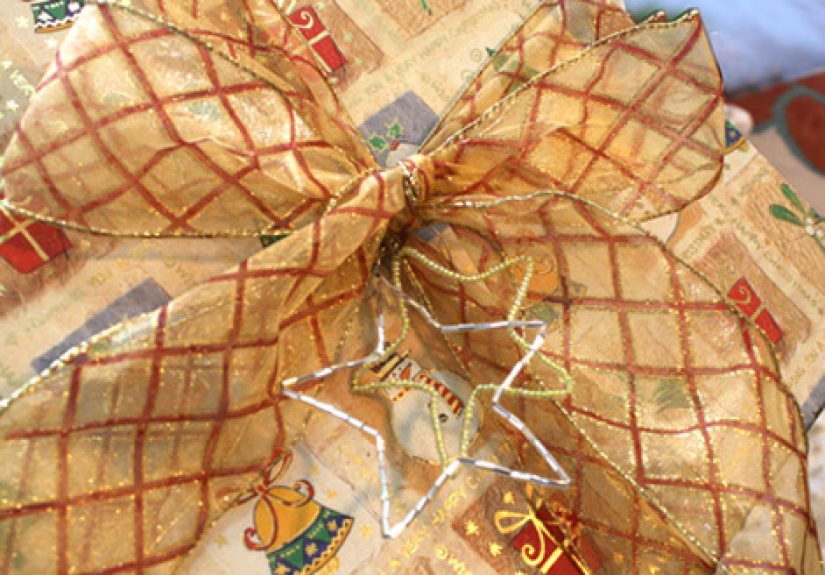
Go gift-ready
Make smaller stars and tie them onto wrapped presents. The package looks extra thoughtful, and the topper becomes part of the gift. That is what we call holiday efficiency.
Common Mistakes to Avoid
Even a simple craft has a few traps. Thankfully, most are easy to dodge.
Using thread that is too flimsy
If the stringing material cannot support the bead weight, the ornament will sag. Choose something sturdy enough to hold shape.
Mixing wildly different bead sizes without a plan
Variation can be beautiful, but random sizing can make the structure look lopsided. Keep your main bead size consistent unless you are intentionally using accent beads.
Poor tension
This is the big one. Loose tension makes the ornament look sleepy. Over-tightening can warp the shape. The sweet spot is secure and even.
Ignoring the hanger placement
If the hanging loop is attached off-center, your beautiful star may dangle like it has given up on the season. Test the balance before finishing.
Overcomplicating the first one
Your first ornament does not need hand-painted beads, tassels, bells, faux snow, and a tiny monogrammed bow. Start simple. Then get fancy once you know the structure.
Why This Ornament Is Great for Families, Gifts, and Holiday Memories
A simple beaded star ornament is one of those rare holiday crafts that actually works for multiple ages and skill levels. Adults enjoy it because it is calming and creative. Older kids can handle larger beads and stringing patterns with supervision. Grandparents like it because it feels classic. Gift-givers like it because handmade ornaments feel personal without requiring a week of unpaid labor.
It is also the kind of project that becomes meaningful over time. Make one each year in a different color. Create a set for newlyweds, new parents, or first-home gifts. Use beads from broken garlands or leftover supplies to give materials a second life. That little star starts as a craft and ends up as a memory marker.
And that is probably why handmade beaded ornaments stay popular. They are not just pretty. They carry the unmistakable charm of “someone made this on purpose,” which is still one of the nicest things décor can say.
Frequently Asked Questions
Is a simple beaded star ornament good for beginners?
Yes. It is one of the more approachable holiday ornament crafts because the pattern is repetitive and the materials are easy to find.
What beads work best?
Wood beads are ideal for a beginner-friendly ornament because they are lightweight and easy to handle. Acrylic and glass beads work too if you want more shine.
Should I use thread, ribbon, or wire?
For a soft, rustic, handmade look, use embroidery thread, baker’s twine, or ribbon. For sharper lines and a more sculptural shape, use thin craft wire.
How long does it take to make one?
Once you understand the pattern, many simple versions can be made in under an hour. The second one is usually much faster than the first.
Can I use it outside the Christmas tree?
Absolutely. Try it as a window ornament, wreath accent, gift topper, napkin tie, or part of a holiday garland.
Extra Notes From the Craft Table: Real-Life Experiences With a Simple Beaded Star Ornament
Here is the honest truth: the first time I made a simple beaded star ornament, I was fully confident for about six minutes. I laid out the beads, cut my string, and had the kind of optimism usually reserved for people who think one trip to the store before Christmas will be “quick.” Then the beads started sliding everywhere, the circle looked a little wonky, and I had to remind myself that almost every holiday craft begins with a suspicious-looking stage.
That early awkward phase is part of the charm. A beaded star ornament does not usually look impressive right away. It looks like a tiny wooden bracelet that made some questionable life choices. But once the second row goes on and the points begin to form, it transforms fast. That moment is surprisingly satisfying. One second you are doubting everything, and the next you are holding a recognizable star and feeling like a holiday genius.
Another thing I learned is that these ornaments are much more addictive than they seem. You make one “just to try it,” and then suddenly you are sorting beads by color and explaining to your family why the dining table is now a seasonal production zone. The simple shape invites experimentation. One version in natural wood becomes three versions in painted beads, metallic beads, and leftover ribbon you were definitely saving for a reason.
I also think these ornaments are great because they leave room for imperfection. Handmade holiday décor should not feel like a standardized test. If one point is slightly chunkier than the others, it still looks lovely on a tree. If the beads are not all exactly the same tone, that often makes the finished ornament look warmer and more interesting. A simple beaded star ornament has structure, but it does not demand factory-level precision. That is part of why it feels homemade in the best way.
One of the nicest experiences related to this craft is making ornaments that suit different people. A neutral wood version feels calm and elegant for a minimalist friend. A red-and-green version feels cheerful for a traditional family tree. A glittery or metallic version works for someone whose holiday decorating style can only be described as “festive and absolutely unbothered by subtlety.” The same basic ornament can shift personality so easily, which makes it ideal for batch crafting and gifting.
And perhaps my favorite part is what happens when the ornament is finished. You hang it up, step back, and it somehow looks more expensive than the supply list would suggest. It catches light. It adds texture. It brings that soft handmade quality that makes holiday decorating feel personal instead of generic. Even better, it often sparks conversation. People notice it because stars are familiar, but beads give the shape a little extra dimension.
So yes, a simple beaded star ornament is just a small DIY project. But it is also the kind of craft that slows things down in a good way. It invites you to make something with your hands, use what you have, and create a decoration that feels connected to the season. That is a lot of work for a tiny star, and honestly, it pulls it off beautifully.
Final Thoughts
A simple beaded star ornament proves that holiday crafts do not need to be complicated to be beautiful. With a few beads, a bit of string or wire, and a repeatable pattern, you can create something that feels warm, festive, and genuinely personal. It is easy enough for beginners, flexible enough for experienced crafters, and charming enough to earn a spot on the tree year after year.
In other words, this is the kind of project that delivers maximum holiday sparkle with minimum craft-table drama. And during the busiest season of the year, that is basically a Christmas miracle.