Table of Contents >> Show >> Hide
- Can Burn Marks Really Be Removed From Wood?
- What You Need Before Starting
- Way 1: Buff Away a Superficial Scorch
- Way 2: Sand Out a Light or Moderate Burn
- Way 3: Remove Deep Char, Fill the Cavity, and Refinish
- How to Match the Repaired Area to the Existing Wood
- Common Burn-Mark Removal Mistakes
- Safety Tips for Wood Repair
- How to Prevent Future Burn Marks
- Frequently Asked Questions
- Conclusion
- Experience Notes: What Usually Happens During Real Wood-Burn Repairs
- SEO Information
A dark burn mark on a wooden table can look alarmingly permanent. One careless hot pan, tipped candle, dropped ember, or enthusiastic soldering project, and suddenly your beautiful wood surface appears to have survived a tiny dragon attack.
Fortunately, many burn marks can be repaired. The correct method depends on whether the damage affects only the finish, reaches the wood fibers, or has created a genuinely charred crater. Starting with the gentlest treatment is important because an aggressive repair can turn a dime-sized scorch into a refinishing project large enough to qualify as a weekend hobby.
This guide explains three practical ways to remove burn marks on wood, how to identify the depth of the damage, how to match the repaired area to the surrounding finish, and when professional restoration is the smarter choice.
Can Burn Marks Really Be Removed From Wood?
Most light or moderate scorch marks can be removed or made nearly invisible. Deep burns can also be repaired, although they may require removing damaged wood, filling the depression, and refinishing the area.
The key is understanding that not every dark mark is the same:
- A heat stain is usually white, cloudy, or hazy. It often forms when moisture becomes trapped in a clear finish.
- A surface scorch is brown or black but feels relatively smooth. It may affect only the finish or the uppermost wood fibers.
- A deep burn feels rough, brittle, sunken, or crumbly. Charred material must be removed before the area can be repaired.
Do not use a heat-stain remedy on genuinely burned wood and expect magic. Petroleum jelly, mayonnaise, or gentle heat may help a cloudy moisture mark, but they cannot rebuild carbonized wood fibers. Sadly, mayonnaise has limits.
What You Need Before Starting
You will not need every item listed below. Choose the supplies that match the repair method and the existing wood finish.
| Tool or Material | Primary Use |
|---|---|
| Soft microfiber cloth | Cleaning and removing residue |
| Mild dish soap | Removing grease and surface dirt |
| #0000 steel wool or an extra-fine synthetic pad | Buffing superficial scorch marks |
| Mineral spirits | Lubricating gentle abrasion on compatible finishes |
| 100-, 150-, 180-, and 220-grit sandpaper | Removing damaged fibers and smoothing wood |
| Cabinet scraper, sharp chisel, or utility knife | Removing deep char |
| Stainable wood filler or matching sanding dust and wood glue | Filling a burn cavity |
| Matching stain, finish, or furniture wax | Blending and protecting the repair |
| Safety glasses and a dust mask or respirator | Reducing exposure to dust and debris |
Inspect the Surface Carefully
Determine whether the piece is solid wood, engineered wood, laminate, or wood veneer. Veneer is a thin layer of real wood attached to a substrate. Aggressive sanding can cut through it quickly, exposing the material underneath and creating a repair far more obvious than the original burn.
Also consider the value and age of the object. An antique table, valuable instrument, decorative inlay, or historically significant floor may require a furniture conservator. Original finishes and patina can be worth preserving even when they are imperfect.
Clean Before You Repair
Mix a small amount of mild dish soap with water. Dampen a cloth, wring it almost dry, and gently wipe the damaged area. Dry it immediately. Cleaning removes grease, soot, wax, and grime that might make the mark look darker or interfere with refinishing.
Test every solvent, stain, polish, and abrasive in an inconspicuous location first. The underside of a table or the back of a cabinet is a much better testing ground than the center of the dining room table.
Way 1: Buff Away a Superficial Scorch
This method works best when the discoloration is light, the surface remains flat, and the wood does not feel soft or deeply charred. It is commonly useful for small cigarette scorches, brief contact from a hot object, or a candle ember that was noticed quickly.
Step 1: Test the Finish
Check an inconspicuous area with your chosen pad and a tiny amount of mineral spirits. Some finishes react differently to solvents and abrasion. If the test spot becomes cloudy, sticky, dull, or discolored, stop and use a finish-specific repair product instead.
Step 2: Rub Very Lightly With the Grain
Moisten a small piece of #0000 steel wool with mineral spirits. It should be damp, not dripping. Rub the burn mark gently in the direction of the wood grain using short, controlled strokes.
Check the surface every few passes. The goal is to remove the scorched layer without cutting through the surrounding finish. More pressure is not automatically more effective. It is merely faster at creating a bare spot.
An extra-fine synthetic finishing pad can be substituted when steel fragments might become trapped in open-grained wood or when the finish manufacturer discourages steel wool.
Step 3: Clean and Restore the Sheen
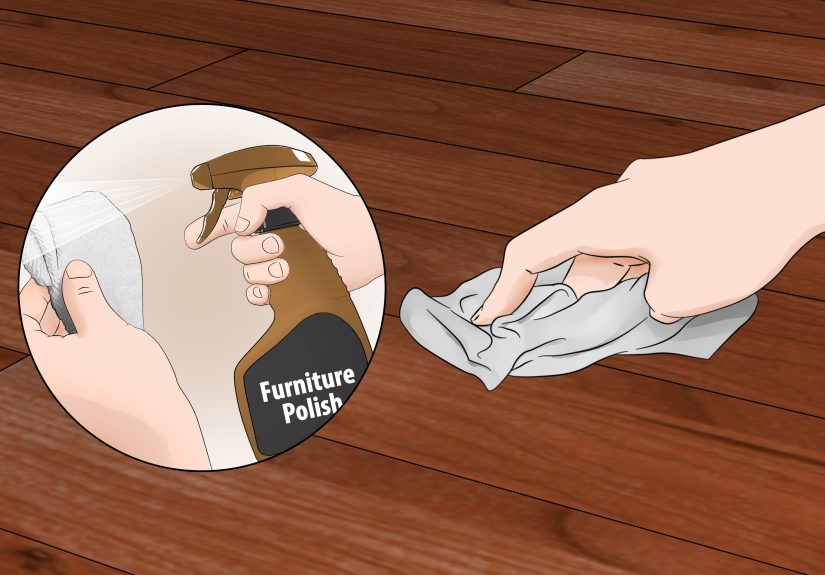
Wipe the area with a clean cloth and allow any solvent to evaporate. If the mark is gone and the finish remains intact, apply a thin coat of suitable furniture wax or polish. Buff with a soft cloth until the sheen blends with the surrounding surface.
When to Stop
If the mark becomes lighter but remains visible after gentle buffing, it probably extends below the finish. Move to controlled sanding rather than repeatedly scrubbing the same spot. Excessive rubbing can produce a shiny halo, a dull patch, or a depression.
Way 2: Sand Out a Light or Moderate Burn
Sanding is the most dependable method for a scorch that has reached the upper wood fibers but has not created a deep hole. It is suitable for solid-wood furniture, butcher-block counters, cutting boards, unfinished trim, and many hardwood floors.
Step 1: Choose the Starting Grit
For a light mark, begin with 150-grit sandpaper. For darker damage on unfinished solid wood, 100- or 120-grit may be appropriate. Avoid beginning with extremely coarse paper unless the damage is substantial. Deep scratches from rough sandpaper can survive long after the burn mark has disappeared.
Step 2: Sand With the Wood Grain
Wrap the paper around a sanding block for a flat surface. Sand with the grain, using light and even pressure. Work slightly beyond the exact edges of the burn so the repair feathers into the surrounding wood instead of forming a tiny divot.
Wipe away dust frequently and inspect the color. Stop as soon as clean, normally colored wood appears. Continuing after the scorch is gone only removes healthy material.
Step 3: Refine the Surface
Progress through finer grits rather than jumping directly from coarse paper to ultra-fine paper. A typical sequence might be 120, 150, 180, and then 220 grit. Each grit should remove the scratches left by the previous one.
On a hardwood floor, feather the sanding into a wider area so the repaired spot does not resemble a shallow bowl. For a butcher-block counter, refinishing the entire section or the full countertop may produce a more consistent result than treating one small circle.
Step 4: Remove the Dust
Vacuum the surface and surrounding area. Follow with a clean cloth suitable for the finish you plan to apply. Do not leave sanding dust in pores or corners, where it can create a gritty final coat.
Wood dust should not be treated as harmless household confetti. Work with ventilation or dust collection, wear eye protection, and use suitable respiratory protection, especially when power sanding.
Step 5: Match the Color and Finish
Apply matching stain in thin coats, allowing the color to develop gradually. It is easier to darken a pale repair than to reverse a patch that suddenly looks like it was colored with a permanent marker.
After the stain dries according to its instructions, apply the appropriate protective finish. Possibilities include polyurethane, lacquer, shellac, varnish, hard-wax oil, mineral oil, or furniture wax. The best choice is usually the same type already used on the surrounding surface.
Way 3: Remove Deep Char, Fill the Cavity, and Refinish
A deep burn requires more than cosmetic cleaning. Blackened, brittle wood is structurally damaged and will not accept filler or finish reliably. All loose char must be removed until firm wood is exposed.
Step 1: Scrape Away the Burned Material
Use a cabinet scraper, narrow chisel, craft knife, or sharp utility blade. Work slowly, keeping the cutting edge under control and directed away from your hands. Remove only blackened or weakened material.
Shape the cavity into a smooth, shallow depression without creating unnecessarily sharp edges. Filler bonds and blends more predictably when the repair area is clean and stable.
Step 2: Prepare a Matching Filler
For painted wood, a quality wood filler is often sufficient because the repair will be hidden under primer and paint. For stained furniture, use a stainable filler or make a small batch from fine sanding dust collected from matching wood and an appropriate wood adhesive.
Remember that filler and natural wood may absorb stain differently. A product labeled “stainable” is not guaranteed to disappear completely. Test your filler-and-stain combination before placing it in the most visible spot on the furniture.
Step 3: Fill in Thin Layers
Press the filler firmly into the cavity with a flexible putty knife. For a deep hole, build the repair in layers rather than applying one thick lump. Slightly overfill the final layer because some products shrink as they cure.
Allow the filler to harden completely. Sanding it too early can tear out the repair and return you to the beginning, now with additional vocabulary.
Step 4: Level and Blend
Once cured, carefully level the filler with a scraper or fine sandpaper. Finish with 180- or 220-grit paper, feathering the edges into the surrounding surface.
Use a stain marker, artist’s brush, graining pen, or small amounts of matching stain to recreate natural color variation. A single flat brown patch often looks less convincing than several subtle tones that follow the existing grain.
Step 5: Seal the Repair
Apply the matching clear coat in thin layers. Blend the sheen as well as the color. A perfectly matched brown patch can still stand out if it is glossy on an otherwise satin table.
If a floorboard is severely burned, cracked, weakened, or damaged across a large area, board replacement may be more durable than filling. Structural damage and burns near electrical wiring should be evaluated by an appropriate professional.
How to Match the Repaired Area to the Existing Wood
Removing the black mark is only half the job. The repair must also cooperate with the surrounding color, grain, and sheen.
Use Color in Small Increments
Apply stain with a cotton swab, small artist’s brush, or folded cloth. Add thin layers and evaluate the color after each one dries. Wet stain normally looks darker than the final result, so judging it immediately can lead to overcorrection.
Recreate Grain Lines
When filler interrupts visible grain, draw a few narrow lines that continue the surrounding pattern. Use more than one shade and soften the lines before sealing them. Grain is irregular, so avoid making every line perfectly straight and evenly spaced.
Match the Sheen
Finishes are available in flat, matte, satin, semi-gloss, and gloss levels. Inspect the surface from an angle under natural light. When uncertain, satin is often less visually demanding than high gloss, which highlights every ripple and sanding scratch like a stage spotlight.
Common Burn-Mark Removal Mistakes
Confusing a Heat Stain With a Burn
A cloudy white ring is usually a finish problem, not charred wood. Sanding it immediately may remove an otherwise intact finish unnecessarily. Begin by identifying the type of damage.
Using Baking Soda as a Universal Cure
Baking soda is mildly abrasive and can affect wood color, especially in species rich in tannins. It may also dull or scratch a delicate finish. Although homemade paste recipes are popular online, they are not universally safe for finished furniture.
Sanding Through Veneer
Veneer can be surprisingly thin. Hand-sand cautiously, avoid concentrating on one tiny point, and stop if the grain pattern or color begins changing unexpectedly.
Applying Stain Before Removing All Char
Stain does not transform blackened, crumbly fibers back into healthy wood. Remaining char can weaken adhesion, contaminate filler, and leave a dark outline around the repair.
Skipping a Test Patch
Finishes that look similar may react very differently to solvents, waxes, and abrasives. A discreet test can prevent a small repair from becoming a full refinishing job.
Ignoring Old Paint Hazards
Painted furniture and architectural woodwork made before 1978 may contain lead-based paint. Disturbing it through sanding can create hazardous dust. Test questionable coatings and follow lead-safe practices rather than dry-sanding first and researching later.
Safety Tips for Wood Repair
- Work in a well-ventilated area when using mineral spirits, stain, or finish.
- Wear safety glasses while scraping or sanding.
- Use dust collection and suitable respiratory protection when generating wood dust.
- Follow the manufacturer’s directions for every solvent, filler, stain, and coating.
- Keep solvents and finishing products away from flames, sparks, pilot lights, and smoking materials.
- Handle oily or solvent-soaked rags carefully because some can ignite without an external flame.
- Store and dispose of used finishing rags according to product instructions and local fire-safety rules.
How to Prevent Future Burn Marks
Repairing scorched wood is satisfying. Avoiding another scorch next Tuesday is even better.
- Place trivets beneath hot pans, kettles, serving dishes, and small appliances.
- Use heat-resistant mats under curling irons, hair tools, soldering equipment, and candle warmers.
- Keep candles in stable holders with a wide, noncombustible base.
- Use coasters for hot mugs, even when someone insists the cup “isn’t that hot.”
- Position fireplaces, grills, and wood stoves so embers cannot reach nearby wooden surfaces.
- Inspect electrical appliances with heating elements for damaged cords or unstable bases.
Frequently Asked Questions
Can toothpaste remove a burn mark from wood?
Toothpaste is sometimes suggested because certain formulas contain mild abrasives. However, it can dull a clear finish, leave residue, or create a lighter patch. A controlled method using an appropriate finishing pad or sandpaper is usually more predictable.
Can vinegar remove scorched wood?
Vinegar may help with certain mineral deposits, grime, or water-related discoloration, but it does not restore carbonized fibers. It can also react with tannins and alter the color of some woods.
Can I paint over a burn mark?
You can paint the area after removing loose char, filling the depression, sanding it smooth, and applying a suitable primer. Painting directly over burned residue may lead to poor adhesion and visible texture.
Should I sand the whole tabletop?
Not always. A small scorch may be repaired locally. However, refinishing the entire top can provide a more consistent color and sheen when the surrounding finish is faded, worn, or difficult to match.
When should I hire a professional?
Professional restoration is advisable for valuable antiques, marquetry, delicate veneer, musical instruments, extensive floor damage, structural burns, and pieces with finishes you cannot identify confidently.
Conclusion
The best way to remove burn marks on wood is to match the repair method to the depth of the damage. Buff a superficial scorch with an extra-fine pad, sand away a mark that has entered the upper wood fibers, and scrape plus fill any deep charred cavity.
Begin gently, work with the grain, inspect the area frequently, and stop removing material as soon as healthy wood appears. Careful color matching and the correct protective finish will determine whether the repair blends naturally or announces itself from across the room.
Most importantly, do not panic. A scorched table is damaged furniture, not a supernatural omen. With patience and a light touch, many ugly black marks can be reduced to a story that only you know is there.
Experience Notes: What Usually Happens During Real Wood-Burn Repairs
Practical repair projects tend to teach the same lesson: the smallest-looking mark is not always the easiest one, and the most dramatic-looking scorch is not always a disaster. Lighting, finish type, and grain pattern can make damage appear deeper or shallower than it really is.
Consider a typical solid-wood coffee table with a small brown circle left by a hot candle holder. At first glance, the spot may look burned through. After cleaning away soot and wax, however, the remaining damage may be limited to the clear finish. In that situation, an extra-fine finishing pad used gently with the grain can reduce the mark quickly. The time-consuming part is not removing the discoloration; it is restoring the same satin sheen without creating a noticeably polished circle.
A second common project involves a butcher-block counter with a black line from a hot baking sheet. Because the counter is solid wood and commonly maintained with oil, controlled sanding is usually straightforward. The repair often begins with medium sandpaper and gradually moves to finer grits. Sanding only the exact black line can create a groove, so blending into a wider area produces a flatter surface. Once the burn disappears, re-oiling the entire counter section helps prevent a pale island around the repaired spot.
Floor repairs provide a different lesson. A small ember can produce a dark crater in a hardwood board. The temptation is to fill it immediately, but filler placed over brittle char may loosen later. Scraping until firm wood appears creates a larger-looking hole, which can feel like the project is going backward. It is not. The clean cavity provides a stable foundation for filler and finish.
Color matching is frequently more difficult than removing the burn. Wood changes color with age, sunlight, cleaning products, and previous coatings. A stain with the correct name on the label may still look too red, yellow, or dark on the actual repair. Thin applications are safer than one heavy coat. Testing on scrap from the same species is ideal, but when scrap is unavailable, the underside or rear edge of the piece can provide useful guidance.
Another practical observation is that people often judge a repair from six inches away while holding a flashlight. That is helpful during sanding but not necessarily how the furniture will be viewed in daily life. After the finish dries, step back several feet and examine the piece under normal room lighting. A tiny color variation that looked enormous during the repair may disappear completely at a realistic viewing distance.
Patience matters most during drying and curing. Filler that feels firm on top may remain soft underneath. Stain that appears dry may still interfere with a clear coat. Applying multiple products too quickly can produce cloudiness, wrinkling, weak adhesion, or a sticky finish. Following label times is less exciting than racing to the final reveal, but it produces better results.
Finally, many successful repairs stop before achieving laboratory perfection. Removing the structural damage, protecting the wood, and blending the color convincingly may be a better outcome than repeatedly sanding an old piece in pursuit of an invisible repair. Wood naturally contains knots, mineral streaks, color changes, and signs of use. A subtle repaired area can become part of that character rather than a flaw demanding endless correction.